Customer Story: Pacific Coast Artisans 1 Dec 2023 2:43 AM (last year)
Now that the gift-giving season is in full swing, postcards aren’t usually the first thing you’d consider when considering gift ideas. But when you think about it, these unassuming stationery pieces are surprisingly thoughtful presents.
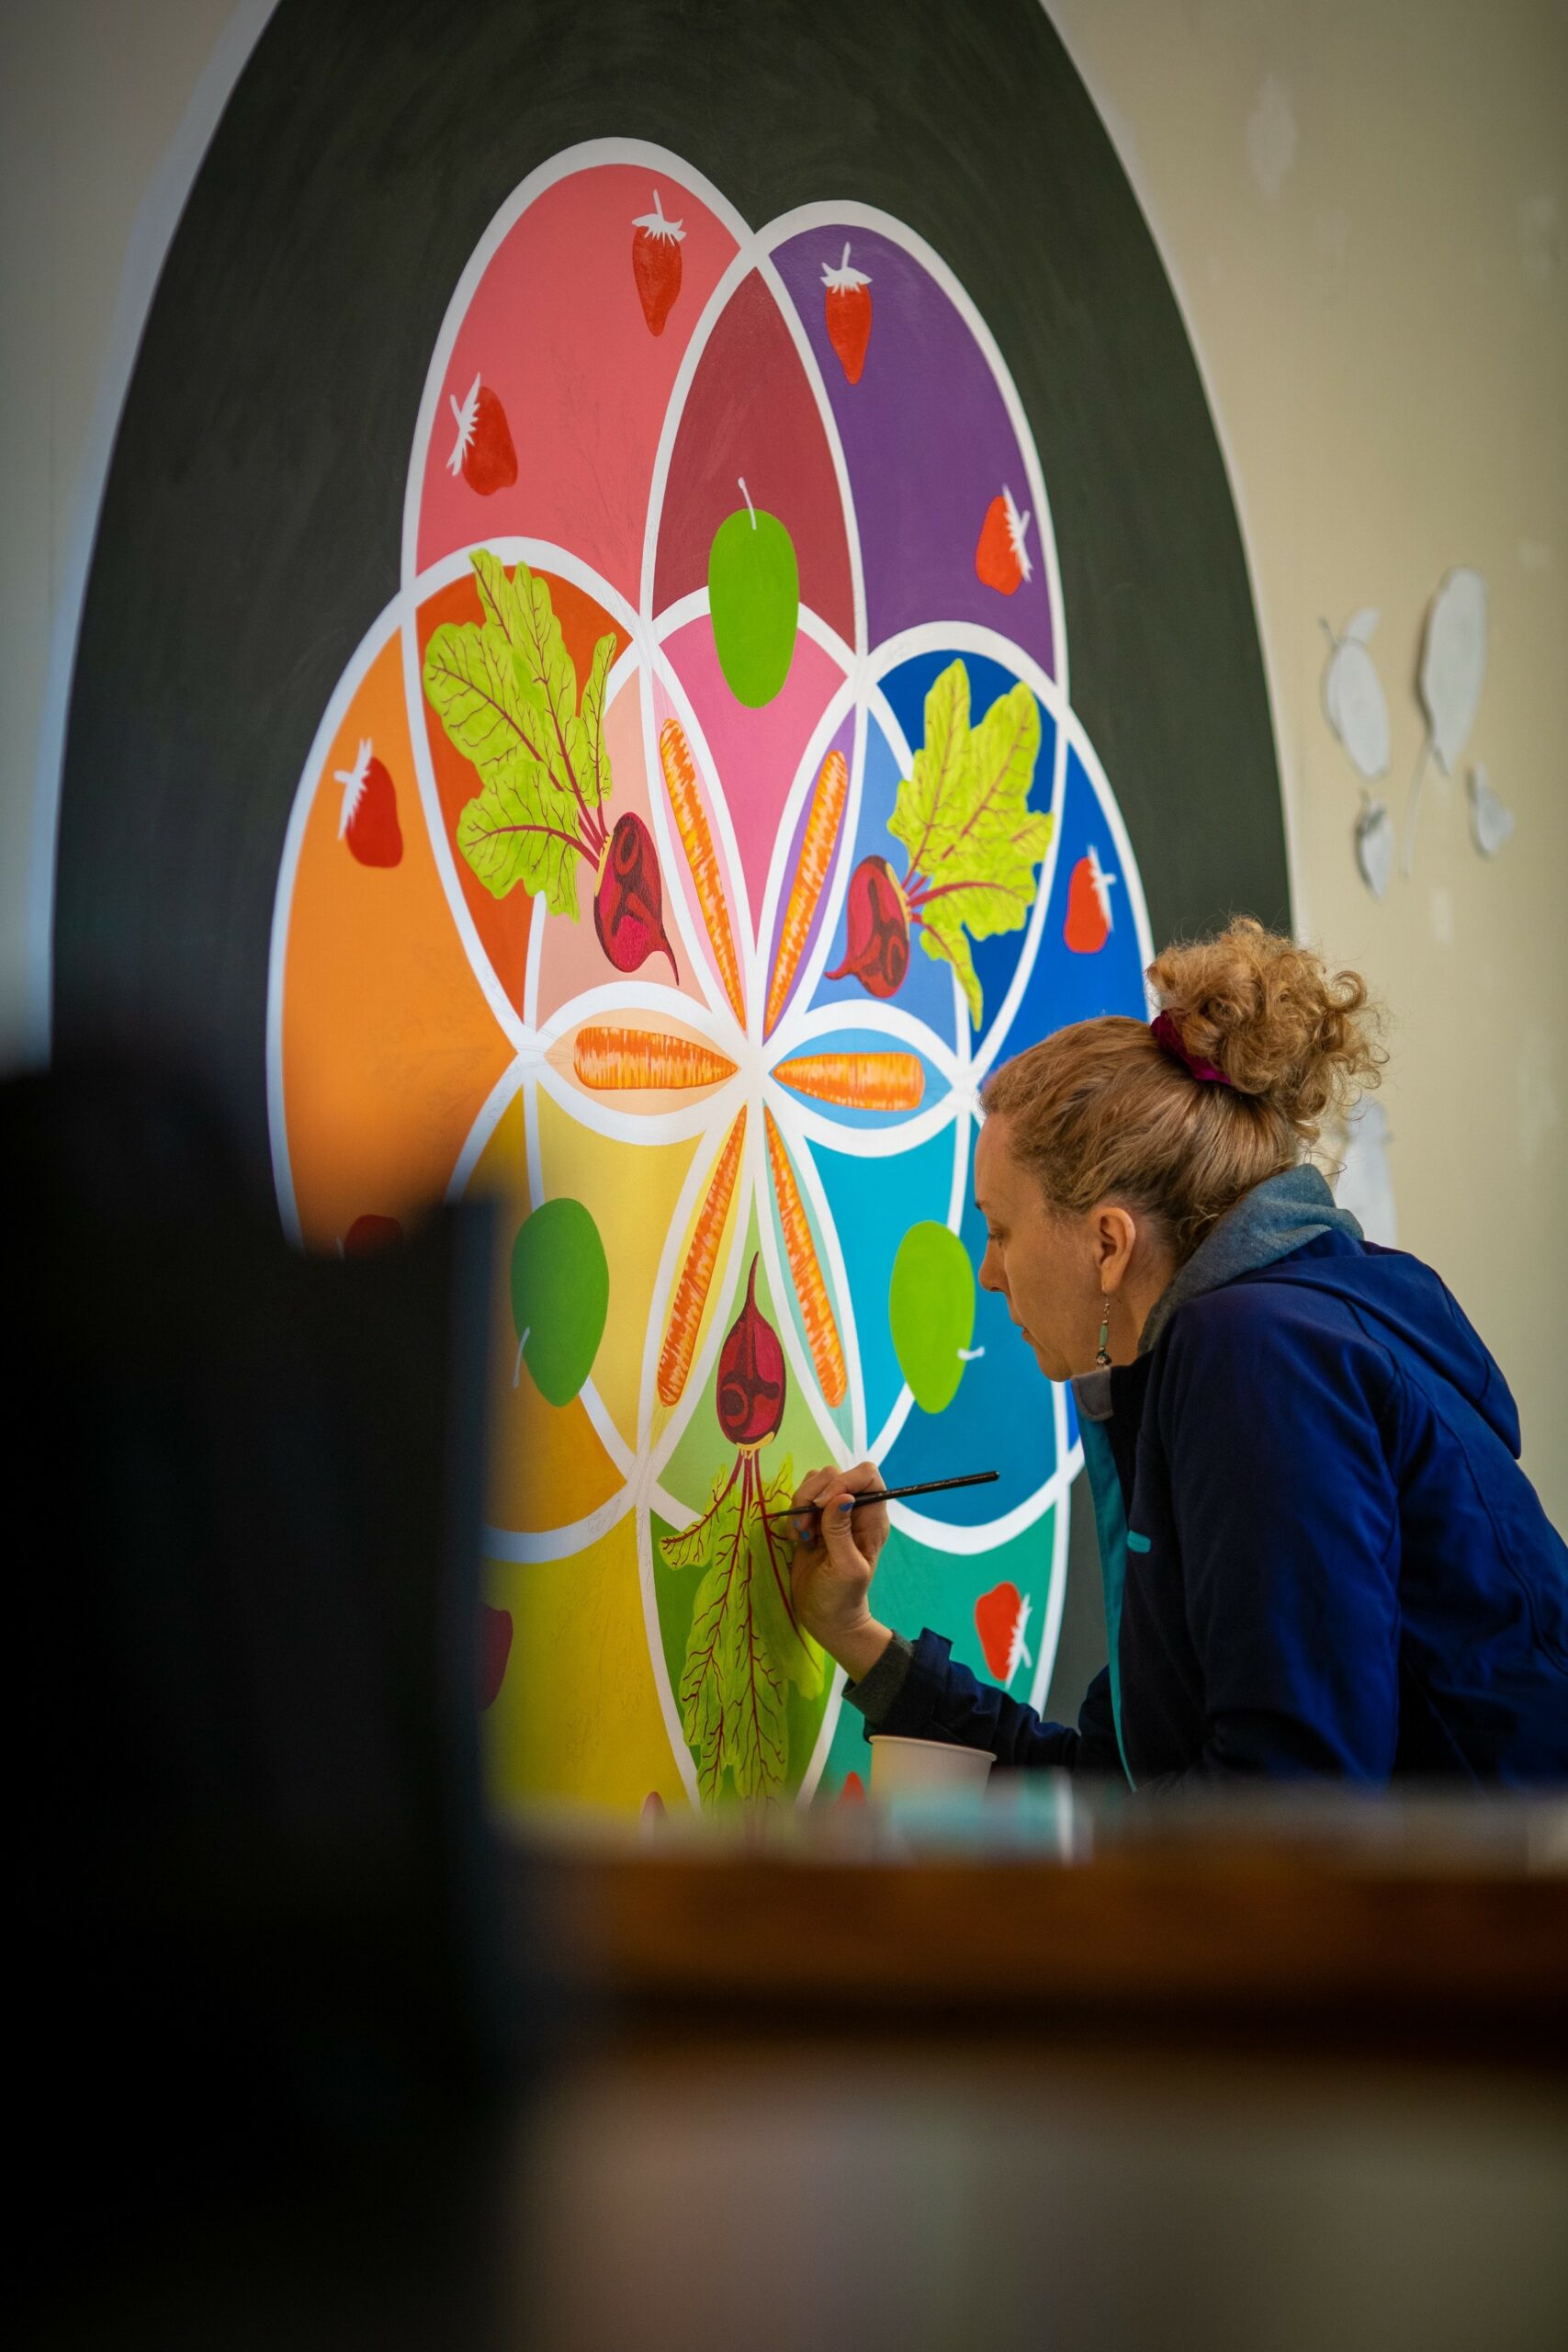
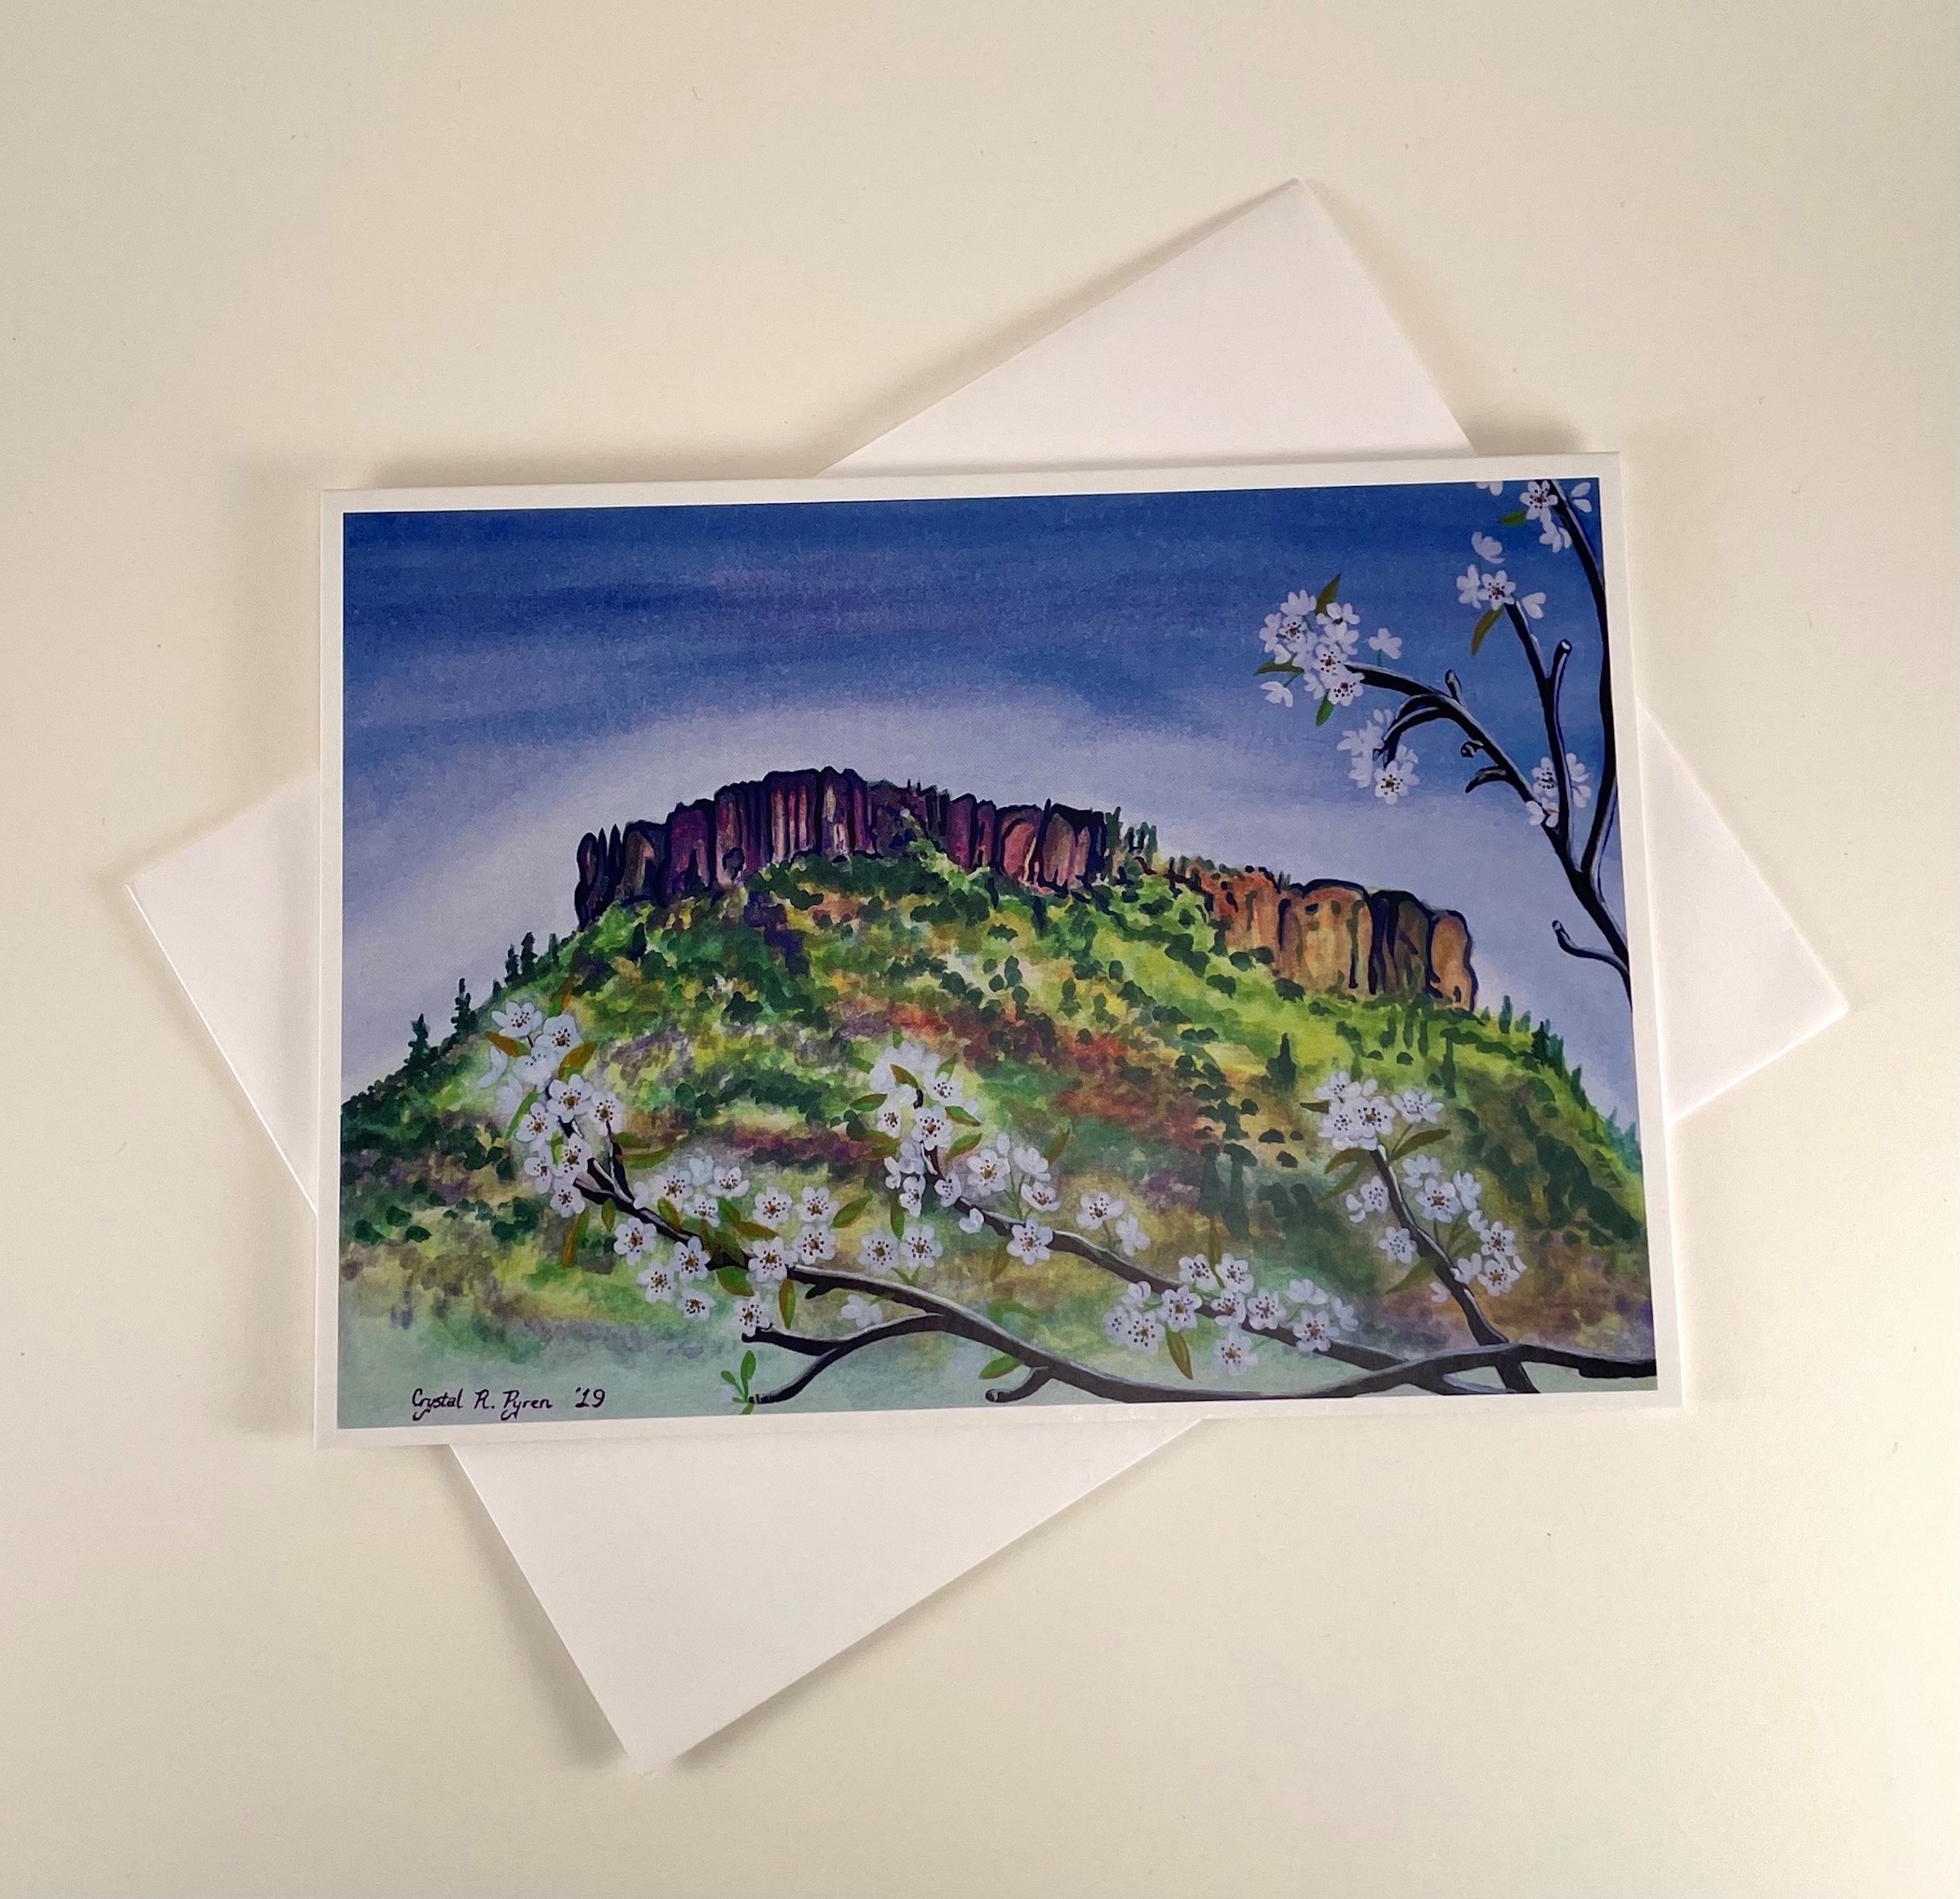
Keep reading and get to know Pacific Coast Artisans, an Oregon-based artist who crafts postcards and greeting cards for all occasions. Crystal, the creative mind behind it, has a unique way of adding a touch of the holiday spirit to her creations: by connecting people through her art, capturing the essence of Christmas with simplicity and heartfelt artistry.
How Pacific Coast Artisans started
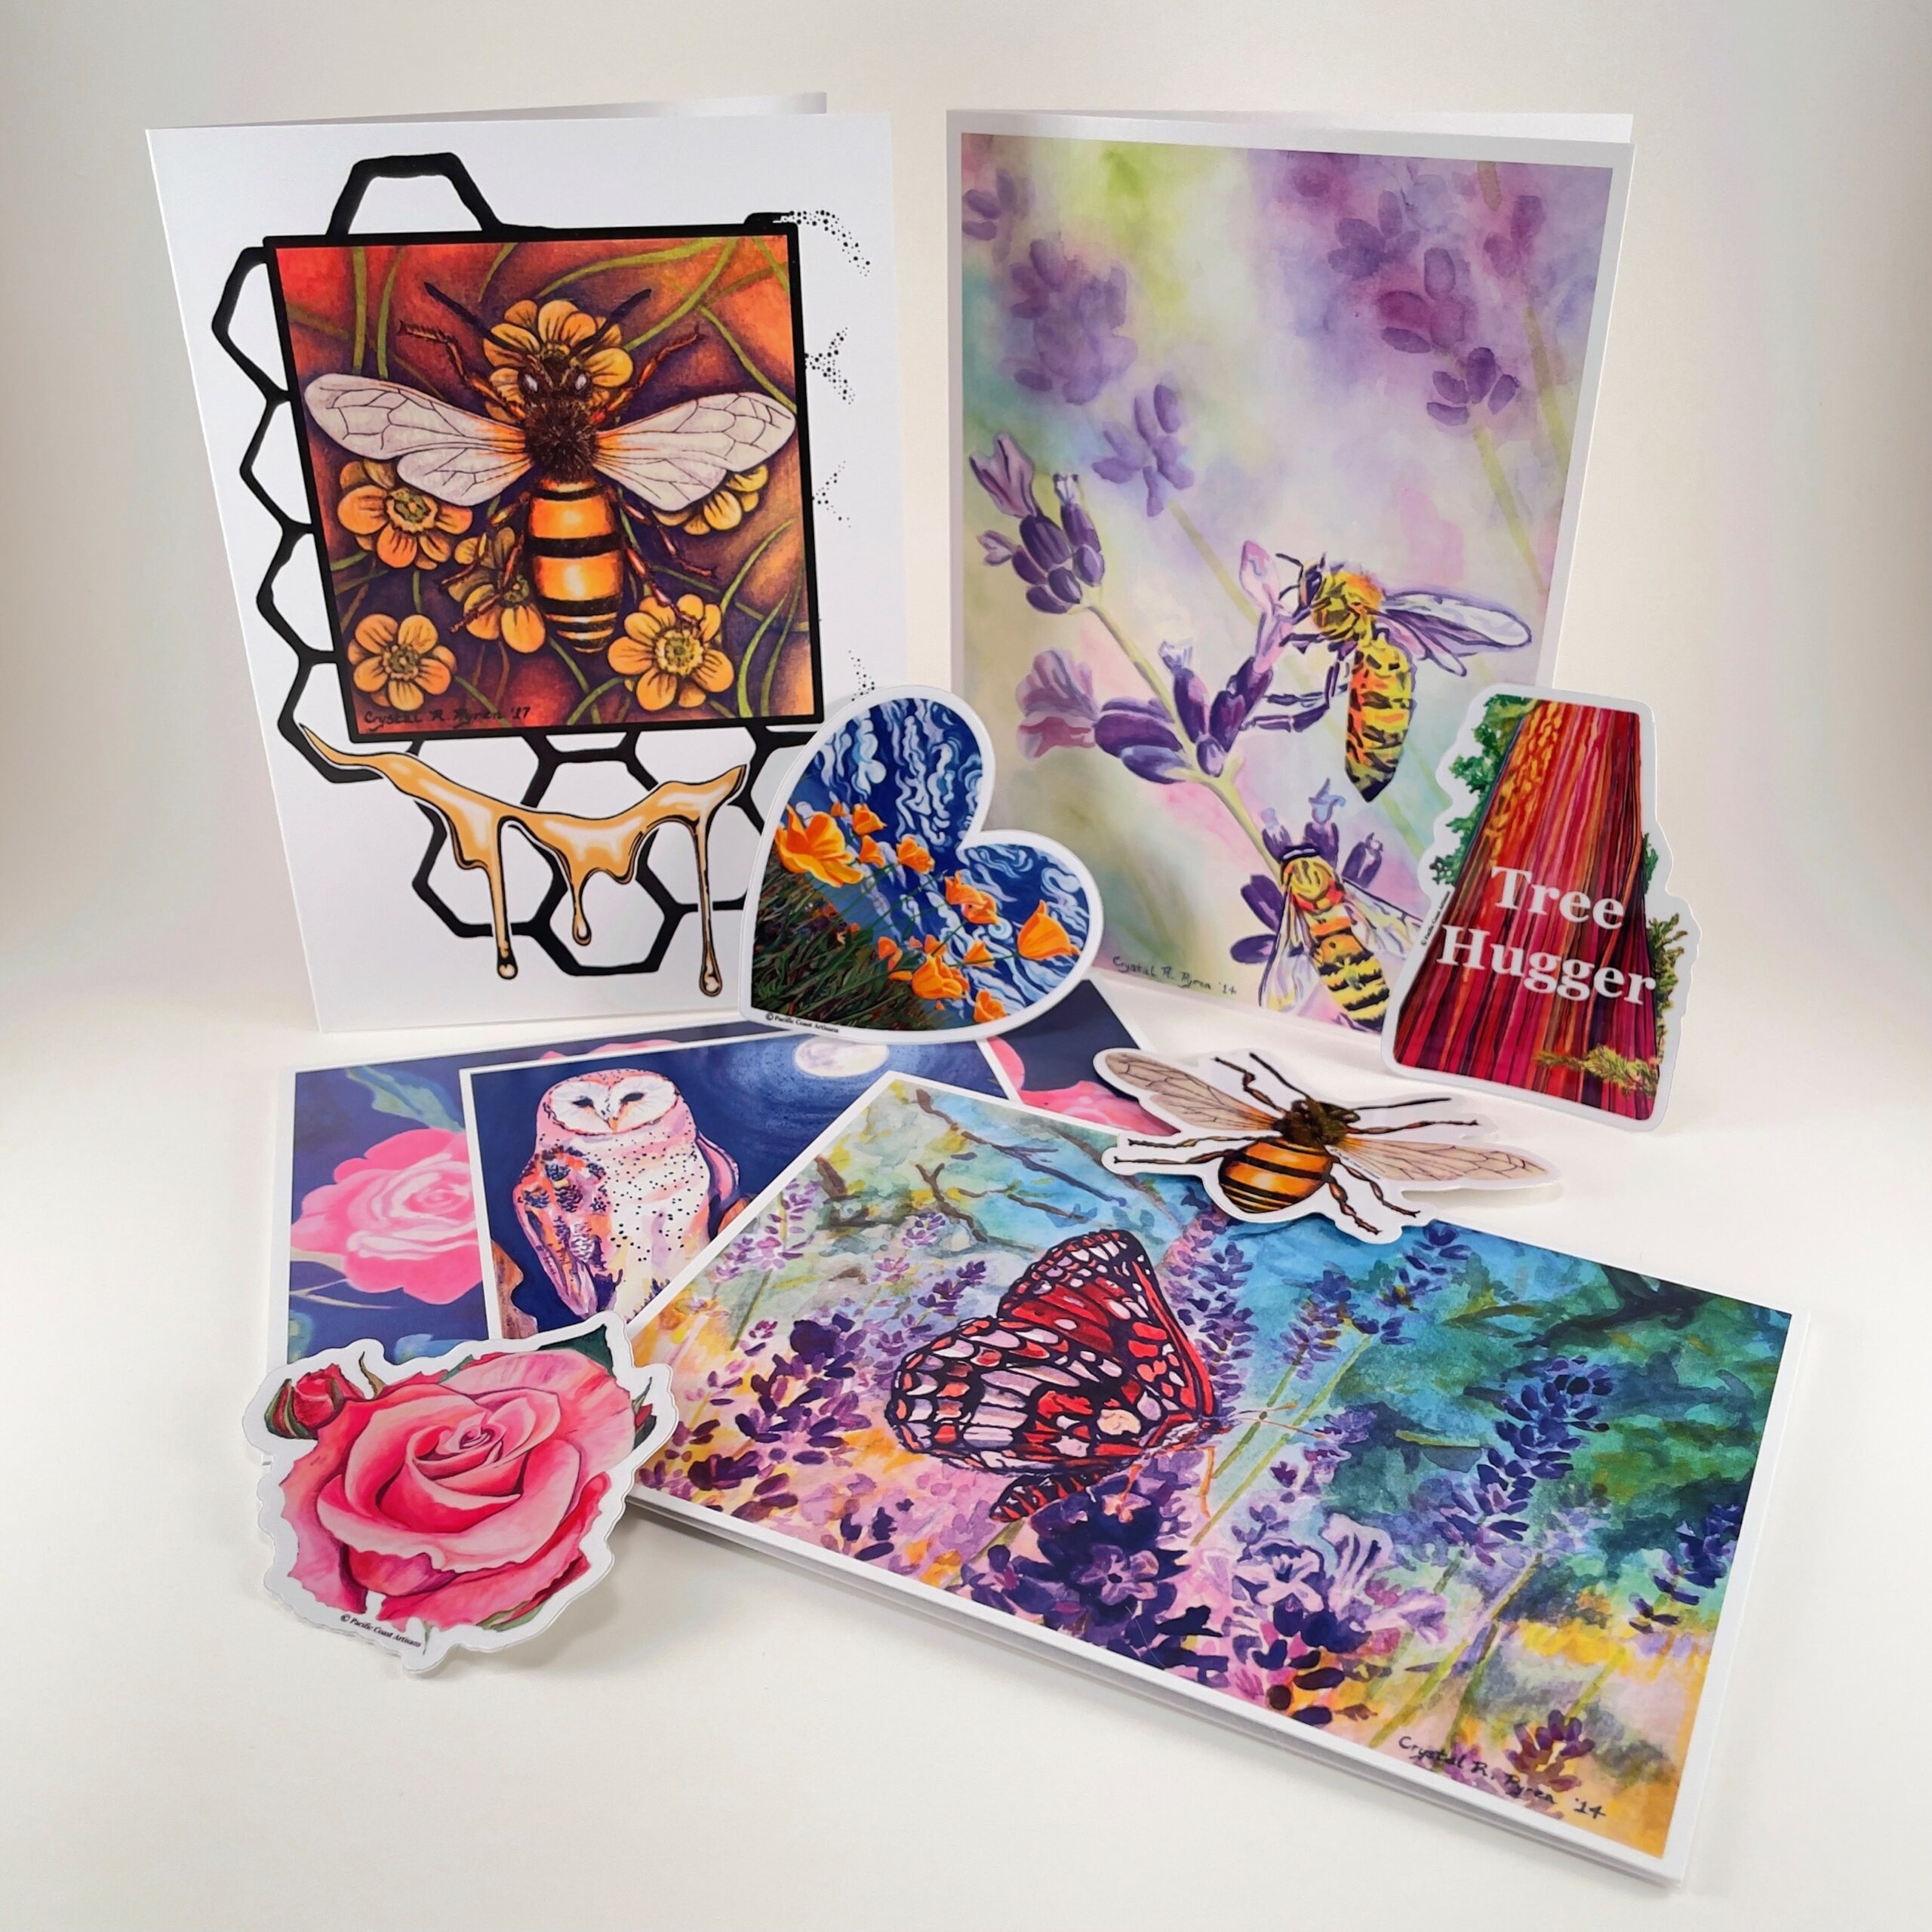
Pacific Coast Artisans is a small business specializing in greeting cards and stickers.
Crystal, the owner, originally intended to sell greeting cards of her artwork at her family’s lavender farm. When it closed, she rebranded and changed the name of her business to Pacific Coast Artisans as a nod to featuring more artwork from friends and family in the future.
What’s on the canvas
Crystal’s art is a mix of nature, watercolors, and acrylics. She likes to paint landscapes from places she has visited, fantasy desserts, birds, insects, and flowers (especially roses) that she finds exceptionally beautiful, cute, and colorful — think picturesque vibrant landscapes and flowers reminiscent of Christmas in the countryside or mountains.
Sharing her creations is something that Crystal genuinely enjoys, hoping they bring inspiration and joy to others.
She aims to craft postcards that are suitable for sale throughout the year. While she hasn’t ventured much into holiday-themed artworks, Christmas and Valentine’s Day postcards are in the pipeline. She also has a few paintings lined up to get printed on cards and stickers — something to watch out for!
Why greeting cards/postcards and stickers
“I love interactive artwork, and I think that is one reason some of my artwork transfers over to greeting cards and stickers so well,” Crystal said.
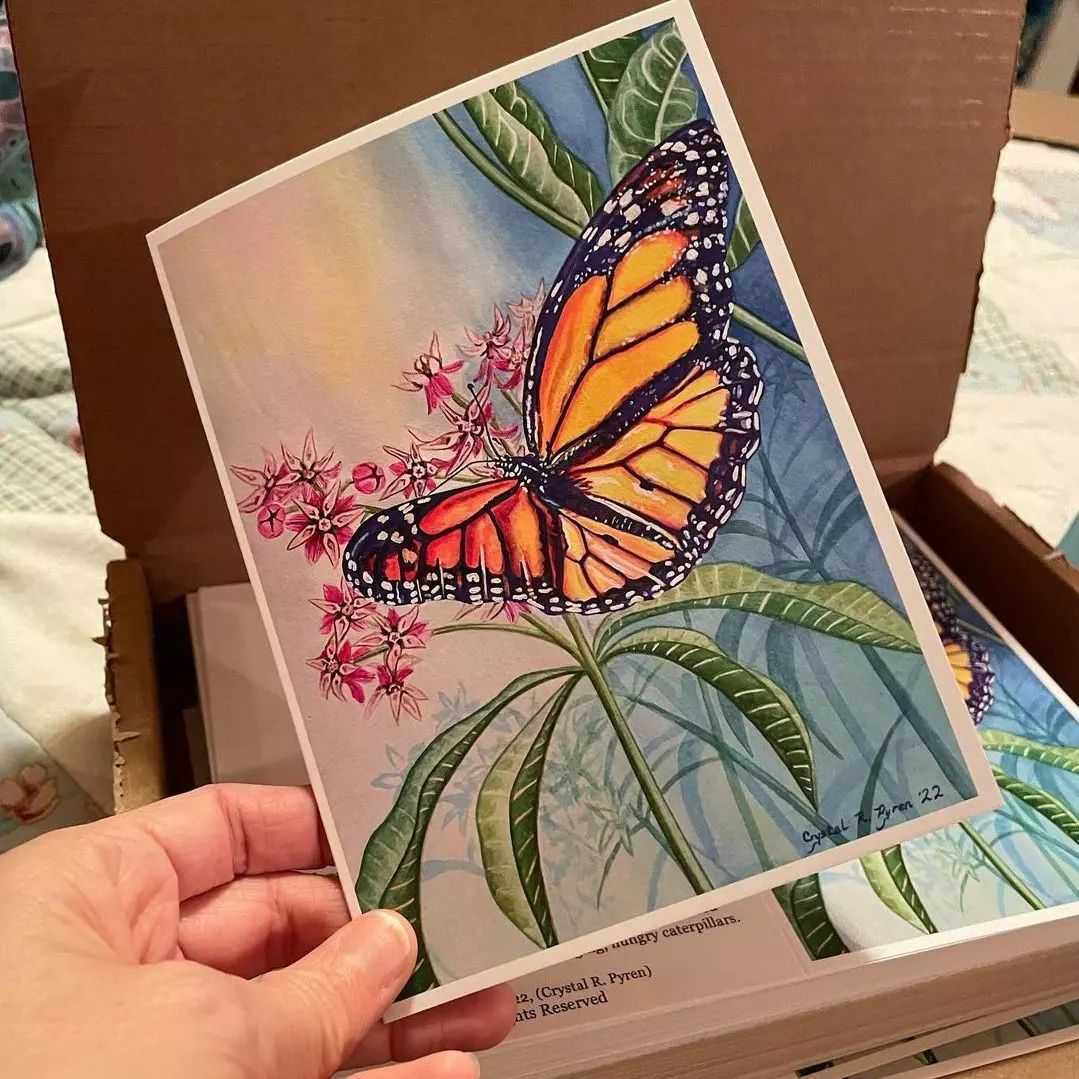
It’s easier and more affordable to purchase a greeting card or a sticker than original paintings for homes or offices. As Crystal puts it, “printing my art on greeting cards and stickers enables me to reach a much larger audience.”
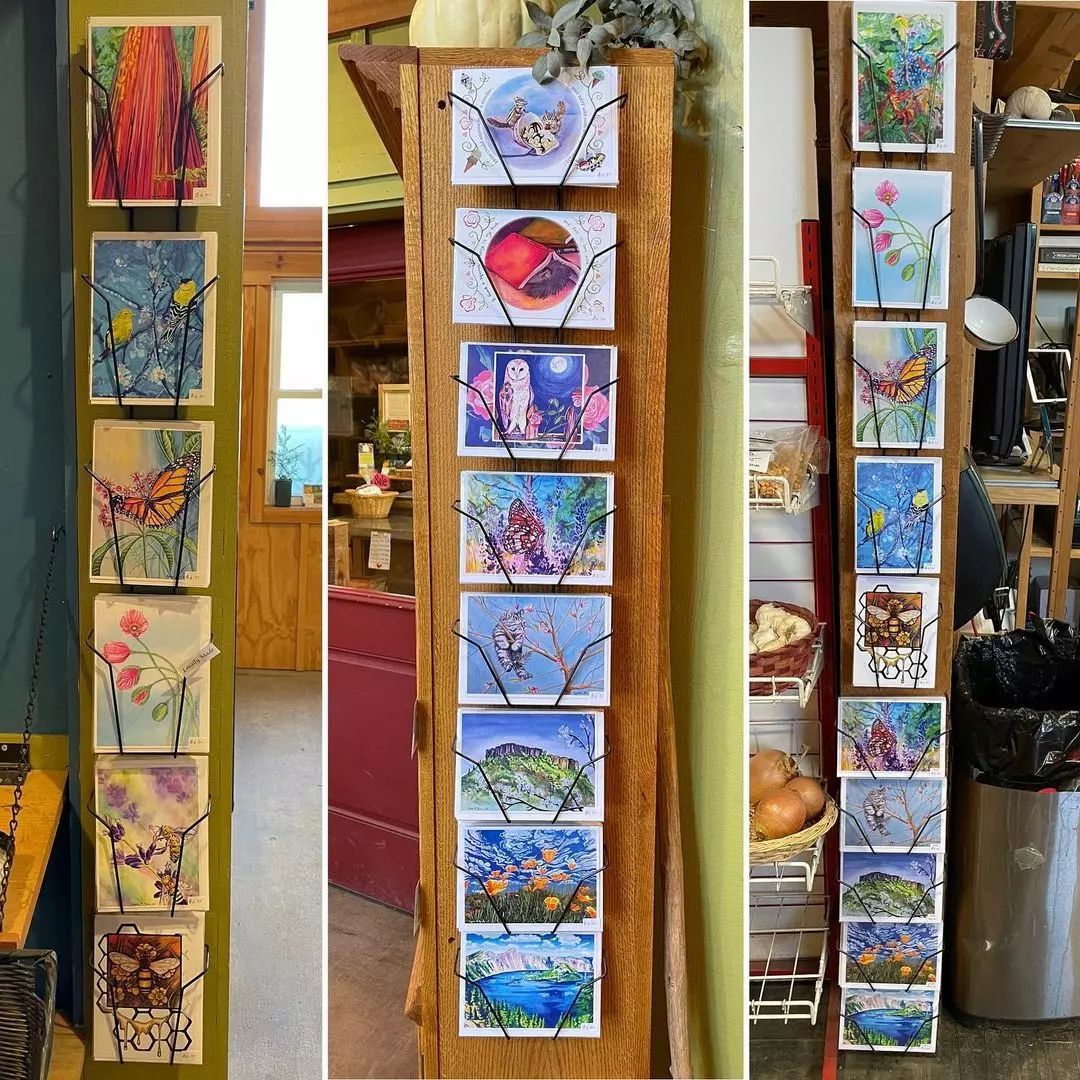
In fact, some of her murals have made their way to her greeting cards and stickers. The murals showcased on her greeting cards and stickers serve as a bridge between locals and tourists. Crystal shared, “I’ve noticed that people want artwork from places they’ve visited. So, my artwork of local Southern Oregon scenes is meaningful to tourists who find my cards and stickers in local gift shops such as Violets & Cream in Jacksonville, OR.
Sometimes strangers reach out and tell me they purchased a greeting card to send to their friends or family. This is what I’m passionate about, and this is why I do it.”
The PrintPlace experience
Pacific Coast Artisans began working with PrintPlace with a simple order of business cards. What began as a one-time transaction has blossomed into a continuous collaboration.
Crystal says, “I have chosen PrintPlace for my 5×7 greeting cards because they allow me to order smaller amounts of each card design. The flexibility to order in smaller quantities has been crucial for a small business like ours since it’s more cost-efficient. I was also pleasantly surprised to find out how easy it was to design using their online editor tool.”
In a nutshell
Pacific Coast Artisans reminds us of the joy of sending and receiving handwritten messages. If you’re looking for something different, why not make your gifts this holiday season more personal with postcards — perfect for any occasion with a touch of warmth and individuality.
Explore Crystal’s postcards, greeting cards, and stickers online or at the following locations:
Grants Pass:
• Aquarius Books & Gifts
• True Juice Organics
Applegate Valley:
• Whistling Duck Farm Store
• Provolt Country Store
• English Lavender Farm (June & July only)
Rogue River:
• Le Fleur Bouquet
Medford/Phoenix:
• Fry Family Farm
• Pollinator Project of Rogue Valley
• Pheasant Fields Farm (Seasonal)
Jacksonville:
• Violets & Cream
Want to be featured in PrintPlace articles?
Share your PrintPlace experience on Facebook and Instagram with the hashtag #PrintPlaceCommunity. You can also email us at community@printplace.com.
The post Customer Story: Pacific Coast Artisans appeared first on PrintPlace.


The Anatomy of a Postcard 28 Nov 2023 12:00 PM (last year)
Postcards may seem simple and compact, but it’s fascinating how the parts of a postcard play a crucial role in their effectiveness. If you’re looking into using postcards to get your message across, it’s important to understand their key features and components. In this article, we’ll explore the anatomy of a postcard and break down various design elements to help you reach your audience and create a memorable impression.
Key Features of a Postcard
Postcards are composed of two distinct sides: the front and the back. Each side serves a specific purpose and contributes to the overall impact of the message.
The Front Side: A Visual Appetizer
The front side is the first thing that recipients will see once you hand them a postcard. It features the image or design, which captures the attention of recipients, evokes emotions, and helps set the tone of the entire postcard.
Image or Design
The image or design showcases scenic landscapes or eye-catching artwork like illustrations, logos, or patterns.
The Back Side: A Functional Space
While the front side emphasizes aesthetics, the back side is where the logistics and message come to play. Below are the following elements included on the back side of the postcard:
Sender’s Name and Address
This is composed of the complete name and address of the sender, including the city, state, and ZIP code. The sender’s name and address provides proper identification and helps the post office return or acknowledge the postcard if needed.
Greeting
A simple greeting or salutation adds a personal touch to your message and creates a warm and friendly vibe for the postcard recipient.
Recipient’s Name and Address
This is where your postcard will be sent. It’s important to always include the full name of the recipient, as well as the complete address to ensure accurate delivery of the postcard.
Postage Stamp
The postage stamp is placed on the upper right corner of the postcard. It enhances the visual appeal of the postcard and also serves as proof that the delivery has been paid by the sender.
Message
This is where you communicate your thoughts, greetings, and other information to the recipient. The space for messages on a postcard is limited, therefore a message is recommended to be short, heartfelt, and impactful.
Digital Inclusions: QR Codes, Website Addresses, and Social Media Handles
At present, postcards now include QR codes, website addresses, and social media handles. These additions give recipients access to online content, which encourages engagement and makes the overall experience with the postcard more interesting and interactive.
The anatomy of a postcard is a perfect combination of creativity and functionality. From the choice of paper to the design elements, each aspect plays a significant role in conveying a meaningful message. When creating your own postcards, remember to explore the various possibilities that this traditional yet timeless form of communication offers.
Need to print custom postcards? Choose PrintPlace for all your printing needs. We offer premium-quality postcards and quick turnaround times.
The post The Anatomy of a Postcard appeared first on PrintPlace.
A Quick Guide on Sending Direct Mail Postcards 14 Aug 2023 12:45 AM (last year)
While it’s true that direct mail has never gone out of fashion, it also remains, to this day, a favorite means of correspondence — whether it’s from your besties or brands you trust. According to communications and advertising giant RR Donnelley (RRD), 63% of Gen Z are excited about getting real mail, while 62% of Millennial consumers feel the same. RRD’s data also revealed that these audiences believe that direct mail is more personal and more trustworthy, and that it catches their attention better compared to email.
And you must admit, a beautiful postcard that stood out in the pile of mail and you opened yourself is harder to lose than an email that can drown in dozens of messages you receive in your inbox any given day. If you’re new to direct mail services, you’d want to read and bookmark this article in which we put together a quick and easy reference on how to send postcards via direct mail.
Step 1: Set goals for your direct mail campaign.
Successful postcard campaigns, no matter how straightforward, thrive on structured planning. Consider a product launch: specify product details, event title, date, time, and location. Plan your postcard send-out early for timely RSVPs. Identify your audience – loyal, lapsed, or new customers – to tailor your message effectively. Lastly, set measurable goals, like sales targets or boosting brand awareness, to track your campaign’s success.
Step 2: Design your postcards.
Once you’ve outlined your campaign goals, it’s time to get creative. Our guide on how to create an effective postcard design will help you get started with your custom postcard: from writing your copy, coming up with a design strategy, down to picking out software you can use — this guide will put you on the right track to acing your postcard design.
PrintPlace offers a free online design tool with free customizable templates. You can also upload your design and personalize both sides of your postcard easily.
For direct mail, consider USPS for affordable rates. Remember, postcards must be rectangular, sized between 3.5″ x 5″ and 4.25″ x 6″, with a thickness of 0.007″ to 0.016″.
Step 3: Prepare your mailing lists.
Your postcard campaign’s reach and success rely heavily on your mailing lists. One way to secure your mailing list is by putting together your existing customer database into an Excel file and uploading it to the site upon checkout. It is also a common practice to rent or buy mailing lists. PrintPlace can help you secure a targeted mailing list; all you need is to add it to your cart as you order for your custom postcards. We will also make sure that the mailing list you use has no duplicates so you can maximize every postcard send-out. Our mailing service also comes with CASS (Coding Accuracy Support System) Certification which helps us ensure that the addresses in the list are correct and match respective US ZIP codes.
It’s important to note that the bigger your mailing list is, the higher the total cost of postage could be. But don’t worry, USPS rates start at $0.32, and you can start with as little as 25 postcards for every order with PrintPlace.
Step 4: Address for your postcards.
Writing addresses doesn’t need to be a tedious task. Whether you’re using the back of your postcards or sending them in envelopes, you need to carefully label your mail, so they are delivered to the right recipients. USPS, for instance, follows a four-line format for addresses for sending direct mail. Use this format and have addresses on your mailing list printed on address labels that you can stick on the postcard or the envelope.
- Recipient’s Name
- Street Address and Apartment Number
- City, State, and ZIP Code
- Country Name
USPS also recommends that addresses are written in all uppercase letters and that senders skip punctuation marks. You may include the company name of your recipients in the second line but keep in mind that USPS recommends not exceeding five lines per address.
Step 5: Choose a postage rate.
It can be tricky to calculate postage costs on your own. In fact, it’s strongly recommended that you bring your postcards to the post office so that the staff can help you determine the final cost of the direct mail service you’re using. And while stamps are still a thing, you can also arrange for metered postage for your postcard campaign, especially if you’re looking into doing send-outs more often or in bigger quantities.
PrintPlace Direct Mail: Your Perfect Postcard Partner
Maximize your direct mail campaign with PrintPlace. We offer an online design tool and a range of paper types and sizes for personalized postcards. Choose First Class Mail for 2-5 day delivery or standard mail for cost savings (7-20 days). We assist with mailing lists and postage costs when you create an account on PrintPlace.com. Engage existing customers and generate leads year-round.
The post A Quick Guide on Sending Direct Mail Postcards appeared first on PrintPlace.
Standard Brochure Sizes for Printing 3 May 2023 12:57 AM (last year)
Brochures come in a variety of sizes, and picking the appropriate one might be essential to properly communicating your message. Understanding the various brochure sizes is crucial whether you’re producing a brochure for your company, an occasion, or a marketing campaign.
Standard Brochure Sizes
- 8.5″ x 11″ – This is the standard size for a tri-fold brochure. It is also known as a letter-sized brochure, and it’s the most common brochure size in the US.
- 8.5″ x 14″ – This is a slightly longer version of the letter-sized brochure. It’s commonly used for legal documents and other longer brochures.
- 9″ x 12″ – This is a popular size for presentation folders that include a brochure or other marketing materials.
- 11″ x 17” – This size is commonly used for bi-fold or tri-fold brochures with larger images or graphics. It is also used for product catalogs, menus, and other types of marketing materials.
- 11″ x 25.5″ – This size is typically used for large-format tri-fold brochures, which are often used for trade shows or other events where you want to make a big impact.
Custom Brochure Sizes
Custom brochure sizes are also offered if you have particular specifications for your size. However, keep in mind that producing items in custom sizes might cost more and take longer.
Choosing the Right Size for Your Brochure
When choosing the size for brochure printing, consider the content that you want to include, as well as the audience you’re targeting. For example, a larger brochure may be better suited for a trade show, where you want to catch the attention of potential customers from a distance. A smaller brochure may be better suited for direct mail campaigns or other situations where you want to keep costs low.
The post Standard Brochure Sizes for Printing appeared first on PrintPlace.
How to Measure the Girth of a Box 1 May 2023 11:58 PM (last year)
Measuring the girth of a box is essential in ensuring that the package is not only within the courier company’s guidelines but also to avoid additional fees or even having the package returned.
Size Definitions:
- Length: The longest measurement of a box from end to end
- Width: The shorter measurement of a box from side to side
- Height: The measurement of a box from bottom to top
- Girth: The measurement of the distance around the widest part of the box or circumference.
To find the girth, measure the width and the height, add both, and multiply by two.
Girth = 2(W + H)
How to Calculate the Girth of a Box:
- Measure the width, and height.
- 10″ = Width
- 12″ = Height
- Add the width and height.
- 10″ + 12″ = 22″
- And multiply the sum by two.
- 22″ x 2 = 44″
Girth of your box is 44″
Order Your Custom Boxes Today
PrintPlace offers a streamlined process for creating and customizing your own boxes. Simply input your preferred dimensions and select the appropriate material and color that matches your brand. Our 3D online design tool allows you to start from scratch, providing a blank canvas to create your design and a real-time 3D preview that updates with every change. Check our custom boxes and start creating the perfect packaging for your products today!
The post How to Measure the Girth of a Box appeared first on PrintPlace.
The Power of Less: How Minimalist Packaging Can Benefit Your Brand and the Environment 16 Apr 2023 11:38 PM (last year)
Minimalist packaging has been gaining popularity in recent years, as more and more consumers are looking for simple, sustainable, and stylish packaging solutions. Minimalist packaging is all about stripping away unnecessary elements and focusing on the essentials, creating a clean and uncluttered design that reflects the product inside. Here are some reasons why minimalist packaging is a smart choice for brands and consumers alike:
Why Go for a Minimalist Packaging?
1. Cost Savings
Minimalist packaging can also be a cost-effective solution for brands, as it requires less material and often involves simpler printing processes. This can result in significant cost savings, especially for brands that produce large volumes of products.
2. Environmental Benefits
Minimalist packaging is often associated with sustainability, as it reduces waste and uses fewer resources than more elaborate packaging designs. By using fewer materials and reducing the size of the packaging, minimalist packaging can significantly decrease a brand’s environmental footprint.
3. Enhanced Brand Image
Minimalist packaging can create a sleek and modern look that appeals to consumers who value simplicity and elegance. Brands that adopt a minimalist approach to packaging can convey a sense of sophistication and quality, which can enhance their overall brand image.
4. Increased Product Visibility
By simplifying the packaging design, minimalist packaging can also increase the visibility of the product inside. This can be particularly important for brands that rely on the visual appeal of their products to drive sales, such as cosmetics or food brands.
Tips for Creating Minimalist Packaging
Creating minimalist packaging that stands out requires careful consideration of design elements and materials. Here are some tips for creating effective minimalist packaging:
Add a Touch of Packaging Tape – Use a custom packaging tape to make up for the emptiness. Choose a plain white paper tape or one with a subtle texture or pattern that complements your minimalist packaging for a cohesive look. Every detail counts.
Focus on Functionality – Minimalist packaging should prioritize function over form. The packaging should be designed to protect the product inside while using as few materials as possible.
Use High-Quality Materials – To create a premium look and feel, minimalist packaging should use high-quality materials, such as recycled paper or biodegradable plastics. This can also align with a brand’s commitment to sustainability.
Keep it Simple – Minimalist packaging should be simple and uncluttered, with a limited color palette and a clean typography. The design should reflect the product inside and its intended use.
Consider Branding – Minimalist packaging should still convey a brand’s identity and values. Brands can incorporate their logo, typography, or other brand elements into the packaging design, while keeping it subtle and understated.
Use Contrast – Contrast can be a powerful tool in minimalist packaging design. By using contrasting colors or textures, brands can create visual interest and emphasize key design elements.
How to Order Minimalist Boxes from PrintPlace
To order custom boxes with a minimalist design, follow these simple steps:
- Navigate to any of your preferred custom box type:
- Select “No Printing (Blank)” as your printing sides.
- Insert other necessary details to complete the order.
Embrace Minimalism for Sustainable and Impactful Packaging
Minimalist packaging is a smart choice for brands looking for simple, sustainable, and stylish packaging solutions. By prioritizing functionality, using high-quality materials, and keeping the design simple and uncluttered, brands can create packaging that reflects their products’ quality while reducing their environmental footprint. Minimalist packaging can also enhance a brand’s image and increase the visibility of its products, making it a win-win for brands and consumers alike.
The post The Power of Less: How Minimalist Packaging Can Benefit Your Brand and the Environment appeared first on PrintPlace.
Printing with AI: What You Need to Know About Designing Marketing Materials Using AI Art 12 Apr 2023 5:40 PM (last year)
We live in a time where printers are easy to come by and graphic design tools are becoming much more accessible to artists and non-designers alike. With the ubiquity of AI, the hype to create digital art is about to take a surge. But what does this mean for small business owners who want to try their hand at creating their own marketing materials?
As AI image generators scale up and get better at creating images, it’s only a matter of time before it becomes a household tool for marketing teams, particularly design and content. We talked to award-winning UX/UI expert and Digital Room, Inc. Creative Director Soo Chyun to help us paint a better picture of how businesses adopt AI. We also listed guidelines on how to customize print materials using artificial intelligence.
What is AI Art?
AI art refers to images generated by artificially intelligent software or machines. These AI image generators are programmed to learn from what already exists on the internet as well as the prompts human users request. They are built with algorithms capable of analyzing massive amounts of data including images and text to deliver results that are as close to the art that human intelligence can create as possible.
Believed to be the domain that stands to gain most from AI content generation, marketing inevitably takes the lead in the use of AI. In a benchmark study conducted by Influencer Marketing Hub, they found that 61.4% of respondents have used AI in marketing activities. In another research, consulting firm McKinsey & Company foresees that by 2023, about 70% of companies will have adopted AI technology in one way or another.
Guidelines in Using AI Art
AI has a long way to go in terms of creativity, something humans have become quite good at. While it’s true that more companies are adopting AI to forward their marketing campaigns, it remains important to understand the do’s and don’ts of designing marketing materials with ai art. It is a tool that humans should wield and regulate. Chyun summarizes the role of AI in marketing appropriately: “Design and art are based on human interpretation, which means making new things and breaking the rules. As it is now, AI only copies what’s given by humans and can’t go further than that.”
Get a better understanding of AI art generators. Take the time to read about your chosen tools as you explore their capabilities, limitations, and terms of use. You’ll find that AI companies in general dedicate a page, sometimes more, on their websites to explain how their tools should and shouldn’t be used, the features they’re currently developing, as well as a list of disclaimers. Educate yourself on how to safely use AI content generators especially if you’re looking into creating images for commercial use.
Use AI art generators for research. AI art generators are a lot like search engines where you type a query into a search box and then wait seconds for results. While Chyun believes that AI can’t go further than mimicking human intelligence (at least not yet), AI tools can be useful in making designers’ lives easier. “I see AI as good research material for designers, when they need more variations for their ideas or research certain elements that are hard to search from the stock photos. It will [also] help by using less low-level designers to do repetitive work; rather, AI will develop multiple variations to help [with] massive marketing material assets,” she explains.
AI image generators can help you brainstorm ideas on how to design logos, product images, and posters. AI, having read a huge chunk of the internet, can help you come up with new angles and visualize them with their built-in mockup tools.
Experiment with prompts and requests. It’s common for AI art generators to be programmed with various art styles that you can apply to images you’ll generate. Some companies also offer instructions on how to create prompts to achieve the most realistic and accurate results possible. Test a bunch of keywords and detailed descriptions when generating images or artwork ideas via AI tools. You can include elements like lighting, resolution, orientation, level of noise, and more.
Build your own concepts based on results you generate. You’re probably wondering if you can use AI-generated art for print on demand. The debate on whether using AI image generators is ethical is an ongoing one and it raises a caveat to anyone who wants to use AI tools especially for commercial purposes. As AI generators are great for brainstorming ideas, it’s not recommended to claim generated images as your own. You can, however, create original designs that are unique to your brand based on your research with AI.
Be mindful of bias and potentially sensitive and offensive images. In an article published by Slate, another controversy surrounding AI image generation is the alleged racial bias exhibited in image results. Heather Tal Murphy wrote about her experiment with a few image generators where she looked up photos of various couples. Murphy noticed that AI’s results primarily showed Caucasian people until she added the word “poor” into her search query — only then did the image generators deliver results that showed brown-skinned people. Bottomline: AI may have an extensive knowledge of the world after reading about it on the internet, but it isn’t perfect, and it requires human intelligence to identify potentially sensitive images.
AI Art Generators You Can Try Today
Fotor AI Generator. Fotor was founded in 2009 and started as an online photo editing software that grew bigger as they added more graphic design tools, pre-made templates, and royalty-free stock photos. In 2022, Fotor upped its game by launching its AI Image Generator, AI Background Remover, and AI Photo Enhancer. Fotor has a free three-day trial and offers two types of paid subscriptions, Fotor Pro and Fotor Pro+ which give access to a massive collection of templates, premium photos, fonts, and cloud storage.
NightCafe Studio. An AI image generator known for its Stable Diffusion App, NightCafe Studio uses text-to-image generation to execute their ideas in a range of presets like anime, oil painting, and CGI. All you need is your imagination, and the machine will do the rest. It’s perfect for when you want to visualize your ideas in specific art styles and take inspiration from generated samples. NightCafe Studio may be used for free using credits you can earn every day, but premium plans offer access to credits that never expire, advanced search, and more images you can generate.
Dall-E 2. Developed by OpenAI, the same company that gave us ChatGPT, Dall-E 2 can generate more realistic and accurate images better than its predecessor Dall-E 1. According to OpenAI, they launched Dall-E 2 with safety in mind so that it has limited ability to turn up images that demonstrate violence, hate, and explicit content. Use of Dall-E 2 is free — just sign up for an account on their website or use your ChatGPT login details.
Craiyon. Craiyon draws images based on text prompts for AI art within minutes. While Craiyon acknowledged that their machine is still learning, it helps when users are specific with their image requests so that they’re able to create better images. Craiyon’s free account gives you access to unlimited images, but they also offer premium subscriptions for those who want to gain early access to new features and want watermarks and ads removed from their images.
DeepAI. Like many other image generators, DeepAI relies on text prompts to create images, but it can also render your ideas in different art styles like Renaissance, street art, 3D, and more. DeepAI also allows for its images to be used commercially but since all the images are in public domain, you can’t truly own them. Using DeepAI is free, but they also disclosed that the resolution of images they can generate is limited which means they may not be ideal for printing.
Start Bringing AI Art to Life
Once you have created the desired output from any AI generators of your choice, you can easily print your designs on high-quality materials with PrintPlace. We offer a wide range of custom print services including:
All of which can be customized to meet your specific needs. Our user-friendly interface makes it easy to upload your designs, choose your preferred print options, and place your order. We use only the best materials and printing techniques to ensure that your marketing materials look professional and eye-catching. So whether you are promoting a new product, announcing an event, or simply looking to enhance your brand image, our printing services can help you achieve your goals.
To Print or Not to Print, You Can Use AI to Work for You
It seems no matter where you look, AI is being posed as something that’s going to put designers and writers out of work. But the truth is AI is still quite far from making creative decisions independent of human input. Chyun encourages designers to see AI for what it is — a tool — and not as a threat. “They need to meet mid-way. Designers and artists must understand that AI is here to aid their work, expand knowledge, and add more variations to create a rich portfolio and outcome. Companies must also realize that they simply cannot use AI to develop sensible, high-quality designs and art.” Whether you use AI art tools to generate images for print or digital, keep these guidelines in mind and remember who you are creating content for — your audience.
The post Printing with AI: What You Need to Know About Designing Marketing Materials Using AI Art appeared first on PrintPlace.
Guide to Creating AI Art for Sticker Printing 12 Apr 2023 3:42 AM (last year)
Sticker printing has become a popular way to promote businesses and organizations, as well as personal brands. With the rise of automation technology, creating stickers has become even easier with the use of artificial intelligence (AI). In this article, we will discuss how to make stickers in AI, how to design AI art for stickers, and whether it is legal to use AI-generated art for stickers.
How to Design AI Art for Stickers
Designing AI art for stickers can be a fun and creative process. The first step is to choose the right software. Adobe Illustrator is a popular choice among graphic designers for creating AI art.
Next, choose the type of AI art you want to create. This can be done by exploring different styles and techniques, such as generative art or abstract art. Once the style is chosen, start creating the art by experimenting with different shapes, colors, and patterns.
When designing AI art for stickers, it is important to keep in mind the size and shape of the sticker. The design should be eye-catching and easy to read, even when it is scaled down to a smaller size.
Is it Illegal to Use AI-Generated Art for Stickers?
While AI-generated art can be a great tool for designing stickers, it is important to make sure that the art is legally allowed to be used. Copyright laws protect original works of authorship, including art, music, and literature. This means that if an AI-generated art piece is created using copyrighted material, such as a photograph or image, it may be illegal to use that art for commercial purposes without obtaining the proper permissions.
To avoid copyright infringement, it is important to use only original art or art that is licensed for commercial use. There are many websites that offer royalty-free AI-generated art that can be used for commercial purposes, such as custom stickers.
Custom Stickers at a Lower Section
Custom stickers are a great way to promote businesses, organizations, or personal brands. With AI technology, designing and creating custom stickers has become even easier. There are many sticker printing companies that offer high-quality, affordable custom stickers.
When choosing a sticker printing company, it is important to consider factors such as price, quality, and turnaround time. Look for a company that offers a wide range of sticker options, such as different sizes, shapes, and materials. Additionally, consider a company that offers design assistance, so that you can create the perfect sticker for your needs.
At the End of the Day, Choose the Right Sticker Printing Services
In conclusion, making stickers in AI is a great way to create custom, eye-catching designs. When designing AI art for stickers, keep in mind the size and shape of the sticker, and ensure that any art used is legally allowed for commercial use. Look for a high-quality, affordable sticker printing service that offers a wide range of options to create the perfect custom sticker for your needs.
The post Guide to Creating AI Art for Sticker Printing appeared first on PrintPlace.
How to Add QR Codes to Postcards: A Step-by-Step Guide 5 Apr 2023 11:37 PM (last year)
Postcards are a simple and affordable method to advertise your company or event. Adding QR codes to your postcards can make them even more effective by allowing customers to easily access your website or special offer. We’ll walk you through the process of adding QR codes to your postcards in this article.
Step 1: Choose a QR Code Generator
Choosing a QR code generator is the first step in adding QR codes to your postcards. Online resources for creating QR codes include Beaconstac, QRCode Monkey, and QR Code Generator. Choose a QR code generator that is simple to use and enables customization.
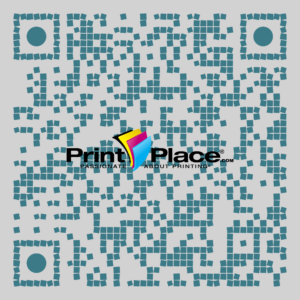
Step 2: Customize Your QR Code
After selecting a QR code maker, it’s time to customize your QR code. You can customize your QR code by adding your logo or changing the color scheme. Make sure your QR code is easy to scan by keeping it simple and not overcrowding it with too much information.
Step 3: Test Your QR Code
It’s crucial to test your QR code to ensure it functions before adding it to your postcard. Make sure the QR code on your smartphone takes you to the right website or landing page by scanning it with a QR code scanner app. If your QR code isn’t functioning, return to step 2 and make the necessary adjustments.
Step 4: Add Your QR Code to Your Postcard Design
It’s time to incorporate your functional QR code into your postcard design now that you have one. Put the QR code on your postcard using a design tool like Adobe Illustrator or Canva. Make sure the QR code is visible on your postcard and that it contains a call to action (CTA) like “Scan to discover more” or “Scan to receive 10% off.”
Step 5: Print and Mail Your Postcards
It’s time to print and mail your postcards after you’ve incorporated your QR code into the design. To ensure that your postcards look professional, pick a high-quality printer and paper stock. Make sure to include your return address and the appropriate postage if you are mailing your postcards.
Take Your Postcard Marketing to the Next Level with QR Codes
Using QR codes on your postcards is a great method to boost interaction and direct them to your website or exclusive deals. You can create a custom postcard with a QR code that is effective and eye-catching by following these easy instructions.
Ready to create custom postcards with QR codes for your business or event? To find out more about our postcard printing services and how we can assist you in developing a distinctive and successful marketing campaign, feel free to contact us. Use our live chat feature for further assistance.
The post How to Add QR Codes to Postcards: A Step-by-Step Guide appeared first on PrintPlace.
5 Things to Consider When Customizing a Retractable Banner 21 Mar 2023 5:53 PM (2 years ago)
You’ve probably seen retractable banners at events like trade shows, conferences, and weekend markets. They’re among the first to catch your attention as you line up or wait for your turn. Whatever the banner’s intention, a well-thought-out design helps people read and understand your message.
What You Need to Know When Customizing Your Retractable Banner:
1. Who is the banner’s audience?
Think about the attendees of your upcoming event or your store’s regular customers. Based on their age, gender, location, income, and jobs, observe the signs or advertisements that call their full attention. Which brands would their demographic likely support? Whose social media accounts do they follow? Based on these answers, see what you can learn from the content they consume. It’s also good to think about their day-to-day lives, what is important to them, and their personal beliefs. These paint a clearer picture of the people who see your banner, so you can ensure every detail appeals to their needs and lifestyle.
2. Which size will best bring out your design?
The size of your retractable banner will depend on the location. There’s room for bigger banners if renting you have ample booth space. You can display one or two banners or set up a few small ones if you’re pressed for space.After considering your location, narrow down your final retractable banner dimensions to the ones that make your message easy to read. You can download a retractable banner layout template to see how your design will appear in your selected size.
3. How will customers read your message?
People typically read from left to right or from top to bottom. Keep these in mind when planning the placement of your logo, text, images, and other information. The most relevant parts, like your logo and company name, should be at the uppermost portion. Arrange everything else according to their order of importance. For example, a sale banner would first reveal the theme or discount, and then product images will follow. Details on when and where the sale will be are placed at the bottom.
4. What images do you want to highlight?
People are drawn to the images on your sign. Focus on one product or highlight several items arranged neatly so they can see the objects from afar. Choose images representing or showing how your items will change or improve their lives. You can also showcase details that will entice potential customers, like intricate latte art or the bright colors of a macaroon. Whatever you decide, the image should be in high resolution and 300 dpi. Anything lower and the image will appear blurry or pixelated on the banner.
5. What type of color scheme do you want to use?
Start with a dominant hue when deciding on the retractable banner’s color scheme. You could use a color similar to the ones in your past signages and other promotional materials. If you can’t find a prevalent shade, think about the words customers should associate with your business. Blue is commonly seen in the sky and the ocean. Hence, people connect it with feelings of calm and security. Black is typically seen on luxury brands for their sophistication and elegance. Yellow is a warm, cheerful color, and green is connected to healing.Once you have a dominant color, it’s easy to pick the rest of your color scheme. Green works well with white, while yellow requires a louder or darker color, like red or black.
Design Tips for Your Custom Retractable Banners
It’s easier to envision and draft your retractable banner’s look after answering the five questions. You’ll also want to refer to these tips when completing the design:
- Try out several designs before deciding on one. Don’t limit yourself to one possibility. You can also see the most effective ones and note what works for your next banner.
- Give the banner room to breathe. Stick to your main message and crucial branding elements like your logo. Use white space to shift the reader’s focus on images and important text, especially if you’re printing a larger retractable banner size.
- Stick to two fonts maximum. Limit your font faces to two types. Make sure they’re both from the same family so the overall appearance doesn’t look disjointed. If you’re unsure where to start, choose fonts from your website or past materials.
- Add a call to action. Customers seeing your retractable banner is the first step, but what’s next? Provide contact info, show the event’s address, or prompt people to follow your social media accounts with a clear call to action.
Customize Your Own Retractable Banner Today
Once you’ve finished the design, you’re ready to order a retractable banner for your upcoming event. Check out the customizable options at PrintPlace. You can either upload a file or use the Online Design Tool that loads on your browser. If you have any questions, our print experts are ready to answer all your queries.
The post 5 Things to Consider When Customizing a Retractable Banner appeared first on PrintPlace.