We've moved! 8 Apr 2016 1:19 PM (9 years ago)


Check it out here -- be sure to bookmark it and sign up for email notifications of new blog posts, so you don't miss a single thing!


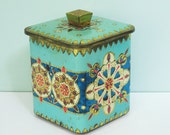
Gift Giving with Vintage Glass and Candy, Candy, Candy 8 Dec 2014 2:33 AM (10 years ago)


seem like a party.


Meet our Members - Susan of T Party Antiques 29 Aug 2014 9:23 AM (10 years ago)


 Can you tell us how you came to sell vintage?
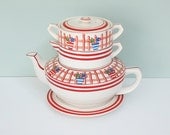
It all started with a large and lovely collection of Lu-Ray Pastel dinnerware. Before we had children, my husband and I used those vintage relics as our everyday dishes. After the birth of our first child, we needed something more practical. Plus, space was at a premium in our tiny first home, so I decided to rent a small space at a local antiques shop. My huge Lu-Ray stash sold quickly and before I knew it, I was looking for more items to fill the space. Fast forward 10 years to when I opened my very own antiques shop and tea room which had a successful 5-year run from 2003-2008.
How did your Etsy shop begin?
When my tea room closed (my landlord planned to tear down the 1890 farmhouse that I rented and I was unable to find a suitable new location), I had a small amount of remaining inventory. So in October 2008, I decided to open an Etsy shop.

What is your favorite era?
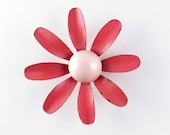
I gravitate toward colorful, whimsical items from the 1930s and 40s.
What is your current favorite Vintage find?
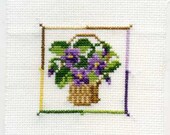
My favorite vintage find is a Home Sweet Home embroidered picture of a sweet little cottage and garden. (I'm partial to cottages as I live in one myself!) I use the piece on the header photo of my Etsy shop, blog, and even on my website's home page. Plus, I had a friend draw up an embroidery pattern for the picture that I sell on Etsy.

Where do you like to hunt for your treasures?
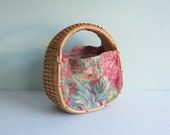
Here, there, and everywhere! I love to go to estate sales where the house is chock full of a messy jumble of old stuff. It's such fun to root around and find a treasure! I also like to go to the Elephant's Trunk Flea Market in New Milford, CT on summer Sunday mornings.

What advice would you wish someone had told you when you first started selling vintage?
Hmmm, good question. I wish someone would have warned me how addicting it can be! ;)
and anything else you want to add??
Just that items filled with vintage goodness have good karma and imperfections that come from being well loved. They have loads of life left and I am thrilled to be able to pass them along to someone who will enjoy and appreciate them.
,%20I%20had%20a%20small%20amount%20of%20remaining%20inventory.%20So%20in%20October%20%0A2008,%20I%20decided%20to%20open%20an%20Etsy%20shop.%3Cbr%20/%3E%0A%3Cdiv%3E%0A%3Ca%20href%3D%22https://img0.etsystatic.com/041/1/5389359/il_170x135.633896592_88ys.jpg%22%20imageanchor%3D%221%22%3E%3Cimg%20border%3D%220%22%20height%3D%22158%22%20src%3D%22https://img0.etsystatic.com/041/1/5389359/il_170x135.633896592_88ys.jpg%22%20width%3D%22200%22%20/%3E%3C/a%3E%3C/div%3E%0A%3Cbr%20/%3E%0A%26nbsp;%20%0A%0AWhat%20is%20your%20favorite%20era?%3Cbr%20/%3E%0AI%20gravitate%20toward%20colorful,%20whimsical%20items%20from%20the%201930s%20and%2040s.%3Cbr%20/%3E%0A%3Cbr%20/%3E%0AWhat%20is%20your%20current%20favorite%20Vintage%20find?%3Cbr%20/%3E%0AMy%20favorite%20vintage%20find%20is%20a%20Home%20Sweet%20Home%20embroidered%20picture%20of%20a%20%0Asweet%20little%20cottage%20and%20garden.%20(I'm%20partial%20to%20cottages%20as%20I%20live%20in%20%0Aone%20myself!)%20I%20use%20the%20piece%20on%20the%20header%20photo%20of%20my%20Etsy%20shop,%20blog,%20%0Aand%20even%20on%20my%20website's%20home%20page.%20Plus,%20I%20had%20a%20friend%20draw%20up%20an%20%0Aembroidery%20pattern%20for%20the%20picture%20that%20I%20sell%20on%20Etsy.%3Cbr%20/%3E%0A%3Cdiv%3E%0A%3Ca%20href%3D%22https://img0.etsystatic.com/033/0/5389359/il_170x135.569610976_qrob.jpg%22%20imageanchor%3D%221%22%3E%3Cimg%20border%3D%220%22%20height%3D%22254%22%20src%3D%22https://img0.etsystatic.com/033/0/5389359/il_170x135.569610976_qrob.jpg%22%20width%3D%22320%22%20/%3E%3C/a%3E%3C/div%3E%0A%3Cbr%20/%3E%0A%3Cbr%20/%3E%0AWhere%20do%20you%20like%20to%20hunt%20for%20your%20treasures?%3Cbr%20/%3E%0AHere,%20there,%20and%20everywhere!%20I%20love%20to%20go%20to%20estate%20sales%20where%20the%20%0Ahouse%20is%20chock%20full%20of%20a%20messy%20jumble%20of%20old%20stuff.%20It's%20such%20fun%20to%20%0Aroot%20around%20and%20find%20a%20treasure!%20I%20also%20like%20to%20go%20to%20the%20Elephant's%20%0ATrunk%20Flea%20Market%20in%20New%20Milford,%20CT%20on%20summer%20Sunday%20mornings.%26nbsp;%20%0A%3Cbr%20/%3E%0A%3Cdiv%3E%0A%3Ca%20href%3D%22https://img0.etsystatic.com/025/0/5389359/il_170x135.625690240_6dx7.jpg%22%20imageanchor%3D%221%22%3E%3Cimg%20border%3D%220%22%20height%3D%22254%22%20src%3D%22https://img0.etsystatic.com/025/0/5389359/il_170x135.625690240_6dx7.jpg%22%20width%3D%22320%22%20/%3E%3C/a%3E%3C/div%3E%0A%3Cbr%20/%3E%0AWhat%20advice%20would%20you%20wish%20someone%20had%20told%20you%20when%20you%20first%20started%20selling%20vintage?%20%3Cbr%20/%3E%0AHmmm,%20good%20question.%20I%20wish%20someone%20would%20have%20warned%20me%20how%20addicting%20it%20can%20be!%20;)%3Cbr%20/%3E%0A%3Cbr%20/%3E%0Aand%20anything%20else%20you%20want%20to%20add??%3Cbr%20/%3E%0AJust%20that%20items%20filled%20with%20vintage%20goodness%20have%20good%20karma%20and%20%0Aimperfections%20that%20come%20from%20being%20well%20loved.%20They%20have%20loads%20of%20life%20%0Aleft%20and%20I%20am%20thrilled%20to%20be%20able%20to%20pass%20them%20along%20to%20someone%20who%20will%0A%20enjoy%20and%20appreciate%20them.%3Cbr%20/%3E%0A%3Cdiv%3E%0A%3Ca%20href%3D%22https://img1.etsystatic.com/013/1/5389359/il_170x135.415948393_1ar4.jpg%22%20imageanchor%3D%221%22%3E%3Cimg%20border%3D%220%22%20height%3D%22158%22%20src%3D%22https://img1.etsystatic.com/013/1/5389359/il_170x135.415948393_1ar4.jpg%22%20width%3D%22200%22%20/%3E%3C/a%3E%3C/div%3E%0A%3Cbr%20/%3E%0A%3Cbr%20/%3E%0A%3Ca%20href%3D%22https://img0.etsystatic.com/033/0/5389359/il_170x135.569610976_qrob.jpg%22%20imageanchor%3D%221%22%3E%3C/a%3E%3Cbr%20/%3E)
Meet Our Members - Carla from Nuggest of Goodness 22 Aug 2014 8:00 AM (10 years ago)


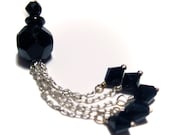
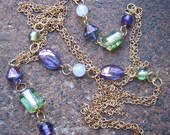
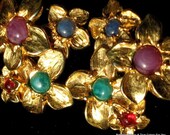
I began collecting vintage jewelry and handbags when I was in high school. Time went by and there so many pieces that I didn't wear, I decided to rework them into something new! As a jewelry maker it was a natural transition to combine the two passions, and Nuggets of Goodness was born!
My favorite era? I adore Art Deco, but my true love is Mid-century Modern! *swoon*
My current favorite Vintage find is a stash of 1950s French fashion magazines. The ads are AMAZING!
Where do you like to hunt for your treasures?
 Thrift stores, antique
malls, flea markets...every once in a while I run across a surprise at a
garage sale. I'm not patient enough for auctions, although I've gotten
some really great pieces that way!
Thrift stores, antique
malls, flea markets...every once in a while I run across a surprise at a
garage sale. I'm not patient enough for auctions, although I've gotten
some really great pieces that way!
What advice would you give anyone starting out?
Educate yourself. I worked for an appraiser for many years and he encouraged me to go to antique stores every chance I had just to look at everything and learn. Notice the decorative details, study in person how pieces are made. If you keep at it, eventually you will begin to recognize styles and spot reproductions.
%3Cbr%20/%3E%0A%3Cbr%20/%3E)
Plastic Kitsch to Plastic Chic 16 Aug 2014 5:28 PM (10 years ago)


Meet Our Members - Second Hand News 1 Aug 2014 9:08 AM (10 years ago)


 My love for vintage started at a very early age. I spent a lot of time
with my Grandmother who had quite the collection of antiques and was
constantly on the look out for unique pieces to add to her collection.
She so patiently taught me by example and instilled in me a passion and
respect for the finer things of our past. Years later, I was introduced
to Etsy through a friend and found the perfect way to share my passion
with others globally.
My love for vintage started at a very early age. I spent a lot of time
with my Grandmother who had quite the collection of antiques and was
constantly on the look out for unique pieces to add to her collection.
She so patiently taught me by example and instilled in me a passion and
respect for the finer things of our past. Years later, I was introduced
to Etsy through a friend and found the perfect way to share my passion
with others globally.My favorite era is the 1950s-1960s. The vibrant colors, styles, culture and the overall way of life during this particular time period are so fascinating to me.
It's difficult for me to choose just one favorite vintage find but I'd have to say that coming across a set of pink chenille twin bedspreads (in perfect condition) and purchasing them for $1.00 a piece was my all time score of the century.
The hunt for vintage treasures gives me the biggest rush. The adrenaline really gets flowing when I hit a 50% off sale at the local Thrift Store, attend a flea market or even a neighborhood yard sale. I've also been blessed with the friendship of a man who is an antique dealer and often supplies me with wonderful vintage inventory to add to my shop. My attic is packed full of items that I need to list!
Research is the key to successfully selling vintage items. I spend a lot of time on the internet conducting research in order to price my items competitively and according to the market. I also spend a considerable amount of time photographing my items as presentation is everything and a good picture speaks volumes. What I find most difficult is focusing my product line. My advice is to find that niche, that one particular area that you are passionate about and offer items that reflect your personality.
%20and%20purchasing%20them%20for%20$1.00%20a%20piece%20was%20my%20all%20%0Atime%20score%20of%20the%20century.%3Cbr%20/%3E%0A%3Cbr%20/%3E%0AThe%20hunt%20for%20vintage%20treasures%20gives%20me%20the%20biggest%20rush.%20%20The%20%0Aadrenaline%20really%20gets%20flowing%20when%20I%20hit%20a%2050%25%20off%20sale%20at%20the%20local%20%0AThrift%20Store,%20attend%20a%20flea%20market%20or%20even%20a%20neighborhood%20yard%20sale.%20%20%0AI've%20also%20been%20blessed%20with%20the%20friendship%20of%20a%20man%20who%20is%20an%20antique%20%0Adealer%20and%20often%20supplies%20me%20with%20wonderful%20vintage%20inventory%20to%20add%20to%20%0Amy%20shop.%20%20My%20attic%20is%20packed%20full%20of%20items%20that%20I%20need%20to%20list!%20%0A%3Cbr%20/%3E%0AResearch%20is%20the%20key%20to%20successfully%20selling%20vintage%20items.%20%20I%20spend%20a%20%0Alot%20of%20time%20on%20the%20internet%20conducting%20research%20in%20order%20%20to%20price%20my%20%0Aitems%20competitively%20and%20according%20to%20the%20market.%20%20I%20also%20spend%20a%20%0Aconsiderable%20amount%20of%20time%20photographing%20my%20items%20as%20presentation%20is%20%0Aeverything%20and%20a%20good%20picture%20speaks%20volumes.%20What%20I%20find%20most%20difficult%0A%20is%20focusing%20my%20product%20line.%20%20My%20advice%20is%20to%20find%20that%20niche,%20that%20one%0A%20particular%20area%20that%20you%20are%20passionate%20about%20and%20offer%20items%20that%20%0Areflect%20your%20personality.%3Cbr%20/%3E%0A%3Cdiv%3E%0A%3Ca%20href%3D%22https://img0.etsystatic.com/024/0/5227896/il_170x135.481846414_9s71.jpg%22%20imageanchor%3D%221%22%3E%3Cimg%20border%3D%220%22%20height%3D%22254%22%20src%3D%22https://img0.etsystatic.com/024/0/5227896/il_170x135.481846414_9s71.jpg%22%20width%3D%22320%22%20/%3E%3C/a%3E%3C/div%3E%0A%3Cbr%20/%3E%0A%3Cdiv%3E%0A%3Ca%20href%3D%22https://img1.etsystatic.com/021/0/5227896/il_170x135.492723305_63no.jpg%22%20imageanchor%3D%221%22%3E%3Cimg%20border%3D%220%22%20height%3D%22254%22%20src%3D%22https://img1.etsystatic.com/021/0/5227896/il_170x135.492723305_63no.jpg%22%20width%3D%22320%22%20/%3E%3C/a%3E%3C/div%3E%0A%3Cbr%20/%3E)
Business or Hobby? by BeadtopiaVintage 24 Jul 2014 10:41 AM (10 years ago)


Fun with Board Games 9 Jul 2014 7:25 AM (10 years ago)


 If you are going to sell vintage
games, there are a few things to keep in mind besides condition. When listing a
board game, you want to talk about condition, graphics and objectives. If you
have played the game, it is good to relate your experience. Photographing board
games can be very challenging, but they are definitely rewarding photos. Some
of my game shots have been my very favorite of all time in my shop. You can
create some really interesting angles and compositions. When thinking of
pricing, you of course want to take into account what you paid, condition and
what the market reflects. There is an amazing site called BoardGameGeek.com
where you can find all things game. I do not think there has been a single game
that I have not been able to read about there. The final thing to take into
account is shipping. Many game boxes are quite large. If the box is very firm,
to save the buyer shipping cost, I will often reinforce with some cardboard and
wrap in a few layers of bubble wrap paying special attention to the
corners.
If you are going to sell vintage
games, there are a few things to keep in mind besides condition. When listing a
board game, you want to talk about condition, graphics and objectives. If you
have played the game, it is good to relate your experience. Photographing board
games can be very challenging, but they are definitely rewarding photos. Some
of my game shots have been my very favorite of all time in my shop. You can
create some really interesting angles and compositions. When thinking of
pricing, you of course want to take into account what you paid, condition and
what the market reflects. There is an amazing site called BoardGameGeek.com
where you can find all things game. I do not think there has been a single game
that I have not been able to read about there. The final thing to take into
account is shipping. Many game boxes are quite large. If the box is very firm,
to save the buyer shipping cost, I will often reinforce with some cardboard and
wrap in a few layers of bubble wrap paying special attention to the
corners. 
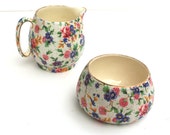
How to Clean Vintage Pottery & Dinnerware 7 Jun 2014 7:04 AM (10 years ago)

By Mary Wald of


Meet our Members 28 May 2014 1:56 PM (10 years ago)

1)Can you tell us how you came to sell vintage? and 2) And how your Etsy shop began?
Many years ago, my husband-to-be introduced me to the world of antiquing. He had been going to yard sales and flea markets since he was a teenager and by his early thirties had amassed quite a collection of primitives. Two decades later, our home is jam-packed with our mutual love of all things distressed, crazed, and chipped. But we can't keep everything we find -- we do NOT want to be featured on a Hoarder's show! My husband had a booth at an antique store at one time and we do local vintage shows in addition to my two online shops.
3) How did you find your shop name? I brainstormed a long time to come up with my shop's name. I wanted something fun and it always gets a giggle, but sometimes I think it's too long!
4) What is your favorite era? I love the look of the 1920s-1940s, although being addicted to Mad Men has given me a new appreciation of the (early) 1960s.
5) What is your current favorite Vintage find? My favorite current vintage find are typewriters. I seem to be the typewriter whisperer, as I find many of them at yard sales. I've always loved them, and we've had two or three displayed in the house most times, but there really isn't much room for a collection. My husband wonders why I can't collect postcards! ;)

6) Where do you like to hunt for your treasures? My favorite place to hunt for treasures are outdoor flea markets and yard sales. Before we sold we used to go to antique stores all the time but I find it harder and harder to shop retail now. I don't usually have much luck at the thrift stores in my area, but yard sales are my happy place. Although I worry we may have shopped every house in the neighborhood!
7) is there any single item you have found that you can not list - what do you love about it- I listed one of my antique dress forms (there are 4 displayed in my home) and it eventually sold. As I struggled with the shipping issues, the buyer asked me to cancel the transaction. I gratefully did so and immediately deactivated the listing. I had seller's remorse and was relieved I could keep it! (There is one that is less old than the others and will be coming with us to our next show).
8) What advice would you wish someone had told you when you first started selling vintage? My advice to new vintage sellers -- don't be afraid to step out of your comfort zone. Even though I don't naturally gravitate towards the look of the 1960s/1970s, that era is very popular to collect now and sells big. If I see something I personally wouldn't buy but I know a lot of people like, I will take a chance on it. And I don't have to worry about buyer's remorse!
Can%20you%20tell%20us%20how%20you%20came%20to%20sell%20vintage?%20and%202)%20And%20how%20your%20Etsy%20shop%20began?%3Cbr%20/%3E%0A%3Cbr%20/%3E%0A%26nbsp;%0AMany%20years%20ago,%20my%20husband-to-be%20introduced%20me%20to%20the%20world%20of%0A%20antiquing.%20He%20had%20been%20going%20to%20yard%20sales%20and%20flea%20markets%20since%20he%20%0Awas%20a%20teenager%20and%20by%20his%20early%20thirties%20had%20amassed%20quite%20a%20collection%20%0Aof%20primitives.%20Two%20decades%20later,%20our%20home%20is%20jam-packed%20with%20our%20mutual%0A%20love%20of%20all%20things%20distressed,%20crazed,%20and%20chipped.%20But%20we%20can't%20keep%20%0Aeverything%20we%20find%20--%20we%20do%20NOT%20want%20to%20be%20featured%20on%20a%20Hoarder's%20show!%0A%20My%20husband%20had%20a%20booth%20at%20an%20antique%20store%20at%20one%20time%20and%20we%20do%20local%20%0Avintage%20shows%20in%20addition%20to%20my%20two%20online%20shops.%26nbsp;%20%0A%3Cbr%20/%3E%0A%3Cbr%20/%3E%0A%3Cdiv%3E%0A%3Ca%20href%3D%22https://img1.etsystatic.com/038/1/5804104/il_170x135.604543147_7hyz.jpg%22%20imageanchor%3D%221%22%3E%3Cimg%20border%3D%220%22%20height%3D%22317%22%20src%3D%22https://img1.etsystatic.com/038/1/5804104/il_170x135.604543147_7hyz.jpg%22%20width%3D%22400%22%20/%3E%3C/a%3E%3C/div%3E%0A%3Cdiv%3E%0A%3Ca%20href%3D%22https://img0.etsystatic.com/022/1/5804104/il_170x135.539592826_dukw.jpg%22%20imageanchor%3D%221%22%3E%3Cbr%20/%3E%3C/a%3E%3C/div%3E%0A%3Cbr%20/%3E%0A3)%20How%20did%20you%20find%20your%20shop%20name?%20I%20brainstormed%20a%20long%20time%20to%20come%20up%20with%20my%20shop's%20name.%20I%20wanted%20%0Asomething%20fun%20and%20it%20always%20gets%20a%20giggle,%20but%20sometimes%20I%20think%20it's%20%0Atoo%20long!%20%3Cbr%20/%3E%0A%3Cbr%20/%3E%0A4)%20What%20is%20your%20favorite%20era?%20I%20love%20the%20look%20of%20the%201920s-1940s,%20although%20being%20addicted%20to%20Mad%20Men%20has%20given%20me%20a%20new%20appreciation%20of%20the%20(early)%201960s.%3Cbr%20/%3E%0A%3Cbr%20/%3E%0A5)%20What%20is%20your%20current%20favorite%20Vintage%20find?%20My%20favorite%20current%20vintage%20find%20are%20typewriters.%20I%20seem%20to%20be%20the%20%0Atypewriter%20whisperer,%20as%20I%20find%20many%20of%20them%20at%20yard%20sales.%20I've%20always%20%0Aloved%20them,%20and%20we've%20had%20two%20or%20three%20displayed%20in%20the%20house%20most%20%0Atimes,%20but%20there%20really%20isn't%20much%20room%20for%20a%20collection.%20My%20husband%20%0Awonders%20why%20I%20can't%20collect%20postcards!%20;)%3Cbr%20/%3E%0A%3Cdiv%3E%0A%3Ca%20href%3D%22https://img1.etsystatic.com/032/2/5804104/il_170x135.578203391_b1wh.jpg%22%20imageanchor%3D%221%22%3E%3Cimg%20border%3D%220%22%20height%3D%22254%22%20src%3D%22https://img1.etsystatic.com/032/2/5804104/il_170x135.578203391_b1wh.jpg%22%20width%3D%22320%22%20/%3E%3C/a%3E%3C/div%3E%0A%3Cdiv%3E%0A%3Ca%20href%3D%22https://img0.etsystatic.com/044/1/5804104/il_170x135.597663318_6vct.jpg%22%20imageanchor%3D%221%22%3E%3Cimg%20border%3D%220%22%20height%3D%22254%22%20src%3D%22https://img0.etsystatic.com/044/1/5804104/il_170x135.597663318_6vct.jpg%22%20width%3D%22320%22%20/%3E%3C/a%3E%3C/div%3E%0A%3Cdiv%3E%0A%3Ca%20href%3D%22https://img0.etsystatic.com/022/1/5804104/il_170x135.539592826_dukw.jpg%22%20imageanchor%3D%221%22%3E%3Cimg%20border%3D%220%22%20height%3D%22317%22%20src%3D%22https://img0.etsystatic.com/022/1/5804104/il_170x135.539592826_dukw.jpg%22%20width%3D%22400%22%20/%3E%3C/a%3E%3C/div%3E%0A%3Cbr%20/%3E%0A%3Cbr%20/%3E%0A6)%20Where%20do%20you%20like%20to%20hunt%20for%20your%20treasures?%26nbsp;%20My%20favorite%20place%20to%20hunt%20for%20treasures%20are%20outdoor%20flea%20markets%20and%20%0Ayard%20sales.%20Before%20we%20sold%20we%20used%20to%20go%20to%20antique%20stores%20all%20the%20time%20%0Abut%20I%20find%20it%20harder%20and%20harder%20to%20shop%20retail%20now.%20I%20don't%20usually%20have%0A%20much%20luck%20at%20the%20thrift%20stores%20in%20my%20area,%20but%20yard%20sales%20are%20my%20happy%20%0Aplace.%20Although%20I%20worry%20we%20may%20have%20shopped%20every%20house%20in%20the%20%0Aneighborhood!%3Cbr%20/%3E%0A%3Cbr%20/%3E%0A7)%20%20is%20there%20any%20single%20item%20you%20have%20found%20that%20you%20can%20not%20list%20-%20what%20do%20you%20love%20about%20it-%26nbsp;%20I%20listed%20one%20of%20my%20antique%20dress%20forms%20(there%20are%204%20displayed%20in%20my%20%0Ahome)%20and%20it%20eventually%20sold.%20As%20I%20struggled%20with%20the%20shipping%20issues,%20%0Athe%20buyer%20asked%20me%20to%20cancel%20the%20transaction.%20I%20gratefully%20did%20so%20and%20%0Aimmediately%20deactivated%20the%20listing.%20I%20had%20seller's%20remorse%20and%20was%20%0Arelieved%20I%20could%20keep%20it!%20(There%20is%20one%20that%20is%20less%20old%20than%20the%20others%0A%20and%20will%20be%20coming%20with%20us%20to%20our%20next%20show).%26nbsp;%26nbsp;%20%3Cbr%20/%3E%0A%3Cbr%20/%3E%0A8)%20What%20advice%20would%20you%20wish%20someone%20had%20told%20you%20when%20you%20first%20started%20selling%20vintage?%20My%20advice%20to%20new%20vintage%20sellers%20--%20don't%20be%20afraid%20to%20step%20out%20of%20%0Ayour%20comfort%20zone.%20Even%20though%20I%20don't%20naturally%20gravitate%20towards%20the%20%0Alook%20of%20the%201960s/1970s,%20that%20era%20is%20very%20popular%20to%20collect%20now%20and%20%0Asells%20big.%20If%20I%20see%20something%20I%20personally%20wouldn't%20buy%20but%20I%20know%20a%20lot%0A%20of%20people%20like,%20I%20will%20take%20a%20chance%20on%20it.%20And%20I%20don't%20have%20to%20worry%20%0Aabout%20buyer's%20remorse!%3Cbr%20/%3E%0A%3Cdiv%3E%0A%3Ca%20href%3D%22https://img0.etsystatic.com/023/0/5804104/il_170x135.502457948_r9o1.jpg%22%20imageanchor%3D%221%22%3E%3Cimg%20border%3D%220%22%20height%3D%22317%22%20src%3D%22https://img0.etsystatic.com/023/0/5804104/il_170x135.502457948_r9o1.jpg%22%20width%3D%22400%22%20/%3E%3C/a%3E%3C/div%3E%0A%3Cbr%20/%3E)
Meet our Members - WonderDIVA 3 May 2014 5:42 AM (10 years ago)
My shop name was the name I used as a buyer, and it comes
from a nickname a friend gave me, because I like Wonder Woman. I
started my shop when Etsy didn't allow sellers to revise shop name, so I
decided to use my shop name to reflect my love of the 1920's and 1930's
and the glamour of that era.
My shop "about" page goes into how I love the 1920's and the design movements that I love. I've loved those styles since I was very young... 1920's and 1930's movies always fascinated me. Predating that era, I also really love the Glasgow School of the Arts and Craft Movement... some of the most beautiful design work ever!

I hunt for treasures at estate sales and flea markets. There are two excellent estate sale companies in my town,and they make treasure hunting a very pleasant process. I keep saying I'm going to start attending farm auctions, but it hasn't happened yet.. maybe this summer!
I have four Christmas cards that the art nouveau illustrator Dugald Stewart Walker drew to send to friends -- the cards apparently came from the estate of someone who knew Walker. I don't know if any other copies of the cards exist outside of a few private collections. They are gorgeous, and Walker is one of my favorite illustrators, so I truly cherish them.

I actually got a lot of good advice because in my first job out of college, I met a coworker who was a hardcore antique and thrift store shopper who taught me so much about enjoying the process and looking for a diamond in the rough. Her process was to have fun, relax and if you found something, that was great -- but if you didn't, there is always next time!

Marcasite Jewelry 8 Apr 2014 4:26 PM (11 years ago)
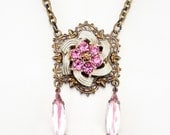
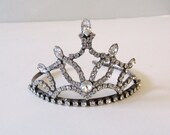
 Made from Pyrite, also known as Fool's Gold, Marcasite jewelry is one of the prettiest class of jewelry available on the vintage market. Known since ancient times, Marcasite jewelry is often set to a sterling base and in Art Nouveau designs. Marcasite jewelry is made from many, many small stones of Pyrite, a form of iron disulphide, cut into facets that make the jewelry sparkle and shimmer.
 |
| Courtesy of SoCalJewelBox |
Made popular by Queen Victoria when she wore it, along w/her mourning clothing, after the death of her husband, Marcasite jewelry often has a Victorian flaire. Designs range from lockets and flowing brooches, to figurals and animals.
 |
| Courtesy of scdvintage |
 |
| Courtesy of SanDiegoJewelryShop |
 |
| On the left: Marcasite; on the right: Pyrite Courtesy of http://www.wire-sculpture.com |

Meet Our Members! Tim and Kim Show 30 Mar 2014 7:12 AM (11 years ago)

1)Can you tell us how you came to sell vintage?
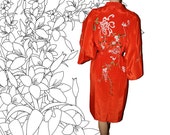
Tim and I had a retail store where we designed and manufactured the mens sportswear. We started collecting vintage Hawaiiana, surf and beach memorabilia to use as decor props.
2) And how your Etsy shop began?
I was scouting for vintage items to use in client's interior design projects and kept running across awesome vintage items that were not right for my clients but too good to pass up. Our house couldn't hold any more so I decided to open the Etsy shop to share the amazing finds.
3) How did you find your shop name?
Tim and Kim Show is a nickname that we have become known as a couple. While I still take on interior design jobs and Tim works in real estate, the etsy shop is a venture we are enjoying together.
4) What is your favorite era?
1950's, hands down!
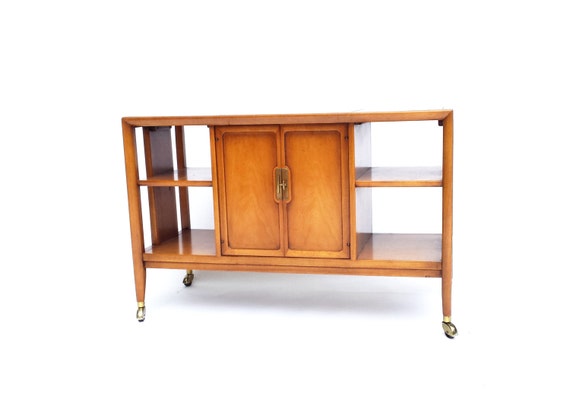
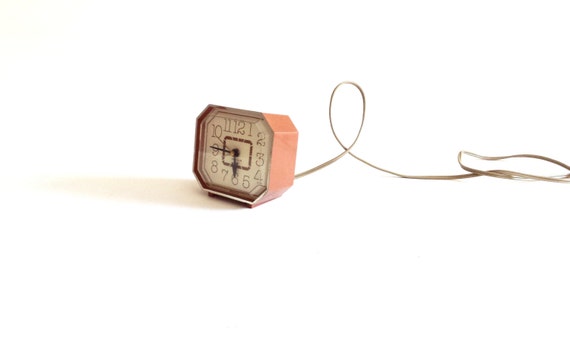
5) What is your current favorite Vintage find?
We are getting ready to list an amazing mid century room divider that has built in lights. We found it in a lighting store that has had it for over 50 years, original tag and all. They were really using as a display shelf for other items but we asked if they would sell it to us. We were elated when they agreed!
6) Where do you like to hunt for your treasures?
We scour for treasures all over Florida; estate sales, auctions and thrifts.
7) is there any single item you have found that you can not list & what do you love about it?
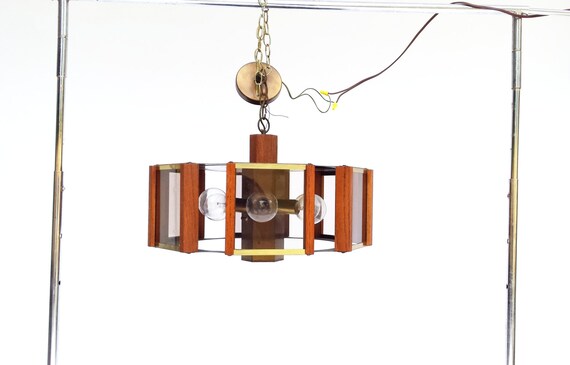
We have two and they are both lighting fixtures. One we listed for a short period but I deactivated it when it struck me how heartbroken I would be if it sold. It is a teak hanging swag pendant that has a lace fabric inner shade. I've never seen one like it! The other is teak floor lamp made by Woolmus in St Petersburg, Florida in the 50 or 60s. I just fits with our other pieces so perfectly!
A master photography class would have been a godsend. If the picture doesn't look good, it doesn't matter how great the piece is
Can%20you%20tell%20us%20how%20you%20came%20to%20sell%20vintage?%26nbsp;%3C/b%3E%3C/i%3E%3C/span%3E%3C/span%3E%3Cbr%20/%3E%0A%3Cbr%20/%3E%0A%3Cspan%3E%3Cspan%3ETim%20and%20I%20had%20a%20retail%20%0Astore%20where%20we%20designed%20and%20manufactured%20the%20mens%20sportswear.%20We%20started%0A%20collecting%20vintage%20Hawaiiana,%20surf%20and%20beach%20memorabilia%20to%20use%20as%20%0Adecor%20props.%3Cbr%20/%3E%3Ci%3E%26nbsp;%3C/i%3E%3C/span%3E%3C/span%3E%3Cbr%20/%3E%0A%3Cspan%3E%3Cspan%3E%3Cb%3E%3Ci%3E2)%20And%20how%20your%20Etsy%20shop%20began?%3C/i%3E%3C/b%3E%3C/span%3E%3C/span%3E%3Cbr%20/%3E%0A%3Cbr%20/%3E%0A%3Cspan%3E%3Cspan%3E%26nbsp;I%20was%20scouting%20for%20vintage%20items%20to%20use%0A%20in%20client's%20interior%20design%20projects%20and%20kept%20running%20across%20awesome%20%0Avintage%20items%20that%20were%20not%20right%20for%20my%20clients%20but%20too%20good%20to%20pass%20%0Aup.%20Our%20house%20couldn't%20hold%20any%20more%20so%20I%20decided%20to%20open%20the%20Etsy%20shop%20%0Ato%20share%20the%20amazing%20finds.%3Cbr%20/%3E%26nbsp;%3C/span%3E%3C/span%3E%3Cbr%20/%3E%0A%3Cspan%3E%3Cspan%3E%3Cb%3E%3Ci%3E3)%20How%20did%20you%20find%20your%20shop%20name?%3C/i%3E%3C/b%3E%3C/span%3E%3C/span%3E%3Cbr%20/%3E%0A%3Cbr%20/%3E%0A%3Cspan%3E%3Cspan%3E%26nbsp;Tim%20and%20Kim%20Show%20is%20a%20nickname%20that%20%0Awe%20have%20become%20known%20as%20a%20couple.%20While%20I%20still%20take%20on%20interior%20design%20%0Ajobs%20and%20Tim%20works%20in%20real%20estate,%20the%20etsy%20shop%20is%20a%20venture%20we%20are%20%0Aenjoying%20together.%3Cbr%20/%3E%26nbsp;%3C/span%3E%3C/span%3E%3Cbr%20/%3E%0A%3Cspan%3E%3Cspan%3E%3Cb%3E%3Ci%3E4)%20What%20is%20your%20favorite%20era?%26nbsp;%3C/i%3E%3C/b%3E%3C/span%3E%3C/span%3E%3Cbr%20/%3E%0A%3Cspan%3E%3Cspan%3E%26nbsp;%20%26nbsp;%20%26nbsp;%20%26nbsp;%20%26nbsp;%20%26nbsp;%20%26nbsp;%20%26nbsp;%20%26nbsp;%20%26nbsp;%20%26nbsp;%20%26nbsp;%20%26nbsp;%20%26nbsp;%20%26nbsp;%20%26nbsp;%20%26nbsp;%20%26nbsp;%20%26nbsp;%20%26nbsp;%20%26nbsp;%26nbsp;%201950's,%20hands%20down!%26nbsp;%26nbsp;%20%26nbsp;%3C/span%3E%3C/span%3E%3Cbr%20/%3E%0A%3Cdiv%3E%0A%3Ca%20href%3D%22https://img1.etsystatic.com/037/1/6516966/il_570xN.562263281_9j8j.jpg%22%20imageanchor%3D%221%22%3E%3Cimg%20border%3D%220%22%20height%3D%22236%22%20src%3D%22https://img1.etsystatic.com/037/1/6516966/il_570xN.562263281_9j8j.jpg%22%20width%3D%22320%22%20/%3E%3C/a%3E%3C/div%3E%0A%3Cspan%3E%3Cbr%20/%3E%3C/span%3E%0A%3Cspan%3E%3Cspan%3E%3Cb%3E%3Ci%3E5)%20What%20is%20your%20current%20favorite%20Vintage%20find?%26nbsp;%3C/i%3E%3C/b%3E%3C/span%3E%3C/span%3E%3Cbr%20/%3E%0A%3Cbr%20/%3E%0A%3Cspan%3E%3Cspan%3E%26nbsp;We%20are%20getting%20ready%20to%20%0Alist%20an%20amazing%20mid%20century%20room%20divider%20that%20has%20built%20in%20lights.%20We%20%0Afound%20it%20in%20a%20lighting%20store%20that%20has%20had%20it%20for%20over%2050%20years,%20original%0A%20tag%20and%20all.%20They%20were%20really%20using%20as%20a%20display%20shelf%20for%20other%20items%20%0Abut%20we%20asked%20if%20they%20would%20sell%20it%20to%20us.%20We%20were%20elated%20when%20they%20%0Aagreed!%20%3Cbr%20/%3E%26nbsp;%3C/span%3E%3C/span%3E%3Cbr%20/%3E%0A%3Cspan%3E%3Cspan%3E%3Ci%3E%3Cb%3E6)%20Where%20do%20you%20like%20to%20hunt%20for%20your%20treasures?%3C/b%3E%3C/i%3E%3C/span%3E%3C/span%3E%3Cbr%20/%3E%0A%3Cspan%3E%3Cspan%3E%26nbsp;%20%26nbsp;%20%26nbsp;%20%26nbsp;%20%26nbsp;%20%26nbsp;%20%26nbsp;%20%26nbsp;%20%26nbsp;%20%26nbsp;%20%26nbsp;%20%26nbsp;%20%26nbsp;%26nbsp;%20We%20scour%20for%20treasures%20all%20over%20Florida;%20estate%20sales,%20auctions%20and%20thrifts.%3Cbr%20/%3E%26nbsp;%3C/span%3E%3C/span%3E%3Cbr%20/%3E%0A%3Cspan%3E%3Cspan%3E7)%20is%20there%20any%20single%20item%20you%20have%20found%20that%20you%20can%20not%20list%20%26amp;%20what%20%0Ado%20you%20love%20about%20it?%3C/span%3E%3C/span%3E%3Cbr%20/%3E%0A%3Cbr%20/%3E%0A%3Cspan%3E%3Cspan%3EWe%20have%20two%20and%20they%20are%20both%20lighting%20fixtures.%20%0AOne%20we%20listed%20for%20a%20short%20period%20but%20I%20deactivated%20it%20when%20it%20struck%20me%20%0Ahow%20heartbroken%20I%20would%20be%20if%20it%20sold.%20It%20is%20a%20teak%20hanging%20swag%20pendant%0A%20that%20has%20a%20lace%20fabric%20inner%20shade.%20I've%20never%20seen%20one%20like%20it!%20The%20%0Aother%20is%20teak%20floor%20lamp%20made%20by%20Woolmus%20in%20St%20Petersburg,%20Florida%20in%20%0Athe%2050%20or%2060s.%20I%20just%20fits%20with%20our%20other%20pieces%20so%20perfectly!%3C/span%3E%3C/span%3E%3Cbr%20/%3E%0A%3Cbr%20/%3E%0A%3Cdiv%3E%0A%3Ca%20href%3D%22https://img1.etsystatic.com/030/1/6516966/il_570xN.560850051_9n5q.jpg%22%20imageanchor%3D%221%22%3E%3Cimg%20border%3D%220%22%20height%3D%22220%22%20src%3D%22https://img1.etsystatic.com/030/1/6516966/il_570xN.560850051_9n5q.jpg%22%20width%3D%22320%22%20/%3E%26nbsp;%3C/a%3E%20%3C/div%3E%0A%26nbsp;%3Cspan%3E%3Cspan%3E%0A%3Ci%3E%3Cb%3E8)%20What%20advice%20would%20you%20wish%20someone%20had%20told%20you%20when%20you%20first%20%0Astarted%20selling%20vintage?%3C/b%3E%3C/i%3E%3C/span%3E%3C/span%3E%3Cbr%20/%3E%0A%3Cbr%20/%3E%0A%3Cspan%3E%3Cspan%3E%26nbsp;A%20master%20photography%20class%20would%20have%20been%20a%20%0Agodsend.%20If%20the%20picture%20doesn't%20look%20good,%20it%20doesn't%20matter%20how%20great%20%0Athe%20piece%20is%3C/span%3E%3C/span%3E%3Cbr%20/%3E%0A%3Cbr%20/%3E%0A%3Cdiv%3E%0A%3Ca%20href%3D%22https://img0.etsystatic.com/023/1/6516966/il_570xN.542402012_3y2a.jpg%22%20imageanchor%3D%221%22%3E%3Cimg%20border%3D%220%22%20height%3D%22180%22%20src%3D%22https://img0.etsystatic.com/023/1/6516966/il_570xN.542402012_3y2a.jpg%22%20width%3D%22320%22%20/%3E%3C/a%3E%3C/div%3E%0A%3Cdiv%3E%0A%3Ca%20href%3D%22https://img0.etsystatic.com/023/1/6516966/il_570xN.525809604_ul5u.jpg%22%20imageanchor%3D%221%22%3E%3Cimg%20border%3D%220%22%20height%3D%22189%22%20src%3D%22https://img0.etsystatic.com/023/1/6516966/il_570xN.525809604_ul5u.jpg%22%20width%3D%22320%22%20/%3E%3C/a%3E%3C/div%3E%0A%3Cdiv%3E%0A%3Ca%20href%3D%22https://img0.etsystatic.com/024/1/6516966/il_570xN.522759566_t0al.jpg%22%20imageanchor%3D%221%22%3E%3Cimg%20border%3D%220%22%20height%3D%22204%22%20src%3D%22https://img0.etsystatic.com/024/1/6516966/il_570xN.522759566_t0al.jpg%22%20width%3D%22320%22%20/%3E%3C/a%3E%3C/div%3E)
New Member Spotlight 24 Mar 2014 4:23 AM (11 years ago)


 |
| "Hi Sweet Friends! I am Kate and I live in North California with my dear Husband. I love to create unique, earthy, ethereal, sometimes edgy, carefree, fun, country, chic, farm, bridal, ranch, cottage clothes for women and children.. casual, yet with a touch of elegance. I love God, and his Son Jesus, His Word....and pleasing him every day is my goal. What a blessing that he is our creator. " |


 ...and what a wonderful collage Kate creates!
Fabric Art isn't Kate's only talent...
She enjoys reading, cooking and an array of outdoor activity. All seemingly inspirations for her creations. She has recently written a Historical Fiction picture book that her husband illustrated, and it will be published this Summer!
She has a Second Etsy Store Katerustic where she creates "Handmade Rustic Farm Girl Home Decor Folk Art."
 |
| Shabby Spring Twiggy Doll As being one of our Etsy Vintage Team Members, you can shop Kate's store confidently, knowing you are getting the highest quality product and customer service possible! |

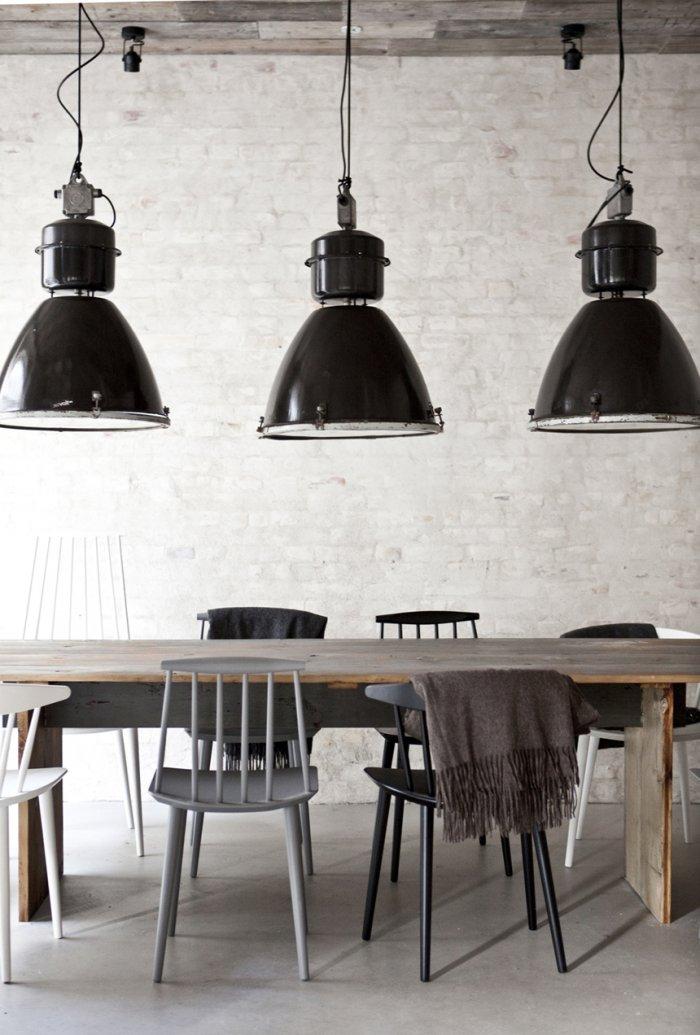
VINTAGE VIGNETTES
vignette
noun \vin-ˈyet, vēn-\: a short piece of writing, music, setting, etc which clearly expresses the typical characteristics of something or someone

To express the characteristics of ourselves, of our personality, in our environment is what makes a house a home. To take a raw space and to interject a bit of who we are, of what interest us, of what lives in our soul, will breathe life into a home like no other diy project. The mix of new and old, handmade and industrial, reflective and matte will blend into a harmonious whole when grouped in aesthetically pleasing combinations. You can have several layered vignettes throughout any room in your house. The key is that there are elements that express who YOU are, not only what is currently trending. By all means, add touches of the color of the moment or include the trend of the season but it is the pieces that speak of you and your family that will be what make the room HOME.


Handmade, Nature, New Vintage
The concept of design vignettes will work across all architectural themes, interior decor styles, eras and design fads. While our family's personal style is a conglomeration of beach shack, mid century and industrial, you can take the concepts of design vignettes in any direction that suites your design sensibilities. Just be sure it makes your heart sing!


Lamp has built in night light behind perforated base for wonderful evening ambiance.
While I am not a huge believer in following design rules, some basic concepts can prove helpful... just don't let them constrain your imagination.
- Balance, whether you choose to go symmetrical or asymmetrical
- Go with the "odd" addition every once in a while... it adds a spark of fun
- Layer the heights
- Combine textures
- Variety of scale / size
- YOUR personality
- Mix of styles and eras


Bottom line, have fun and express yourself!

Ten Killer Tips for Attending a Sheriff's Auction 1 Mar 2014 2:00 AM (11 years ago)


Etsy Apps and Protypes 18 Feb 2014 11:08 AM (11 years ago)
Just wanted to let everyone know about some useful things Etsy and others offer -
I know I have told everyone about Enhantsy - (which is no longer free, but for $2.49 a month it is better than paying for ads)
http://www.etsy.com/apps
apps are made by other people to work with Etsy, but are not made by Etsy
Explore the options some seem really good!
Craftcult http://www.etsy.com/apps/6290520/craft-cult-treasury-widget
Make a Treasury widget and more ...
http://www.etsy.com/apps/1660255685/1-free-bulk-listing-editor-betsi-lite
Key Features:
• Manage Active Listing Titles, Descriptions, Prices
(supports Normal, Digital, and Variation Listings), Quantities, Shop
Section linking, Taxable flagging, and Request Custom Job flagging.
• Flexible Filtering by Shop Section &/or Categories
• Instant Text Search by Titles &/or Descriptions as you type
• Key information at your fingertips
• Review Changes before Sending - Unique!
• Free and Friendly customer support
For more detailed information, please check out our Features page: http://www.blugrin.com/Betsi/Features
http://www.etsy.com/apps/4789429873/respondify I would be cautious with this one - Etsy likes to be the spammer of customers - they frown on contacting customers directly - unless of course its a negative review and then you have to work it out ...
http://www.etsy.com/prototypes?ref=si_prototypes
Protypes are actually made by Etsy and it usually is something they are trying out (without running it on the entire site first)
Taken from the Prototypes page
Prototypes are projects from Etsy Admin that explore different ways of using Etsy.
Each prototype is released with the goal of gathering data and observing how people use them.
When I am researching something or doing a treasury I can find an item I like and this shows up and I can see all similar items
and the shipping profiles - this lets you add upgrade charges as an item - which used to be against the rules - having shipping charges as an add on item but with this you can offer regular standard shipping and customers can add on priority or Express upgrades
http://www.etsy.com/teams/17793/shipping-upgrades-and-shipping-profile
By Patti from Fleaosophy
DIY: Antiquing a Modern Body Form Tutorial (making your mannequin look French Vintage) 16 Feb 2014 5:44 AM (11 years ago)
 Here is a great DIY Tutorial for Antiquing Body Forms!

- freezer paper
- printer
- metal spoon (eating utensil size)
- printer paper
- Walnut Antiquing ink
- painters tape
- sponge
- old white cloth
- cloth style body form
- Graphics (links on where to find them in this tutorial)
Most of us in the business are constantly looking for ways to improve our seller photographs. I wanted to upgrade in a BIG way, but without killing my pocket. I began by endlessly searching the internet for Antique Female Body Forms, and quickly realized they were pretty costly! Being the thrifty shopper that I am, I figured there HAD to be a way to take my modern form and make her look antique. I had purchased a female body form and stand from eBay a while back. She was looking a little worn, so I figured she would be the perfect trial.


Next, I grabbed an old cloth and dampened it (not saturated). I began spraying the antiquing ink over my body form and then blending it in with the damp cloth.


 |


Your Finished Product will look like this!


 |
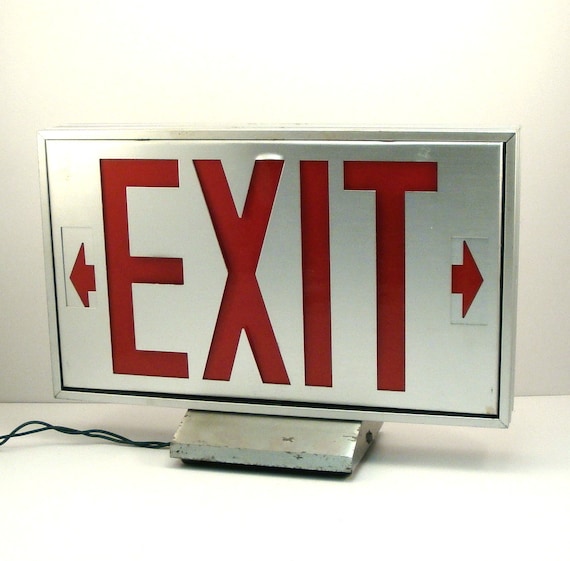
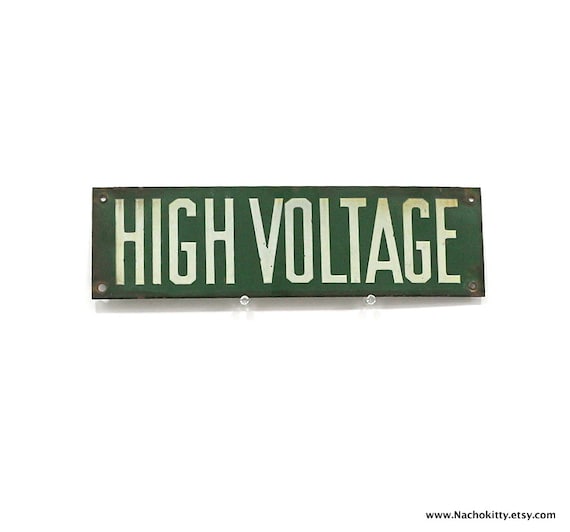
| Railroad Signs for the train lover |
 |
| Industrial flare for our industrious Teen's |
 |
| Travel Signs for the car lover
Purchasing these signs is very simple and you can come across a variety of them online. Here are just a few I have found currently on sale. You may click the photo's below if you are interested in purchasing these signs or pricing them.
|
   |
 |
| Bedroom |
 |
| Dining-room or Kitchen |
 |
| Great Room |


Cool things I found to help run my Etsy shop 28 Jan 2014 1:40 PM (11 years ago)

 | |
| Treasury featuring EVT members made with Enhantsy |

- Treasurease - what you use to make the Treasuries
- Treasurease Clone - use an old treasury you made and CLONE it into a new treasury
- Treasurease Convos - instantly send Convos to everyone in the treasury you just made!
- First dibs - have all new stores and new items show up on your home page -
- Canned Convos - have several Convos preset to send when you create a Treasury

check out Statsy - Featurator this will send you an email anytime an item or a treasury you made is on the Front Page - Statsy has some other cool features but I only use Featurator.

Another one is Craftcult.com CraftCult With this you can add treasuries to Blogs, webpages etc, use the widget. Also checkout the VAULT on CraftCult- you can look up treasuries your items have been featured in or all the treasuries you have made, you can do this in search in Etsy from the main treasury page too
Some other features but these are the ones I have personal experience with.
ShopValueCalculator.com
Here you can see top shops on Etsy, the estimated value of YOUR OWN STORE!, views and all sorts of great into. Don't get sidelined at the top stores, they may have lots of sales, but quite a few are very low value items. I don't know about you but I want to make sure I am making a decent profit on the sales as I have them and not selling tons of little stuff for $2.00 I see that as a time suck.
Then I just found Etsy Gadget This one is by donation, so if you love it you can donate to the author. I think the shop status is the best use of this site. With shop status it will sort your items by view and admirers, AND the best use is it will let you know if you are missing keywords. It doesn't tell you what keywords to use, but if you are like me you will have a bunch of items you renew over and over and they may have less than the 13 keywords.
You can also see where your products fall in search, and where your store falls when searched by keyword combinations.
Last one for now is Etsy Fee Calculator from Ecommercebytes.com
Have Fun!
Vintage Pencil Sharpeners for Back to School 20 Aug 2013 4:47 PM (11 years ago)
 By KatyO (VintagePDX)
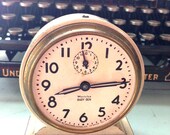
For those of us with school age children, one of the more dreaded back-to-school tasks has to be sharpening the vast quantities of #2 pencils on the school supply list. A modern electric pencil sharpener is noisy, unreliable, and expensive, and a notebook-sized hand sharpener will drive you mad after the first pencil.
Behold! The affordable and reliable vintage alternative: an old-school, wall-mounted, hand-crank pencil sharpener.
 |
| Boston Sharpener from EVT Seller HappilyEraAfter |
I grew up with one of these in our laundry room, and when I visited my grandmother, I discovered she had her own mounted on a post halfway up the basement stairs. A few years later, as my mother was closing out Grandma's house, I gathered up the sharpener, shavings and all, and put it in a Ziploc to take home. I couldn't bear to leave it behind. When our daughter was heading off to kindergarten, I finally put grandma's sharpener up in our laundry room. (I should add: I had to empty out 50 years of shavings I had carted around through 4 moves across the country.) Now our daughter can sharpen her own pencils. I'm happy to be spared the hassle of grinding down 40 yellow Ticonderogas.
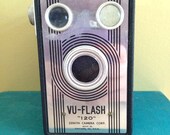
EVT members have a selection of pencil sharpeners for your back-to-school needs. Here are a few other fun examples. The see-through body and angles make this one perfect for a machine-age office:
 |
| Futuramic Sharpener from EVT Seller Dentwood |
The orange color of this Boston brand sharpener is perfect for a mid-century home:
 | |||
| Orange Bostonette Sharpener from EVT Seller VintageGypsies |
And this Apsco has a sizing wheel to sharpen different size pencils:
 |
| Apsco Sharpener from EVT Seller wretchedshekels |
Additional EVT Seller's sharpeners can be found here: EVT Sharpeners.
Add a practical new vintage item to your home this fall! You'll find pricing on vintage sharpeners is often less than a new electric model, and you get a higher quality product when you buy vintage. Just make sure to to take it with you if you move. One of my college friends bemoaned the loss of her family sharpener; she accidentally left it mounted in the pantry of her old home.
<a href="http://www.bloglovin.com/blog/576762/?claim=btpu6d4nx27">Follow my blog with Bloglovin</a>
%20%3C/i%3E%3Cbr%20/%3E%0A%3Cbr%20/%3E%0AFor%20those%20of%20us%20with%20school%20age%20children,%20one%20of%20the%20more%20dreaded%20back-to-school%20tasks%20has%20to%20be%20sharpening%20the%20vast%20quantities%20of%20%232%20pencils%20on%20the%20school%20supply%20list.%26nbsp;%20A%20modern%20electric%20pencil%20sharpener%20is%20noisy,%20unreliable,%20and%20expensive,%20and%20a%20notebook-sized%20hand%20sharpener%20will%20drive%20you%20mad%20after%20the%20first%20pencil.%20%3Cbr%20/%3E%0A%3Cbr%20/%3E%0ABehold!%20The%20affordable%20and%20reliable%20%3Cb%3E%3Cu%3Evintage%3C/u%3E%3C/b%3E%20alternative:%20an%20old-school,%20wall-mounted,%20hand-crank%20pencil%20sharpener.%3Cbr%20/%3E%0A%3Cbr%20/%3E%0A%3Cbr%20/%3E%0A%3Ctable%20align%3D%22center%22%20cellpadding%3D%220%22%20cellspacing%3D%220%22%3E%3Ctbody%3E%0A%3Ctr%3E%3Ctd%3E%3Ca%20href%3D%22https://www.etsy.com/listing/150359594/vintage-boston-l-pencil-sharpener%22%20target%3D%22_blank%22%3E%3Cimg%20border%3D%220%22%20src%3D%22https://blogger.googleusercontent.com/img/b/R29vZ2xl/AVvXsEg0R4ZdVMQVEfJ-gX58-oysfk1AS5HF7LUEX2F9ECABhArfTChbABOv1tAlBBW-E9V8wnhSZIO5TXe_ZlsQ6cjQlNKyTnVxIVwt15tmN-t_2qdxywi39R3SjX5XURwnu5O2WqiTDZwee_wV/s320/HappilyEraAfter_boston.jpg%22%20height%3D%22320%22%20style%3D%22margin-left:%20auto;%20margin-right:%20auto;%22%20width%3D%22240%22%20/%3E%3C/a%3E%3C/td%3E%3C/tr%3E%0A%3Ctr%3E%3Ctd%3E%3Ca%20href%3D%22https://www.etsy.com/listing/150359594/vintage-boston-l-pencil-sharpener%22%20target%3D%22_blank%22%3EBoston%20Sharpener%20from%20EVT%20Seller%20HappilyEraAfter%3C/a%3E%3C/td%3E%3C/tr%3E%0A%3C/tbody%3E%3C/table%3E%0A%3Cdiv%3E%0A%3C/div%3E%0A%3Cbr%20/%3E%0A%3Cbr%20/%3E%0AI%20grew%20up%20with%20one%20of%20these%20in%20our%20laundry%20room,%20and%20when%20I%20%0Avisited%20my%20grandmother,%20I%20discovered%20she%20had%20her%20own%20mounted%20on%20a%20post%20%0Ahalfway%20up%20the%20basement%20stairs.%20%26nbsp;%20A%20few%20years%20later,%20as%20my%20mother%20was%20%0Aclosing%20out%20Grandma's%20house,%20I%20gathered%20up%20the%20sharpener,%20shavings%20%0Aand%20all,%20and%20put%20it%20in%20a%20Ziploc%20to%20take%20home.%20I%20couldn't%20bear%20to%20leave%20%0Ait%20behind.%26nbsp;%20When%20our%20daughter%20was%20heading%20off%20to%20kindergarten,%20I%20finally%20put%20grandma's%20sharpener%20up%20in%20our%20laundry%20%0Aroom.%20(I%20should%20add:%26nbsp;%20I%20had%20to%20empty%20out%2050%20years%20of%20shavings%20I%20had%20carted%20around%20through%204%20moves%20across%20the%20country.)%26nbsp;%20Now%20our%20%0Adaughter%20can%20sharpen%20her%20own%20pencils.%20I'm%20happy%20to%20be%20spared%20the%20hassle%20of%20grinding%0A%20down%2040%20yellow%20Ticonderogas.%3Cbr%20/%3E%0A%3Cbr%20/%3E%0A%3Cbr%20/%3E%0A%3Cbr%20/%3E%0AEVT%20members%20have%20a%20selection%20of%20pencil%20%0Asharpeners%20for%20your%20back-to-school%20needs.%26nbsp;%20Here%20are%20a%20few%20other%20fun%20%0Aexamples.%26nbsp;%20The%20see-through%20body%20and%20angles%20make%20this%20one%20perfect%20for%20a%20machine-age%20office:%20%3Cbr%20/%3E%0A%3Cbr%20/%3E%0A%3Cbr%20/%3E%0A%3Cbr%20/%3E%0A%3Ctable%20align%3D%22center%22%20cellpadding%3D%220%22%20cellspacing%3D%220%22%3E%3Ctbody%3E%0A%3Ctr%3E%3Ctd%3E%3Ca%20href%3D%22https://www.etsy.com/listing/157582144/futuramic-pencil-sharpene%22%20target%3D%22_blank%22%3E%3Cimg%20border%3D%220%22%20src%3D%22https://blogger.googleusercontent.com/img/b/R29vZ2xl/AVvXsEguiOVIN2zZ0eqqSOuLAmmq1mcRlepmK-Kq30dj2Hcocw-vXGCXjilkwcb-i3psUCZi6E9zC1TVw57GcdsSw8ORMpsab5fHnAOYmz5VHkWQwfmrJzSH7kZF3pixZx-WJnBTy0cpLEdzhcXh/s320/Dentwood_Futuramic.jpg%22%20height%3D%22212%22%20width%3D%22320%22%20/%3E%3C/a%3E%3C/td%3E%3C/tr%3E%0A%3Ctr%3E%3Ctd%3E%3Ca%20href%3D%22https://www.etsy.com/listing/157582144/futuramic-pencil-sharpene%22%20target%3D%22_blank%22%3EFuturamic%20Sharpener%20from%20EVT%20Seller%20Dentwood%3C/a%3E%3C/td%3E%3C/tr%3E%0A%3C/tbody%3E%3C/table%3E%0A%3Cbr%20/%3E%0A%3Cbr%20/%3E%0AThe%20orange%20color%20of%20this%20Boston%20brand%20sharpener%20is%20perfect%20for%20a%20mid-century%20home:%20%3Cbr%20/%3E%0A%3Ctable%20align%3D%22center%22%20cellpadding%3D%220%22%20cellspacing%3D%220%22%3E%3Ctbody%3E%0A%3Ctr%3E%3Ctd%3E%3Ca%20href%3D%22https://www.etsy.com/listing/128955628/orange-bostonette-mounted-pencil%22%20imageanchor%3D%221%22%20target%3D%22_blank%22%3E%3Cimg%20border%3D%220%22%20src%3D%22https://blogger.googleusercontent.com/img/b/R29vZ2xl/AVvXsEha5TDPXaAkAzHp1GZeohZwVBbKYHz-087Ax5_Ppm9wPeDG8grETEX4aN2HzetsN6MZpuwYxR_si_oaT67ZvlXICbGjO76mGDSXJ6ImcM3wibwLAlFsUn3V9aRRrMTiDDKv-raSFjN7TWnp/s320/VintageGypsies_orange.jpg%22%20height%3D%22239%22%20width%3D%22320%22%20/%3E%3C/a%3E%3C/td%3E%3C/tr%3E%0A%3Ctr%3E%3Ctd%3E%3Ca%20href%3D%22https://www.etsy.com/listing/128955628/orange-bostonette-mounted-pencil%22%20target%3D%22_blank%22%3EOrange%20Bostonette%20Sharpener%20from%20EVT%20Seller%20VintageGypsies%3C/a%3E%3C/td%3E%3Ctd%3E%3C/td%3E%3Ctd%3E%3C/td%3E%3Ctd%3E%3C/td%3E%3C/tr%3E%0A%3C/tbody%3E%3C/table%3E%0A%3Cdiv%3E%0A%3C/div%3E%0A%3Cbr%20/%3E%0AAnd%20this%20Apsco%20has%20a%20sizing%20wheel%20to%20sharpen%20different%20size%20pencils:%3Cbr%20/%3E%0A%3Ctable%20align%3D%22center%22%20cellpadding%3D%220%22%20cellspacing%3D%220%22%3E%3Ctbody%3E%0A%3Ctr%3E%3Ctd%3E%3Ca%20href%3D%22https://www.etsy.com/listing/159048449/vintage-old-school-pencil-sharpener%22%20imageanchor%3D%221%22%20target%3D%22_blank%22%3E%3Cimg%20border%3D%220%22%20src%3D%22https://blogger.googleusercontent.com/img/b/R29vZ2xl/AVvXsEglRouL9R90C3vvQCR2Feerfb-NTAZlTldW3wVGEb1ln6L0dD1X6-3etyIqhJbh3lwkKFYeHs87AegHpYaBQLJPNaQGg_AiPQxmOBChzuHdKs5SFGKtj75XBF2VMkyZZwrdZVhD8q8YjLtn/s320/wretched_sharp.jpg%22%20height%3D%22213%22%20width%3D%22320%22%20/%3E%3C/a%3E%3C/td%3E%3C/tr%3E%0A%3Ctr%3E%3Ctd%3E%3Ca%20href%3D%22https://www.etsy.com/listing/159048449/vintage-old-school-pencil-sharpener%22%20target%3D%22_blank%22%3EApsco%20Sharpener%20from%20EVT%20Seller%20wretchedshekels%3C/a%3E%3C/td%3E%3C/tr%3E%0A%3C/tbody%3E%3C/table%3E%0A%3Cbr%20/%3E%0AAdditional%20EVT%20Seller's%20sharpeners%20can%20be%20found%20here:%20%3Ca%20href%3D%22https://www.etsy.com/search?q%253Detsyvintageteam%2520pencil%2520sharpener%2526view_type%253Dgallery%22%20target%3D%22_blank%22%3EEVT%20Sharpeners%3C/a%3E.%20%3Cbr%20/%3E%0A%3Cbr%20/%3E%0A%3Cbr%20/%3E%0AAdd%20a%20practical%20new%20vintage%20item%20to%20your%20home%20this%20fall!%26nbsp;%20%0AYou'll%20find%20pricing%20on%20vintage%20sharpeners%20is%20often%20less%20than%20a%20new%20%0Aelectric%20model,%20and%20you%20get%20a%20higher%20quality%20product%20when%20you%20buy%20%0Avintage.%20Just%20make%20sure%20to%20to%20take%20it%20with%20you%20if%20you%20move.%20One%20of%20my%20%0Acollege%20friends%20bemoaned%20the%20loss%20of%20her%20family%20sharpener;%20she%20%0Aaccidentally%20left%20it%20mounted%20in%20the%20pantry%20of%20her%20old%20home.%3Cbr%20/%3E%0A%3Cbr%20/%3E%0A%26lt;a%20href%3D%22http://www.bloglovin.com/blog/576762/?claim%3Dbtpu6d4nx27%22%26gt;Follow%20my%20blog%20with%20Bloglovin%26lt;/a%26gt;)
Picnic Season 12 Jun 2012 2:14 AM (12 years ago)
 by Susan Borgen (T-Party Antiques)
Now that the warm weather is upon us, don't you feel the urge to pack a picnic and dine outdoors? Whether you head to the seashore, a local park, or your backyard, having a picnic is the essence of summer. So welcome to picnic season!
 |
| Photo by Susan Borgen |
 | |
|
Check out these fun picnic items below, offered by members of the Etsy Vintage Team. Happy picnicking!
 |
| 1960s Flower Power Cotton Tablecloth by Lagelle |
 |
| Vintage Sunflower Plate and Cup Holders Set by LeasAtticSpace |
 |
| Tindeco Small Oval Picnic Tin with a Fruit Pattern by Tparty |
 |
| The Picnic Grounds Center Island Park 1908 Postcard by TheOldBarnDoor |
 |
| Thermos Holiday Picnic Jug by TheNerdNest |
 |
| 1950s Wool Striped Picnic Blanket by Nachokitty |
 |
| Vintage Ingrid Plastic Ware Cups and Plates by Shoptastic |
Fresh Picks: For the Love of Dad 10 Jun 2012 5:42 AM (12 years ago)
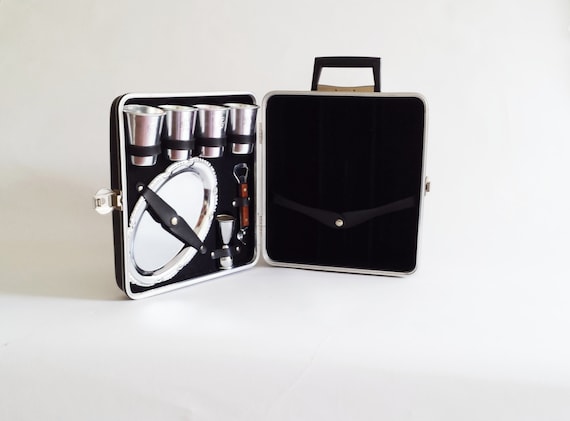
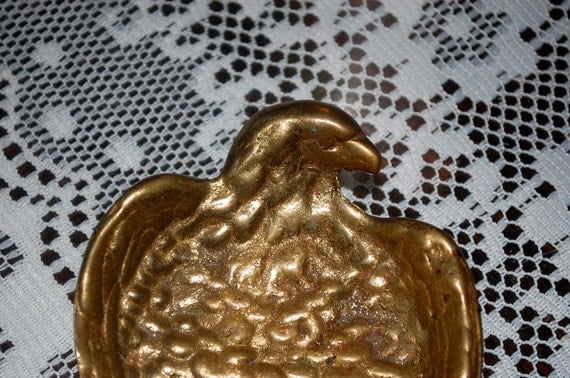
We like to say vintage makes a unique, one-of-a-kind gift. But when it comes to Dad, you may ask how you can express your love with vintage? These finds are true treasures that he will cherish for many years to come!
by ReBopShop
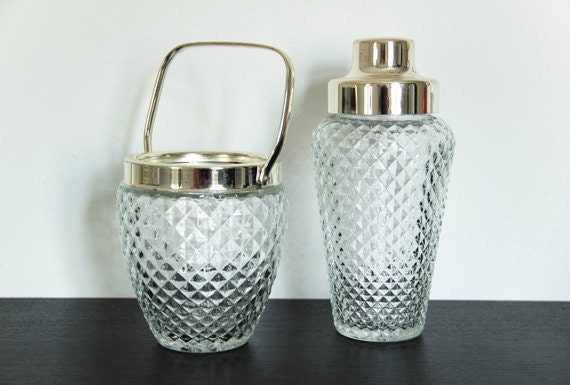 Cocktail Shaker Ice Bucket M... $40.00 | 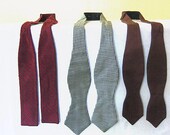 Mens Vintage Silk 1930s Neck... $24.00 | 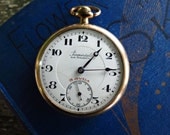 Buren Imperial 21 Jewel Open... $215.00 |
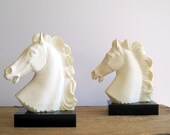 Vintage Alabaster Horse Book... $125.00 | 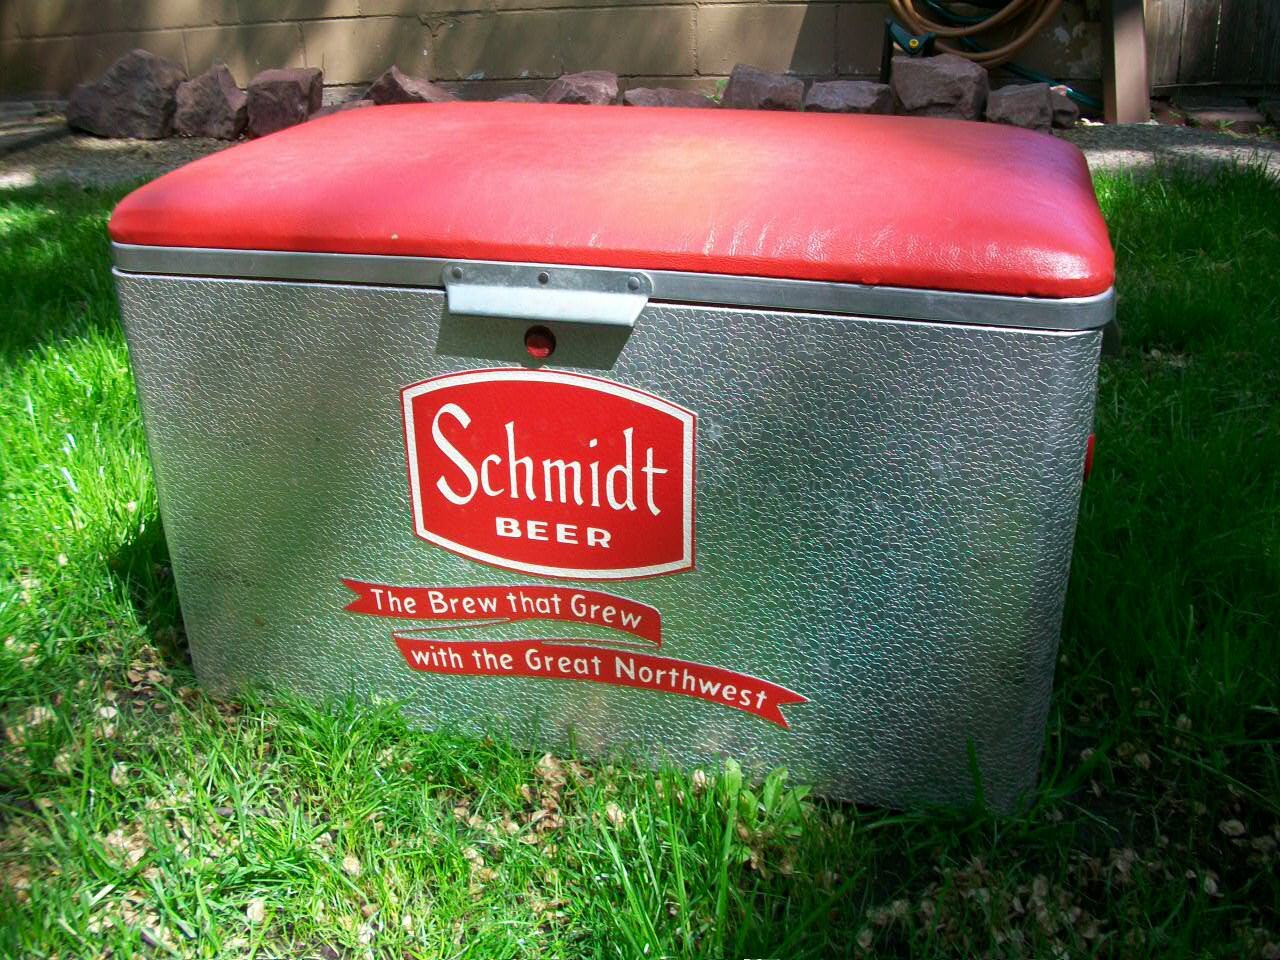 Vintage Schmidt Beer Cooler ... $135.00 | 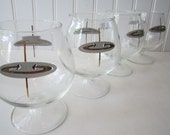 Vintage Mid Century Mod Bran... $34.50 |
Treasury tool supported by the dog house

Fresh Picks: For the Love of Pansies 19 May 2012 3:30 AM (12 years ago)
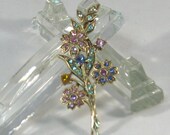
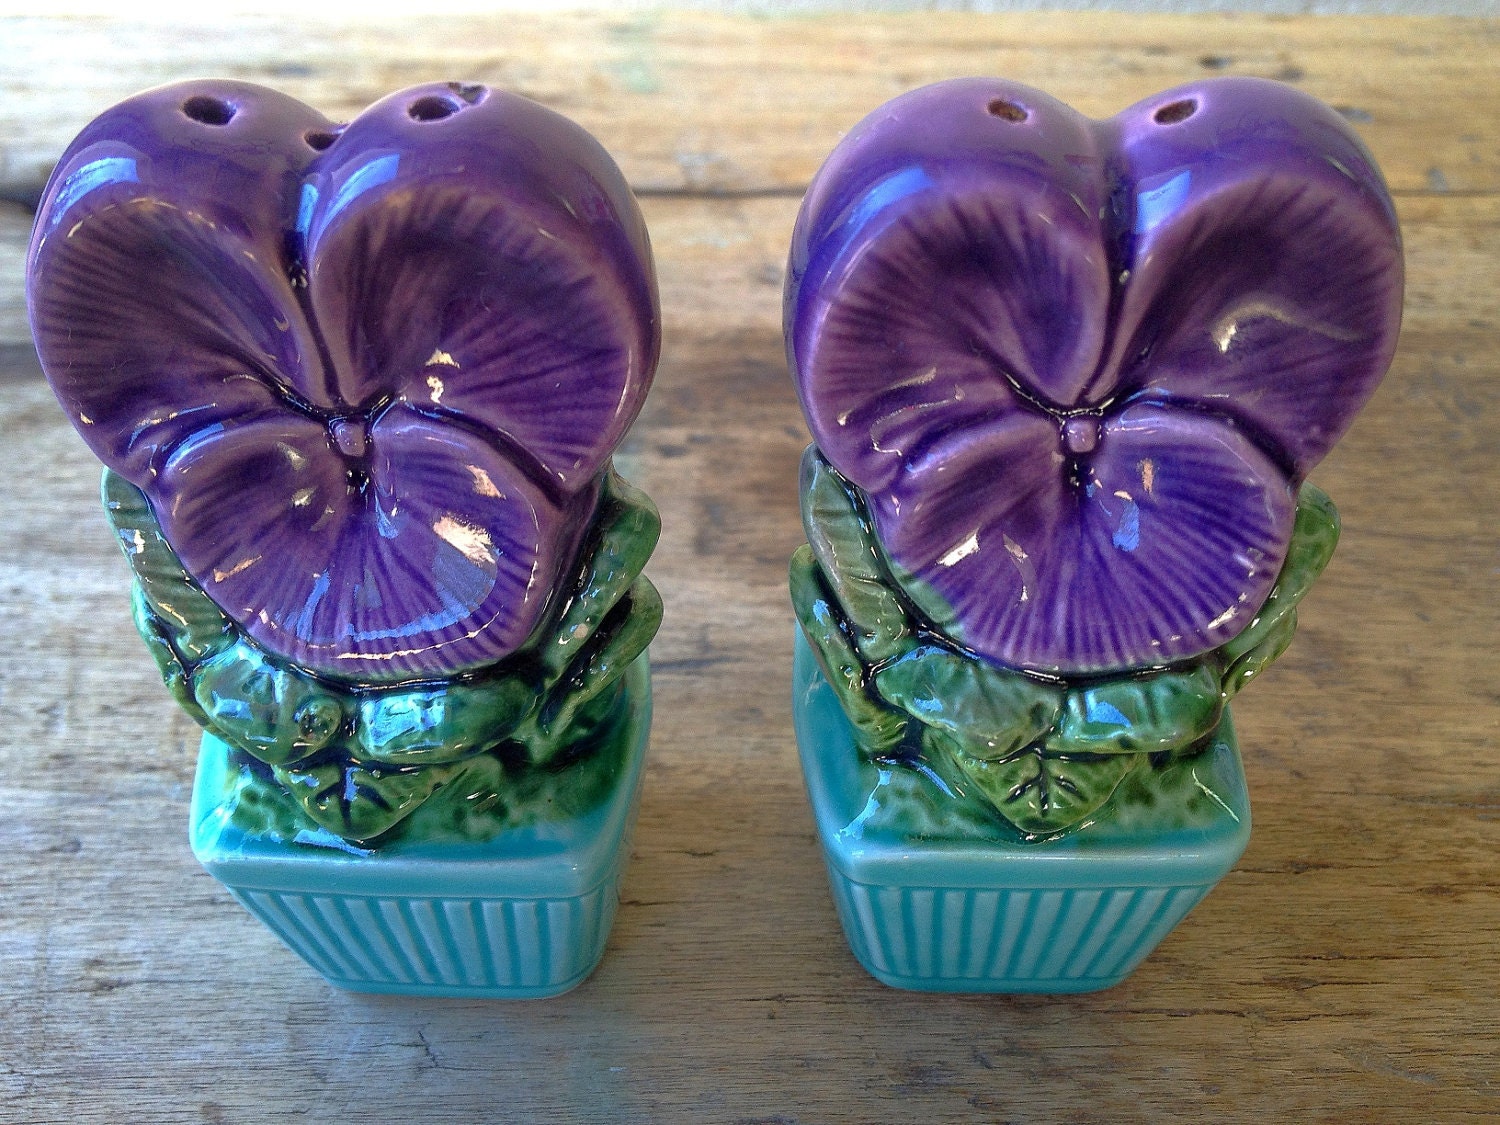
A welcome cool weather joy, pansies have been celebrated in poetry and art since Shakespeare. Enjoy these pansy-inspired vintage finds!
by ReBopShop

Treasury tool by Red Row Studio

Fresh Picks: God is in the Details 11 May 2012 3:48 AM (12 years ago)
The quote usually attributed to architect Mies van der Rohe is so apt for vintage clothing and accessories. These fabulous finds beg you to take time to savor the luscious detail that makes vintage so special!
by ReBopShop
 Vintage Real Photo Postcard:... $20.00 | 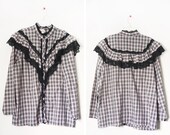 Vintage Plaid Button-up Shir... $25.00 | 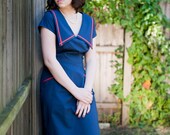 Retro womens clothing 1950s ... $49.00 |
 Vintage Kimono Robe Red Silk... $38.00 | 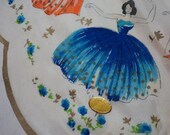 vintage silk & rayon Dancing... $14.00 |  Vintage Antique Shell Purse ... $40.00 |
Treasury tool supported by website usability testing
