Blast from the past! 7 Nov 2017 3:58 AM (7 years ago)
Hi everyone! It's me, Cassie, author of How To Eat A Cupcake! It feels like forever since I've posted an update, and that's probably because it has been *literally* forever. I've received so many emails and Facebook messages from nostalgic readers searching for my blog and coming up empty. That's because I lost the domain name howtoeatacupcake.net, and it took me a while to figure out how set it back to howtoeatacupcake.blogspot.com! Old links to howtoeatacupcake.net will take you to some random German website using my HTEAC banner, but I assure you that's not me. All of your fave HTEAC recipes and posts are available here on howtoeatacupcake.blogspot.com! :-)
To follow my bakery's progress (we just celebrated 7years in business last month), please "like" us on Facebook... Facebook.com/flourchildbakery
Thank you for all of your love and continued support! It means so much to me that some of my readers have visited the bakery and told me they miss my blog posts. I miss all my readers too! Thank you for encouraging me to follow my dream and bring Flour Child Bakery to life!
Catch ya later! xoxo Cassie


An update about the bakery! 31 Dec 2010 1:12 PM (14 years ago)
Hey guys!!! Long time, no post! I'm so so so very sorry it's been so long. I've met (or heard about) so many of you local readers who have actually come to visit the bakery! Even a few out-of-towners who were readers of HTEAC have come by to check us out! Thanks so much for all the incredible support. :D :D
There's a new post on Flour Child Bakery's blog! Go check it out! http://flourchildbakery.blogspot.com/ ;)
Thanks again and HAPPY NEW YEAR!
<3 Cassie
It's Not Goodbye! 23 Aug 2010 9:32 AM (14 years ago)
Dear loyal readers, lurkers, fellow bloggers, that one girl who recognized me on the street at Greek fest, and everyone else who has ever had a part in making this blog what it is...
With great regret, I am writing this entry to admit that my plate is full. As much as I enjoy this blog (a.k.a. my outlet for making up excuses to bake and posting my successes and failures for your reading and recreating pleasures), it seems I am unable to make time for anything on the computer other than looking for wedding planners, shopping for retro lighting, multiplying all my recipes by 3, and organizing the gazillion resumes I received after posting an ad for Flour Child Bakery on craiglist. Who knew it would be so time consuming to start a business and plan a wedding at the same time? Hah! (Oh, did I mention Josh proposed to me on my birthday??) ;D
All I can say is thank you times infinity for all of the wonderful support, help when I was looking for a certain recipe, comments saying how much you wished I would start baking cupcakes again, and letting me know when I typed 2 tablespoons of baking powder instead of 2 teaspoons. I know I wouldn't be the baker I am today without this blog and all of you! I hope that you will continue to support me by following my other blog, http://flourchildbakery.blogspot.com. There, I will try my best to keep everyone updated on the progress of the bakery, as well as try to reassure other aspiring entrepreneurs that opening a bakery isn't the gauntlet some lead me to believe. It's been fun and fulfilling so far, especially because I'm doing it all with my mom by my side. :)
I'm not saying goodbye because I feel like this won't be my absolute last post on How To Eat A Cupcake. Think of it as more of a TTFN (or "ta ta for now" in case my mom ever reads this and doesn't understand internet acronyms)! :D I've enjoyed every minute of it!!
<3 Cassie Baker
Sorry for my absence, but... 6 Aug 2010 1:10 PM (14 years ago)
 ... I'm a soon-to-be business woman!
 Well, folks! It seems my time as an unemployed baking hobbyist and part-time blogger is almost over! Soon I'll be a very proud co-owner of my dream bakery! If you haven't been following along, my mom and I are currently in the process of filing paperwork, hiring painters and contractors, buying equipment, writing recipes, etc. It's so much fun! We've already got a location and a name. Flour Child Bakery will be located at
We're shooting to open in late September or early October. I'm doing my best to document our journey on my other blog, flourchildbakery.blogspot.com. We're also on Facebook, facebook.com/flourchildbakery!1716 Pleasure House Road, Suite 104
Virginia Beach, VA 23455
I haven't forgotten about this blog, though! I have two recipes ready to be blogged. Whole Wheat Sticky Buns are coming up first. Then, Brooklyn Blackout Cake is next! I've just been soooo busy lately, I hope everyone can understand.
OH YEAH!! Josh and I are going to NYC next week! We'll be there from August 12-15. Where should we go, and what should we do??????? :D :D :D
Until next time,
Cassie <3

Italian Tri-Color Cookies 22 Jul 2010 1:35 AM (14 years ago)

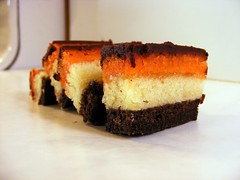 Not much of a story behind making these. They were way easier to make than I thought they'd be, and they were just as yummy as I expected!
I'm going to apologize ahead of time for my future absence from this blog. We're really starting to make progress at out bakery. Tuesday was our first day of construction. We're knocking down a wall to double the size of the kitchen. It was so exciting to take a hammer to the wall and destroy things! ;D I can't wait until we finish the build-out and get to see the big picture. BTW, there are pictures on my Flickr photostream. Here's a link: Building a Bakery!
And here's the recipe! Baked Tricolor Cookies (from Baked: New Frontiers in Baking by Matt Lewis and Renato Poliafito)
For the cookie layers
1 cup all-purpose flour
1/4 tsp salt
7 oz homemade or store-bought almond paste (recipe follows)
3/4 cup sugar
1/2 tsp pure almond extract
1 1/2 sticks unsalted butter, softened
3 large eggs
Grated zest of 1 orange (I omitted)
Orange food coloring (liquid or gel)
2 tbs dark unsweetened cocoa powder, sifted
For the filling
2/3 cup apricot jam
2 tbs amaretto liquer (I omitted)
For the glaze
6 oz dark chocolate (60% cacao)
1 tsp light corn syrup
1 stick unsalted butter, softened
Preheat the oven to 350°. Butter three 8-inch square baking pans. Line the bottom of each pan with parchment paper and butter the parchment. Dust with flour and knock out the excess flour. (I used cooking spray in place of the butter.) Sift the flour and salt together in a small bowl and set aside.
In the bowl of an electric mixer fitted with the paddle attachment, beat the almond paste, sugar, and almond extract together until small crumbs form. Add the butter and beat on high speed until the mixture is combined. Scrape down the bowl and add the eggs, one at a time, beating until each is incorporated. Add the orange zest and beat until combined. Add the flour mixture in three parts, beating on low speed after each addition until combined.
Divide the batter among three small mixing bowls. In the first bowl, add a few drops of orange food coloring to the batter, and mix well. Continue to add a few drops of food coloring and mixing until the batter is medium orange in color. In the second bowl, add the cocoa powder to the batter and whisk until fully incorporated. Leave the third bowl plain.
Pour each batter into a prepared pan and smooth the tops. Bake the layers for 12 to 15 minutes or until a toothpick inserted in the center of each layer comes out clean. Transfer the pans to a wire rack and cool for 20 minutes. Invert the cakes onto the rack, remove the pans, and let cool completely. Remove the parchment.
In a small saucepan over low heat, stir the jam and amaretto until warmed through and completely blended, 3 to 5 minutes.
Place the chocolate layer on a serving rack and evenly spread half of the apricot jam over the top. Top with the plain layer and spread with the remaining apricot filling. Top with the orange layer and let the layers sit in the refrigerator for 5 minutes (or while you make the chocolate glaze).
In a large nonreactive metal bowl, combine the chocolate, corn syrup, and butter. Set the bowl over a saucepan of simmering water and cook, stirring with a rubber spatula, until the mixture is completely smooth. Remove the bowl from the pan and stir for 30 seconds to cool slightly.
Spread the glaze over the top of the bar cookies, completely covering the orange layer (some glaze may spill down the sides of the cake). Place the tray in the refrigerator until the chocolate topping completely sets (about 1 hour). Remove the tray from the refrigerator, wait 30 minutes for the chocolate to warm up, and cut into 20 individual squares or use a small cookie cutter to cream your own shapes.
The bars can be stored in the refrigerator, tightly covered, for up to 4 days.
Almond Paste
1 1/2 cups finely ground almonds
1 cup confectioners sugar, sifted
1/2 tsp pure almond extract
Put all the ingredients in a food processor with 2 tbs water and process until a paste forms. Remove from the processor, wrap tightly in plastic, and refrigerate until ready to use. Extra almond paste, tightly wrapped, keeps well in the freezer.
%3Cbr%20/%3E%3Cbr%20/%3EFor%20the%20cookie%20layers%3Cbr%20/%3E1%20cup%20all-purpose%20flour%3Cbr%20/%3E1/4%20tsp%20salt%3Cbr%20/%3E7%20oz%20homemade%20or%20store-bought%20almond%20paste%20(recipe%20follows)%3Cbr%20/%3E3/4%20cup%20sugar%3Cbr%20/%3E1/2%20tsp%20pure%20almond%20extract%3Cbr%20/%3E1%201/2%20sticks%20unsalted%20butter,%20softened%3Cbr%20/%3E3%20large%20eggs%3Cbr%20/%3EGrated%20zest%20of%201%20orange%20(I%20omitted)%3Cbr%20/%3EOrange%20food%20coloring%20(liquid%20or%20gel)%3Cbr%20/%3E2%20tbs%20dark%20unsweetened%20cocoa%20powder,%20sifted%3Cbr%20/%3E%3Cbr%20/%3EFor%20the%20filling%3Cbr%20/%3E2/3%20cup%20apricot%20jam%3Cbr%20/%3E2%20tbs%20amaretto%20liquer%20(I%20omitted)%3Cbr%20/%3E%3Cbr%20/%3EFor%20the%20glaze%3Cbr%20/%3E6%20oz%20dark%20chocolate%20(60%25%20cacao)%3Cbr%20/%3E1%20tsp%20light%20corn%20syrup%3Cbr%20/%3E1%20stick%20unsalted%20butter,%20softened%3Cbr%20/%3E%3Cbr%20/%3EPreheat%20the%20oven%20to%20350%C2%B0.%20Butter%20three%208-inch%20square%20baking%20pans.%20Line%20the%20bottom%20of%20each%20pan%20with%20parchment%20paper%20and%20butter%20the%20parchment.%20Dust%20with%20flour%20and%20knock%20out%20the%20excess%20flour.%20(I%20used%20cooking%20spray%20in%20place%20of%20the%20butter.)%20Sift%20the%20flour%20and%20salt%20together%20in%20a%20small%20bowl%20and%20set%20aside.%3Cbr%20/%3E%3Cbr%20/%3EIn%20the%20bowl%20of%20an%20electric%20mixer%20fitted%20with%20the%20paddle%20attachment,%20beat%20the%20almond%20paste,%20sugar,%20and%20almond%20extract%20together%20until%20small%20crumbs%20form.%20Add%20the%20butter%20and%20beat%20on%20high%20speed%20until%20the%20mixture%20is%20combined.%20Scrape%20down%20the%20bowl%20and%20add%20the%20eggs,%20one%20at%20a%20time,%20beating%20until%20each%20is%20incorporated.%20Add%20the%20orange%20zest%20and%20beat%20until%20combined.%20Add%20the%20flour%20mixture%20in%20three%20parts,%20beating%20on%20low%20speed%20after%20each%20addition%20until%20combined.%3Cbr%20/%3E%3Cbr%20/%3EDivide%20the%20batter%20among%20three%20small%20mixing%20bowls.%20In%20the%20first%20bowl,%20add%20a%20few%20drops%20of%20orange%20food%20coloring%20to%20the%20batter,%20and%20mix%20well.%20Continue%20to%20add%20a%20few%20drops%20of%20food%20coloring%20and%20mixing%20until%20the%20batter%20is%20medium%20orange%20in%20color.%20In%20the%20second%20bowl,%20add%20the%20cocoa%20powder%20to%20the%20batter%20and%20whisk%20until%20fully%20incorporated.%20Leave%20the%20third%20bowl%20plain.%3Cbr%20/%3E%3Cbr%20/%3EPour%20each%20batter%20into%20a%20prepared%20pan%20and%20smooth%20the%20tops.%20Bake%20the%20layers%20for%2012%20to%2015%20minutes%20or%20until%20a%20toothpick%20inserted%20in%20the%20center%20of%20each%20layer%20comes%20out%20clean.%20Transfer%20the%20pans%20to%20a%20wire%20rack%20and%20cool%20for%2020%20minutes.%20Invert%20the%20cakes%20onto%20the%20rack,%20remove%20the%20pans,%20and%20let%20cool%20completely.%20Remove%20the%20parchment.%3Cbr%20/%3E%3Cbr%20/%3EIn%20a%20small%20saucepan%20over%20low%20heat,%20stir%20the%20jam%20and%20amaretto%20until%20warmed%20through%20and%20completely%20blended,%203%20to%205%20minutes.%3Cbr%20/%3E%3Cbr%20/%3EPlace%20the%20chocolate%20layer%20on%20a%20serving%20rack%20and%20evenly%20spread%20half%20of%20the%20apricot%20jam%20over%20the%20top.%20Top%20with%20the%20plain%20layer%20and%20spread%20with%20the%20remaining%20apricot%20filling.%20Top%20with%20the%20orange%20layer%20and%20let%20the%20layers%20sit%20in%20the%20refrigerator%20for%205%20minutes%20(or%20while%20you%20make%20the%20chocolate%20glaze).%3Cbr%20/%3E%3Cbr%20/%3EIn%20a%20large%20nonreactive%20metal%20bowl,%20combine%20the%20chocolate,%20corn%20syrup,%20and%20butter.%20Set%20the%20bowl%20over%20a%20saucepan%20of%20simmering%20water%20and%20cook,%20stirring%20with%20a%20rubber%20spatula,%20until%20the%20mixture%20is%20completely%20smooth.%20Remove%20the%20bowl%20from%20the%20pan%20and%20stir%20for%2030%20seconds%20to%20cool%20slightly.%3Cbr%20/%3E%3Cbr%20/%3ESpread%20the%20glaze%20over%20the%20top%20of%20the%20bar%20cookies,%20completely%20covering%20the%20orange%20layer%20(some%20glaze%20may%20spill%20down%20the%20sides%20of%20the%20cake).%20Place%20the%20tray%20in%20the%20refrigerator%20until%20the%20chocolate%20topping%20completely%20sets%20(about%201%20hour).%20Remove%20the%20tray%20from%20the%20refrigerator,%20wait%2030%20minutes%20for%20the%20chocolate%20to%20warm%20up,%20and%20cut%20into%2020%20individual%20squares%20or%20use%20a%20small%20cookie%20cutter%20to%20cream%20your%20own%20shapes.%3Cbr%20/%3E%3Cbr%20/%3EThe%20bars%20can%20be%20stored%20in%20the%20refrigerator,%20tightly%20covered,%20for%20up%20to%204%20days.%3Cbr%20/%3E%3Cbr%20/%3EAlmond%20Paste%3Cbr%20/%3E1%201/2%20cups%20finely%20ground%20almonds%3Cbr%20/%3E1%20cup%20confectioners%20sugar,%20sifted%3Cbr%20/%3E1/2%20tsp%20pure%20almond%20extract%3Cbr%20/%3E%3Cbr%20/%3EPut%20all%20the%20ingredients%20in%20a%20food%20processor%20with%202%20tbs%20water%20and%20process%20until%20a%20paste%20forms.%20Remove%20from%20the%20processor,%20wrap%20tightly%20in%20plastic,%20and%20refrigerate%20until%20ready%20to%20use.%20Extra%20almond%20paste,%20tightly%20wrapped,%20keeps%20well%20in%20the%20freezer.%3C/span%3E)
Oatmeal Cream Pies 18 Jul 2010 9:50 AM (14 years ago)

 You know those little oatmeal cream pies you get at the grocery store? Made by Little Debbie or some other snack cake peddling hussy? Flat like they've been sat on and getting smaller and smaller every year? THESE-ARE-NOT-THOSE-PIES!!! These are the best oatmeal cream pies you've ever put to your lips. Your kids will thank you for replacing those fake @$$ cream pies with lease luscious gifts from heaven in their lunch box! I initially saw the recipe in The Amish Cook's Baking Book, but I didn't like their filling recipe. I remembered the most popular filling I've seen for whoopie pies has been a marshmallow fluff/Crisco mash-up. Not having any marshmallow fluff on hand, I made my own! Mixed in a little vegetable shortening (which you can't even taste! no greasy film on the roof of your mouth!) and TADA!
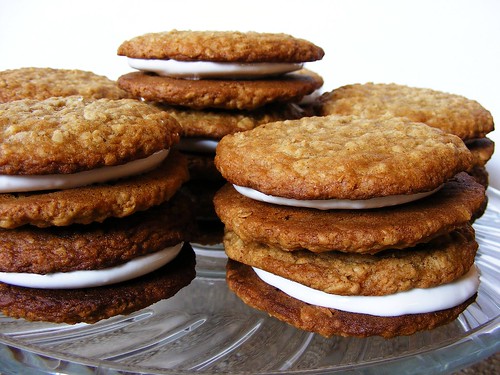 The filling sets up to be very marshmallowy. Waaayyy better than storebought marshmallow cream. The cookies are somewhat soft at first, and thanks to the brown sugar in them, they get even softer as they sit out. I can say with no doubt in my mind, I'll still be making these when I'm 72!!
 Oatmeal Cream Pies (from “The Amish Cook’s Baking Book”)
Makes about 24 pies
3/4 cup (1 1/2 sticks) unsalted butter, softened
2 cups packed brown sugar
2 large eggs
1/2 teaspoon salt
2 cups all-purpose flour
1 teaspoon baking powder
1 teaspoon ground cinnamon
2 cups quick-cooking rolled oats
2 teaspoons baking soda
3 tablespoons boiling water
Filling (adapted from “The All-American Dessert Book”)
1 tablespoon plus 1 teaspoon unflavored gelatin (about 1 1/2 packets)
1/3 cup plus 1/4 cup water (divided)
3/4 cup granulated sugar
1/2 cup light corn syrup
2 teaspoons vanilla extract
1 cup powdered sugar
8 ounces vegetable shortening
Preheat the oven to 425 degrees F. Lightly grease a baking sheet and set aside (or use parchment).
Cream the butter, sugar, and eggs in a large bowl. In a separate bowl, sift together the salt, flour, and baking powder. Add to the creamed mixture. Add the cinnamon and oats. Mix well. In a small dish, add the baking soda to the boiling water, and then stir the mixture into the rest of the batter. Mix well. Drop by the tablespoon (I did 2 tablespoons) onto the baking sheets about 2 inches apart and bake until the cookies are firm and just starting to turn golden around the edges, 10 to 15 minutes. Cool the cookies on a wire rack or a plate.
For the filling, in a small measuring cup, sprinkle the gelatin over 1/3 cup cold water. Let stand, stirring once or twice until the gelatin softens, about 5 minutes. In a heavy 2-quart saucepan over medium-high heat, stir together the granulated sugar, corn syrup, and 1/4 cup hot water until well blended. Continuing to stir, raise the heat to high and bring to a full boil. Continue boiling for 30 seconds. Immediately remove from the heat. Stir in the gelatin mixture until it dissolves completely.
Transfer the mixture to a large bowl. Add the vanilla. With a mixer on medium speed, beat for 20 seconds. Gradually raise the speed to high and beat until the mixture is stiffened, white, very fluffy, and cooled to barely warm, about 5 minutes. Reduce the mixer speed to low and gradually add the powdered sugar. Add the shortening and beat until completely smooth. The filling will set up as it sits, so wait until it is thick enough to spread or pipe before filling the cookies.
%20and%20TADA!%3Ca%20href%3D%22http://www.flickr.com/photos/ilafffalot/4794020349%22%3E%3Cimg%20style%3D%22TEXT-ALIGN:%20center;%20MARGIN:%200px%20auto;%20WIDTH:%20500px;%20DISPLAY:%20block;%20HEIGHT:%20375px;%20CURSOR:%20hand%22%20border%3D%220%22%20alt%3D%22%22%20src%3D%22http://farm5.static.flickr.com/4140/4794020349_5b3771d75b.jpg%22%20/%3E%3C/a%3EThe%20filling%20sets%20up%20to%20be%20very%20marshmallowy.%20Waaayyy%20better%20than%20storebought%20marshmallow%20cream.%20The%20cookies%20are%20somewhat%20soft%20at%20first,%20and%20thanks%20to%20the%20brown%20sugar%20in%20them,%20they%20get%20even%20softer%20as%20they%20sit%20out.%20I%20can%20say%20with%20no%20doubt%20in%20my%20mind,%20I'll%20still%20be%20making%20these%20when%20I'm%2072!!%3Ca%20href%3D%22http://www.flickr.com/photos/ilafffalot/4794012105%22%3E%3Cimg%20style%3D%22TEXT-ALIGN:%20center;%20MARGIN:%200px%20auto;%20WIDTH:%20500px;%20DISPLAY:%20block;%20HEIGHT:%20375px;%20CURSOR:%20hand%22%20border%3D%220%22%20alt%3D%22%22%20src%3D%22http://farm5.static.flickr.com/4120/4794012105_89c0f16174.jpg%22%20/%3E%3C/a%3E%3Cspan%3E%3Cstrong%3EOatmeal%20Cream%20Pies%3C/strong%3E%20(from%20%E2%80%9CThe%20Amish%20Cook%E2%80%99s%20Baking%20Book%E2%80%9D)%3Cbr%20/%3EMakes%20about%2024%20pies%3Cbr%20/%3E%3Cbr%20/%3E3/4%20cup%20(1%201/2%20sticks)%20unsalted%20butter,%20softened%3Cbr%20/%3E2%20cups%20packed%20brown%20sugar%3Cbr%20/%3E2%20large%20eggs%3Cbr%20/%3E1/2%20teaspoon%20salt%3Cbr%20/%3E2%20cups%20all-purpose%20flour%3Cbr%20/%3E1%20teaspoon%20baking%20powder%3Cbr%20/%3E1%20teaspoon%20ground%20cinnamon%3Cbr%20/%3E2%20cups%20quick-cooking%20rolled%20oats%3Cbr%20/%3E2%20teaspoons%20baking%20soda%3Cbr%20/%3E3%20tablespoons%20boiling%20water%3Cbr%20/%3E%3Cbr%20/%3E%3Cem%3EFilling%3C/em%3E%20(adapted%20from%20%E2%80%9CThe%20All-American%20Dessert%20Book%E2%80%9D)%3Cbr%20/%3E1%20tablespoon%20plus%201%20teaspoon%20unflavored%20gelatin%20(about%201%201/2%20packets)%3Cbr%20/%3E1/3%20cup%20plus%201/4%20cup%20water%20(divided)%3Cbr%20/%3E3/4%20cup%20granulated%20sugar%3Cbr%20/%3E1/2%20cup%20light%20corn%20syrup%3Cbr%20/%3E2%20teaspoons%20vanilla%20extract%3Cbr%20/%3E1%20cup%20powdered%20sugar%3Cbr%20/%3E8%20ounces%20vegetable%20shortening%3Cbr%20/%3E%3Cbr%20/%3EPreheat%20the%20oven%20to%20425%20degrees%20F.%20Lightly%20grease%20a%20baking%20sheet%20and%20set%20aside%20(or%20use%20parchment).%3Cbr%20/%3ECream%20the%20butter,%20sugar,%20and%20eggs%20in%20a%20large%20bowl.%20In%20a%20separate%20bowl,%20sift%20together%20the%20salt,%20flour,%20and%20baking%20powder.%20Add%20to%20the%20creamed%20mixture.%20Add%20the%20cinnamon%20and%20oats.%20Mix%20well.%20In%20a%20small%20dish,%20add%20the%20baking%20soda%20to%20the%20boiling%20water,%20and%20then%20stir%20the%20mixture%20into%20the%20rest%20of%20the%20batter.%20Mix%20well.%20Drop%20by%20the%20tablespoon%20(I%20did%202%20tablespoons)%20onto%20the%20baking%20sheets%20about%202%20inches%20apart%20and%20bake%20until%20the%20cookies%20are%20firm%20and%20just%20starting%20to%20turn%20golden%20around%20the%20edges,%2010%20to%2015%20minutes.%20Cool%20the%20cookies%20on%20a%20wire%20rack%20or%20a%20plate.%3Cbr%20/%3EFor%20the%20filling,%20in%20a%20small%20measuring%20cup,%20sprinkle%20the%20gelatin%20over%201/3%20cup%20cold%20water.%20Let%20stand,%20stirring%20once%20or%20twice%20until%20the%20gelatin%20softens,%20about%205%20minutes.%20In%20a%20heavy%202-quart%20saucepan%20over%20medium-high%20heat,%20stir%20together%20the%20granulated%20sugar,%20corn%20syrup,%20and%201/4%20cup%20hot%20water%20until%20well%20blended.%20Continuing%20to%20stir,%20raise%20the%20heat%20to%20high%20and%20bring%20to%20a%20full%20boil.%20Continue%20boiling%20for%2030%20seconds.%20Immediately%20remove%20from%20the%20heat.%20Stir%20in%20the%20gelatin%20mixture%20until%20it%20dissolves%20completely.%3Cbr%20/%3ETransfer%20the%20mixture%20to%20a%20large%20bowl.%20Add%20the%20vanilla.%20With%20a%20mixer%20on%20medium%20speed,%20beat%20for%2020%20seconds.%20Gradually%20raise%20the%20speed%20to%20high%20and%20beat%20until%20the%20mixture%20is%20stiffened,%20white,%20very%20fluffy,%20and%20cooled%20to%20barely%20warm,%20about%205%20minutes.%20Reduce%20the%20mixer%20speed%20to%20low%20and%20gradually%20add%20the%20powdered%20sugar.%20Add%20the%20shortening%20and%20beat%20until%20completely%20smooth.%20The%20filling%20will%20set%20up%20as%20it%20sits,%20so%20wait%20until%20it%20is%20thick%20enough%20to%20spread%20or%20pipe%20before%20filling%20the%20cookies.%3C/span%3E)
Cinnamon-Swirl Bread 14 Jul 2010 1:45 AM (14 years ago)

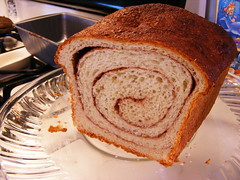 There's not much of a story behind this post. But just for fun, let's see how much I can say about it. I woke up one morning this week and decided I had to have cinnamon-swirl bread. I parked my butt on the carpet in front of the bookcase and started browsing the index of all 5 million of my baking books. After about 11 books, I finally found a recipe for cinnamon raisin bread in Joy of Cooking. The basis of the recipe was their milk bread, which I use for hamburger buns, so I already knew it was good. I made the recipe sans raisins because I have to be in the mood for raisins.
The end result was this incredible-smelling, light as a feather, beautiful loaf of cinnamon-swirl bread. It was exactly what I was craving. My mom can't ever stand to wait the proper time for bread to cool. She forces me to ruin my breads all the time by slicing into them while they're hot. But this time, I was so glad she did! This is the loaf of my dreams! Slightly sweetened, cinnamon-y, with a nice crust. Ohhhh I LOVE IT! :D :D Cinnamon Raisin Bread (from Joy of Cooking)
Yields 1 loaf
Ingredients
1 package (2 1/4 teaspoons) active dry yeast
3 tablespoons of warm (105º to 115ºF) water
1 cup whole or low-fat milk, warmed to 105º to 115ºF (I used skim)
5 tablespoons of melted unsalted butter
3 tablespoons of sugar
1 large egg
1 teaspoon of salt
3 1/2 - 4 cups all-purpose flour or bread flour
Filling
1/2 cup raisins
2 tablespoons granulated sugar
2 teaspoons cinnamon
Finishing
1 egg
Pinch of salt
Mix yeast and water together in a large bowl or bowl of heavy-duty mixer and let stand for five minutes until yeast dissolves.
Add the remaining ingredients except for the flour and mix for 1 minute on low speed. Gradually add 3 1/2 cups of flour. If needed, slowly add remaining 1/2 cup flour, 2 tablespoons at a time, until the dough is moist, not sticky. Dough should clear the sides of the bowl but stick to the bottom. Knead for about 10 minutes on low to medium speed until the dough is smooth and elastic.
Transfer the dough to an oiled bowl and turn it over once to coat. Loosely cover with plastic wrap and let rise for 1 1/2 to 2 hours or until doubled in volume.
While the dough is rising place raisins in a small saucepan with enough cold water to cover by 1/2 inch and bring to a boil. Drain well and let cool. Stir together sugar and cinnamon.
Grease an 8 1/2”x4 1/2” loaf pan. Punch dough down. Roll the dough into an 8”x18” rectangle about 1/2” thick. Brush the surface of the dough with 1 1/2 teaspoons of melted butter. Sprinkle all but 2 teaspoons of the cinnamon mixture over the dough and spread the raisins evenly over the surface. Starting from one 8” side, roll up the dough and pinch the seam and ends closed. Place seam side down in the pan. Cover loosely with oiled plastic wrap and let rise until doubled in volume, 1 to 1 1/2 hours.
Preheat the oven to 375ºF. Whisk egg and salt together and gently brush over the top of the loaf. Sprinkle the top of the dough with the remaining cinnamon mixture. Bake until crust is deep golden brown and the bottom of the sounds hollow when tapped, 40 to 45 minutes (or until the internal temperature reaches 195ºF or above). Remove loaf from the pan onto a cooling rack. While the bread is still hot, brush the top with: 2 teaspoons of melted butter. Let cool completely before slicing.
%3Cbr%20/%3EYields%201%20loaf%3Cbr%20/%3E%3Cbr%20/%3E%3Cem%3EIngredients%3C/em%3E%3Cbr%20/%3E1%20package%20(2%201/4%20teaspoons)%20active%20dry%20yeast%3Cbr%20/%3E3%20tablespoons%20of%20warm%20(105%C2%BA%20to%20115%C2%BAF)%20water%3Cbr%20/%3E1%20cup%20whole%20or%20low-fat%20milk,%20warmed%20to%20105%C2%BA%20to%20115%C2%BAF%20(I%20used%20skim)%3Cbr%20/%3E5%20tablespoons%20of%20melted%20unsalted%20butter%3Cbr%20/%3E3%20tablespoons%20of%20sugar%3Cbr%20/%3E1%20large%20egg%3Cbr%20/%3E1%20teaspoon%20of%20salt%3Cbr%20/%3E3%201/2%20-%204%20cups%20all-purpose%20flour%20or%20bread%20flour%3Cbr%20/%3E%3Cbr%20/%3E%3Cem%3EFilling%3C/em%3E%3Cbr%20/%3E1/2%20cup%20raisins%3Cbr%20/%3E2%20tablespoons%20granulated%20sugar%3Cbr%20/%3E2%20teaspoons%20cinnamon%3Cbr%20/%3E%3Cbr%20/%3E%3Cem%3EFinishing%3Cbr%20/%3E%3C/em%3E1%20egg%3Cbr%20/%3EPinch%20of%20salt%3Cbr%20/%3E%3Cbr%20/%3EMix%20yeast%20and%20water%20together%20in%20a%20large%20bowl%20or%20bowl%20of%20heavy-duty%20mixer%20and%20let%20stand%20for%20five%20minutes%20until%20yeast%20dissolves.%3Cbr%20/%3EAdd%20the%20remaining%20ingredients%20except%20for%20the%20flour%20and%20mix%20for%201%20minute%20on%20low%20speed.%20Gradually%20add%203%201/2%20cups%20of%20flour.%20If%20needed,%20slowly%20add%20remaining%201/2%20cup%20flour,%202%20tablespoons%20at%20a%20time,%20until%20the%20dough%20is%20moist,%20not%20sticky.%20Dough%20should%20clear%20the%20sides%20of%20the%20bowl%20but%20stick%20to%20the%20bottom.%20Knead%20for%20about%2010%20minutes%20on%20low%20to%20medium%20speed%20until%20the%20dough%20is%20smooth%20and%20elastic.%3Cbr%20/%3ETransfer%20the%20dough%20to%20an%20oiled%20bowl%20and%20turn%20it%20over%20once%20to%20coat.%20Loosely%20cover%20with%20plastic%20wrap%20and%20let%20rise%20for%201%201/2%20to%202%20hours%20or%20until%20doubled%20in%20volume.%3Cbr%20/%3EWhile%20the%20dough%20is%20rising%20place%20raisins%20in%20a%20small%20saucepan%20with%20enough%20cold%20water%20to%20cover%20by%201/2%20inch%20and%20bring%20to%20a%20boil.%20Drain%20well%20and%20let%20cool.%20Stir%20together%20sugar%20and%20cinnamon.%3Cbr%20/%3EGrease%20an%208%201/2%E2%80%9Dx4%201/2%E2%80%9D%20loaf%20pan.%20Punch%20dough%20down.%20Roll%20the%20dough%20into%20an%208%E2%80%9Dx18%E2%80%9D%20rectangle%20about%201/2%E2%80%9D%20thick.%20Brush%20the%20surface%20of%20the%20dough%20with%201%201/2%20teaspoons%20of%20melted%20butter.%20Sprinkle%20all%20but%202%20teaspoons%20of%20the%20cinnamon%20mixture%20over%20the%20dough%20and%20spread%20the%20raisins%20evenly%20over%20the%20surface.%20Starting%20from%20one%208%E2%80%9D%20side,%20roll%20up%20the%20dough%20and%20pinch%20the%20seam%20and%20ends%20closed.%20Place%20seam%20side%20down%20in%20the%20pan.%20Cover%20loosely%20with%20oiled%20plastic%20wrap%20and%20let%20rise%20until%20doubled%20in%20volume,%201%20to%201%201/2%20hours.%3Cbr%20/%3EPreheat%20the%20oven%20to%20375%C2%BAF.%20Whisk%20egg%20and%20salt%20together%20and%20gently%20brush%20over%20the%20top%20of%20the%20loaf.%20Sprinkle%20the%20top%20of%20the%20dough%20with%20the%20remaining%20cinnamon%20mixture.%20Bake%20until%20crust%20is%20deep%20golden%20brown%20and%20the%20bottom%20of%20the%20sounds%20hollow%20when%20tapped,%2040%20to%2045%20minutes%20(or%20until%20the%20internal%20temperature%20reaches%20195%C2%BAF%20or%20above).%20Remove%20loaf%20from%20the%20pan%20onto%20a%20cooling%20rack.%20While%20the%20bread%20is%20still%20hot,%20brush%20the%20top%20with:%202%20teaspoons%20of%20melted%20butter.%20Let%20cool%20completely%20before%20slicing.%3C/span%3E%3Cbr%20/%3E%3Ca%20href%3D%22https://docs.google.com/document/export?format%253Dpdf%2526id%253D1IfGBxeIdYSiDOCsmAvAJYbfxcBllbbpzHPL7n_qeAPQ%22%20target%3D%22_blank%22%3E%3Cimg%20border%3D%220%22%20src%3D%22http://www.tryimg.com/uploads/7465b9b45e.bmp%22%20/%3E%3C/a%3E)
"Baked" Red Velvet Cupcakes 11 Jul 2010 1:45 AM (14 years ago)

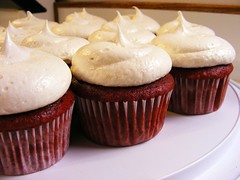 My mom asked me if I'd make something sweet for her to take to her very last meeting at her job of 31 years. She's leaving to work with me as we open our own bakery. I hadn't made red velvet in a while, so it was time to break out the red food coloring. At first, I foolishly tried a recipe other than my favorite. I tried the one in Southern Cakes by Nancie McDermott. MISTAKE! The cake had almost no flavor, and the tops stuck to the cupcake pan. Never fear, for I see lots and lots of cake truffles in my future. After that bomb, I ran back to my copy of "Baked: New Frontiers in Baking." I've made their red velvet cake as cupcakes before, and they were 100% perfect. Their frosting is the best I've ever tasted! I'll never stray from the red velvet path again!
Recipe here!

Morning Glory Muffins 8 Jul 2010 1:38 PM (14 years ago)

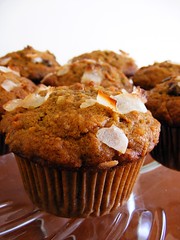 We're in the beginning stages of writing the future menu for Flour Child Bakery, and right now I'm compiling recipes. Today I decided to work on MUFFINS! I already have a knock-out blueberry muffin recipe in mind. But I also love muffins that contain everything but the kitchen sink to give you a full belly and a good boost of energy in the morning. These morning glory muffins do just that. The original recipe is from King Arthur Flour Whole Grain Baking. It's a good jumping off point for me to figure out what I want and don't want in these muffins.
I love these because you can fill the liners literally to the tippy top with batter. You end up with nice big tops that don't overflow and spread to make one giant muffin top across your pan. You know what I'm talking about! The flavor in these is nice, but I'd like the coconut to stand out a little more. I also think adding pumpkin seeds would give them a nice boost of nuttiness. But they are quite yummy as is! Morning Glory Muffins (from King Arthur Flour Whole Grain Baking)
Makes 12 regular muffins (I got 14 even when filling the cups to the brim)
1/2 cup (3 ounces) raisins
2 cups (8 ounces) King Arthur whole wheat flour, traditional or white whole wheat
1 cup (7 1/2 ounces) light brown sugar
2 teaspoons baking soda
2 teaspoons cinnamon
1/2 teaspoon ground ginger
1/2 teaspoon salt
2 cups (7 ounces) carrots, peeled and grated
1 large tart apple, peeled, cored, and grated
1/2 cup (1 1/2 ounces) sweetened shredded coconut
1/2 cup (2 ounces) chopped walnuts
1/3 cup (1 1/2 ounces) sunflower seeds or wheat germ, optional (I used wheat germ)
3 large eggs
2/3 cup (4 5/8 ounces) vegetable oil
2 teaspoons vanilla extract
1/4 cup (2 ounces) orange juice
Preheat the oven to 375°F. Lightly grease a 12-cup muffin tin, or line it with papers and spray the insides of the papers.
In a small bowl, cover the raisins with hot water, and set them aside to soak while you assemble the rest of the recipe. In a large bowl, whisk together the flour, sugar, baking soda, spices, and salt. Stir in the carrots, apple, coconut, nuts, and sunflower seeds or wheat germ, if using. In a separate bowl, beat together the eggs, oil, vanilla, and orange juice. Add to the flour mixture, and stir until evenly moistened. Drain the raisins and stir them in. Divide the batter among the wells of the prepared pan (they'll be full almost to the top; that's OK).
Bake for 25 to 28 minutes, until nicely domed and a cake tester inserted in the center comes out clean. Remove from the oven, let cool for 5 minutes in their pan on a rack, then turn out of pans to finish cooling.
Nutrition information per serving (1 muffin, 106g): 20g whole grains, 342 cal, 18g fat, 6g protein, 26g complex carbohydrates, 19g sugar, 4g dietary fiber, 53mg Cholesterol, 347mg sodium, 322mg potassium, 541RE vitamin A, 3mg vitamin C, 2mg iron, 47mg calcium, 131mg phosphorous.
%3Cbr%20/%3EMakes%2012%20regular%20muffins%3Cspan%3E%20%3C/span%3E%3Cem%3E%3Cspan%3E(I%20got%2014%20even%20when%20filling%20the%20cups%20to%20the%20brim)%3C/span%3E%3Cbr%20/%3E%3C/em%3E%3Cbr%20/%3E1/2%20cup%20(3%20ounces)%20raisins%3Cbr%20/%3E2%20cups%20(8%20ounces)%20King%20Arthur%20whole%20wheat%20flour,%20traditional%20or%20white%20whole%20wheat%3Cbr%20/%3E1%20cup%20(7%201/2%20ounces)%20light%20brown%20sugar%3Cbr%20/%3E2%20teaspoons%20baking%20soda%3Cbr%20/%3E2%20teaspoons%20cinnamon%3Cbr%20/%3E1/2%20teaspoon%20ground%20ginger%3Cbr%20/%3E1/2%20teaspoon%20salt%3Cbr%20/%3E2%20cups%20(7%20ounces)%20carrots,%20peeled%20and%20grated%3Cbr%20/%3E1%20large%20tart%20apple,%20peeled,%20cored,%20and%20grated%3Cbr%20/%3E1/2%20cup%20(1%201/2%20ounces)%20sweetened%20shredded%20coconut%3Cbr%20/%3E1/2%20cup%20(2%20ounces)%20chopped%20walnuts%3Cbr%20/%3E1/3%20cup%20(1%201/2%20ounces)%20sunflower%20seeds%20or%20wheat%20germ,%20optional%3Cem%3E%3Cspan%3E%20(I%20used%20wheat%20germ)%3Cbr%20/%3E%3C/span%3E%3C/em%3E3%20large%20eggs%3Cbr%20/%3E2/3%20cup%20(4%205/8%20ounces)%20vegetable%20oil%3Cbr%20/%3E2%20teaspoons%20vanilla%20extract%3Cbr%20/%3E1/4%20cup%20(2%20ounces)%20orange%20juice%3Cbr%20/%3E%3Cbr%20/%3EPreheat%20the%20oven%20to%20375%C2%B0F.%20Lightly%20grease%20a%2012-cup%20muffin%20tin,%20or%20line%20it%20with%20papers%20and%20spray%20the%20insides%20of%20the%20papers.%3Cbr%20/%3E%3Cbr%20/%3EIn%20a%20small%20bowl,%20cover%20the%20raisins%20with%20hot%20water,%20and%20set%20them%20aside%20to%20soak%20while%20you%20assemble%20the%20rest%20of%20the%20recipe.%20In%20a%20large%20bowl,%20whisk%20together%20the%20flour,%20sugar,%20baking%20soda,%20spices,%20and%20salt.%20Stir%20in%20the%20carrots,%20apple,%20coconut,%20nuts,%20and%20sunflower%20seeds%20or%20wheat%20germ,%20if%20using.%20In%20a%20separate%20bowl,%20beat%20together%20the%20eggs,%20oil,%20vanilla,%20and%20orange%20juice.%20Add%20to%20the%20flour%20mixture,%20and%20stir%20until%20evenly%20moistened.%20Drain%20the%20raisins%20and%20stir%20them%20in.%20Divide%20the%20batter%20among%20the%20wells%20of%20the%20prepared%20pan%20(they'll%20be%20full%20almost%20to%20the%20top;%20that's%20OK).%3Cbr%20/%3E%3Cbr%20/%3EBake%20for%2025%20to%2028%20minutes,%20until%20nicely%20domed%20and%20a%20cake%20tester%20inserted%20in%20the%20center%20comes%20out%20clean.%20Remove%20from%20the%20oven,%20let%20cool%20for%205%20minutes%20in%20their%20pan%20on%20a%20rack,%20then%20turn%20out%20of%20pans%20to%20finish%20cooling.%3Cbr%20/%3E%3Cbr%20/%3ENutrition%20information%20per%20serving%20(1%20muffin,%20106g):%2020g%20whole%20grains,%20342%20cal,%2018g%20fat,%206g%20protein,%2026g%20complex%20carbohydrates,%2019g%20sugar,%204g%20dietary%20fiber,%2053mg%20Cholesterol,%20347mg%20sodium,%20322mg%20potassium,%20541RE%20vitamin%20A,%203mg%20vitamin%20C,%202mg%20iron,%2047mg%20calcium,%20131mg%20phosphorous.%3C/span%3E%3Cbr%20/%3E%3Ca%20href%3D%22http://www.kingarthurflour.com/shop/PrintRecipeOld?RID%253D1163102240702%22%20target%3D%22_blank%22%3E%3Cimg%20border%3D%220%22%20src%3D%22http://www.tryimg.com/uploads/7465b9b45e.bmp%22%20/%3E%3C/a%3E)
Levain Bakery-esque Chocolate Chip Walnut Cookies 5 Jul 2010 1:30 AM (14 years ago)

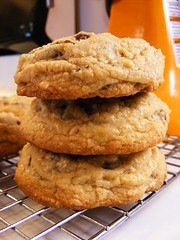 After seeing Levain Bakery on Food Network's Throwdown with Bobby Flay, I KNEW I had to try and recreate those cookies in my own kitchen. Sorry, but Bobby's cookies were a sad comparison to the giant, chewy, gooey gobs of cookies from Levain Bakery. I did a Google search for "Levain Bakery chocolate chip cookie recipe," and I found a handy little compilation of various copy-cats on Levain's own website. Nice! I settled on a recipe from LisaMichele.wordpress.com. She had already made and RE-made her own copy-cat version of Levain's cookies. The only change I made was to use all light brown sugar because I think that's what the Levain girls said they used in their cookies.
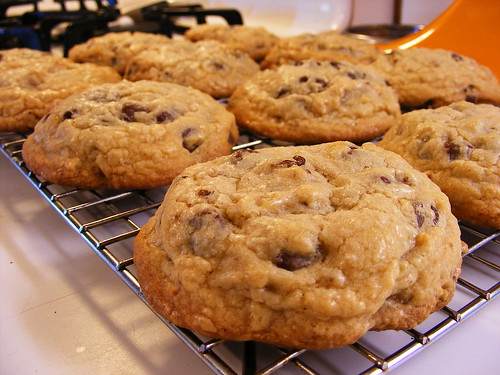 The end result was FAB-U-LOUS! Truthfully, I've never had a cookie from the famed Levain Bakery in NY... YET! I say "yet" because Josh and I will be headed to NY in August, and I'm going to try my hardest to get my hands on a world famous cookie! Anywho, these cookies are scrumdiddlyumptious! They've got a thin, crackly crust on the outside, but the inside is gooey and soft. They're not cake-like at all. They've got a nice chew and great flavor. I think I differ from the Levain girls' opinion that vanilla has no place in their CCC. Next time I'll add a teaspoon of the good stuff just because that's what my mouth expects to taste in a choco-chip cookie.
 All in all, I'm very happy with this recipe. Maybe if I think about it, after I get a REAL Levain Bakery cookie, I'll come back and edit this to see how they compare.
Levain Bakery Chocolate Chip Walnut Cookies (copy-cat recipe)
I got 21 cookies using a #20 scoop (about 4 tbsp of cookie dough)
2 sticks unsalted butter, cool but slightly softened
2 cups light brown sugar
2 eggs, straight from the fridge
2 3/4 cups AP flour
1 teaspoon table salt
1 teaspoon baking powder
1/4 tsp baking soda
2 cups semisweet chocolate chips
1 cup walnuts
Preheat oven to 375 degrees.
In bowl of electric mixer fitted with paddle, mix together butter and sugar on low speed until blended. Add eggs, one at a time, and beat on low speed until incorporated.
Add flour, salt, baking soda, baking powder and mix until just combined. Gently fold in chocolate chips and nuts.
Scoop cookie dough onto parchment lined baking sheet 1 1/2 inches apart. Bake 15-20 minutes until the edges are golden brown and the tops are just lightly browned. (For smaller cookies, of course you'll need to watch them because they'll bake much faster.) Cool completely on wire racks. Store airtight until you eat them all!
%3C/strong%3E%3Cbr%20/%3E%3Cem%3E%3Cspan%3EI%20got%2021%20cookies%20using%20a%20%2320%20scoop%20(about%204%20tbsp%20of%20cookie%20dough)%3C/span%3E%3C/em%3E%3Cbr%20/%3E%3Cbr%20/%3E2%20sticks%20unsalted%20butter,%20cool%20but%20slightly%20softened%3Cbr%20/%3E2%20cups%20light%20brown%20sugar%3Cbr%20/%3E2%20eggs,%20straight%20from%20the%20fridge%3Cbr%20/%3E2%203/4%20cups%20AP%20flour%3Cbr%20/%3E1%20teaspoon%20table%20salt%3Cbr%20/%3E1%20teaspoon%20baking%20powder%3Cbr%20/%3E1/4%20tsp%20baking%20soda%3Cbr%20/%3E2%20cups%20semisweet%20chocolate%20chips%3Cbr%20/%3E1%20cup%20walnuts%3Cbr%20/%3E%3Cbr%20/%3EPreheat%20oven%20to%20375%20degrees.%3Cbr%20/%3E%3Cbr%20/%3EIn%20bowl%20of%20electric%20mixer%20fitted%20with%20paddle,%20mix%20together%20butter%20and%20sugar%20on%20low%20speed%20until%20blended.%20Add%20eggs,%20one%20at%20a%20time,%20and%20beat%20on%20low%20speed%20until%20incorporated.%3Cbr%20/%3E%3Cbr%20/%3EAdd%20flour,%20salt,%20baking%20soda,%20baking%20powder%20and%20mix%20until%20just%20combined.%20Gently%20fold%20in%20chocolate%20chips%20and%20nuts.%3Cbr%20/%3E%3Cbr%20/%3EScoop%20cookie%20dough%20onto%20parchment%20lined%20baking%20sheet%201%201/2%20inches%20apart.%20Bake%2015-20%20minutes%20until%20the%20edges%20are%20golden%20brown%20and%20the%20tops%20are%20just%20lightly%20browned.%20%3Cem%3E%3Cspan%3E(For%20smaller%20cookies,%20of%20course%20you'll%20need%20to%20watch%20them%20because%20they'll%20bake%20much%20faster.)%3C/span%3E%3C/em%3E%20Cool%20completely%20on%20wire%20racks.%20Store%20airtight%20until%20you%20eat%20them%20all!%20%3C/span%3E%3Cbr%20/%3E%3Ca%20href%3D%22https://docs.google.com/document/export?format%253Dpdf%2526id%253D1RDpBgr5eJIL02mQ7_7vQsQi5ybXRqB8jQiByc5hxUTo%22%20target%3D%22_blank%22%3E%3Cimg%20border%3D%220%22%20src%3D%22http://www.tryimg.com/uploads/7465b9b45e.bmp%22%20/%3E%3C/a%3E)
Patriotic Poke Cake 2 Jul 2010 9:22 AM (14 years ago)
 Ladies and Gentleman, please give a warm welcome back to Cassie's baking abilities!!!
In case you haven't been part of the unlucky few who live in my house and have been subjected to my bad baking lately, I've been a path of strike-outs for a few weeks. But I'm proud to say I finally hit a homerun. This cake is phenomenal! The white cake layers are scrumptious and moist. The Jell-O gives the cake such a fun, bright flavor. And the frosting... WOW! I love boiled flour buttercreams! They are just genius and crazy delicious! So creamy and wonderful! Not to mention, this cake looks so festive and awesome. Woo hoo! I'm back!


 Thanks to Jell-O for coming up with the basic idea for this cake. And thanks to Tish Boyle for the Basic White Cake Layers recipe in "The Cake Book." Another A+ recipe from her! :) Also, thanks to the boys of "Baked: New Frontiers in Baking" for their outstanding boiled buttercream frosting recipe. I adapted it a little by adding a tiny bit of lemon zest to match the brightness of the berry flavored Jell-o in the cake. I think I'm gonna go have a tiny slice right now!

 Patriotic Poke Cake (inspired by Jell-O and AllRecipes.com)
2 baked 9-inch round white cake layers, cooled (recipe below)
2 cups boiling water, divided
1 (3 ounce) package Jell-O, any red flavor (I used strawberry)
1 (3 ounce) package Jell-O, Berry Blue flavor
1 recipe of your favorite frosting (recipe below)
Place cake layers, top sides up, in 2 clean 9-inch round cake pans. Pierce cake with large fork at 1/2-inch intervals (I used a chopstick for larger spread out holes).
In one bowl, stir 1 cup of the boiling water into red Jell-O. In a separete bowl, stir 1 cup boiling water into Berry Blue Jell-O. Stir for 2 minutes until completely dissolved. Carefully pour red gelatin over 1 cake layer and Berry Blue gelatin over second cake layer. Cover with plastic wrap and refrigerate 3 hours.
Dip one cake pan in warm water 10 seconds; unmold onto serving plate. Spread with about 1 cup of frosting. Unmold second cake layer; carefully place on first cake layer. Frost top and sides of cake with remaining frosting.
Refrigerate 1 hour or until ready to serve. Garnish with fresh fruit, if desired. Store leftover cake in refrigerator.
Basic White Cake Layers (from “The Cake Book” by Tish Boyle)
Makes 2 9” cake layers
3 1/4 cups (11.5 oz/325 g) sifted cake flour (Notice it doesn’t say "cake flour, sifted." SIFT FIRST, and WEIGH it!)
1 tablespoon baking powder
3/4 teaspoon salt
1 cup (2 sticks/8 oz/227 g) unsalted butter, softened (around 65-67°F)
1 1/2 cups (10.6 oz/300 g) granulated sugar
6 large egg whites
2 teaspoons vanilla extract
1 1/3 cups (320 ml) whole milk
Position a rack in the center of the oven and preheat the oven to 350°F. Grease the bottom and sides of two 9-inch round cake pans. Dust the pans with flour.
Sift together the cake flour, baking powder, and salt into a medium bowl. Whisk to combine, and set aside.
In the bowl of an electric mixer, using the paddle attachment, beat the butter at medium-high speed until creamy, about 30 seconds. Gradually add the sugar and beat at high speed until light, about 2 minutes. Reduce the speed to low and add the egg whites one at a time, beating well after each addition and scraping down the sides of the bowl as necessary. Beat in the vanilla extract.
If you have a splatter shield for your mixer, attach it now (the milk tends to splash up as you add it). Add the flour mixture at low speed in three additions, alternating it with the milk in additions and mixing just until the flour is incorporated. Scrape the batter into the prepared pans, dividing it evenly, and smooth the tops.
Bake the cake for 25 to 30 minutes, until lightly browned around the edges (In 8” round pans, mine took about 32 minutes). Cool the cakes in the pans on wire racks for 15 minutes. Invert the layers onto the racks and cool completely.
Store at room temperature, covered in foil, for up to 5 days.
Boiled Buttercream Frosting (from "Baked: New Frontiers in Baking" by Matt Lewis and Renato Poliafito)
1 1/2 cups sugar
1/4 cup all-purpose flour
1 1/2 cups milk
1/4 cup heavy cream (I used all 1% milk)
1 1/2 cups (3 sticks) unsalted butter, soft but cool, cut into small pieces (of course I reduced this to 2 1/2 sticks because that's just how I do!)
1 teaspoon pure vanilla extract
1 teaspoon lemon zest
In a medium heavy-bottomed saucepan, whisk the sugar and flour together. Add the milk and cream and cook over medium heat, whisking occasionally, until the mixture comes to a boil and has thickened, about 20 minutes (It will look like VERY thick glue when it's ready).
Transfer the mixture to the bowl of an electric mixer fitted with the paddle attachment. Beat on high speed until cool (I let mine cool to room temp in the fridge). Reduce the speed to low and add the butter; beat until thoroughly incorporated. Increase the speed to medium-high and beat until the frosting is light and fluffy.
Add the vanilla and lemon zest and continue mixing until combined. If the frosting is too soft, transfer the bowl to the refrigerator to chill slightly; then beat again until it is the proper consistency. If the frosting is too firm, place the bowl over a pot of simmering water and beat with a wooden spoon until it is the proper consistency.
Cake Doughnuts... Baked, Not Fried! 29 Jun 2010 11:28 AM (14 years ago)

 I've been in a doughnut mood lately! I haven't made any, and the only ones I've eaten were from Dunkin Deathnuts, yuck! Yesterday I came across these mini fluted tube pans at Wal-Mart, and I had to have them. Since they could produce a baked good with a hole in the middle, I figured DOUGHNUTS! Why not? After a quick google search for baked doughnuts, I ended up at the King Arthur Flour website. The recipe had good reviews, and I had all of the ingredients on hand.
Commence my first baked doughnut experience...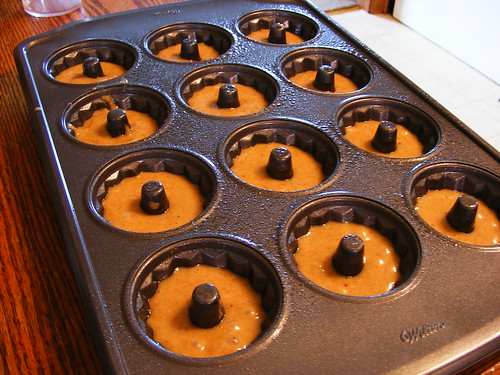 The whole process took under 30 minutes. I mean literally from start to finish, from batter to photograph, was under half an hour. That's gotta be some kind of kitchen miracle. During their brief stint in the oven, the house smelled sooo delightful. You could practically see the cartoon scents swirling through the air. As soon as they came out of the oven, I shook them around in a bag full of cinnamon sugar. It was hard to resist not grabbing one of these warm little guys before getting pictures. But I kept it together until I was ready for a shot of the innards.
 My evaluation is that these are yummy, considering the fact that they're baked and that they're cake doughnuts (which don't even place in my "top 5 doughnuts" list). The surface that browned in the pans is crunchy and spectacular. The flavor is nice, but I think next time I'd leave the cinnamon out of the batter and just have it in the cinnamon sugar. Overall, I'd make these again, but they're still not in my top 5! Also, next time I'm going to make them chocolate and dip them in a chocolate glaze. :D
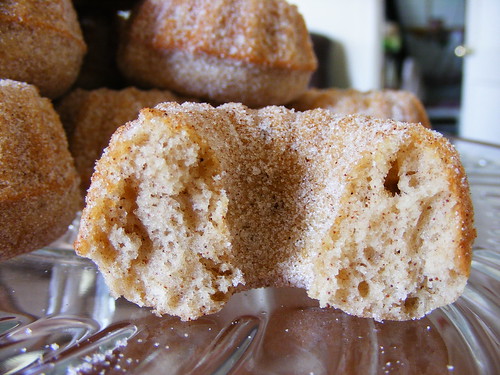 Baked Doughnuts
Makes 6 regular sized or 12 mini doughnuts
1 cup (4 ounces) Round Table Unbleached Pastry Flour or 7/8 cup (4 ounces) King Arthur Unbleached All-Purpose Flour
1/2 cup sugar
1 teaspoon baking powder
1/8 teaspoon nutmeg
1/4 teaspoon salt
1 teaspoon cinnamon
3 tablespoons dried buttermilk powder (or use 2 tablespoons buttermilk or yogurt in place of the 2 tablespoons water)
2 large eggs
3 tablespoons vegetable oil
2 tablespoons water
Whisk together all of the dry ingredients in a medium-sized mixing bowl.
In a separate bowl, beat the eggs, oil and water (or buttermilk or yogurt) until foamy.
Pour the liquid ingredients all at once into the dry ingredients and stir just until combined.
Butter or grease the doughnut pan; non-stick pan spray works well here. Note: even though the pan is non-stick, since the doughnuts are low-fat they may stick unless you grease the pan first. Fill each doughnut form half full. (I used a pastry bag and piped one circle of batter into each cup.)
Bake the doughnuts in a preheated 375°F oven for 10 to 12 minutes. (My mini doughnuts baked for about 7 minutes.) When done, they'll spring back when touched lightly, and will be quite brown on the top. (Mine were barely browned on top.)
Remove the doughnuts from the oven, remove them from the pan, and allow them to cool on rack. Glaze with icing, or coat with cinnamon-sugar (1/2 cup sugar + 1/2 teaspoon cinnamon) or any non-melting sugar.
Printable recipe can be found on this page: Baked Doughnuts: King Arthur Flour
.%20The%20surface%20that%20browned%20in%20the%20pans%20is%20crunchy%20and%20spectacular.%20The%20flavor%20is%20nice,%20but%20I%20think%20next%20time%20I'd%20leave%20the%20cinnamon%20out%20of%20the%20batter%20and%20just%20have%20it%20in%20the%20cinnamon%20sugar.%20Overall,%20I'd%20make%20these%20again,%20but%20they're%20still%20not%20in%20my%20top%205!%20Also,%20next%20time%20I'm%20going%20to%20make%20them%20chocolate%20and%20dip%20them%20in%20a%20chocolate%20glaze.%20:D%3Ca%20href%3D%22http://www.flickr.com/photos/ilafffalot/4746814940%22%3E%3Cimg%20style%3D%22TEXT-ALIGN:%20center;%20MARGIN:%200px%20auto;%20WIDTH:%20500px;%20DISPLAY:%20block;%20HEIGHT:%20375px;%20CURSOR:%20hand%22%20border%3D%220%22%20alt%3D%22%22%20src%3D%22http://farm5.static.flickr.com/4141/4746814940_b5f585f4a4.jpg%22%20/%3E%3C/a%3E%3Cspan%3E%3Cstrong%3EBaked%20Doughnuts%3C/strong%3E%3Cbr%20/%3EMakes%206%20regular%20sized%20or%2012%20mini%20doughnuts%3Cbr%20/%3E%3Cbr%20/%3E1%20cup%20(4%20ounces)%20Round%20Table%20Unbleached%20Pastry%20Flour%20or%207/8%20cup%20(4%20ounces)%20King%20Arthur%20Unbleached%20All-Purpose%20Flour%3Cbr%20/%3E1/2%20cup%20sugar%3Cbr%20/%3E1%20teaspoon%20baking%20powder%3Cbr%20/%3E1/8%20teaspoon%20nutmeg%3Cbr%20/%3E1/4%20teaspoon%20salt%3Cbr%20/%3E1%20teaspoon%20cinnamon%3Cbr%20/%3E3%20tablespoons%20dried%20buttermilk%20powder%20(or%20use%202%20tablespoons%20buttermilk%20or%20yogurt%20in%20place%20of%20the%202%20tablespoons%20water)%3Cbr%20/%3E2%20large%20eggs%3Cbr%20/%3E3%20tablespoons%20vegetable%20oil%3Cbr%20/%3E2%20tablespoons%20water%3Cbr%20/%3E%3Cbr%20/%3EWhisk%20together%20all%20of%20the%20dry%20ingredients%20in%20a%20medium-sized%20mixing%20bowl.%3Cbr%20/%3E%3Cbr%20/%3EIn%20a%20separate%20bowl,%20beat%20the%20eggs,%20oil%20and%20water%20(or%20buttermilk%20or%20yogurt)%20until%20foamy.%3Cbr%20/%3E%3Cbr%20/%3EPour%20the%20liquid%20ingredients%20all%20at%20once%20into%20the%20dry%20ingredients%20and%20stir%20just%20until%20combined.%3Cbr%20/%3E%3Cbr%20/%3EButter%20or%20grease%20the%20doughnut%20pan;%20non-stick%20pan%20spray%20works%20well%20here.%20Note:%20even%20though%20the%20pan%20is%20non-stick,%20since%20the%20doughnuts%20are%20low-fat%20they%20may%20stick%20unless%20you%20grease%20the%20pan%20first.%20Fill%20each%20doughnut%20form%20half%20full.%20%3C/span%3E%3Cspan%3E%3Cem%3E%3Cspan%3E(I%20used%20a%20pastry%20bag%20and%20piped%20one%20circle%20of%20batter%20into%20each%20cup.)%3Cbr%20/%3E%3C/span%3E%3C/em%3E%3Cbr%20/%3EBake%20the%20doughnuts%20in%20a%20preheated%20375%C2%B0F%20oven%20for%2010%20to%2012%20minutes.%20%3Cem%3E%3Cspan%3E(My%20mini%20doughnuts%20baked%20for%20about%207%20minutes.)%3C/span%3E%3C/em%3E%20When%20done,%20they'll%20spring%20back%20when%20touched%20lightly,%20and%20will%20be%20quite%20brown%20on%20the%20top.%3Cem%3E%3Cspan%3E%20(Mine%20were%20barely%20browned%20on%20top.)%20%3C/span%3E%3C/em%3E%3Cbr%20/%3E%3Cbr%20/%3ERemove%20the%20doughnuts%20from%20the%20oven,%20remove%20them%20from%20the%20pan,%20and%20allow%20them%20to%20cool%20on%20rack.%20Glaze%20with%20icing,%20or%20coat%20with%20cinnamon-sugar%20(1/2%20cup%20sugar%20+%201/2%20teaspoon%20cinnamon)%20or%20any%20non-melting%20sugar.%3Cbr%20/%3E%3Cbr%20/%3EPrintable%20recipe%20can%20be%20found%20on%20this%20page:%20%3Ca%20href%3D%22http://www.kingarthurflour.com/recipes/baked-doughnuts-recipe%22%3EBaked%20Doughnuts:%20King%20Arthur%20Flour%3C/a%3E%3C/span%3E)
Coconut Cream Pie 22 Jun 2010 8:55 AM (14 years ago)

 There's a looong story that goes with this post, but since I have a TON of work to do on the computer today, I'm gonna make it short and sweet. I asked my dad what dessert he wanted for Father's Day, and his first reply was pie crust. His favorite thing is when I bake my leftover pie crust scraps with cinnamon and sugar. I wouldn't feel satisfied if all I baked him on Father's Day was scraps, so his second choice was coconut custard pie... and pie scraps, of course! :D I found a great recipe for coconut cream pie in The America's Test Kitchen Family Baking Book. I liked it because it used coconut milk in the custard.
I started by making and baking the pie crust. I made a double batch of pie pastry. I rolled out half and put it in a pie pan. Then I rolled out the other half, cut it into strips, sprinkled them with cinnamon sugar, and baked them as "scraps." While the crust was in the oven, I made the coconut custard. It was insanely delicious, and I knew it was gonna make a GREAT pie. Next is when the baking gods decided take a giant, steaming deuce on my day!
When I went to retrieve my beautiful pre-baked pie crust from the oven, it slid back on the oven mitt, and the 375 degree dark metal pie pan made contact with my arm flesh! Naturally, my reflex was to get it off me, ASAP! I jerked my arm forward and watched in slow motion as my perfect pie crust hit the floor and flattened into a fugly hot mess. My mom, trying to remedy the situation, grabbed the pie crust and tried to put it back together jigsaw style. "Cassie, you can't even tell!" No way! No way was I gonna serve my dad a pie that had once been in pieces on the floor! By this time, dinner was almost ready. I had no time to re-do anything. I accepted my defeat, and with my head down, I put the coconut custard in the fridge to wait until the next day when I could gather my wits and try again. But remember how I said the baking gods took not only a deuce, but a GIANT, STEAMING deuce on my day?? Yeah, I also baked a birthday cake for a family friend. Can you guess how that turned out? I'll put it this way, I took one bite and spit it out... SPIT IT OUT! How embarassing is that? I am trying to open my own bakery, and I just produced a cake for someone's birthday that might've tasted better if I'd made it in my Easy-Bake Oven! Gahh!! Needless to say, I had a well-deserved cry while Josh reassured me that I simply made a mistake somewhere in the recipe, and that I was still a baking goddess. :D I love that boy! <3
  Ok, so it didn't end up being a short story after all. Oh well, that just means less time playing FarmVille later.... Here's the Coconut Cream Pie recipe. BTW, the pictures look redonkulous because I was using the camera I gave to my dad for Father's Day. I haven't figured out any of the settings yet.
Coconut Cream Pie (adapted from The America’s Test Kitchen Family Baking Book)
1 pre-baked 9” pie crust (half of the recipe after the link)
Filling
1 can (14 ounces) coconut milk (look for this on the Asian food aisle in the grocery store)
1 cup whole milk
2/3 cup granulated sugar, divided
1/4 teaspoon table salt
5 large egg yolks
1/4 cup cornstarch
2 tablespoons unsalted butter, cut into 2 pieces
1 teaspoon vanilla extract
Topping (my own recipe)
1 1/2 cups cold heavy cream
2 tablespoons confectioners’ sugar
1 teaspoon coconut flavoring
1/2 teaspoon vanilla extract
1/2 cup toasted coconut, optional
Bring coconut milk, whole milk, 1/3 cup of sugar, and salt to simmer over medium-high heat, stirring occasionally to ensure that sugar dissolves.
Whisk yolks, cornstarch, and remaining 1/3 cup of sugar in medium bowl until thoroughly combined. Whisking constantly, gradually ladle about 1 cup hot milk mixture over yolk mixture; whisk well to combine. Whisking constantly, gradually add remaining milk mixture to yolk mixture in 3 or 4 additions; whisk well to combine. Return mixture to saucepan. Reduce the heat to medium and cook, whisking vigorously, until the mixture is thickened and a few bubbles burst on the surface, about 30 seconds.
Off heat, whisk in the butter and vanilla. Let the mixture cool until just warm, stirring often, about 5 minutes. Pour warm filling into cooled pie crust. Press plastic wrap directly against surface of filling and refrigerate until firm, about 4 hours.
For the topping, whip the cream, sugar, and flavorings with an electric mixer on medium speed until stiff peaks form. Do not overbeat or the cream will curdle. Pipe or spread the whipped cream on top of the pie and sprinkle with toasted coconut.
Chocolate Cream Pie v2.0 22 Jun 2010 8:35 AM (14 years ago)

 "Cassie, you wanna make the dessert?" Of course I do! What would you like? "Oh, just make whatever you feel like making." They say that to me thinking they're doing me a favor. No, no, no... I love it when you tell me exactly what you want! I wish people would do it more often! So last week when my dad asked me for a chocolate cream pie, not too dark, kind milk chocolate-y, I jumped at the opportunity! Plus, it was an excuse for me to finally use the Dove solid milk chocolate bunny I've had since Easter.
The last time my dad requested a chocolate cream pie, I used a recipe from AllRecipes.com. It was alright, but you know me and my inability to settle on a recipe. This time I went for a surefire, failproof recipe from the ONLY source for perfect pie recipes, The Pie and Pastry Bible by Rose Levy Beranbaum. The recipe was unbelievably easy and quick. I made my favorite pie crust recipe to accompany the creamy chocolate filling and the cool whipped cream. (I know it's my dad's favorite pie crust too because his initial request wasn't for chocolate cream pie. It was for just plain pie crust that he could break into shards and dip into his Kozy Shack chocolate pudding!)
Rose didn't let me down. The pie was a hit, and my dad was completely satisfied. He's so funny! Everytime I make something we could potentially sell at our future bakery, he always calls out a prospective price. This one will be $34.95! ;D Some advice: When you cook the filling, make sure you let it thicken until it's almost as thick as you want it to be in your finished pie. It thickens as it cools, but it's not like Jell-O! It needs all the help it can get on the stove. And let it chill overnight. We cut into hours when it had been in the fridge for about 3 hours, and the filling was still a bit too soft. :)
PS: I didn't even notice until I started typing out the recipe, but there's a variation in the book for a milk chocolate version!! Lol! I included it here.
Chocolate Cream Pie (from The Pie and Pastry Bible by Rose Levy Beranbaum)
1 9-inch pie crust, prebaked (half the recipe after the link)
Filling
2 large eggs
1/4 cup (24 g) unsweetened cocoa powder, preferably Dutch-processed
3 tablespoons (28 g) cornstarch
3 cups milk, divided
2/3 cup (132 g) sugar
Pinch of salt
6 ounces (170 g) bittersweet chocolate, grated or finely chopped (I used milk chocolate)
2 tablespoons unsalted butter
1 teaspoon pure vanilla extract
Topping (I made a double recipe of this)
1 cup heavy cream
1 tablespoo n confectioners' sugar
1 teaspoon pure vanilla extract
Chocolate curls or shavings for garnish, optional
In a small bowl, whisk together the eggs, cocoa, cornstarch, and 1/4 cup of the milk until smooth.
In a medium nonreactive saucepan, stir together the remaining 2 3/4 cups of milk, the sugar, and salt. Over medium heat, bring the mixture to a full boil. Whisk 1/4 cup of this hot mixture into the egg mixture. Whisk the egg mixture into the milk mixture. Cook, continuing to whisk rapidly, being sure to go into the edges of the pan, until the mixture thickens and pools a little when dropped on the surface. (It thickens quickly, but let it cook until it's almost as thick as you want it to be in your finished pie.)
Remove it from the heat and whisk in the chocolate and butter. Continue whisking until the chocolate has melted and the mixture is smooth. Whisk in the vanilla extract. Using a rubber spatula, immediately press the mixture through a fine-mesh sieve and place a piece of plastic wrap directly on the surface to prevent a skin from forming. Allow it to cool to room temperature, or refrigerate until cold, about 1 hour and 15 minutes.
Pour the chocolate filling into the baked pie shell. It will fill the shell up to the top. Place a piece of greased plastic wrap on the surface and refrigerate the pie for at least 3 hours.
In a chilled bowl with chilled beaters, combine the heavy cream, sugar, and vanilla and beat until stiff peaks form. (Do not over beat; it will turn to butter!) Remove the plastic wrap from the pie and mound the topping over the chocolate filling.
VARIATION: For a less bittersweet, more milk chocolate filling, replace the milk with half-and-half, decrease the sugar to 1/2 cup (100 g), omit the cocoa, and increase the chocolate to 10 ounces (284 g).
%3Cbr%20/%3E%3Cbr%20/%3ERose%20didn't%20let%20me%20down.%20The%20pie%20was%20a%20hit,%20and%20my%20dad%20was%20completely%20satisfied.%20He's%20so%20funny!%20Everytime%20I%20make%20something%20we%20could%20potentially%20sell%20at%20our%20future%20bakery,%20he%20always%20calls%20out%20a%20prospective%20price.%20This%20one%20will%20be%20$34.95!%20;D%3Ca%20href%3D%22http://www.flickr.com/photos/ilafffalot/4689338578%22%3E%3Cimg%20style%3D%22TEXT-ALIGN:%20center;%20MARGIN:%200px%20auto%2010px;%20WIDTH:%20500px;%20DISPLAY:%20block;%20HEIGHT:%20375px;%20CURSOR:%20hand%22%20border%3D%220%22%20alt%3D%22%22%20src%3D%22http://farm5.static.flickr.com/4042/4689338578_efd24b4fac.jpg%22%20/%3E%3C/a%3ESome%20advice:%20When%20you%20cook%20the%20filling,%20make%20sure%20you%20let%20it%20thicken%20until%20it's%20almost%20as%20thick%20as%20you%20want%20it%20to%20be%20in%20your%20finished%20pie.%20It%20thickens%20as%20it%20cools,%20but%20it's%20not%20like%20Jell-O!%20It%20needs%20all%20the%20help%20it%20can%20get%20on%20the%20stove.%20And%20let%20it%20chill%20overnight.%20We%20cut%20into%20hours%20when%20it%20had%20been%20in%20the%20fridge%20for%20about%203%20hours,%20and%20the%20filling%20was%20still%20a%20bit%20too%20soft.%20:)%3Cbr%20/%3E%3Cbr%20/%3E%3Cstrong%3EPS:%3C/strong%3E%20I%20didn't%20even%20notice%20until%20I%20started%20typing%20out%20the%20recipe,%20but%20there's%20a%20variation%20in%20the%20book%20for%20a%20milk%20chocolate%20version!!%20Lol!%20I%20included%20it%20here.%3Cbr%20/%3E%3Cbr%20/%3E%3Cspan%3E%3Cstrong%3EChocolate%20Cream%20Pie%3C/strong%3E%20(from%20The%20Pie%20and%20Pastry%20Bible%20by%20Rose%20Levy%20Beranbaum)%3Cbr%20/%3E%3Cbr%20/%3E1%20%3Ca%20href%3D%22http://www.howtoeatacupcake.net/2009/09/spicy-cinnamon-apple-pie.html%22%3E9-inch%20pie%20crust%3C/a%3E,%20prebaked%20(half%20the%20recipe%20after%20the%20link)%3Cbr%20/%3E%3Cbr%20/%3E%3Cstrong%3EFilling%3C/strong%3E%3Cbr%20/%3E2%20large%20eggs%3Cbr%20/%3E1/4%20cup%20(24%20g)%20unsweetened%20cocoa%20powder,%20preferably%20Dutch-processed%3Cbr%20/%3E3%20tablespoons%20(28%20g)%20cornstarch%3Cbr%20/%3E3%20cups%20milk,%20divided%3Cbr%20/%3E2/3%20cup%20(132%20g)%20sugar%3Cbr%20/%3EPinch%20of%20salt%3Cbr%20/%3E6%20ounces%20(170%20g)%20bittersweet%20chocolate,%20grated%20or%20finely%20chopped%3Cem%3E%3Cspan%3E%20(I%20used%20milk%20chocolate)%3C/span%3E%3C/em%3E%3Cbr%20/%3E2%20tablespoons%20unsalted%20butter%3Cbr%20/%3E1%20teaspoon%20pure%20vanilla%20extract%3Cbr%20/%3E%3Cbr%20/%3E%3Cstrong%3ETopping%3C/strong%3E%20%3Cspan%3E%3Cem%3E(I%20made%20a%20double%20recipe%20of%20this)%3C/em%3E%3Cbr%20/%3E%3C/span%3E1%20cup%20heavy%20cream%3Cbr%20/%3E1%20tablespoo%20n%20confectioners'%20sugar%3Cbr%20/%3E1%20teaspoon%20pure%20vanilla%20extract%3Cbr%20/%3E%3Cbr%20/%3EChocolate%20curls%20or%20shavings%20for%20garnish,%20optional%3Cbr%20/%3E%3Cbr%20/%3EIn%20a%20small%20bowl,%20whisk%20together%20the%20eggs,%20cocoa,%20cornstarch,%20and%201/4%20cup%20of%20the%20milk%20until%20smooth.%3Cbr%20/%3EIn%20a%20medium%20nonreactive%20saucepan,%20stir%20together%20the%20remaining%202%203/4%20cups%20of%20milk,%20the%20sugar,%20and%20salt.%20Over%20medium%20heat,%20bring%20the%20mixture%20to%20a%20full%20boil.%20Whisk%201/4%20cup%20of%20this%20hot%20mixture%20into%20the%20egg%20mixture.%20Whisk%20the%20egg%20mixture%20into%20the%20milk%20mixture.%20Cook,%20continuing%20to%20whisk%20rapidly,%20being%20sure%20to%20go%20into%20the%20edges%20of%20the%20pan,%20until%20the%20mixture%20thickens%20and%20pools%20a%20little%20when%20dropped%20on%20the%20surface.%20%3Cem%3E%3Cspan%3E(It%20thickens%20quickly,%20but%20let%20it%20cook%20until%20it's%20almost%20as%20thick%20as%20you%20want%20it%20to%20be%20in%20your%20finished%20pie.)%3C/span%3E%3C/em%3E%3Cbr%20/%3ERemove%20it%20from%20the%20heat%20and%20whisk%20in%20the%20chocolate%20and%20butter.%20Continue%20whisking%20until%20the%20chocolate%20has%20melted%20and%20the%20mixture%20is%20smooth.%20Whisk%20in%20the%20vanilla%20extract.%20Using%20a%20rubber%20spatula,%20immediately%20press%20the%20mixture%20through%20a%20fine-mesh%20sieve%20and%20place%20a%20piece%20of%20plastic%20wrap%20directly%20on%20the%20surface%20to%20prevent%20a%20skin%20from%20forming.%20Allow%20it%20to%20cool%20to%20room%20temperature,%20or%20refrigerate%20until%20cold,%20about%201%20hour%20and%2015%20minutes.%3Cbr%20/%3EPour%20the%20chocolate%20filling%20into%20the%20baked%20pie%20shell.%20It%20will%20fill%20the%20shell%20up%20to%20the%20top.%20Place%20a%20piece%20of%20greased%20plastic%20wrap%20on%20the%20surface%20and%20refrigerate%20the%20pie%20for%20at%20least%203%20hours.%3Cbr%20/%3EIn%20a%20chilled%20bowl%20with%20chilled%20beaters,%20combine%20the%20heavy%20cream,%20sugar,%20and%20vanilla%20and%20beat%20until%20stiff%20peaks%20form.%20%3Cem%3E%3Cspan%3E(Do%20not%20over%20beat;%20it%20will%20turn%20to%20butter!)%3C/span%3E%3C/em%3E%20Remove%20the%20plastic%20wrap%20from%20the%20pie%20and%20mound%20the%20topping%20over%20the%20chocolate%20filling.%3Cbr%20/%3E%3Cbr%20/%3E%3Cstrong%3EVARIATION:%3C/strong%3E%20For%20a%20less%20bittersweet,%20more%20milk%20chocolate%20filling,%20replace%20the%20milk%20with%20half-and-half,%20decrease%20the%20sugar%20to%201/2%20cup%20(100%20g),%20omit%20the%20cocoa,%20and%20increase%20the%20chocolate%20to%2010%20ounces%20(284%20g).%3Cbr%20/%3E%3C/span%3E%3Ca%20href%3D%22http://docs.google.com/View?docID%253Ddg5mng3t_307gmm7v9gh%2526revision%253D_latest%2526hgd%253D1%2526spi%253D1%22%20target%3D%22_blank%22%3E%3Cimg%20border%3D%220%22%20src%3D%22http://www.tryimg.com/uploads/7465b9b45e.bmp%22%20/%3E%3C/a%3E)
Soft Sugar Cookies w/ Pink Frosting 9 Jun 2010 12:48 PM (14 years ago)

 If you follow me on Twitter, or if you're a fan of the HTEAC Facebook page, you already know that I was seriously craving these cookies today! I must admit, a lot of times when I have a particular craving, I don't always hit the nail on the head with the recipe I choose. Today, I did it! These cookies are exactly what I wanted. They're soft and moist without being cake-like. The flavor is bangin', and the frosting is... well... the icing on the cookie! I predict these cookies will disappear like a fart in a fan factory. And I'll just go ahead and make a check mark on my bucket list beside "Use the idiom 'disappear like a fart in a fan factory.'" CHECK! (PS: Sorry if you're grossed out. Stop thinking about farts and start thinking about cookies!)
 I figured I didn't want to spend all day smearing frosting on these cookies, so I made a shortcut by rolling some of them in pink sugar before baking. They looked so pretty. The cookies with the frosting are very sweet, but it didn't stop me from eating a whole one and two bites off a second one. I bet they'd be perfect for kids! This recipe is totally a keeper.
 For the frosting, I didn't use a recipe. I started with
1 stick unsalted butter, softened
I mixed in about
1-2 cups confectioners' sugar
until it was stiffened. Then I added about
1 tablespoon milk
1/2 teaspoon vanilla extract
1 drop red food coloring
and mixed until it was creamy and spreadable.
Soft Sugar Cookies (from The America's Test Kitchen Family Baking Book)
Makes 2 dozen cookies
2 cups granulated sugar, divided
2 1/2 cups all-purpose flour
1/2 tsp baking powder
1/2 tsp salt
14 Tbsp (1 3/4 sticks) unsalted butter, softened
2 teaspoons vanilla extract
2 large eggs
Set oven rack in middle of the oven. Preheat oven to 350°F. Spread 1/2 cup of the sugar in a shallow dish for coating and set aside. In a separate bowl, whisk the flour, baking powder, and salt together and set aside.
Beat softened butter and remaining 1 1/2 cups sugar together in a large bowl using an electric mixer on medium speed until light and fluffy, 3-6 minutes. Beat in the vanilla then eggs, one at a time, until combined, about 30 seconds, scraping down the bowl & beaters as needed.
Reduce mixer speed to low and slowly mix in the flour mixture until combineds. Give the dough a final stir with a rubber spatula to make sure dough is combined.
Line large baking sheets with parchment paper. Using damp palms, roll 2 tablespoons of dough at a time into balls, then roll in sugar to coat. Place balls on parchment-lined baking sheets, spaced 2 inches apart. Flatten cookies with the buttered bottom of a drinking glass, then sprinkle and remaining sugar over flattened tops. (I just layed a piece of plastic wrap over my cookies and pressed them with the bottom of a clean glass.)
Bake cookies, one sheet at a time, until the edges are set and just beginning to brown but the centers are still soft and puffy, 10-12 minutes, rotating the baking sheet halfway through baking. Allow cookies to cook on baking sheet for 10 minutes, then serve warm or transfer to a wire rack and let cool completely.
*takes a bow for using the word "fart" 4 times in a blog post about prissy pink cookies!!* ;D
%3Ca%20href%3D%22http://www.flickr.com/photos/ilafffalot/4685713335%22%3E%3Cimg%20style%3D%22TEXT-ALIGN:%20center;%20MARGIN:%200px%20auto;%20WIDTH:%20500px;%20DISPLAY:%20block;%20HEIGHT:%20375px;%20CURSOR:%20hand%22%20border%3D%220%22%20alt%3D%22%22%20src%3D%22http://farm5.static.flickr.com/4044/4685713335_a757dd9152.jpg%22%20/%3E%3C/a%3EI%20figured%20I%20didn't%20want%20to%20spend%20all%20day%20smearing%20frosting%20on%20these%20cookies,%20so%20I%20made%20a%20shortcut%20by%20rolling%20some%20of%20them%20in%20pink%20sugar%20before%20baking.%20They%20looked%20so%20pretty.%20The%20cookies%20with%20the%20frosting%20are%20very%20sweet,%20but%20it%20didn't%20stop%20me%20from%20eating%20a%20whole%20one%20and%20two%20bites%20off%20a%20second%20one.%20I%20bet%20they'd%20be%20perfect%20for%20kids!%20This%20recipe%20is%20totally%20a%20keeper.%3Ca%20href%3D%22http://www.flickr.com/photos/ilafffalot/4685737451/%22%3E%3Cimg%20style%3D%22TEXT-ALIGN:%20center;%20MARGIN:%200px%20auto;%20WIDTH:%20500px;%20DISPLAY:%20block;%20HEIGHT:%20375px;%20CURSOR:%20hand%22%20border%3D%220%22%20alt%3D%22%22%20src%3D%22http://farm5.static.flickr.com/4026/4685737451_516000ee4b.jpg%22%20/%3E%3C/a%3E%3Ca%20href%3D%22http://www.flickr.com/photos/ilafffalot/4685725937%22%3E%3Cimg%20style%3D%22TEXT-ALIGN:%20center;%20MARGIN:%200px%20auto%2010px;%20WIDTH:%20500px;%20DISPLAY:%20block;%20HEIGHT:%20375px;%20CURSOR:%20hand%22%20border%3D%220%22%20alt%3D%22%22%20src%3D%22http://farm5.static.flickr.com/4005/4685725937_21a3d412db.jpg%22%20/%3E%3C/a%3EFor%20the%20frosting,%20I%20didn't%20use%20a%20recipe.%20I%20started%20with%3Cbr%20/%3E%3Cstrong%3E1%20stick%20unsalted%20butter,%20softened%3C/strong%3E%3Cbr%20/%3EI%20mixed%20in%20about%3Cbr%20/%3E%3Cstrong%3E1-2%20cups%20confectioners'%20sugar%3C/strong%3E%3Cbr%20/%3Euntil%20it%20was%20stiffened.%20Then%20I%20added%20about%3Cbr%20/%3E%3Cstrong%3E1%20tablespoon%20milk%3Cbr%20/%3E1/2%20teaspoon%20vanilla%20extract%3Cbr%20/%3E1%20drop%20red%20food%20coloring%3C/strong%3E%3Cbr%20/%3Eand%20mixed%20until%20it%20was%20creamy%20and%20spreadable.%3Cbr%20/%3E%3Cbr%20/%3E%3Cspan%3E%3Cstrong%3ESoft%20Sugar%20Cookies%3C/strong%3E%20(from%20The%20America's%20Test%20Kitchen%20Family%20Baking%20Book)%3Cbr%20/%3EMakes%202%20dozen%20cookies%3Cbr%20/%3E%3Cbr%20/%3E2%20cups%20granulated%20sugar,%20divided%3Cbr%20/%3E2%201/2%20cups%20all-purpose%20flour%3Cbr%20/%3E1/2%20tsp%20baking%20powder%3Cbr%20/%3E1/2%20tsp%20salt%3Cbr%20/%3E14%20Tbsp%20(1%203/4%20sticks)%20unsalted%20butter,%20softened%3Cbr%20/%3E2%20teaspoons%20vanilla%20extract%3Cbr%20/%3E2%20large%20eggs%3Cbr%20/%3E%3Cbr%20/%3ESet%20oven%20rack%20in%20middle%20of%20the%20oven.%20Preheat%20oven%20to%20350%C2%B0F.%20Spread%201/2%20cup%20of%20the%20sugar%20in%20a%20shallow%20dish%20for%20coating%20and%20set%20aside.%20In%20a%20separate%20bowl,%20whisk%20the%20flour,%20baking%20powder,%20and%20salt%20together%20and%20set%20aside.%3Cbr%20/%3E%3Cbr%20/%3EBeat%20softened%20butter%20and%20remaining%201%201/2%20cups%20sugar%20together%20in%20a%20large%20bowl%20using%20an%20electric%20mixer%20on%20medium%20speed%20until%20light%20and%20fluffy,%203-6%20minutes.%20Beat%20in%20the%20vanilla%20then%20eggs,%20one%20at%20a%20time,%20until%20combined,%20about%2030%20seconds,%20scraping%20down%20the%20bowl%20%26amp;%20beaters%20as%20needed.%3Cbr%20/%3E%3Cbr%20/%3EReduce%20mixer%20speed%20to%20low%20and%20slowly%20mix%20in%20the%20flour%20mixture%20until%20combineds.%20Give%20the%20dough%20a%20final%20stir%20with%20a%20rubber%20spatula%20to%20make%20sure%20dough%20is%20combined.%3Cbr%20/%3E%3Cbr%20/%3ELine%20large%20baking%20sheets%20with%20parchment%20paper.%20Using%20damp%20palms,%20roll%202%20tablespoons%20of%20dough%20at%20a%20time%20into%20balls,%20then%20roll%20in%20sugar%20to%20coat.%20Place%20balls%20on%20parchment-lined%20baking%20sheets,%20spaced%202%20inches%20apart.%20Flatten%20cookies%20with%20the%20buttered%20bottom%20of%20a%20drinking%20glass,%20then%20sprinkle%20and%20remaining%20sugar%20over%20flattened%20tops.%20%3Cem%3E%3Cspan%3E(I%20just%20layed%20a%20piece%20of%20plastic%20wrap%20over%20my%20cookies%20and%20pressed%20them%20with%20the%20bottom%20of%20a%20clean%20glass.)%3Cbr%20/%3E%3C/span%3E%3C/em%3E%3Cbr%20/%3EBake%20cookies,%20one%20sheet%20at%20a%20time,%20until%20the%20edges%20are%20set%20and%20just%20beginning%20to%20brown%20but%20the%20centers%20are%20still%20soft%20and%20puffy,%2010-12%20minutes,%20rotating%20the%20baking%20sheet%20halfway%20through%20baking.%20Allow%20cookies%20to%20cook%20on%20baking%20sheet%20for%2010%20minutes,%20then%20serve%20warm%20or%20transfer%20to%20a%20wire%20rack%20and%20let%20cool%20completely.%3C/span%3E%3Cbr%20/%3E%3Ca%20href%3D%22http://docs.google.com/View?docID%253D0AXrRcv7dBD3yZGc1bW5nM3RfMzA2Y3h6bXJiZjI%2526revision%253D_latest%2526hgd%253D1%2526spi%253D1%22%20target%3D%22_blank%22%3E%3Cimg%20border%3D%220%22%20src%3D%22http://www.tryimg.com/uploads/7465b9b45e.bmp%22%20/%3E%3C/a%3E%3Cbr%20/%3E%3Cspan%3E%3Cstrong%3E%3C/strong%3E%3C/span%3E%3Cbr%20/%3E%3Cspan%3E%3Cstrong%3E*takes%20a%20bow%20for%20using%20the%20word%20%22fart%22%204%20times%20in%20a%20blog%20post%20about%20prissy%20pink%20cookies!!*%20;D%3C/strong%3E%3C/span%3E)
Sour Cherry Lattice Pie 1 Jun 2010 5:46 AM (14 years ago)

 Happy belated Memorial Day! What better way to celebrate an American holiday than with a homemade cherry pie? Well truthfully, it started out as a mulberry pie. But when I went to retrieve my mulberries from the refrigerator, I discovered mold had taken over. Gross! I plundered my kitchen cabinets and found two cans of sour cherries. That'll do, pig! I scanned through my cookbook collection until I finally found a cherry pie recipe that called for canned cherries. This one comes from The Taste of Home Baking Book. I used my go-to crust recipe, and it was perfect. The use of cake flour and my adapted way of making the pastry are really forgiving. I baked the scraps while the pie was in the oven, and even after being rolled and re-rolled, they were still soooo yummy sprinkled with cinnamon and sugar.
 Dad is the grill master!
 I also took this opportunity to test out a pie pan I just got. It's made by Chicago Metallic, and it allegedly makes slicing and serving pies a breeze. It comes with a contraption that slices the pie into 8 even slices. The pan itself has a removable bottom, and it came with a little stand that pushes the pie up from the bottom of the pan so that the slices can be removed from the sides without damaging them.
 After baking and slicing the pie in the Slice Solutions pan, I'm a BIG fan! It browned the crust nicely, and it kept the slices beautiful and clean. The package said it works best on single crust pies, but with some finesse, I managed to press the cutter into my lattice-topped pie with minimal damage. I'll absolutely be using this pie pan again and again! ;D If you're interested, I got it from UWantSavings.com for $17 and FREE shipping!
 PS: Let's keep this a secret from the new bathing suit I got from Target on Saturday... I'm having a slice of this pie for breakfast right now!
Sour Cherry Lattice Pie (from The Taste of Home Baking Book)
Makes 1 9-inch pie
2 cans (14.5-16 oz each) tart pitted cherries
1 cup sugar
3 tablespoons instant tapioca
1/4 teaspoon almond extract
1/4 teaspoon salt
Red food coloring, optional (the canned cherries are somewhat grayish; I added 3 drops red gel color)
1 tablespoon butter
1 double-crust pastry
Divide pastry dough in half. Roll half into a 12-inch circle, fit into pie pan, and let it rest for 30 minutes in the refrigerator or freezer.
Preheat the oven to 375 degrees F. Drain cherries, reserving 1/4 cup juice. In a large bowl, combine the cherries, juice, sugar, tapioca, extract, salt, and food coloring if desired; let stand for 15 minutes. Meanwhile, roll other half of pastry into a 12-inch circle, and allow it to rest in the refrigerator until needed.
Pour filling into pie shell and dot with butter. With a knife or pastry wheel cut the other rolled out pastry into 3/4” strips. Place pastry strips in a lattice pattern on top of pie. (Click here for illustrated help.) Bake for 55-60 minutes. If crust begins to brown too quickly, cover edges with aluminum foil or a pie crust shield. Cool completely on a wire rack before slicing.
%3Cbr%20/%3EMakes%201%209-inch%20pie%3Cbr%20/%3E%3Cbr%20/%3E2%20cans%20(14.5-16%20oz%20each)%20tart%20pitted%20cherries%3Cbr%20/%3E1%20cup%20sugar%3Cbr%20/%3E3%20tablespoons%20instant%20tapioca%3Cbr%20/%3E1/4%20teaspoon%20almond%20extract%3Cbr%20/%3E1/4%20teaspoon%20salt%3Cbr%20/%3ERed%20food%20coloring,%20optional%20(the%20canned%20cherries%20are%20somewhat%20grayish;%20I%20added%203%20drops%20red%20gel%20color)%3Cbr%20/%3E1%20tablespoon%20butter%3Cbr%20/%3E1%20%3Ca%20href%3D%22http://www.howtoeatacupcake.net/2009/12/favorite-deep-dish-apple-pie.html%22%3Edouble-crust%20pastry%3Cbr%20/%3E%3C/a%3E%3Cbr%20/%3EDivide%20pastry%20dough%20in%20half.%20Roll%20half%20into%20a%2012-inch%20circle,%20fit%20into%20pie%20pan,%20and%20let%20it%20rest%20for%2030%20minutes%20in%20the%20refrigerator%20or%20freezer.%3Cbr%20/%3E%3Cbr%20/%3EPreheat%20the%20oven%20to%20375%20degrees%20F.%20Drain%20cherries,%20reserving%201/4%20cup%20juice.%20In%20a%20large%20bowl,%20combine%20the%20cherries,%20juice,%20sugar,%20tapioca,%20extract,%20salt,%20and%20food%20coloring%20if%20desired;%20let%20stand%20for%2015%20minutes.%20Meanwhile,%20roll%20other%20half%20of%20pastry%20into%20a%2012-inch%20circle,%20and%20allow%20it%20to%20rest%20in%20the%20refrigerator%20until%20needed.%3Cbr%20/%3E%3Cbr%20/%3EPour%20filling%20into%20pie%20shell%20and%20dot%20with%20butter.%20With%20a%20knife%20or%20pastry%20wheel%20cut%20the%20other%20rolled%20out%20pastry%20into%203/4%E2%80%9D%20strips.%20Place%20pastry%20strips%20in%20a%20lattice%20pattern%20on%20top%20of%20pie.%20(%3C/span%3E%3Ca%20href%3D%22http://simplyrecipes.com/recipes/how_to_make_a_lattice_top_for_a_pie_crust/%22%3E%3Cspan%3EClick%20here%20for%20illustrated%20help%3C/span%3E%3C/a%3E%3Cspan%3E.)%20Bake%20for%2055-60%20minutes.%20If%20crust%20begins%20to%20brown%20too%20quickly,%20cover%20edges%20with%20aluminum%20foil%20or%20a%20pie%20crust%20shield.%20Cool%20completely%20on%20a%20wire%20rack%20before%20slicing.%3Cbr%20/%3E%3C/span%3E%3Ca%20href%3D%22http://docs.google.com/View?docID%253Ddg5mng3t_305gzs8nzgp%2526revision%253D_latest%2526hgd%253D1%2526spi%253D1%22%20target%3D%22_blank%22%3E%3Cimg%20border%3D%220%22%20src%3D%22http://www.tryimg.com/uploads/7465b9b45e.bmp%22%20/%3E%3C/a%3E)
Please welcome back to the blog, VANILLA CUPCAKES! 27 May 2010 1:07 PM (14 years ago)

 Cheers! Yay! *applause applause* How long has it been since you've seen cupcakes on this blog???? I'll tell you... It's been 10 MONTHS since a cupcake has been spotted here (the last cupcake was seen July 23, 2009)! Cupcakes and I have developed a love-hate relationship. I really wore them out over the past few years, so now I only make them if someones asks. Well no, that's incorrect. If someone BEGS me to make cupcakes, I'll do it.
So... the wife of one of Josh's co-workers has never had a cupcake. *gasp* I know, right!? Anyway, Josh told her if she'd send some lumpia to work with her husband, then he'd bring in some cupcakes from me. Since she's sent in lumpia twice already, I guess it's high time I held up Josh's end of the bargain. And since I recently met her in person, along with his other co-workers who BEGGED me to make cupcakes for them, how could I say no??
I had forgotten all about my old standby recipes for vanilla cupcakes. Did I ever even settle on one? Knowing me, probably not. I rarely settle on recipes, even if by most people's standards the recipes are flawless. I digress...
Since I'm planning on opening my own bakery, I figured it would be a wise idea to learn baker's math. It's something I'll need to know in order to adjust and write my own recipes. I sat down with my copy of BakeWise by Shirley O. Corriher. There is no one in the baking industry I would trust more than her. Plus, my heart flutters a bit when she makes an appearance on Good Eats! ;) After traveling back in time to my community college days and scribbling a page and a half of notes, I felt pretty confident that I could look at any basic cake recipe with ingredients measured by weight, and along with the help of a calculator, I would be able to tell whether or not the recipes were accurately written according to baker's math. I would also be able to tell whether a cake was high-ratio (more moist but with a weaker structure) or lean (less moist but with a strong structure). For more info on baker's math, I strongly suggest anyone who's interested to read BakeWise!
First, I tested a recipe from The Cake Bible by Rose Levy Beranbaum. The measurements were accurate, but I didn't like the texture of the cake made using the reverse creaming (or two-stage) method (the cake was very crumbly/sandy and gave a false impression of dryness). Next, I found a good looking recipe in The Cake Book by Tish Boyle. It's ingredients were also accurate (with the exception of the weight of the eggs not being greater than or equal to the weight of the fat, but that's a whoooole other blog entry). This recipe utilized the creaming method, which produces a better mouthfeel, IMHO. This recipe is a winner. It has a soft texture without being SO soft that it crumbles into tiny particles in your mouth. The flavor is delicious, but the cake flour has a very detectable taste. Anyone else notice that about Swans Down? Anyway, I frosted the cupcakes with one of the few go-to's I live by, Swiss meringue buttercream, and sent them off with Josh. I'll update later with his co-workers comments! :) In the next shot, you can sort see how moist and shiny the cake looks... and those luscious vanilla bean flecks!
 Basic Golden Cake Layers (from The Cake Book by Tish Boyle)
Makes 2 9-inch cake layers (or about 30 cupcakes)
3 1/4 cups (11.5 oz/325 g) sifted cake flour (notice it doesnt say "cake flour, sifted." SIFT FIRST, and WEIGH it!)
1 tablespoon baking powder
3/4 teaspoon salt
1 cup (2 sticks/8 oz/227 g) unsalted butter, softened (around 65-67°F)
1 1/2 cups (10.6 oz/300 g) granulated sugar (I used vanilla sugar)
3 large eggs
2 large egg yolks
2 teaspoons vanilla extract
1 1/3 cups (320 ml) whole milk
Position a rack in the center of the oven and preheat the oven to 350°F. Grease the bottom and sides of two 9-inch round cake pans. Dust the pans with flour.
Sift together the cake flour, baking powder, and salt into a medium bowl. Whisk to combine, and set aside.
In the bowl of an electric mixer, using the paddle attachment, beat the butter at medium-high speed until creamy, about 30 seconds. Gradually add the sugar and beat at high speed until light, about 2 minutes. Reduce the speed to low and add the eggs and egg yolks one at a time, beating well after each addition and scraping down the sides of the bowl as necessary. Beat in the vanilla extract.
If you have a splatter shield for your mixer, attach it now (the milk tends to splash up as you add it). Add the flour mixture at low speed in three additions, alternating it with the milk in additions and mixing just until the flour is incorporated. Scrape the batter into the prepared pans, dividing it evenly, and smooth the tops.
Bake the cake for 25 to 30 minutes, until lightly browned around the edges (my cupcakes baked for about 16-17 minutes). Cool the cakes in the pans on wire racks for 15 minutes. Invert the layers onto the racks and cool completely.
Store at room temperature, covered in foil, for up to 5 days.
Swiss Meringue Buttercream (my own recipe)
Makes enough to frost 30 cupcakes generously
6 egg whites
2 cups granulated sugar
3 sticks unsalted butter, softened but still cool
1 tablespoons vanilla extract
Put egg whites and sugar into the top of a double boiler over a pan of simmering water. Whisking constantly, cook until sugar has dissolved and mixture is warm (about 160 degrees).
Pour heated egg whites into the bowl of an electric mixer fitted with the whisk attachment. Beat egg white mixture on high speed until it forms stiff (but not dry) peaks. Continue beating until completely cooled to room temperature, about 7 minutes (it may take longer).
Switch to the paddle attachment. With mixer on medium, add butter two tablespoons at a time, beating well after each addition. Increase speed to high; continue beating until frosting comes together, about 3 minutes (it may take longer). During this time, the frosting may appear runny or curdled. Just keep beating it. If it seems to be taking too long, let it rest in the refrigerator for 10 minutes before returning it to the mixer on high speed.
Stir in vanilla extract.
Peanut Butter Oatmeal Chocolate Chipsters... Milk's New Favorite Cookies! 21 May 2010 11:47 AM (14 years ago)

 Moooooove over Oreo, there's a new cookie in town. And I'm pretty confident that in a race to a tall, cold glass of reduced fat milk, these cookies would mow down any Oreo, even Double Stuffed, that got in their way! These cookies are the brain child of none other than Dorie Greenspan. If you're a TWDer, you're already familiar with the deliciousness of these cookies. I, however, was a virgin to the idea of peanut butter, oatmeal, and chocolate chips all married together as one delicious, chewy piece of perfection! Well, not including those no-bake chocolate peanut butter oatmeal cookies... OMG that's a whole other wet dream!


 I have to admit, the only cookies I've ever eaten with milk were Oreos and Lorna Doones. But after reading Dorie's description of these cookies and how they pair so well with milk, I simply could not resist. Feel free to cheat on your Oreos with these cookies. I promise you won't regret it! ;D
 Peanut Butter Oatmeal Chocolate Chipsters (from "Baking From My Home to Yours" by Dorie Greenspan)
Makes 60 cookies (I got 46 using a #30 [2 Tbsp] scoop)
3 cups old fashioned oats
1 cup all purpose flour
1 tsp baking soda
2 tsp ground cinnamon (I omitted)
1/4 tsp freshly ground nutmeg (I omitted)
1/4 tsp salt
2 sticks (8 ounces) unsalted butter, at room temperature
1 cup peanut butter, chunky or smooth (but not natural)
1 cup sugar
1 cup (packed) light brown sugar
2 large eggs
1 tsp pure vanilla extract
9 ounces bittersweet chocolate, chopped into chunks, or 1 1/2 cups store-bought chocolate chips or chunks (I used 12 ounces mini peanut butter cups)
Position the racks to divide the oven into thirds and preheat the oven to 350 degrees F. Line two baking sheets with parchment or silicone mats.
Whisk together the oats, flour, baking soda, spices and salt.
Working with a stand mixer, preferably fitted with a paddle attachment, or with a hand mixer in a large bowl, beat the butter, peanut butter, sugar and brown sugar on medium speed until smooth and creamy. Add the eggs one at a time, beating for 1 minute after each addition, then beat in the vanilla. Reduce the mixer speed to low and slowly add the dry ingredients, beating only until blended. Mix in the chips. If you have the time, cover and chill the dough for about 2 hours or for up to one day. (Chilling the dough will give you more evenly shaped cookies.)
If the dough is not chilled, drop rounded tablespoonfuls 2 inches apart onto the baking sheets. If the dough is chilled, scoop up rounded tablespoons, roll the balls between your palms and place them 2 inches apart on the sheets. Press the chilled balls gently with the heel of your hand until they are about 1/2 inch thick.
Bake for 13 to 15 minutes, rotating the sheets from top to bottom and front to back after 7 minutes. The cookies should be golden and just firm around the edges. Lift the cookies onto cooling racks with a wide metal spatula - they'll firm as they cool.
Repeat with the remaining dough, cooling the baking sheets between batches.
Serving: I can't remember when I actually served these. They're more often plucked from a cookie jar than picked from a platter.
Storing: Wrapped airtight or piled into a cookie jar, the cookies will keep at room temperature for about 4 days. Wrapped and frozen, they'll be good for 2 months.
%3Cbr%20/%3EMakes%2060%20cookies%20%3Cem%3E%3Cspan%3E(I%20got%2046%20using%20a%20%2330%20%5B2%20Tbsp%5D%20scoop)%3C/span%3E%3C/em%3E%3Cbr%20/%3E%3Cbr%20/%3E3%20cups%20old%20fashioned%20oats%3Cbr%20/%3E1%20cup%20all%20purpose%20flour%3Cbr%20/%3E1%20tsp%20baking%20soda%3Cbr%20/%3E2%20tsp%20ground%20cinnamon%20%3Cem%3E%3Cspan%3E(I%20omitted)%3Cbr%20/%3E%3C/span%3E%3C/em%3E1/4%20tsp%20freshly%20ground%20nutmeg%3Cspan%3E%3Cem%3E%20%3Cspan%3E(I%20omitted)%3C/span%3E%3Cbr%20/%3E%3C/em%3E%3C/span%3E1/4%20tsp%20salt%3Cbr%20/%3E2%20sticks%20(8%20ounces)%20unsalted%20butter,%20at%20room%20temperature%3Cbr%20/%3E1%20cup%20peanut%20butter,%20chunky%20or%20smooth%20(but%20not%20natural)%3Cbr%20/%3E1%20cup%20sugar%3Cbr%20/%3E1%20cup%20(packed)%20light%20brown%20sugar%3Cbr%20/%3E2%20large%20eggs%3Cbr%20/%3E1%20tsp%20pure%20vanilla%20extract%3Cbr%20/%3E9%20ounces%20bittersweet%20chocolate,%20chopped%20into%20chunks,%20or%201%201/2%20cups%20store-bought%20chocolate%20chips%20or%20chunks%3Cem%3E%3Cspan%3E%20(I%20used%2012%20ounces%20mini%20peanut%20butter%20cups)%3C/span%3E%3C/em%3E%3Cbr%20/%3E%3Cbr%20/%3EPosition%20the%20racks%20to%20divide%20the%20oven%20into%20thirds%20and%20preheat%20the%20oven%20to%20350%20degrees%20F.%20Line%20two%20baking%20sheets%20with%20parchment%20or%20silicone%20mats.%3Cbr%20/%3E%3Cbr%20/%3EWhisk%20together%20the%20oats,%20flour,%20baking%20soda,%20spices%20and%20salt.%3Cbr%20/%3E%3Cbr%20/%3EWorking%20with%20a%20stand%20mixer,%20preferably%20fitted%20with%20a%20paddle%20attachment,%20or%20with%20a%20hand%20mixer%20in%20a%20large%20bowl,%20beat%20the%20butter,%20peanut%20butter,%20sugar%20and%20brown%20sugar%20on%20medium%20speed%20until%20smooth%20and%20creamy.%20Add%20the%20eggs%20one%20at%20a%20time,%20beating%20for%201%20minute%20after%20each%20addition,%20then%20beat%20in%20the%20vanilla.%20Reduce%20the%20mixer%20speed%20to%20low%20and%20slowly%20add%20the%20dry%20ingredients,%20beating%20only%20until%20blended.%20Mix%20in%20the%20chips.%20If%20you%20have%20the%20time,%20cover%20and%20chill%20the%20dough%20for%20about%202%20hours%20or%20for%20up%20to%20one%20day.%20(Chilling%20the%20dough%20will%20give%20you%20more%20evenly%20shaped%20cookies.)%3Cbr%20/%3E%3Cbr%20/%3EIf%20the%20dough%20is%20not%20chilled,%20drop%20rounded%20tablespoonfuls%202%20inches%20apart%20onto%20the%20baking%20sheets.%20If%20the%20dough%20is%20chilled,%20scoop%20up%20rounded%20tablespoons,%20roll%20the%20balls%20between%20your%20palms%20and%20place%20them%202%20inches%20apart%20on%20the%20sheets.%20Press%20the%20chilled%20balls%20gently%20with%20the%20heel%20of%20your%20hand%20until%20they%20are%20about%201/2%20inch%20thick.%3Cbr%20/%3E%3Cbr%20/%3EBake%20for%2013%20to%2015%20minutes,%20rotating%20the%20sheets%20from%20top%20to%20bottom%20and%20front%20to%20back%20after%207%20minutes.%20The%20cookies%20should%20be%20golden%20and%20just%20firm%20around%20the%20edges.%20Lift%20the%20cookies%20onto%20cooling%20racks%20with%20a%20wide%20metal%20spatula%20-%20they'll%20firm%20as%20they%20cool.%3Cbr%20/%3E%3Cbr%20/%3ERepeat%20with%20the%20remaining%20dough,%20cooling%20the%20baking%20sheets%20between%20batches.%3Cbr%20/%3E%3Cbr%20/%3E%3Cstrong%3EServing%3C/strong%3E:%20I%20can't%20remember%20when%20I%20actually%20served%20these.%20They're%20more%20often%20plucked%20from%20a%20cookie%20jar%20than%20picked%20from%20a%20platter.%3Cbr%20/%3E%3Cbr%20/%3E%3Cstrong%3EStoring%3C/strong%3E:%20Wrapped%20airtight%20or%20piled%20into%20a%20cookie%20jar,%20the%20cookies%20will%20keep%20at%20room%20temperature%20for%20about%204%20days.%20Wrapped%20and%20frozen,%20they'll%20be%20good%20for%202%20months.%3C/span%3E%3Cbr%20/%3E%3Ca%20href%3D%22http://docs.google.com/View?docID%253Ddg5mng3t_303g8m3428r%2526revision%253D_latest%2526hgd%253D1%2526spi%253D1%22%20target%3D%22_blank%22%3E%3Cimg%20border%3D%220%22%20src%3D%22http://www.tryimg.com/uploads/7465b9b45e.bmp%22%20/%3E%3C/a%3E)
Battle of the Blondies 17 May 2010 6:47 AM (14 years ago)

 For those who don't already know, I've been trying to open my own bakery for a few years now. For a while it seemed like a dream in my far away future. But lately, it's looking like my dream may be part of my not-so-far away future. As a result, I've been paying a lot more attention to the recipes I make at home. I'm looking for things I like, as well as ruling out things I don't like. I was thinking about blondies today, and I realized I had no idea what my ideal blondie was! Did I want a thick and chewy blondie? Or did I want a soft and cakey blondie? Did I want it to be rich in butterscotch/caramel flavor? Or did I want it to be mild in flavor, similar to that of a sugar cookie? I didn't know! So what's the best way to find out??? Pit two popular recipes against each other and have yourself a good 'ole taste test! I present to you:
The recipes: Very similar ingredient proportions; the major difference being SK's does not contain a leavening agent and CI's does. Nearly identical mixing/baking methods, re-worded to reflect the fact.
Let's take a look at the recipes side-by-side:
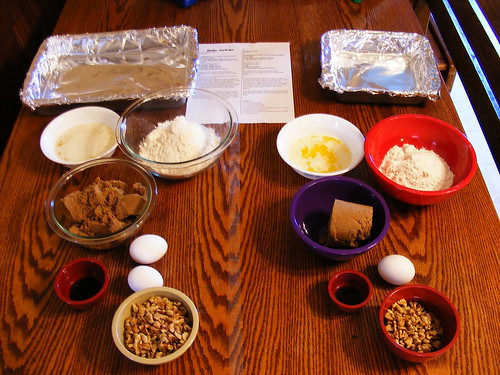

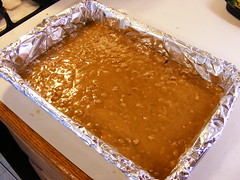
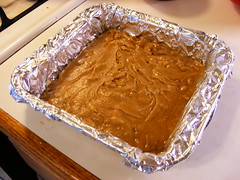
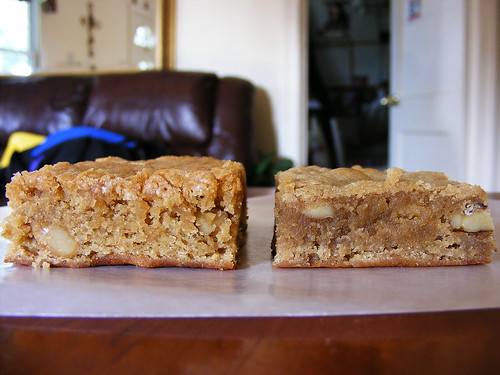 The results: As I bite into SK's blondie, the first thing I notice is how moist and "fudgy" it is. I liken it to really delicious cookie dough, without all that pesky graininess from undissolved sugar. This blondie would definitely be a suitable non-chocolate choice for lovers of fudgy brownies.
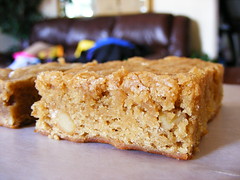
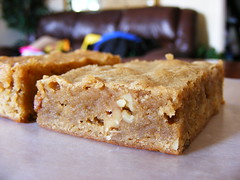
Cooks Illustrated on the left; Smitten Kitchen on the right
Neither of these have the hard, sugary chew of a chocolate chip cookie. Let it be known that these blondies are in a class of their own. I've seen some recipes for so-called "blondies" that are nothing more than chocolate chip cookies baked in bar form. These are NOT those!
As I said before, the flavors of these two blondie competitors are nearly identical. And the textures are noticeably different, but not enough to make me want to choose one over the other. I would call it a tie, but then what kind of battle would this be?? Before I give my final verdict, I just want to make it clear that both of these contenders played a fair game. They gave it their all, and when it comes down to it, I'd eat a barrel full of either if someone invented an "everything-you-swallow-after-this-will-be-fat-free" pill.
And now for the winner of this epic battle of Blondie vs. Blondie... only because I seemed to be more in the mood for something fudgy and squishy today:
UPDATE: After getting feedback from the peanut gallery, no one could really tell a difference between the two! Everyone loved them both. I have to call this one a tie!

Classic Shortbread 14 May 2010 12:55 PM (14 years ago)

 If you're ever in the mood to bake something sweet, and you find yourself with a shortage of pantry items, NEVER FEAR! With only FOUR ingredients (one being salt), you can bake delicious shortbread in the most meager of kitchens! This recipe comes from my standby for cookie baking, Martha Stewart's Cookies. It could not be easier to make, and the end result is fantastic! No one would ever guess how simple it is to make these scrumptious shortbread cookies!
Of course, it wouldn't be a proper HTEAC post if I didn't throw my opinion around like a frisbee. This recipe is lovely as is, but I think next time I'll use table salt rather than coarse salt. And I'll cut back on the amout to probably 3/4 teaspoon. I got a few large grains of salt in a couple bites, and it sort of reminded me of eating salted pretzels.... weird. Other than that, bravo Mrs. Stewart (or whichever of her kitchen staff came up with this recipe). ;D
 Classic Shortbread (from Martha Stewart's Cookies)
Makes 8 wedges (You could get away with cutting this into 12 wedges for more modest serving sizes)
2 cups all purpose flour
1 1/4 teaspoons coarse salt
1 cup (2 sticks) unsalted butter at room temperature, plus more for the pan
3/4 cup confectioners' sugar
Sift flour and salt into a bowl; set aside. Put butter into the bowl of an electric mixer fitted with the paddle attachment. Mix on medium-high speed until light and fluffy - 3 to 5 minutes. Gradually add sugar; beat until pale and fluffy, about 2 minutes. Reduce speed to low. Add flour to mixture all at once; mix until just combined.
Preheat oven to 300 degrees, with rack in upper third of oven.
Using plastic wrap, press dough into a buttered 10-inch fluted tart pan with a removable bottom. With plastic on dough, refrigerate 20 minutes. Remove plastic wrap. Cut out a round from center using a 2 1/4-inch cookie cutter; discard. Put cutter back in center. Cut dough into eight wedges with a paring knife. Using a wooden skewer, prick all over at 1/4-inch intervals.
Bake until golden brown and firm in center, about 1 hour. Transfer pan to a wire rack. Recut shortbread into wedges; let cool completely in pan. Cookies can be stored in an airtight container at room temperature up to 2 weeks.
,%20you%20can%20bake%20delicious%20shortbread%20in%20the%20most%20meager%20of%20kitchens!%20This%20recipe%20comes%20from%20my%20standby%20for%20cookie%20baking,%20Martha%20Stewart's%20Cookies.%20It%20could%20not%20be%20easier%20to%20make,%20and%20the%20end%20result%20is%20fantastic!%20No%20one%20would%20ever%20guess%20how%20simple%20it%20is%20to%20make%20these%20scrumptious%20shortbread%20cookies!%3Cbr%20/%3E%3Cbr%20/%3EOf%20course,%20it%20wouldn't%20be%20a%20proper%20HTEAC%20post%20if%20I%20didn't%20throw%20my%20opinion%20around%20like%20a%20frisbee.%20This%20recipe%20is%20lovely%20as%20is,%20but%20I%20think%20next%20time%20I'll%20use%20table%20salt%20rather%20than%20coarse%20salt.%20And%20I'll%20cut%20back%20on%20the%20amout%20to%20probably%203/4%20teaspoon.%20I%20got%20a%20few%20large%20grains%20of%20salt%20in%20a%20couple%20bites,%20and%20it%20sort%20of%20reminded%20me%20of%20eating%20salted%20pretzels....%20weird.%20Other%20than%20that,%20bravo%20Mrs.%20Stewart%20(or%20whichever%20of%20her%20kitchen%20staff%20came%20up%20with%20this%20recipe).%20;D%3Ca%20href%3D%22http://www.flickr.com/photos/ilafffalot/4606514673%22%3E%3Cimg%20style%3D%22TEXT-ALIGN:%20center;%20MARGIN:%200px%20auto;%20WIDTH:%20500px;%20DISPLAY:%20block;%20HEIGHT:%20375px;%20CURSOR:%20hand%22%20border%3D%220%22%20alt%3D%22%22%20src%3D%22http://farm5.static.flickr.com/4052/4606514673_61ed766ec8.jpg%22%20/%3E%3C/a%3E%20%3Ca%20href%3D%22http://www.flickr.com/photos/ilafffalot/4607454788%22%3E%3Cimg%20style%3D%22TEXT-ALIGN:%20center;%20MARGIN:%200px%20auto%2010px;%20WIDTH:%20500px;%20DISPLAY:%20block;%20HEIGHT:%20375px;%20CURSOR:%20hand%22%20border%3D%220%22%20alt%3D%22%22%20src%3D%22http://farm5.static.flickr.com/4002/4607454788_a3b5d44b27.jpg%22%20/%3E%3C/a%3E%3Cspan%3E%3Cstrong%3EClassic%20Shortbread%3C/strong%3E%20(from%20%3Cem%3EMartha%20Stewart's%20Cookies%3C/em%3E)%3Cbr%20/%3EMakes%208%20wedges%20(You%20could%20get%20away%20with%20cutting%20this%20into%2012%20wedges%20for%20more%20modest%20serving%20sizes)%3Cbr%20/%3E%3Cbr%20/%3E2%20cups%20all%20purpose%20flour%3Cbr%20/%3E1%201/4%20teaspoons%20coarse%20salt%3Cbr%20/%3E1%20cup%20(2%20sticks)%20unsalted%20butter%20at%20room%20temperature,%20plus%20more%20for%20the%20pan%3Cbr%20/%3E3/4%20cup%20confectioners'%20sugar%3Cbr%20/%3E%3Cbr%20/%3ESift%20flour%20and%20salt%20into%20a%20bowl;%20set%20aside.%20Put%20butter%20into%20the%20bowl%20of%20an%20electric%20mixer%20fitted%20with%20the%20paddle%20attachment.%20Mix%20on%20medium-high%20speed%20until%20light%20and%20fluffy%20-%203%20to%205%20minutes.%20Gradually%20add%20sugar;%20beat%20until%20pale%20and%20fluffy,%20about%202%20minutes.%20Reduce%20speed%20to%20low.%20Add%20flour%20to%20mixture%20all%20at%20once;%20mix%20until%20just%20combined.%3Cbr%20/%3EPreheat%20oven%20to%20300%20degrees,%20with%20rack%20in%20upper%20third%20of%20oven.%3Cbr%20/%3EUsing%20plastic%20wrap,%20press%20dough%20into%20a%20buttered%2010-inch%20fluted%20tart%20pan%20with%20a%20removable%20bottom.%20With%20plastic%20on%20dough,%20refrigerate%2020%20minutes.%20Remove%20plastic%20wrap.%20Cut%20out%20a%20round%20from%20center%20using%20a%202%201/4-inch%20cookie%20cutter;%20discard.%20Put%20cutter%20back%20in%20center.%20Cut%20dough%20into%20eight%20wedges%20with%20a%20paring%20knife.%20Using%20a%20wooden%20skewer,%20prick%20all%20over%20at%201/4-inch%20intervals.%3Cbr%20/%3EBake%20until%20golden%20brown%20and%20firm%20in%20center,%20about%201%20hour.%20Transfer%20pan%20to%20a%20wire%20rack.%20Recut%20shortbread%20into%20wedges;%20let%20cool%20completely%20in%20pan.%20Cookies%20can%20be%20stored%20in%20an%20airtight%20container%20at%20room%20temperature%20up%20to%202%20weeks.%3Cbr%20/%3E%3C/span%3E%3Ca%20href%3D%22http://docs.google.com/View?docID%253Ddg5mng3t_300d79wd849%2526revision%253D_latest%2526hgd%253D1%2526spi%253D1%22%20target%3D%22_blank%22%3E%3Cimg%20border%3D%220%22%20src%3D%22http://www.tryimg.com/uploads/7465b9b45e.bmp%22%20/%3E%3C/a%3E)
Apple Raisin Bread 12 May 2010 10:31 AM (14 years ago)

 What happens when I get bored and there are apples on the kitchen table? I bake! Well, really that question could just be "what happens when I get bored," and the answer would still be the same. But that's not the point. The point is this apple raisin bread! The recipe comes from The Modern Baker by Nick Malgieri. It was absolutely delicious. But I think I should've squeezed some of the liquid out of my apples. They were really juicy, and after 10 additional minutes of baking, the bread was still gooey in the center. I was afraid of overbaking the edges, so I took it out. The baked parts are delicious, but the middle was still a bit raw. Oh well, nothing the dog won't take care of!
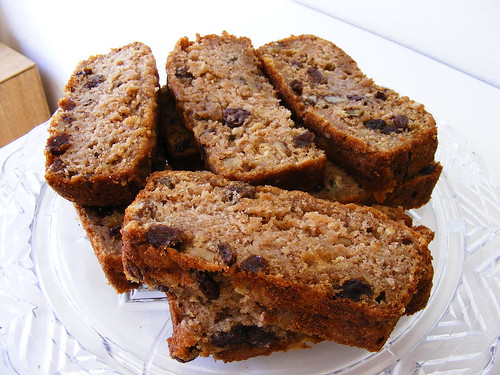 Apple Raisin Bread (from "The Modern Baker" by Nick Malgieri)
Makes one 8 1/2 x 4 1/2-inch loaf
2/3 cup all-purpose flour
2/3 cup whole wheat flour
3/4 teaspoon baking soda
1/2 teaspoon cinnamon
2 large eggs
1/2 cup light brown sugar
2/3 cup vegetable oil
2 large tart apples, such as Granny Smith
1/2 cup dark raisins
1/2 cup chopped walnuts
1. Set a rack in the middle level of the oven and preheat to 350 degrees F. Butter an 8 1/2 x 4 1/2-inch loaf pan and line the bottom with parchment paper.
2. Combine the flours, baking soda, and cinnamon in a bowl and stir to mix well.
3. In a separate large bowl, whisk the eggs to break them up and whisk the sugar into the eggs. Whisk in the oil and set the bowl aside.
4. Quickly peel and grate the apples into a shallow bowl. You should have about 2 cups of grated apple.
5. Use a large rubber spatula to fold the flour mixture into the egg mixture. Quickly fold in the apples, raisins, and walnuts.
6. Scrape the batter into the prepared pan and smooth the top. Bake the bread until it is well-risen and a toothpick or a narrow-bladed knife inserted into the center of the bread emerges clean, 35-40 minutes.
7. Cool the bread in the pan on a rack for 5 minutes, then unmold it and cool it completely on a rack. Transfer the bread to a platter or cutting board before serving.
%3Cbr%20/%3EMakes%20one%208%201/2%20x%204%201/2-inch%20loaf%3Cbr%20/%3E%3Cbr%20/%3E2/3%20cup%20all-purpose%20flour%3Cbr%20/%3E2/3%20cup%20whole%20wheat%20flour%3Cbr%20/%3E3/4%20teaspoon%20baking%20soda%3Cbr%20/%3E1/2%20teaspoon%20cinnamon%3Cbr%20/%3E2%20large%20eggs%3Cbr%20/%3E1/2%20cup%20light%20brown%20sugar%3Cbr%20/%3E2/3%20cup%20vegetable%20oil%3Cbr%20/%3E2%20large%20tart%20apples,%20such%20as%20Granny%20Smith%3Cbr%20/%3E1/2%20cup%20dark%20raisins%3Cbr%20/%3E1/2%20cup%20chopped%20walnuts%3Cbr%20/%3E%3Cbr%20/%3E1.%20Set%20a%20rack%20in%20the%20middle%20level%20of%20the%20oven%20and%20preheat%20to%20350%20degrees%20F.%20Butter%20an%208%201/2%20x%204%201/2-inch%20loaf%20pan%20and%20line%20the%20bottom%20with%20parchment%20paper.%3Cbr%20/%3E2.%20Combine%20the%20flours,%20baking%20soda,%20and%20cinnamon%20in%20a%20bowl%20and%20stir%20to%20mix%20well.%3Cbr%20/%3E3.%20In%20a%20separate%20large%20bowl,%20whisk%20the%20eggs%20to%20break%20them%20up%20and%20whisk%20the%20sugar%20into%20the%20eggs.%20Whisk%20in%20the%20oil%20and%20set%20the%20bowl%20aside.%3Cbr%20/%3E4.%20Quickly%20peel%20and%20grate%20the%20apples%20into%20a%20shallow%20bowl.%20You%20should%20have%20about%202%20cups%20of%20grated%20apple.%3Cbr%20/%3E5.%20Use%20a%20large%20rubber%20spatula%20to%20fold%20the%20flour%20mixture%20into%20the%20egg%20mixture.%20Quickly%20fold%20in%20the%20apples,%20raisins,%20and%20walnuts.%3Cbr%20/%3E6.%20Scrape%20the%20batter%20into%20the%20prepared%20pan%20and%20smooth%20the%20top.%20Bake%20the%20bread%20until%20it%20is%20well-risen%20and%20a%20toothpick%20or%20a%20narrow-bladed%20knife%20inserted%20into%20the%20center%20of%20the%20bread%20emerges%20clean,%2035-40%20minutes.%3Cbr%20/%3E7.%20Cool%20the%20bread%20in%20the%20pan%20on%20a%20rack%20for%205%20minutes,%20then%20unmold%20it%20and%20cool%20it%20completely%20on%20a%20rack.%20Transfer%20the%20bread%20to%20a%20platter%20or%20cutting%20board%20before%20serving.%3C/span%3E%3Cbr%20/%3E%3Ca%20href%3D%22http://docs.google.com/View?docID%253Ddg5mng3t_300d79wd849%2526revision%253D_latest%2526hgd%253D1%2526spi%253D1%22%20target%3D%22_blank%22%3E%3Cimg%20border%3D%220%22%20src%3D%22http://www.tryimg.com/uploads/7465b9b45e.bmp%22%20/%3E%3C/a%3E)
Strawberry Cobbler 8 May 2010 1:00 AM (14 years ago)

 It's strawberry season here in the U.S.! When we had our Cinco de Mayo party, a lot of people had strawberry margaritas on the brain. We ended up with quite a few leftover containers of strawberries. Maybe it was all the other margarita mixes everyone else brought? Or maybe after 3 or 4 margaritas, the designated margarita maker forgot how to make them? I'm not judging... ;) Either way, it was up to me to find a good use for these strawberries before nature called them to a moldy grave.
 After browsing through 6 or 8 cookbooks and comparing recipes with the ingredients I already had on hand, I came upon this lovely little recipe for strawberry cobbler. I had never had strawberry cobbler, or even heard of it. It sounded perfect!
 I ended up using all of the strawberries we had (somewhere around 2 pounds), and it came out to be the perfect amount! This cobbler is outrageous! It's so juicy and fruity and sweet with a little bit of tartness from the lemon juice. And the biscuit topping is such a perfect mellow compliment to the POW! from the bright strawberries. It's got a bit of crunch on the outside, but the inside of the biscuit is soft and ever-so-slightly sweetened.
 As usual, I made some minor changes to the recipe. I added a bit more lemon juice (only 1 1/2 teaspoons more) because I love how it brightens fruit flavors. I also added a nice pinch of salt to the strawberry filling, just in case the added lemon juice would be too tart. My filling didn't seem to be thickening up enough on the stove, so I added 2 more teaspoons of cornstarch in a slurry of 2 teaspoons of cold water. The only thing I would do differently next time would be to 1.5x the biscuit topping recipe. You could definitely double it if you love LOTS of topping on your cobbler, but the given amount was enough to make the topping look somewhat skimpy in the casserole dish. Oh, and I'd quarter the strawberries. The recipe didn't say to cut them at all, but I halved the large ones. I'd cut them smaller next time.
 Overall, I'm calling this recipe a keeper. It's nice to have on hand when you get sick of eating strawberry ice cream, strawberry cupcakes, strawberry rhubarb pie, strawberry shortcake, strawberry trifle, strawberry cheesecake......... *yawn*
Strawberry Cobbler (from The Wooden Spoon Dessert Book by Marilyn M. Moore)
1 1/2 cups sugar
2 tablespoons cornstarch (plus a few more teaspoons if your strawberries are extra juicy)
(I added about 1/8 teaspoon salt)
2 tablespoons water
1 1/2 tablespoons fresh lemon juice (I used 2 tablespoons)
6 cups strawberries, washed and hulled (I'd halve the small ones, quarter the large ones)
1 tablespoon unsalted butter, softened
Biscuit Topping
Preheat the oven to 400 degrees F. Butter a 3-quart casserole. In a large nonreactive saucepan stir together the sugar and cornstarch. Stir in the water and lemon juice. Stir in the strawberries.
Cook over medium heat, stirring often until thickened. Remove from the heat and stir in the butter. Transfer to the prepared casserole. Cover with Biscuit Topping.
Bake for 25 minutes. Serve warm with cream. (I let mine cool for about an hour before digging in.)
Biscuit Topping
1 1/2 cups unbleached all-purpose flour
2 teaspoons baking powder
1/2 teaspoon salt
2 tablespoons granulated sugar (vanilla sugar would be excellent here)
5 tablespoons shortening
1/2 cup cold milk or half-and-half
Stir or sift together the flour, baking powder, salt, and sugar. Rub in the shortening with your fingers. Using a fork, gently stir in the milk, just intl the dough cleans the bowl.
Toss on a lightly floured surface until no longer sticky, and then pat or roll out to a shape that fits the top of the casserole to be used. (I just pinched off pieces of dough and dolloped them over the filling. Like I said, 1.5x this recipe would be a better amount of topping.)
%20Either%20way,%20it%20was%20up%20to%20me%20to%20find%20a%20good%20use%20for%20these%20strawberries%20before%20nature%20called%20them%20to%20a%20moldy%20grave.%3Ca%20href%3D%22http://www.flickr.com/photos/ilafffalot/4584422355%22%3E%3Cimg%20style%3D%22TEXT-ALIGN:%20center;%20MARGIN:%200px%20auto;%20WIDTH:%20500px;%20DISPLAY:%20block;%20HEIGHT:%20375px;%20CURSOR:%20hand%22%20border%3D%220%22%20alt%3D%22%22%20src%3D%22http://farm5.static.flickr.com/4012/4584422355_c0e9d1bb8a.jpg%22%20/%3E%3C/a%3EAfter%20browsing%20through%206%20or%208%20cookbooks%20and%20comparing%20recipes%20with%20the%20ingredients%20I%20already%20had%20on%20hand,%20I%20came%20upon%20this%20lovely%20little%20recipe%20for%20strawberry%20cobbler.%20I%20had%20never%20had%20strawberry%20cobbler,%20or%20even%20heard%20of%20it.%20It%20sounded%20perfect!%3Ca%20href%3D%22http://www.flickr.com/photos/ilafffalot/4584422475%22%3E%3Cimg%20style%3D%22TEXT-ALIGN:%20center;%20MARGIN:%200px%20auto;%20WIDTH:%20500px;%20DISPLAY:%20block;%20HEIGHT:%20375px;%20CURSOR:%20hand%22%20border%3D%220%22%20alt%3D%22%22%20src%3D%22http://farm5.static.flickr.com/4053/4584422475_7fa37d7613.jpg%22%20/%3E%3C/a%3EI%20ended%20up%20using%20all%20of%20the%20strawberries%20we%20had%20(somewhere%20around%202%20pounds),%20and%20it%20came%20out%20to%20be%20the%20perfect%20amount!%20This%20cobbler%20is%20outrageous!%20It's%20so%20juicy%20and%20fruity%20and%20sweet%20with%20a%20little%20bit%20of%20tartness%20from%20the%20lemon%20juice.%20And%20the%20biscuit%20topping%20is%20such%20a%20perfect%20mellow%20compliment%20to%20the%20%3Cem%3EPOW!%3C/em%3E%20from%20the%20bright%20strawberries.%20It's%20got%20a%20bit%20of%20crunch%20on%20the%20outside,%20but%20the%20inside%20of%20the%20biscuit%20is%20soft%20and%20ever-so-slightly%20sweetened.%3Ca%20href%3D%22http://www.flickr.com/photos/ilafffalot/4585050440/%22%3E%3Cimg%20style%3D%22TEXT-ALIGN:%20center;%20MARGIN:%200px%20auto;%20WIDTH:%20500px;%20DISPLAY:%20block;%20HEIGHT:%20375px;%20CURSOR:%20hand%22%20border%3D%220%22%20alt%3D%22%22%20src%3D%22http://farm5.static.flickr.com/4051/4585050440_074ac1fc2b.jpg%22%20/%3E%3C/a%3EAs%20usual,%20I%20made%20some%20minor%20changes%20to%20the%20recipe.%20I%20added%20a%20bit%20more%20lemon%20juice%20(only%201%201/2%20teaspoons%20more)%20because%20I%20love%20how%20it%20brightens%20fruit%20flavors.%20I%20also%20added%20a%20nice%20pinch%20of%20salt%20to%20the%20strawberry%20filling,%20just%20in%20case%20the%20added%20lemon%20juice%20would%20be%20too%20tart.%20My%20filling%20didn't%20seem%20to%20be%20thickening%20up%20enough%20on%20the%20stove,%20so%20I%20added%202%20more%20teaspoons%20of%20cornstarch%20in%20a%20slurry%20of%202%20teaspoons%20of%20cold%20water.%20The%20only%20thing%20I%20would%20do%20differently%20next%20time%20would%20be%20to%201.5x%20the%20biscuit%20topping%20recipe.%20You%20could%20definitely%20double%20it%20if%20you%20love%20LOTS%20of%20topping%20on%20your%20cobbler,%20but%20the%20given%20amount%20was%20enough%20to%20make%20the%20topping%20look%20somewhat%20skimpy%20in%20the%20casserole%20dish.%20Oh,%20and%20I'd%20quarter%20the%20strawberries.%20The%20recipe%20didn't%20say%20to%20cut%20them%20at%20all,%20but%20I%20halved%20the%20large%20ones.%20I'd%20cut%20them%20smaller%20next%20time.%3Ca%20href%3D%22http://www.flickr.com/photos/ilafffalot/4585083826%22%3E%3Cimg%20style%3D%22TEXT-ALIGN:%20center;%20MARGIN:%200px%20auto;%20WIDTH:%20500px;%20DISPLAY:%20block;%20HEIGHT:%20375px;%20CURSOR:%20hand%22%20border%3D%220%22%20alt%3D%22%22%20src%3D%22http://farm5.static.flickr.com/4010/4585083826_dab852b0d3.jpg%22%20/%3E%3C/a%3EOverall,%20I'm%20calling%20this%20recipe%20a%20keeper.%20It's%20nice%20to%20have%20on%20hand%20when%20you%20get%20sick%20of%20eating%20strawberry%20ice%20cream,%20strawberry%20cupcakes,%20strawberry%20rhubarb%20pie,%20strawberry%20shortcake,%20strawberry%20trifle,%20strawberry%20cheesecake.........%20*yawn*%3Cbr%20/%3E%3Cbr%20/%3E%3Cspan%3E%3Cstrong%3EStrawberry%20Cobbler%3C/strong%3E%20(from%20%3Cem%3EThe%20Wooden%20Spoon%20Dessert%20Book%3C/em%3E%20by%20Marilyn%20M.%20Moore)%3Cbr%20/%3E%3Cbr%20/%3E1%201/2%20cups%20sugar%3Cbr%20/%3E2%20tablespoons%20cornstarch%20%3Cspan%3E%3Cem%3E(plus%20a%20few%20more%20teaspoons%20if%20your%20strawberries%20are%20extra%20juicy)%3C/em%3E%3C/span%3E%3Cbr%20/%3E(I%20added%20about%201/8%20teaspoon%20salt)%3Cbr%20/%3E2%20tablespoons%20water%3Cbr%20/%3E1%201/2%20tablespoons%20fresh%20lemon%20juice%3Cem%3E%3Cspan%3E%20(I%20used%202%20tablespoons)%3C/span%3E%3C/em%3E%3Cbr%20/%3E6%20cups%20strawberries,%20washed%20and%20hulled%20%3Cem%3E%3Cspan%3E(I'd%20halve%20the%20small%20ones,%20quarter%20the%20large%20ones)%3C/span%3E%3C/em%3E%3Cbr%20/%3E1%20tablespoon%20unsalted%20butter,%20softened%3Cbr%20/%3EBiscuit%20Topping%3Cbr%20/%3E%3Cbr%20/%3EPreheat%20the%20oven%20to%20400%20degrees%20F.%20Butter%20a%203-quart%20casserole.%20In%20a%20large%20nonreactive%20saucepan%20stir%20together%20the%20sugar%20and%20cornstarch.%20Stir%20in%20the%20water%20and%20lemon%20juice.%20Stir%20in%20the%20strawberries.%3Cbr%20/%3ECook%20over%20medium%20heat,%20stirring%20often%20until%20thickened.%20Remove%20from%20the%20heat%20and%20stir%20in%20the%20butter.%20Transfer%20to%20the%20prepared%20casserole.%20Cover%20with%20Biscuit%20Topping.%3Cbr%20/%3EBake%20for%2025%20minutes.%20Serve%20warm%20with%20cream.%3Cem%3E%3Cspan%3E%20%3C/span%3E%3Cspan%3E(I%20let%20mine%20cool%20for%20about%20an%20hour%20before%20digging%20in.)%3C/span%3E%3C/em%3E%3Cbr%20/%3E%3Cbr%20/%3E%3C/span%3E%3Cspan%3E%3Cstrong%3EBiscuit%20Topping%3Cbr%20/%3E%3C/strong%3E1%201/2%20cups%20unbleached%20all-purpose%20flour%3Cbr%20/%3E2%20teaspoons%20baking%20powder%3Cbr%20/%3E1/2%20teaspoon%20salt%3Cbr%20/%3E2%20tablespoons%20granulated%20sugar%20%3Cem%3E%3Cspan%3E(vanilla%20sugar%20would%20be%20excellent%20here)%3C/span%3E%3C/em%3E%3Cbr%20/%3E5%20tablespoons%20shortening%3Cbr%20/%3E1/2%20cup%20cold%20milk%20or%20half-and-half%3Cbr%20/%3E%3Cbr%20/%3EStir%20or%20sift%20together%20the%20flour,%20baking%20powder,%20salt,%20and%20sugar.%20Rub%20in%20the%20shortening%20with%20your%20fingers.%20Using%20a%20fork,%20gently%20stir%20in%20the%20milk,%20just%20intl%20the%20dough%20cleans%20the%20bowl.%3Cbr%20/%3EToss%20on%20a%20lightly%20floured%20surface%20until%20no%20longer%20sticky,%20and%20then%20pat%20or%20roll%20out%20to%20a%20shape%20that%20fits%20the%20top%20of%20the%20casserole%20to%20be%20used.%20%3Cspan%3E%3Cem%3E(I%20just%20pinched%20off%20pieces%20of%20dough%20and%20dolloped%20them%20over%20the%20filling.%20Like%20I%20said,%201.5x%20this%20recipe%20would%20be%20a%20better%20amount%20of%20topping.)%3C/em%3E%3C/span%3E%20%3C/span%3E%3Cbr%20/%3E%3Ca%20href%3D%22http://docs.google.com/View?docID%253Ddg5mng3t_299gbf683ft%2526revision%253D_latest%2526hgd%253D1%2526spi%253D1%22%20target%3D%22_blank%22%3E%3Cimg%20border%3D%220%22%20src%3D%22http://www.tryimg.com/uploads/7465b9b45e.bmp%22%20/%3E%3C/a%3E)
Cinco de Mayo ...was yesterday!! 6 May 2010 12:08 PM (14 years ago)

 Yeah, I'm a bit late. But I had a party to throw! In honor of Cinco de Mayo, I decided to make homemade churros! Crispy on the outside and moist and chewy on the inside, just the way I love my churros! They were extremely easy to make, but beware, one batch will NOT be enough for a crowd!
I also made guacamole and fried my own tortilla chips! The guacamole was amazing, and I got rave reviews on it, so I'm including the recipe for that as well. (But no picture, sorry!) Churros (from AllRecipes.com)
I got 24 2-inch bites
1 cup water
2 1/2 tablespoons white sugar
1/2 teaspoon salt
2 tablespoons vegetable oil
1 cup all-purpose flour
2 quarts oil for frying (I only needed about 1 1/4 quarts for the size pot I used)
1/2 cup white sugar, or to taste
1 teaspoon ground cinnamon (I doubled the cinnamon)
1. (Begin heating your oil first, as it may take a while.) In a small saucepan over medium heat, combine water, 2 1/2 tablespoons sugar, salt and 2 tablespoons vegetable oil. Bring to a boil and remove from heat. Stir in flour until mixture forms a ball.
2. Heat oil for frying in deep-fryer or deep skillet to 375 degrees F (190 degrees C). Pipe strips of dough into hot oil using a pastry bag. (I tried using the largest star tip I had, which was an Ateco 2D. It was a closed star tip, and it did not work at all. The pieces fell apart in the hot oil. For my second batch I switched to a large round tip and piped 2-inch long pieces.) Fry until golden (They stick together in the oil, so only fry a few at a time, depending on how large your pot is. When they float to the top, fry them for 1-2 minutes longer, or until they are golden brown); drain on paper towels.
3. Combine 1/2 cup sugar and cinnamon. Roll drained churros in cinnamon and sugar mixture. (I put my cinnamon-sugar in a bag and tossed the cooled churros in it.)
Guacamole (from AllRecipes.com)
AllRecipes.com says this serves 4, but we served at least 12 people with this.
3 avocados - peeled, pitted, and mashed
1 lime, juiced
1 teaspoon salt
1/2 cup diced onion
3 tablespoons chopped fresh cilantro (I used about 1/3 cup cilantro)
2 roma (plum) tomatoes, diced
1 teaspoon minced garlic
1 pinch ground cayenne pepper (This didn't add any heat. Next time I'd use at least 1/4 teaspoon if I wanted to make it spicy.)
In a medium bowl, mash together the avocados, lime juice, and salt. Mix in onion, cilantro, tomatoes, and garlic. Stir in cayenne pepper. Refrigerate 1 hour for best flavor, or serve immediately. (I made mine about 3 hours ahead and pressed a piece of plastic wrap directly on the surface.)
%3Cbr%20/%3E%3Cbr%20/%3E%3Ca%20href%3D%22http://www.flickr.com/photos/ilafffalot/4584977490%22%3E%3Cimg%20style%3D%22TEXT-ALIGN:%20center;%20MARGIN:%200px%20auto;%20WIDTH:%20500px;%20DISPLAY:%20block;%20HEIGHT:%20375px;%20CURSOR:%20hand%22%20border%3D%220%22%20alt%3D%22%22%20src%3D%22http://farm5.static.flickr.com/4045/4584977490_8a99dbf761.jpg%22%20/%3E%3C/a%3E%3Ca%20href%3D%22http://allrecipes.com/Recipe/Churros/Detail.aspx%22%3E%3Cstrong%3E%3Cspan%3EChurros%3C/span%3E%3C/strong%3E%3C/a%3E%3Cspan%3E%20(from%20AllRecipes.com)%3Cbr%20/%3E%3Cem%3E%3Cspan%3EI%20got%2024%202-inch%20bites%3C/span%3E%3C/em%3E%3Cbr%20/%3E1%20cup%20water%3Cbr%20/%3E2%201/2%20tablespoons%20white%20sugar%3Cbr%20/%3E1/2%20teaspoon%20salt%3Cbr%20/%3E2%20tablespoons%20vegetable%20oil%3Cbr%20/%3E1%20cup%20all-purpose%20flour%3Cbr%20/%3E2%20quarts%20oil%20for%20frying%3Cem%3E%20%3Cspan%3E(I%20only%20needed%20about%201%201/4%20quarts%20for%20the%20size%20pot%20I%20used)%3C/span%3E%3C/em%3E%3Cbr%20/%3E1/2%20cup%20white%20sugar,%20or%20to%20taste%3Cbr%20/%3E1%20teaspoon%20ground%20cinnamon%20%3Cem%3E%3Cspan%3E(I%20doubled%20the%20cinnamon)%3C/span%3E%3C/em%3E%3Cbr%20/%3E%3Cbr%20/%3E1.%20%3Cem%3E%3Cspan%3E(Begin%20heating%20your%20oil%20first,%20as%20it%20may%20take%20a%20while.)%3C/span%3E%3C/em%3E%20In%20a%20small%20saucepan%20over%20medium%20heat,%20combine%20water,%202%201/2%20tablespoons%20sugar,%20salt%20and%202%20tablespoons%20vegetable%20oil.%20Bring%20to%20a%20boil%20and%20remove%20from%20heat.%20Stir%20in%20flour%20until%20mixture%20forms%20a%20ball.%3Cbr%20/%3E2.%20Heat%20oil%20for%20frying%20in%20deep-fryer%20or%20deep%20skillet%20to%20375%20degrees%20F%20(190%20degrees%20C).%20Pipe%20strips%20of%20dough%20into%20hot%20oil%20using%20a%20pastry%20bag.%20%3Cem%3E%3Cspan%3E(I%20tried%20using%20the%20largest%20star%20tip%20I%20had,%20which%20was%20an%20Ateco%202D.%20It%20was%20a%20closed%20star%20tip,%20and%20it%20did%20not%20work%20at%20all.%20The%20pieces%20fell%20apart%20in%20the%20hot%20oil.%20For%20my%20second%20batch%20I%20switched%20to%20a%20large%20round%20tip%20and%20piped%202-inch%20long%20pieces.)%3C/span%3E%3C/em%3E%20Fry%20until%20golden%20%3Cem%3E%3Cspan%3E(They%20stick%20together%20in%20the%20oil,%20so%20only%20fry%20a%20few%20at%20a%20time,%20depending%20on%20how%20large%20your%20pot%20is.%20When%20they%20float%20to%20the%20top,%20fry%20them%20for%201-2%20minutes%20longer,%20or%20until%20they%20are%20golden%20brown)%3C/span%3E%3C/em%3E;%20drain%20on%20paper%20towels.%3Cbr%20/%3E3.%20Combine%201/2%20cup%20sugar%20and%20cinnamon.%20Roll%20drained%20churros%20in%20cinnamon%20and%20sugar%20mixture.%3Cem%3E%3Cspan%3E%20(I%20put%20my%20cinnamon-sugar%20in%20a%20bag%20and%20tossed%20the%20cooled%20churros%20in%20it.)%3C/span%3E%3C/em%3E%3Cbr%20/%3E%3Cbr%20/%3E%3C/span%3E%3Ca%20href%3D%22http://allrecipes.com/Recipe/Guacamole/Detail.aspx%22%3E%3Cspan%3E%3Cstrong%3EGuacamole%3C/strong%3E%20%3C/span%3E%3C/a%3E%3Cspan%3E(from%20AllRecipes.com)%3Cbr%20/%3E%3Cem%3E%3Cspan%3EAllRecipes.com%20says%20this%20serves%204,%20but%20we%20served%20at%20least%2012%20people%20with%20this.%3C/span%3E%3C/em%3E%3Cbr%20/%3E3%20avocados%20-%20peeled,%20pitted,%20and%20mashed%3Cbr%20/%3E1%20lime,%20juiced%3Cbr%20/%3E1%20teaspoon%20salt%3Cbr%20/%3E1/2%20cup%20diced%20onion%3Cbr%20/%3E3%20tablespoons%20chopped%20fresh%20cilantro%3C/span%3E%3Cspan%3E%3Cspan%3E%20%3Cem%3E(I%20used%20about%201/3%20cup%20cilantro)%3C/em%3E%3Cbr%20/%3E%3C/span%3E2%20roma%20(plum)%20tomatoes,%20diced%3Cbr%20/%3E1%20teaspoon%20minced%20garlic%3Cbr%20/%3E1%20pinch%20ground%20cayenne%20pepper%20%3Cem%3E%3Cspan%3E(This%20didn't%20add%20any%20heat.%20Next%20time%20I'd%20use%20at%20least%201/4%20teaspoon%20if%20I%20wanted%20to%20make%20it%20spicy.)%3C/span%3E%3C/em%3E%3Cbr%20/%3E%3Cbr%20/%3EIn%20a%20medium%20bowl,%20mash%20together%20the%20avocados,%20lime%20juice,%20and%20salt.%20Mix%20in%20onion,%20cilantro,%20tomatoes,%20and%20garlic.%20Stir%20in%20cayenne%20pepper.%20Refrigerate%201%20hour%20for%20best%20flavor,%20or%20serve%20immediately.%20%3Cem%3E%3Cspan%3E(I%20made%20mine%20about%203%20hours%20ahead%20and%20pressed%20a%20piece%20of%20plastic%20wrap%20directly%20on%20the%20surface.)%3C/span%3E%3C/em%3E%3C/span%3E)
Oatmeal Fudge Bars 3 May 2010 7:49 AM (14 years ago)

 My mom asked me to make dessert yesterday to eat after we had Dad's famous ribs for dinner. After Dad's ribs, the dessert has to be amazing or it won't be remembered! These bars were pretty sensational, if I may say so myself. They are very rich, so an 8x8 pan could easily make 16 small servings. But we are a gluttonous family, so I cut mine into 12 pieces. The crispy, crunchy oat crust/topping is a wonderful accompaniment to the soft, fudgy center. This recipe is definitely a keeper!
 OATMEAL FUDGE BARS (from The America’s Test Kitchen Family Baking Book)
MAKES 16 bars
Old-fashioned rolled oats may be substituted for the quick-cooking oats, although the bars will be more chewy.
CRUST AND TOPPING
1 cup (3 ounces) quick-cooking oats
1 cup packed (7 ounces) light brown sugar
3/4 cup (3 3/4 ounces) all-purpose flour
1/4 teaspoon baking powder
1/4 teaspoon baking soda
1/4 teaspoon salt
8 tablespoons (1 stick) unsalted butter, melted and cooled
FILLING
1/4 cup (1 1/4 ounces) all-purpose flour
1/4 cup packed (1 3/4 ounces) light brown sugar
2 teaspoons instant espresso or instant coffee (if using granulated instant coffee, dissolve into 2 teaspoons hot water and stir into the chocolate mixture after the egg)
1/4 teaspoon salt
1 1/2 cups (9 ounces) semisweet chocolate chips
2 tablespoons unsalted butter
1 large egg
1. FOR THE CRUST AND TOPPING: Adjust an oven rack to the middle position and heat the oven to 325 degrees. Line an 8-inch square baking pan with a foil sling and grease the foil.
2. Whisk the oats, brown sugar, flour, baking powder, baking soda, and salt together in a large bowl. Stir in the melted butter until combined. Reserve 3/4 cup of the oat mixture for the topping.
3. Sprinkle the remaining oat mixture into the prepared pan and press into an even layer with the bottom of a measuring cup. Bake the crust until light golden brown, about 8 minutes. Let the crust cool completely on a wire rack, about 1 hour.
4. FOR THE FILLING: Whisk the flour, sugar, instant espresso, and salt together in a medium bowl. Melt the chocolate chips and butter together in the microwave, stirring often, 1 to 3 minutes. Transfer the chocolate mixture to a large bowl and let cool slightly. Whisk in the egg until combined. Stir in the flour mixture until just incorporated.
5. Adjust an oven rack to the middle position and heat the oven to 325 degrees. Spread the filling evenly over the cooled crust and smooth the top. Sprinkle with the reserved oat topping. Bake the bars until a toothpick inserted into the center comes out with a few moist crumbs attached and the filling begins to pull away from the sides of the pan, 25 to 30 minutes, rotating the pan halfway through baking.
6. Let the bars cool completely in the pan, set on a wire rack, about 2 hours. Remove the bars from the pan using the foil, cut into squares, and serve.
%3Cbr%20/%3EMAKES%2016%20bars%3Cbr%20/%3E%3Cspan%3E%3Cem%3EOld-fashioned%20rolled%20oats%20may%20be%20substituted%20for%20the%20quick-cooking%20oats,%20although%20the%20bars%20will%20be%20more%20chewy.%3C/em%3E%3Cbr%20/%3E%3C/span%3ECRUST%20AND%20TOPPING%3Cbr%20/%3E1%20cup%20(3%20ounces)%20quick-cooking%20oats%3Cbr%20/%3E1%20cup%20packed%20(7%20ounces)%20light%20brown%20sugar%3Cbr%20/%3E3/4%20cup%20(3%203/4%20ounces)%20all-purpose%20flour%3Cbr%20/%3E1/4%20teaspoon%20baking%20powder%3Cbr%20/%3E1/4%20teaspoon%20baking%20soda%3Cbr%20/%3E1/4%20teaspoon%20salt%3Cbr%20/%3E8%20tablespoons%20(1%20stick)%20unsalted%20butter,%20melted%20and%20cooled%3Cbr%20/%3E%3Cbr%20/%3EFILLING%3Cbr%20/%3E1/4%20cup%20(1%201/4%20ounces)%20all-purpose%20flour%3Cbr%20/%3E1/4%20cup%20packed%20(1%203/4%20ounces)%20light%20brown%20sugar%3Cbr%20/%3E2%20teaspoons%20instant%20espresso%20or%20instant%20coffee%20%3Cem%3E%3Cspan%3E(if%20using%20granulated%20instant%20coffee,%20dissolve%20into%202%20teaspoons%20hot%20water%20and%20stir%20into%20the%20chocolate%20mixture%20after%20the%20egg)%3C/span%3E%3C/em%3E%3Cbr%20/%3E1/4%20teaspoon%20salt%3Cbr%20/%3E1%201/2%20cups%20(9%20ounces)%20semisweet%20chocolate%20chips%3Cbr%20/%3E2%20tablespoons%20unsalted%20butter%3Cbr%20/%3E1%20large%20egg%3Cbr%20/%3E%3Cbr%20/%3E1.%20FOR%20THE%20CRUST%20AND%20TOPPING:%20Adjust%20an%20oven%20rack%20to%20the%20middle%20position%20and%20heat%20the%20oven%20to%20325%20degrees.%20Line%20an%208-inch%20square%20baking%20pan%20with%20a%20foil%20sling%20and%20grease%20the%20foil.%3Cbr%20/%3E2.%20Whisk%20the%20oats,%20brown%20sugar,%20flour,%20baking%20powder,%20baking%20soda,%20and%20salt%20together%20in%20a%20large%20bowl.%20Stir%20in%20the%20melted%20butter%20until%20combined.%20Reserve%203/4%20cup%20of%20the%20oat%20mixture%20for%20the%20topping.%3Cbr%20/%3E3.%20Sprinkle%20the%20remaining%20oat%20mixture%20into%20the%20prepared%20pan%20and%20press%20into%20an%20even%20layer%20with%20the%20bottom%20of%20a%20measuring%20cup.%20Bake%20the%20crust%20until%20light%20golden%20brown,%20about%208%20minutes.%20Let%20the%20crust%20cool%20completely%20on%20a%20wire%20rack,%20about%201%20hour.%3Cbr%20/%3E4.%20FOR%20THE%20FILLING:%20Whisk%20the%20flour,%20sugar,%20instant%20espresso,%20and%20salt%20together%20in%20a%20medium%20bowl.%20Melt%20the%20chocolate%20chips%20and%20butter%20together%20in%20the%20microwave,%20stirring%20often,%201%20to%203%20minutes.%20Transfer%20the%20chocolate%20mixture%20to%20a%20large%20bowl%20and%20let%20cool%20slightly.%20Whisk%20in%20the%20egg%20until%20combined.%20Stir%20in%20the%20flour%20mixture%20until%20just%20incorporated.%3Cbr%20/%3E5.%20Adjust%20an%20oven%20rack%20to%20the%20middle%20position%20and%20heat%20the%20oven%20to%20325%20degrees.%20Spread%20the%20filling%20evenly%20over%20the%20cooled%20crust%20and%20smooth%20the%20top.%20Sprinkle%20with%20the%20reserved%20oat%20topping.%20Bake%20the%20bars%20until%20a%20toothpick%20inserted%20into%20the%20center%20comes%20out%20with%20a%20few%20moist%20crumbs%20attached%20and%20the%20filling%20begins%20to%20pull%20away%20from%20the%20sides%20of%20the%20pan,%2025%20to%2030%20minutes,%20rotating%20the%20pan%20halfway%20through%20baking.%3Cbr%20/%3E6.%20Let%20the%20bars%20cool%20completely%20in%20the%20pan,%20set%20on%20a%20wire%20rack,%20about%202%20hours.%20Remove%20the%20bars%20from%20the%20pan%20using%20the%20foil,%20cut%20into%20squares,%20and%20serve.%3C/span%3E%3Cbr%20/%3E%3Ca%20href%3D%22http://docs.google.com/View?docID%253Ddg5mng3t_298f8fk6ccj%2526revision%253D_latest%2526hgd%253D1%2526spi%253D1%22%20target%3D%22_blank%22%3E%3Cimg%20border%3D%220%22%20src%3D%22http://www.tryimg.com/uploads/7465b9b45e.bmp%22%20/%3E%3C/a%3E)
Cream Cheese Pound Cake 29 Apr 2010 2:24 PM (14 years ago)

 ...or Melt-In-Your-Mouth Pound Cake ...or White Velvet Pound Cake ...or The Best D@#% Pound Cake I've Ever Eaten! Any of these could be proper titles for this blog post. Seriously, this is THE pound cake to end all pound cakes. It's moist, rich, dense, flavorful, silky, delicious! The texture alone is what sold me on this pound cake recipe. It has no chemical leaveners, so it relies on whipping the batter up into a fluffy, sweet cloud in order for it to get a nice lift in the oven. And since cake flour is used instead of all purpose flour, each bite feels like silk on your tongue. It's pretty darn incredible! Tomorrow I'm going to get some juicy strawberries and make strawberry shortcake with it. Heck, I might even get a little crazy and use it to make a nutella-banana panini à la Amanda of Is This Thing On? Either way, I'm going to be in heaven for the next couple of days. And I can say that with confidence because I made TWO of these suckers!!


A scale comes in handy for making sure you fill both pans equally.

 Look at that crumb... yummy!
I originally came across this recipe on AllRecipes.com, but after further investigation, I noticed it's nearly identical to Smitten Kitchen's recipe. The following is an adaptation of ingredients and methods from both recipes, as well as some improvisation.
Cream Cheese Pound Cake
Makes 1 large bundt, 1 10-inch tube cake, or 2 standard loaves
1 1/2 cups (3 sticks) unsalted butter, at room temperature
1 package (8 ounces) cream cheese, at room temperature
3 cups sugar
6 large eggs, at room temperature
3 cups cake flour
1/2 teaspoon salt
1 tablespoon pure vanilla extract
1 teaspoon almond extract
1. Preheat the oven to 325°F. Lightly butter a 10-inch tube pan, then line the bottom with parchment paper. Alternately, you can use 2 loaf pans. (I used 2 9x5" loaf pans and my cakes were somewhat short. I recommend using 2 8x4" pans.)
2. Place the butter, cream cheese, and sugar in the bowl of a stand mixer and beat on medium speed for 5 minutes. Add the eggs, one at a time, beating for 30 seconds after each addition and scraping down the sides of the bowl as needed.
3. Whisk together the flour and salt in a medium bowl. With the mixer on low speed, add half of the flour mixture. Gradually increase speed to medium and beat for 30 seconds. Beat in the extracts. Add the remaining flour and beat on medium speed for 30 seconds. Scrape the bowl thoroughly.
4. Pour the batter into the prepared pan(s) and shake lightly to even out the top. Bake until the cake is golden brown and a toothpick inserted in the cake comes out clean, 1 hour and 15 minutes.
5. Place the pan(s) on a cake rack and cool for 10 minutes, then remove the cake from the pan and let it cool completely. Serve at room temperature.
%20unsalted%20butter,%20at%20room%20temperature%3Cbr%20/%3E1%20package%20(8%20ounces)%20cream%20cheese,%20at%20room%20temperature%3Cbr%20/%3E3%20cups%20sugar%3Cbr%20/%3E6%20large%20eggs,%20at%20room%20temperature%3Cbr%20/%3E3%20cups%20cake%20flour%3Cbr%20/%3E1/2%20teaspoon%20salt%3Cbr%20/%3E1%20tablespoon%20pure%20vanilla%20extract%3Cbr%20/%3E1%20teaspoon%20almond%20extract%3Cbr%20/%3E%3Cbr%20/%3E1.%20Preheat%20the%20oven%20to%20325%C2%B0F.%20Lightly%20butter%20a%2010-inch%20tube%20pan,%20then%20line%20the%20bottom%20with%20parchment%20paper.%20Alternately,%20you%20can%20use%202%20loaf%20pans.%20(I%20used%202%209x5%22%20loaf%20pans%20and%20my%20cakes%20were%20somewhat%20short.%20I%20recommend%20using%202%208x4%22%20pans.)%3Cbr%20/%3E2.%20Place%20the%20butter,%20cream%20cheese,%20and%20sugar%20in%20the%20bowl%20of%20a%20stand%20mixer%20and%20beat%20on%20medium%20speed%20for%205%20minutes.%20Add%20the%20eggs,%20one%20at%20a%20time,%20beating%20for%2030%20seconds%20after%20each%20addition%20and%20scraping%20down%20the%20sides%20of%20the%20bowl%20as%20needed.%3Cbr%20/%3E3.%20Whisk%20together%20the%20flour%20and%20salt%20in%20a%20medium%20bowl.%20With%20the%20mixer%20on%20low%20speed,%20add%20half%20of%20the%20flour%20mixture.%20Gradually%20increase%20speed%20to%20medium%20and%20beat%20for%2030%20seconds.%20Beat%20in%20the%20extracts.%20Add%20the%20remaining%20flour%20and%20beat%20on%20medium%20speed%20for%2030%20seconds.%20Scrape%20the%20bowl%20thoroughly.%3Cbr%20/%3E4.%20Pour%20the%20batter%20into%20the%20prepared%20pan(s)%20and%20shake%20lightly%20to%20even%20out%20the%20top.%20Bake%20until%20the%20cake%20is%20golden%20brown%20and%20a%20toothpick%20inserted%20in%20the%20cake%20comes%20out%20clean,%201%20hour%20and%2015%20minutes.%3Cbr%20/%3E5.%20Place%20the%20pan(s)%20on%20a%20cake%20rack%20and%20cool%20for%2010%20minutes,%20then%20remove%20the%20cake%20from%20the%20pan%20and%20let%20it%20cool%20completely.%20Serve%20at%20room%20temperature.%20%3C/span%3E%3Cbr%20/%3E%3Ca%20href%3D%22http://docs.google.com/View?docID%253Ddg5mng3t_297d2ghn6cw%2526revision%253D_latest%2526hgd%253D1%2526spi%253D1%22%20target%3D%22_blank%22%3E%3Cimg%20border%3D%220%22%20src%3D%22http://www.tryimg.com/uploads/7465b9b45e.bmp%22%20/%3E%3C/a%3E)