Mastering the Art of Insightful Report Card Comments 23 May 2024 9:02 AM (10 months ago)
When you’re writing report card comments and progress reports, it can be a real puzzle to get across how each student is doing. But here’s the deal: kick things off with the good stuff. We’re talking about the wins, the high-fives, the “I’m doing awesome” moments. By including assessments of both academic achievements and personal behaviors in the report card, students and parents can recognize strengths and areas for growth. To make your life easier, we have provided a selection of thoughtful and flexible report card comments to give students a boost as they head into the summer months.
Provided below are subject specific comments at three levels of achievement.
Mathematics
Proficient
- It is apparent that ____ enjoys math. He/she participates in class and can always explain his/her work.
- It is a joy to correct ____’s math work pages. He/she takes pride in his/her work and is very proficient in math.
Making Progress
- ____ has memorized all of his/her ____ facts. This impacts his/her ability to complete assignments accurately . Please keep using the flashcards at home each evening to increase speed.
- ____ is steadily improving in math. He/she pays attention in class and completes his/her work with few errors . I am pleased with his/her progress.
- ____ has shown increased interest in math. This is reflected in his/her math scores.
Needs Improvement
- ____’s progress in math is not consistent. Although he/she has made some progress, he/she needs to continue reviewing ____ every evening.
- ____ is struggling in math. He/she does not seem to enjoy it at all. We need to continue working on basic skills to build a stronger foundation in math.
- Encourage ____ to use flashcards and complete all math homework to strengthen skills and develop confidence.
Language Arts
Proficient
- ____ asks pertinent questions and participates in story discussions. He/she is a leader in our classroom.
- ____ demonstrates critical thinking in writing. He/she also expresses his/her ideas clearly and concisely.
- ____ has done well this semester. He/she shows great enthusiasm when doing in-class activities.
Making Progress
- ____ is reading fluently but does not comprehend what he/she reads. When ____ reads at home, ask him/her questions about the story.
- ____ does not willingly participate in reading activities. We need to help him/her develop more skills so reading is easier. We should also help him/her choose interesting books so reading is more enjoyable.
- ____ is not retaining ____ . He/she needs more repetition and practice at home.

Social Skills
Proficient
- ____ is cheerful and friendly. He/she assumes responsibility, excels in the classroom, and is well-liked by his/her peers.
- ____ always has time to do something nice for other students. For this reason, he/she is well-liked among his/her peers.
Making Progress
- ____’s social maturity is improving. We need to continue supporting him/her in this area.
- ____ has a great sense of humor that we all enjoy. He/she is now learning when it is more appropriate to be serious.
Needs Improvement
- ____ tries to dominate every activity. He/she needs to take turns and be more considerate of others.
- ____ frequently interrupts others. We will be working to develop patience.
Behavior
Proficient
- ______ shares and listens. He/she works well with others.
- _______is a pleasant, respectful, and well-behaved student.
Making Progress
- _______ is learning to anticipate the consequences of his/her actions. This is improving his/her behavior because he/she is taking time to think before acting.
- There has been noticeable improvement in _______’s behavior. He/she has made an effort to cooperate with his/her peers and practice self-control. Thank you for your support.
Needs Improvement
- _______ can be very aggressive towards his classmates. Perhaps we should have him/her meet with the school counselor.
- Please encourage _______ to use socially appropriate language at all time.
These suggested comments are a jumping off point for a direct line of communication between teachers and parents. These comments provide a clear, concise, and constructive update on progress. When teachers take the time to craft thoughtful report card comments, they have the potential to be incredibly effective, not only offering encouragement but also making a positive impact on both students and their parents.
Giving Thanks: An Easy Classroom Craft 9 Nov 2023 11:59 AM (last year)
Thanksgiving provides us with a great excuse to sit on the couch all day, overeat, and maybe catch a game or two (or a parade!), but it’s also the perfect time to stop and reflect on the things in our lives that we’re most thankful for.
As much as I enjoy the holiday, our house never gets the attention it deserves for Thanksgiving. We’re usually too exhausted from taking down the Halloween decorations and busy making plans and space for the soon-to-be Christmas explosion that besieges our house annually. We do, however, have a couple of turkey-themed decorations that make it onto our walls and shelves in November; and our hands-down favorite is a turkey our daughter made in the first grade. She’s off at college now, but her “Giving Thanks” Turkey still lives at home on our mantle above the fireplace. It’s not a complicated craft, or even all that original, but it’s a reminder to all of us to stop and be thankful for the blessings in our lives. Like my daughter almost 14 years ago, I’m very grateful for my family, my health, my friends, ice cream, and my toys.
I encourage you to create your own “Giving Thanks” Turkey with your students. It’s a fun snapshot of a moment in time, and hopefully something that will find a place on a shelf in their own home one day.
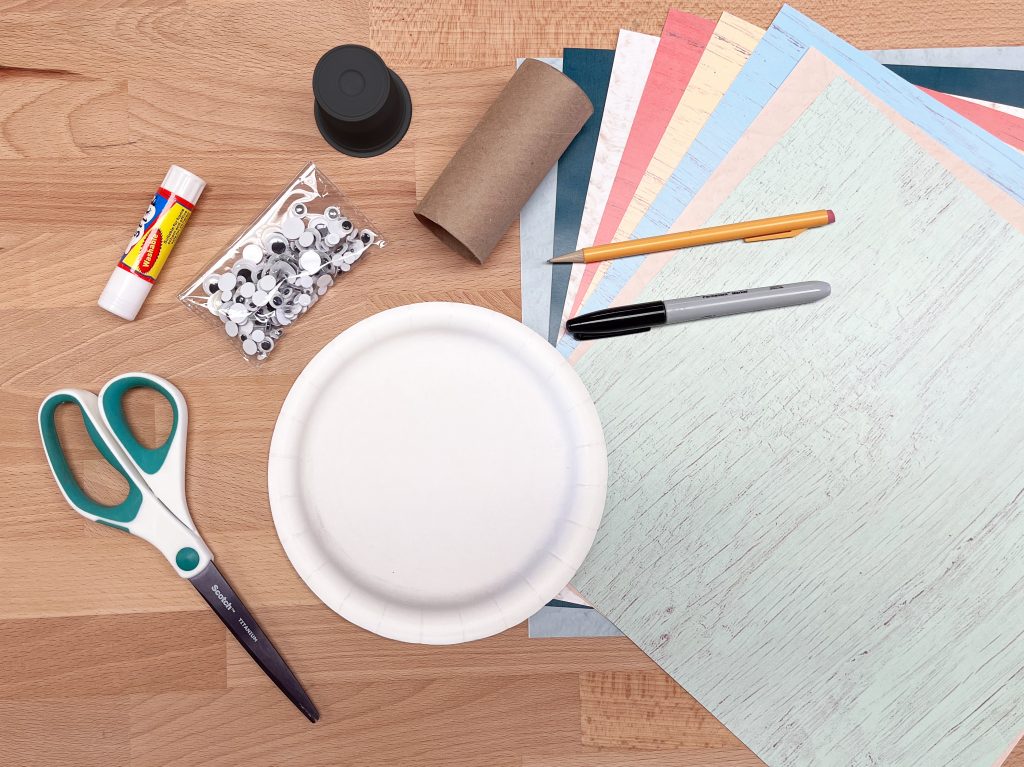
This craft only requires a few materials (shown above):
Materials
- precut “feathers” made from construction paper of various colors
- paper plates (orange plates look great, or you can use white and have students color them any color they want)
- toilet paper rolls
- googly eyes
- small plastic or paper cups (3-ounce cups work great)
- construction paper scraps for beaks and wattles
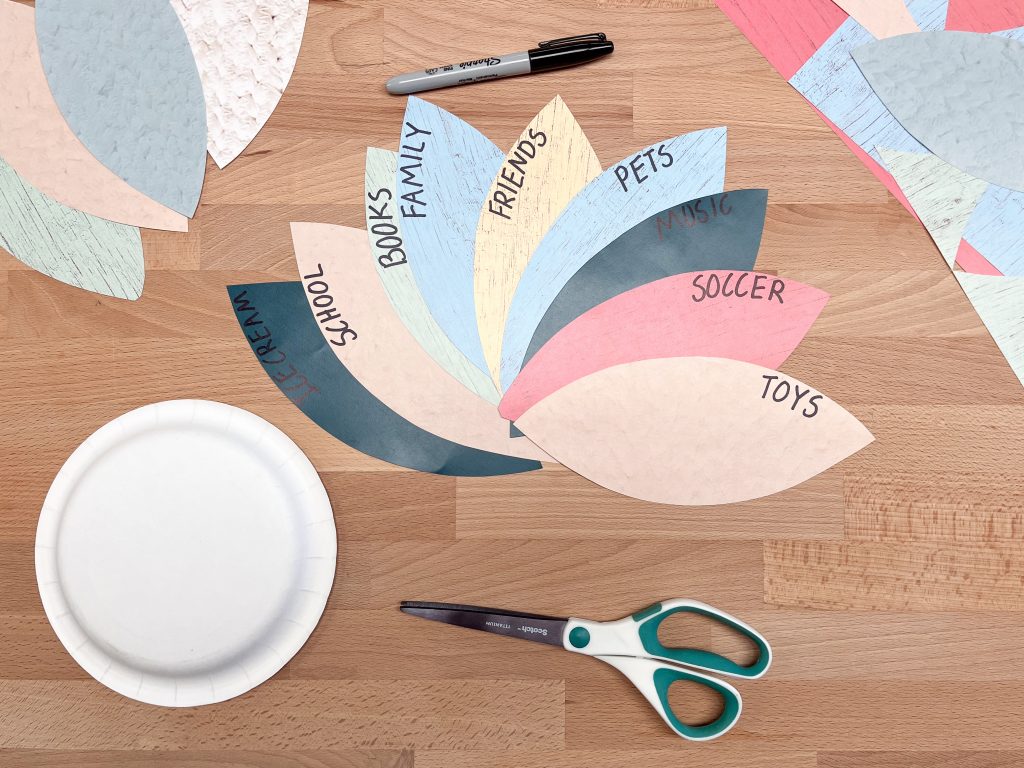
Procedure
- I always think it’s best to start an activity like this with a group discussion about what it means to be thankful and why we should be thankful for certain things and people in our lives. It’s surprising how many young students have never been asked to stop and reflect on this.
- Often, it helps to create a classroom list of all the suggestions. A list will help to get the wheels turning and help with spelling.
- Allow each student to choose nine feathers. On each feather they should write one thing that they are thankful for.
- Demonstrate how to attach the feathers to the “top” of a paper plate (the final turkey will have the bottom of the plate facing forward). Start with the top feather (in the 12:00 position). Glue works best, but a stapler could be used. Add two more feathers (in the 11:00 and 1:00 positions) so that the turkey looks even and balanced. Continue to add the remaining 6 feathers, taking care to leave the bottom third of the plate featherless.
- If necessary, color the toilet paper roll, and then glue it to the bottom of the plate. If you’re able to fit a stapler inside the toilet paper roll, a staple or two really helps to secure the two pieces together. The turkey should now be able to stand on its own.
Cut out a beak and wattle and, along with two googly eyes, glue everything in place. Add the cup to the turkey’s head for the final pièce de résistance. You can also make the hat out of construction paper if you’re feeling extra crafty.
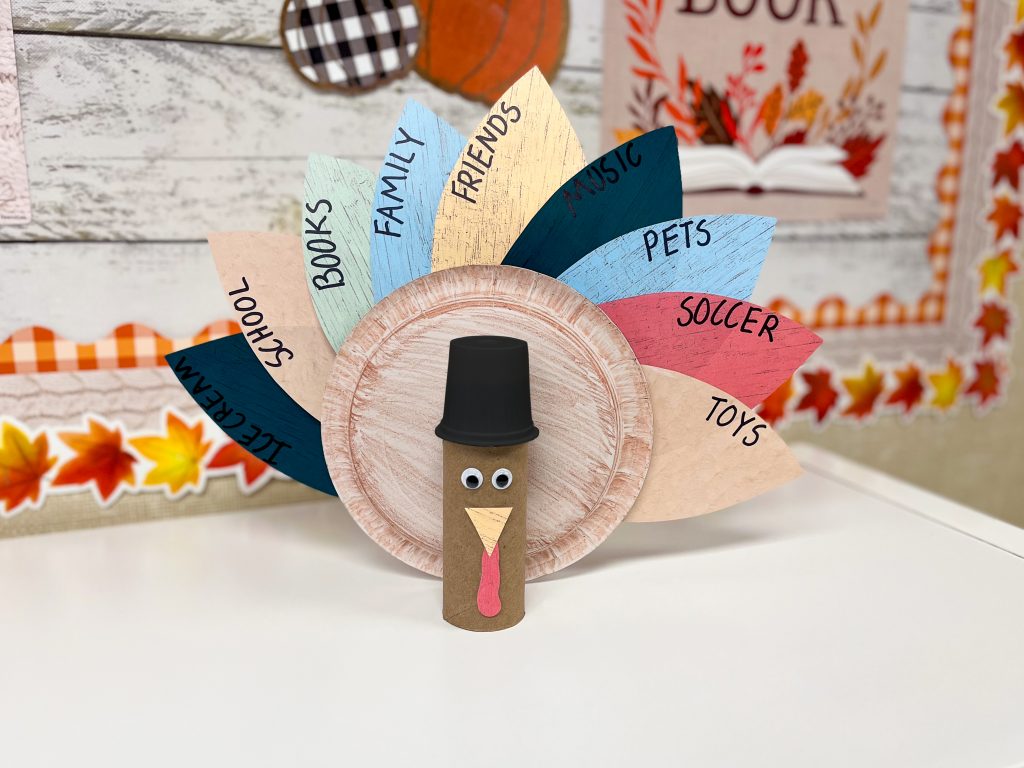
We have found that we sometimes need to place a little tape on the back of the turkey to keep it from leaping off our mantle, but attaching a weight inside the base of the toilet paper roll would more than likely produce similar results.
Happy crafting. We hope this activity generates some important conversations in your classroom and some fun “Giving Thanks” Turkeys for your students to share with their families.
Happy Thanksgiving.
Inspire Creativity in the Classroom with a Festive Halloween Spider Craft! 19 Oct 2021 1:08 PM (3 years ago)
Here is a simple craft that your students will absolutely love during spooky season. We’ve included a step-by-step guide with photos to enhance your crafting experience!
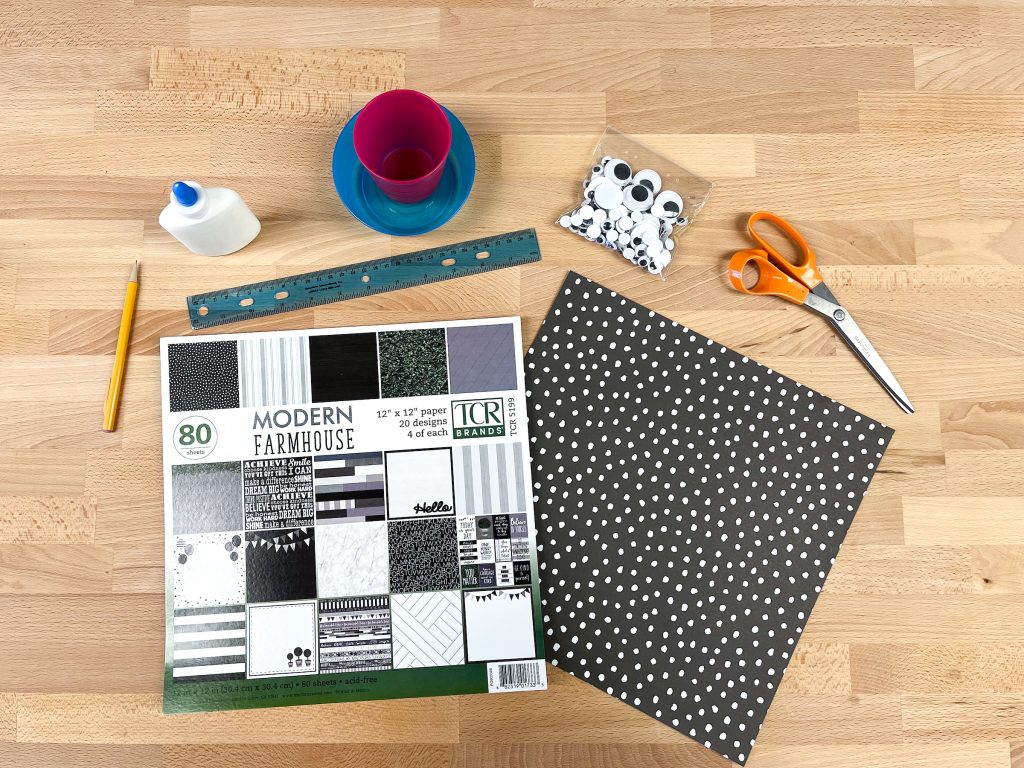
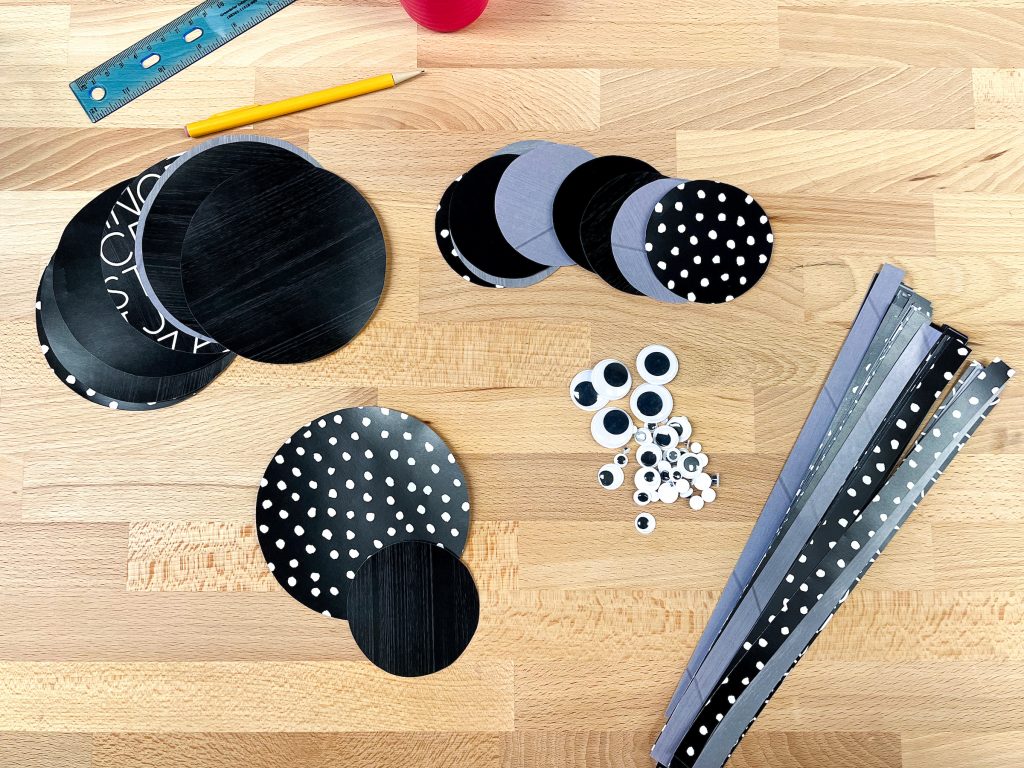
This craft only requires a few materials (shown below):
- Craft Paper – we used Modern Farmhouse Project Paper
- Googly Eyes
- Scissors
- Glue
- Pencil
- Ruler
- Objects for Tracing
Step 1:
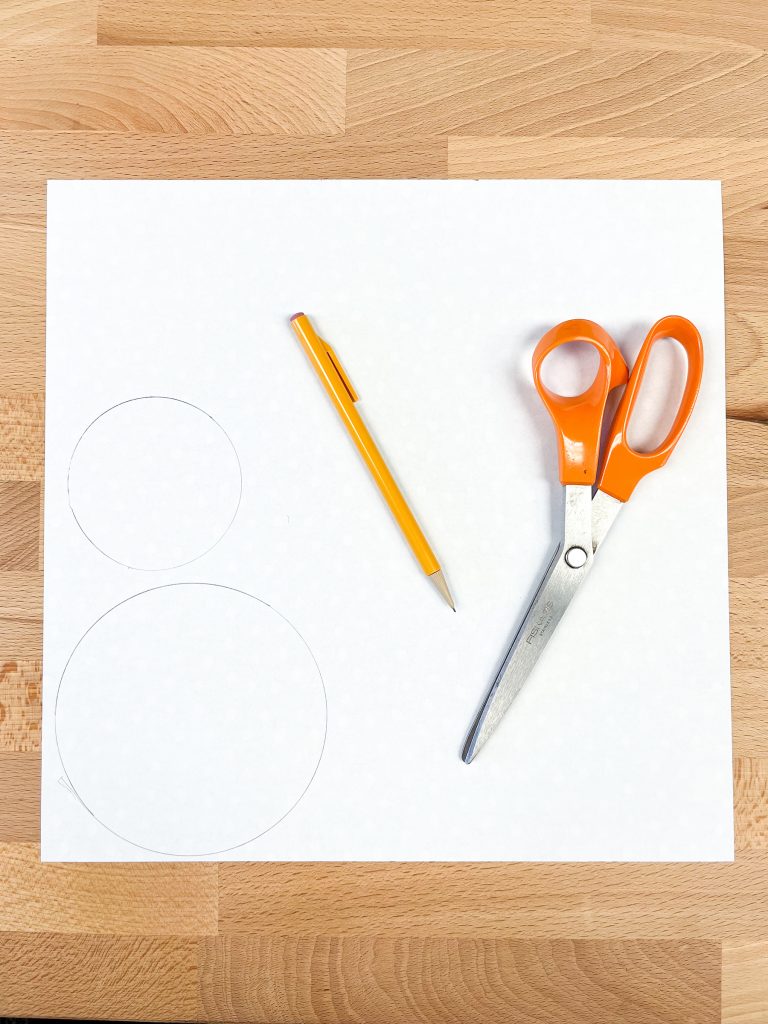
To start, take out a piece of craft paper. Flip it over and trace a 5-inch circle and a 3-inch circle. The 5-inch circle will be the spider’s body, while the 3-inch circle will be the spider’s head. When finished tracing, cut out the two circles!
Step 2:
Next, take your craft paper and cut out eight half-inch strips (pictured below on the right). Now, you have all of the pieces you need to craft your spider!
Step 3:
Take the eight strips of project paper and accordion fold each one to make the spider’s legs.
Once the strips are accordion folded, glue the legs underneath the spider’s body.
Glue the spider’s head onto the top of its body.
Then, take some googly eyes and glue them onto the spider’s head. You can glue on as many eyes as you’d like!
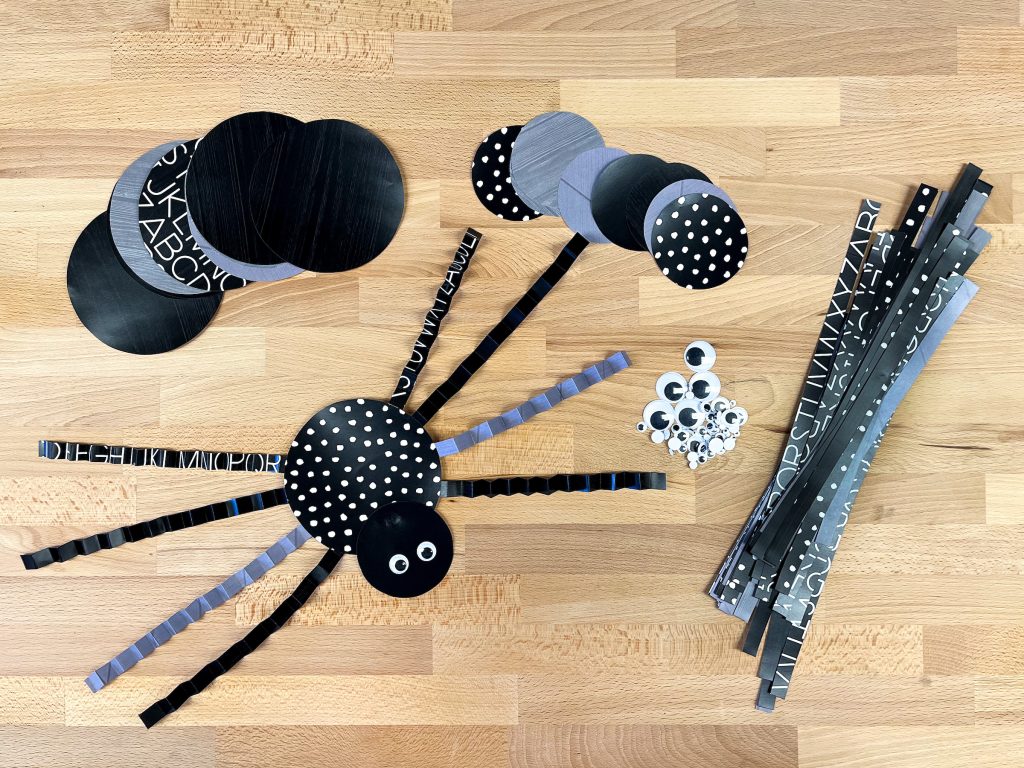
Now, you have your spider craft! Simple as that. Feel free to make your spider as funky as you’d like! Encourage your students to be creative with this craft.
For more in-depth instruction, we encourage you to check out our Spider Craft Tutorial on TikTok.
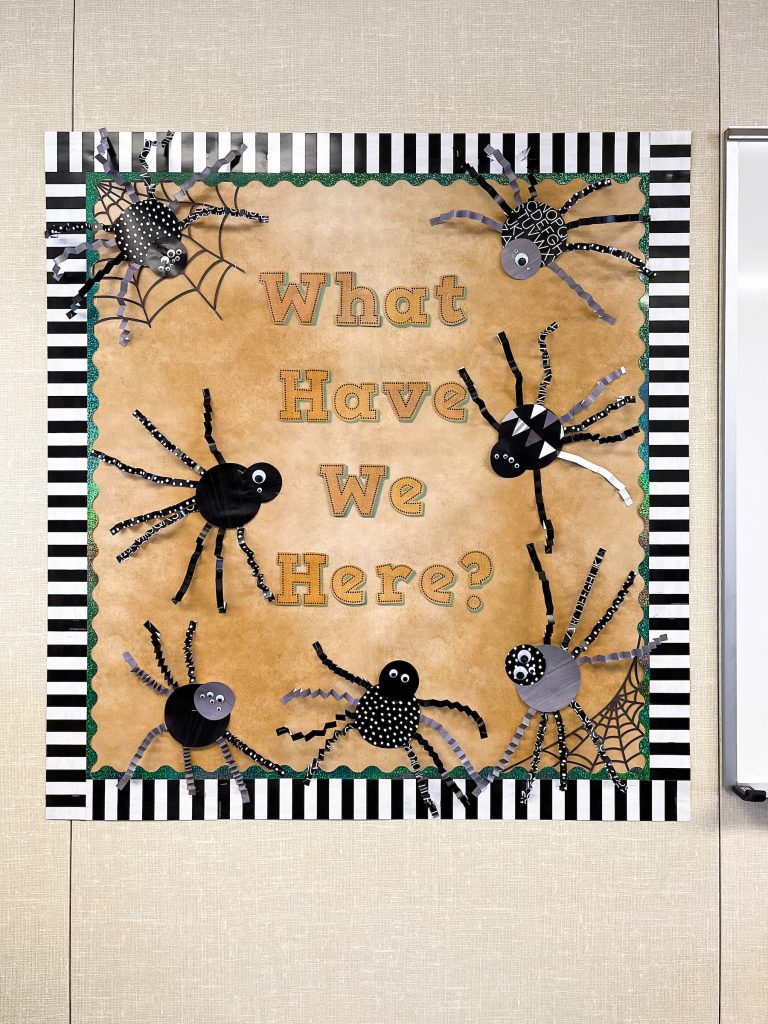
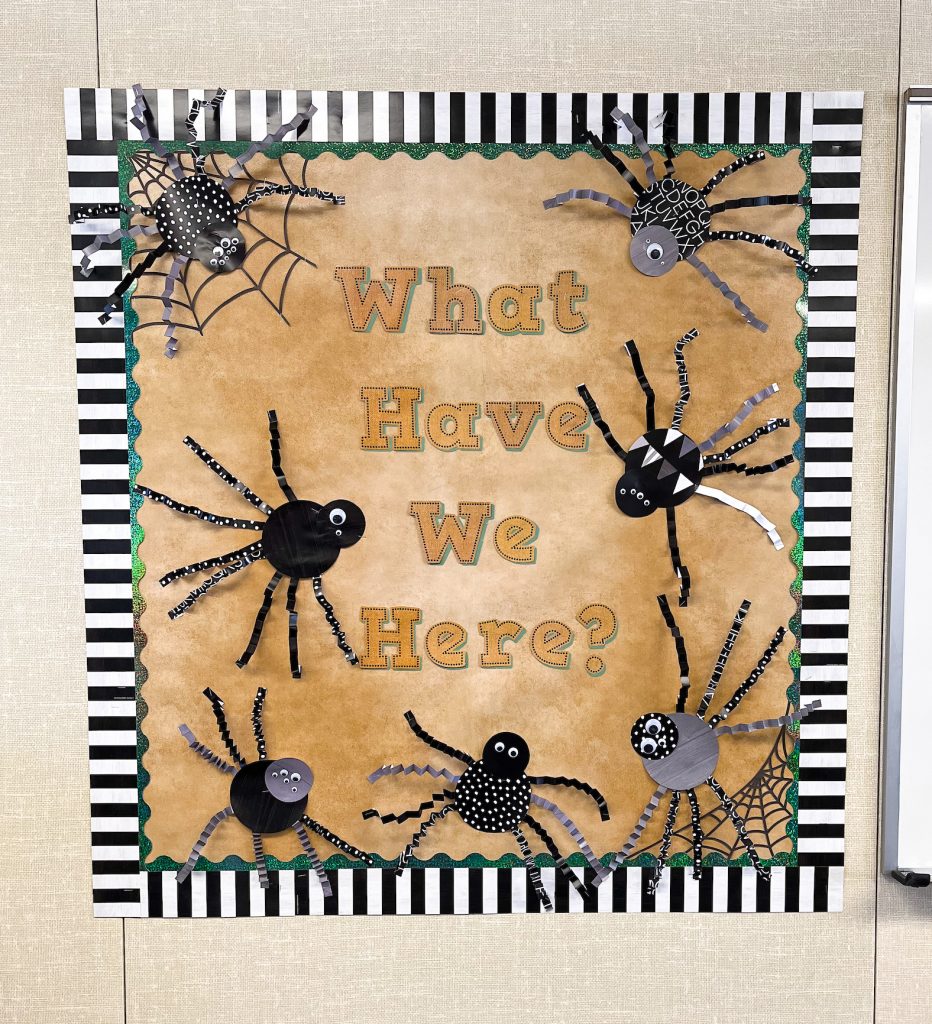
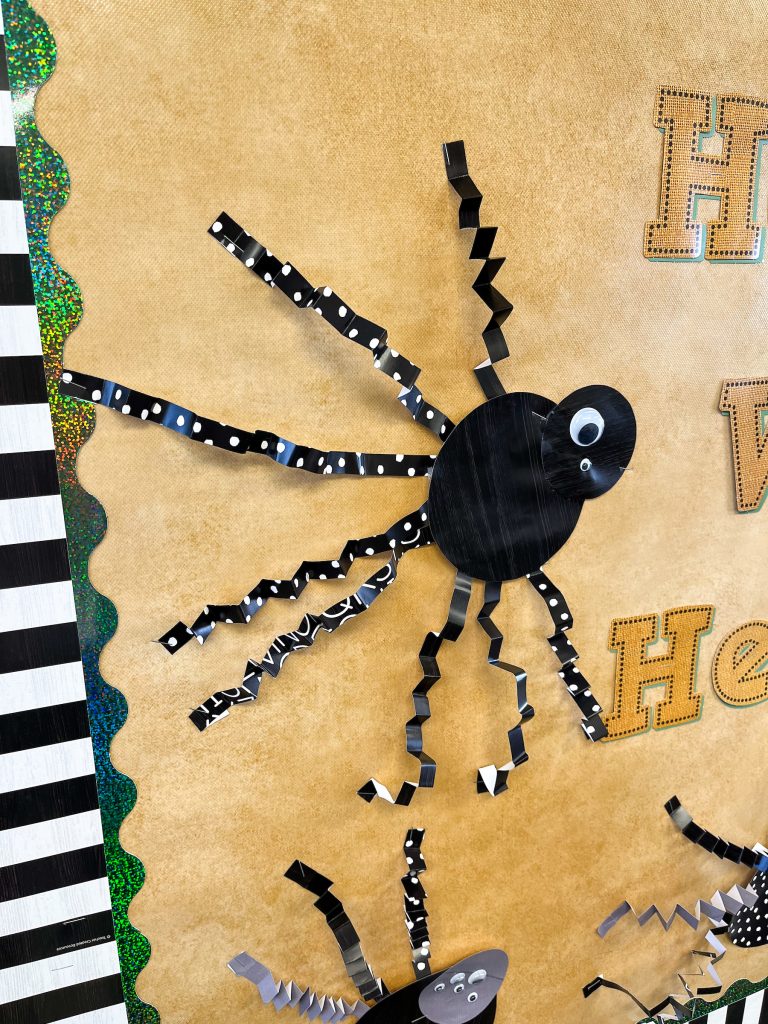
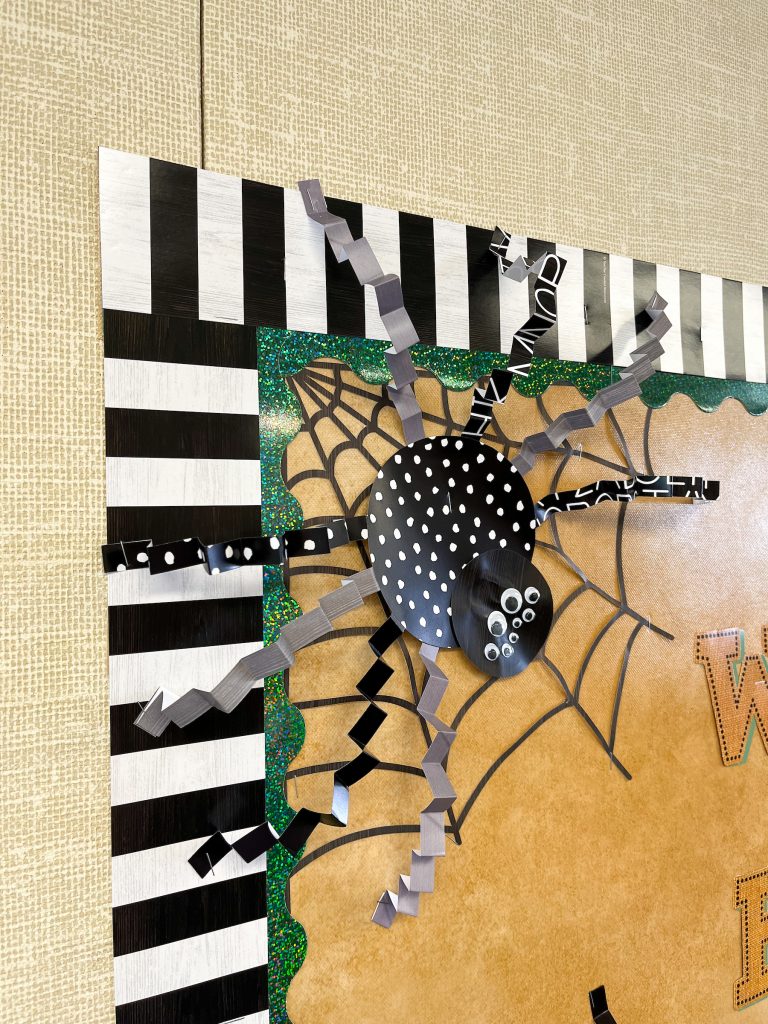
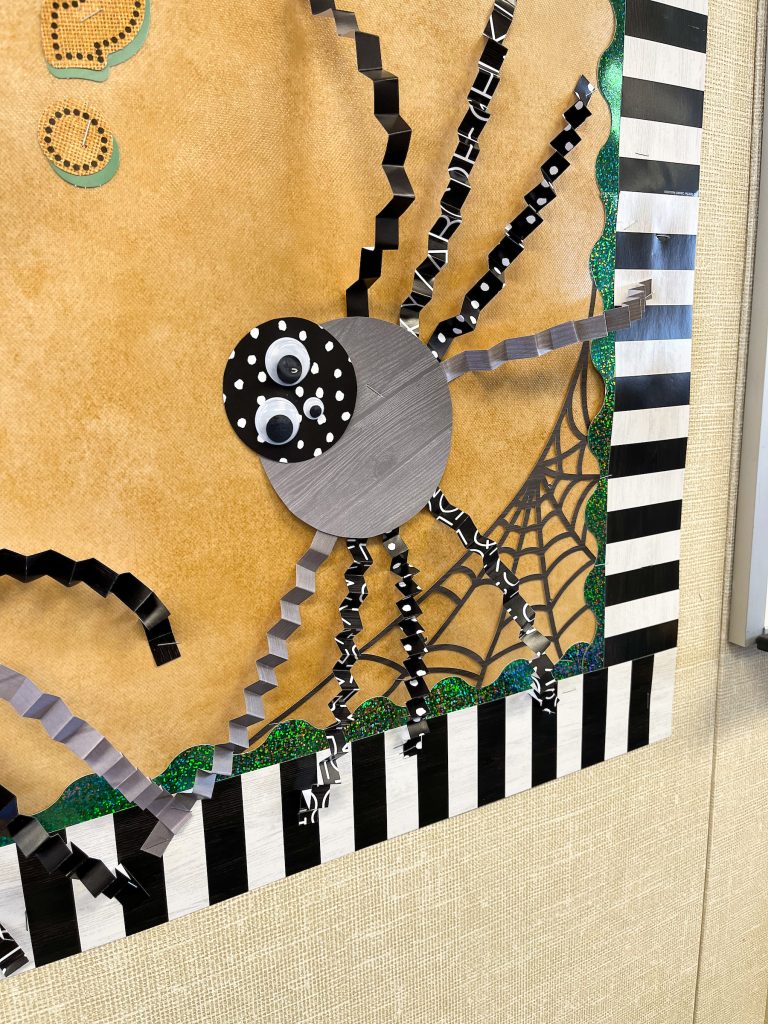
Put your students’ creativity on display! For the bulletin board shown below, we used archment Better Than Paper Bulletin Board Roll, Modern Farmhouse Black Stripes Straight Border Trim, and Green Sparkle Scalloped Border Trim.
Lessons in Empathy and Proactivity: Two Great Summer Reads for Upper Elementary Students and Middle Schoolers 1 Jul 2021 7:57 AM (3 years ago)

For those of us parenting through these uncertain times, one thing has felt absolutely certain: our children have not been getting all the education they have needed or would normally receive. And now summer is here.
Our children need to be outdoors running, swimming, reestablishing connections to others and to the world that once was. But that learning loss? How can we overcome that? What can we do in these precious weeks before school begins in the fall and life no doubt gets a little uncertain again?
The answers can’t always be found in electronic devices. The last things many kids need is more tablet time. Fortunately, a new answer doesn’t need to be found. It’s been here all along.
Novels are still a thing. Even with all the shining, flashing, beeping competition for their attention, many children still read and love books. Teachers, librarians, and parents all deserve credit for this. And so do authors. The first two decades of this young century have seen an explosion of children’s and young-adult (YA) literature worthy of your young readers’ attention.
These contemporary novels feature relatable characters, appealing genres, and engaging storylines. Many are as well written as the 20th century classics kids encounter in school, but these newer novels are of higher interest to today’s young readers.
Two examples of 21st century novels your child will likely love are Out of My Mind and The City of Ember. Both are highly rated and recommended by teachers and parents. Each overwhelmingly receives 5-star customer reviews on book-selling websites.
Out of My Mind by Sharon M. Draper
Empathy is the ability to understand others’ emotions, and it is a skill that is gaining focus in our children’s education. And like many skills, the past year has not given our children enough of a chance to interact and develop in this area. Out of My Mind is a bigtime empathy builder.
The novel’s narrator and main character is Melody, an extraordinarily bright and perceptive 11-year-old who also happens to have cerebral palsy. Her condition keeps her from walking, talking, and controlling her movements. She has a photographic memory and so many ideas to share, but she cannot easily communicate. She cannot get her thoughts out of her mind. Others can’t understand her, and they make assumptions about who she is. To hear her tell it, this really drives her out of her mind.
But then two things happen: Melodyâ€ s school begins integrating special-needs students such as herself with the able-bodied students, and Melody gets a special computer that gives her a voice. The novel offers her perspective on how others treat her and how they struggle to transition from who they thought she was to who she really is.
Three Reasons Why Your Young Reader Might Love This Book
- The main character is someone worth rooting for. Readers get to know her, they get to understand her challenges, and they want her to succeed.
- Young readers may respond to the concept of having ideas that they can’t yet express and abilities that they aren’t yet able to show.
- The school-age children are very authentic. They talk and act like actual fifth graders.
One Big Reason Why You Might Love that Your Young Reader Is Reading this Book
- This book is full of social-emotional lessons. It can inspire great conversations about what we can learn about ourselves, how others may see us differently than we see ourselves, and how we can approach life’s challenges and learn from life’s setbacks.
The City of Ember by Jeanne DuPrau
Proactivity is the ability to diagnose an issue and solve it before it becomes a problem. Itâ€ s self-initiated. No one tells you that something needs to be done: you figure it out yourself and you take the necessary steps. This is what the child characters in The City of Ember do.
The city of Ember was built long ago by the Builders. It is a city lit entirely by electricity; and its storerooms are stocked with all the vitamins, food, and supplies that its citizens need to survive. But lately, the ancient generator has been failing and supplies are running low. Everyone is terrified when the lights go out and the city is plunged into darkness, but they’ve never known a different life. What could even be done?
Lina and Doon know in their hearts that something is not right and that some other life must be out there. Fate gives them a clue and they follow it with all of their energy, intelligence, and intuition in an effort to save themselves and everyone else from a dark future.
Two Reasons Why Your Young Reader Might Love This Book
- It is a story of action, adventure, and mystery. Though it’s not a short novel, the writing is exciting and fast-paced.
- Even though the story is fantastical and fictional, the two main characters are realistic young people who recognize a problem and look for a solution. It is empowering in that the children believe in themselves and work toward solving the mysteries of their universe, even though they donâ€
 t always make the right choices or execute their plan as they intend to.
Three Reasons Why You Might Love that Your Young Reader Is Reading this Book
- The young characters in this book are not superheroes. They do not have powers. They are just blessed with curiosity, energy, and awareness: traits that actual children in the real world can have.
- The adults in this novel are not all mindless or villainous (though some are). For reasons integral to the plot, everyone who lives in the city of Ember has very little understanding of how nature and the world works. This levels the playing field in a way that is more realistic than most novels that feature children saving the day.
- This novel can inspire conversations about environmental consciousness, doing what’s right for the common good, and why ignoring problems can have long-term consequences.
Discussing These Novels With Your Young Reader
Finding a book your child will love and actually enjoy reading is a big win. But don’t stop there. Discuss the book with your child. Check in with them to see how much they are getting from the novel. If possible, do this in a way that does not feel like homework. It should feel like a conversation, not an assignment.
But wait, does that mean you have to read the book, too? Who has time for that? And how can you both be on the same page, literally or figuratively?
The good news is that there are parent guides out there for each of these novels. These guides will keep you in the loop and give you the questions to ask and ideas to explore. Our Novels at Home series features guides for Discussing Out of My Mind with Your Young Reader and Discussing The City of Ember with Your Young Reader.
And how about other novels? We’ve got you covered there, too. Check out 5 Parent Hacks for Discussing a Novel You Haven’t Read.
5 Parent Hacks for Discussing a Novel You Haven’t Read 24 Jun 2021 7:04 AM (3 years ago)

Your child is reading a novel. That is a good thing! But you might actually like to know a bit more about the subject: What lessons or ideas does the novel have to offer? What is my child taking from it? How well is my child understanding it? Why this book?
If you are like most parents, getting satisfying answers to these questions can be challenging. It can feel impossible if the novel is one you’ve never read.
Your next thought may be, “I will read the book myself!” After all, reading fiction is as much about connection as it is comprehension. “Sharing is caring” is an adage that applies perfectly to literature. Talking about a book can open a child’s eyes to ideas that come from outside themselves while allowing them to give voice to the thoughts that come from within.
But you’ve got so many things pulling your attention in so many directions, and sitting down to read a 256-page novel is not realistically going to happen any time soon. Besides, your kid is into this book right now, not next week.
So how can you talk to your young reader about a book you’ve never read? How can you be prepared in the moment to discuss something you really don’t know anything about?
Here are some approaches, ideas, and questions to try.
- Talk, don’t test. Have a conversation.
Keep it informal. No one should be reminded of schoolwork while this is happening. This will not be on the test. We’re just talking here!
- Ask specific questions. And then ask specific follow-up questions.
Avoid questions that are too general. “What do you think of the book?” is probably going to get you an “It’s good” response. Ask “What’s it about?” and you are not likely to get much analysis or introspection.
But how can you ask specific questions about an unfamiliar novel? That’s what #3–5 on this list are for. Use those prompts to guide your child’s focus and increase your chances of having an enlightening conversation.
Choose the questions that make most sense to you. Adjust the wording as needed to make them comfortable and authentic. And be prepared to follow up your child’s answers with something along the lines of “Give me an example of that” or “I think I understand, but tell me more.” Don’t let the conversational momentum be stalled by a one-word answer.
- Ask questions about characters. Answers about plot will tag along for the ride.
In general, children’s and YA (Young Adult) literature is very character-driven. Adults may read novels about protagonists who are completely unlike them, but this is usually not the case for children. The authors of children’s and YA novels want their young readers to identify with the main character(s).
So ask questions about the main character(s):
- Who is the main character? Why are they in the world of this story?
- What is something memorable that happens to the main character? Why was that memorable?
- What is something memorable that the main character does? Why was that memorable?
- Does the main character change at all as the story goes along? How?
And then include a few questions about the minor characters:
- Which character most helps the main character? How?
- Which character most hurts the main character? How?
- Were there any characters who you felt one way about in the beginning of the story and then felt differently about by the end of the story?
- Ask questions about choices. Characters make choices, and authors do, too.
When we talk to our children about choices we can make in how we treat others, how we feel about ourselves, and just about anything else, the situations are often hypothetical and the concepts are often abstract. Lean on literature to explore these ideas in more concrete ways. Discuss the choices characters make and the consequences of those choices.
While you’re at it, work in some thoughts about the choices the author makes. Artists make art that makes us feel stuff, right? How do they do that? Being aware of the author’s craft can help make your children become better readers, writers, and thinkers.
Ask questions about the characters’ choices:
- What was one “bad” choice that a character made in this story? Why do you think they made that choice? Did they end up regretting that choice? (You may want to also talk about the word “bad.” Could a more accurate word be used to describe the choice that was made?)
- What was one “good” choice a character made in the story? What was a different choice they could have made? What might have happened if they made that choice? (You may want to also talk about the word “good.” Could a more accurate word be used to describe the choice that was made?)
Ask questions about the author’s choices:
- Where does the story mostly take place? Why does it need to take place there?
- Do the chapters end in a way that makes you want to keep reading? Why do you think that is?
- What are one or two really memorable scenes in this book? Why are those scenes so memorable?
- Ask questions about empathy and experience.
We don’t just read one book in our lives or see one film. We experience all kinds of art, and the lessons we take from each artwork build upon one another. The same goes with our understanding of other people. Literature gives us a valuable perspective from which to observe characters’ actions and choices and to try to understand what they do and why they’ve done it.
- Why do you think people like this book?
- Would you like being a character in the world of this book? Why or why not?
- One year from now, what do you think you will most remember about this book? Why will that be the thing that most sticks with you?
Why Novels? Why Now?
The past 16 months have been tough on our children and on us parents. As we enter the second summer of these uncertain times, there are a lot of us who are worried that our children have suffered some amount of learning loss. But we don’t all feel prepared or qualified to fill in the gaps, and we don’t know where to begin. Reading novels at home this summer and discussing them is an organic way to infuse learning into an activity many children will do on their own.
The reason this works is because there are so many fantastic novels available to children in the upper elementary grades and middle school. These contemporary novels feature relatable characters, appealing genres, and engaging storylines. Many are as well written as the 20th century classics kids encounter in school, but these newer novels are of higher interest to today’s young readers.
Two great examples of contemporary novels your child may enjoy are Out of My Mind by Sharon M. Draper and The City of Ember by Jeanne DuPrau. For guides to discussing these novels with your children, check out our Novels at Home series: Discussing Out of My Mind with Your Young Reader and Discussing The City of Ember with Your Young Reader. These guides will keep you in the loop and give you the questions to ask and ideas to explore.
Teacher Appreciation Giveaway! 4 May 2021 11:00 AM (3 years ago)

Happy National Teacher Day! To help celebrate Teacher Appreciation Week, we want to thank all you hard-working teachers out there who have persevered through a challenging, life-altering year of teaching!
We’re giving away a $50 gift card to 5 lucky teachers. Just head over to our INSTAGRAM GIVEAWAY POST, like the post, follow us (if you’re not already), and comment which of our two newest décor themes is your favorite!
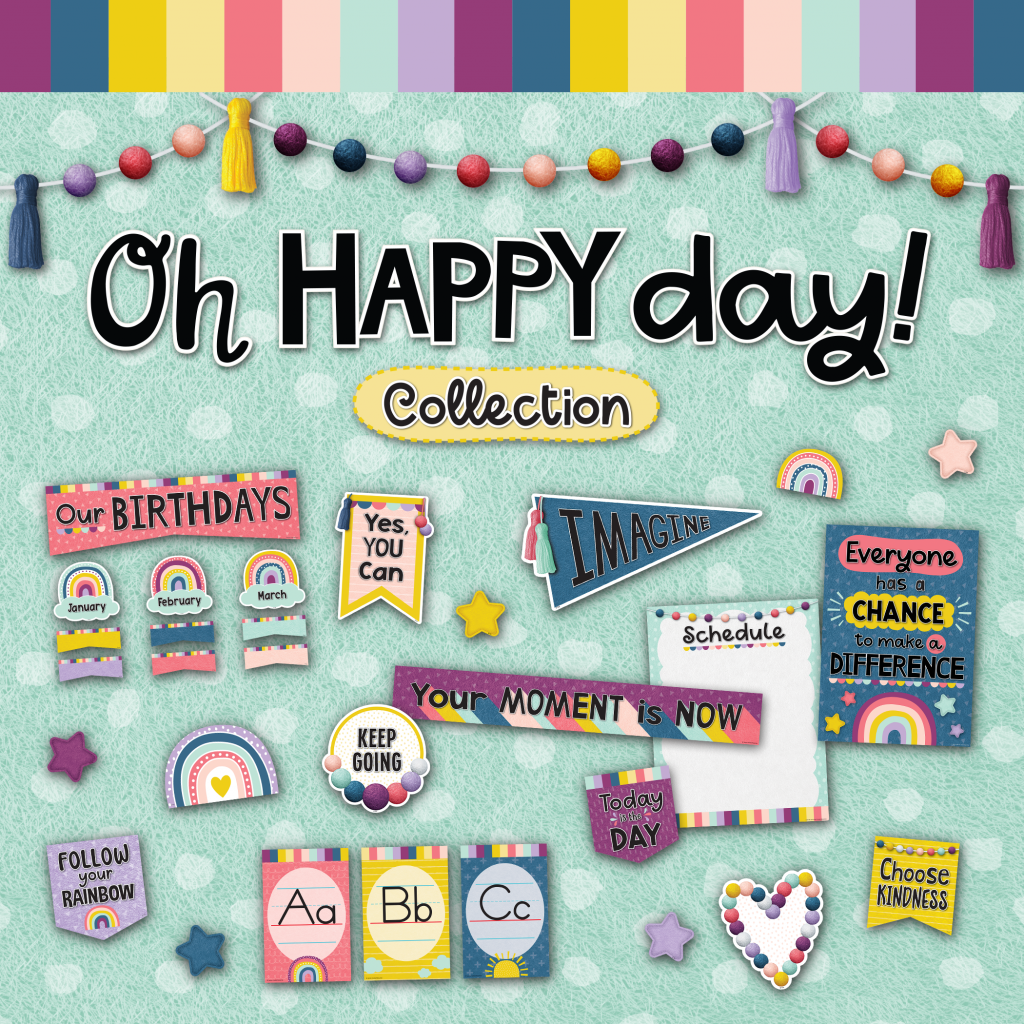
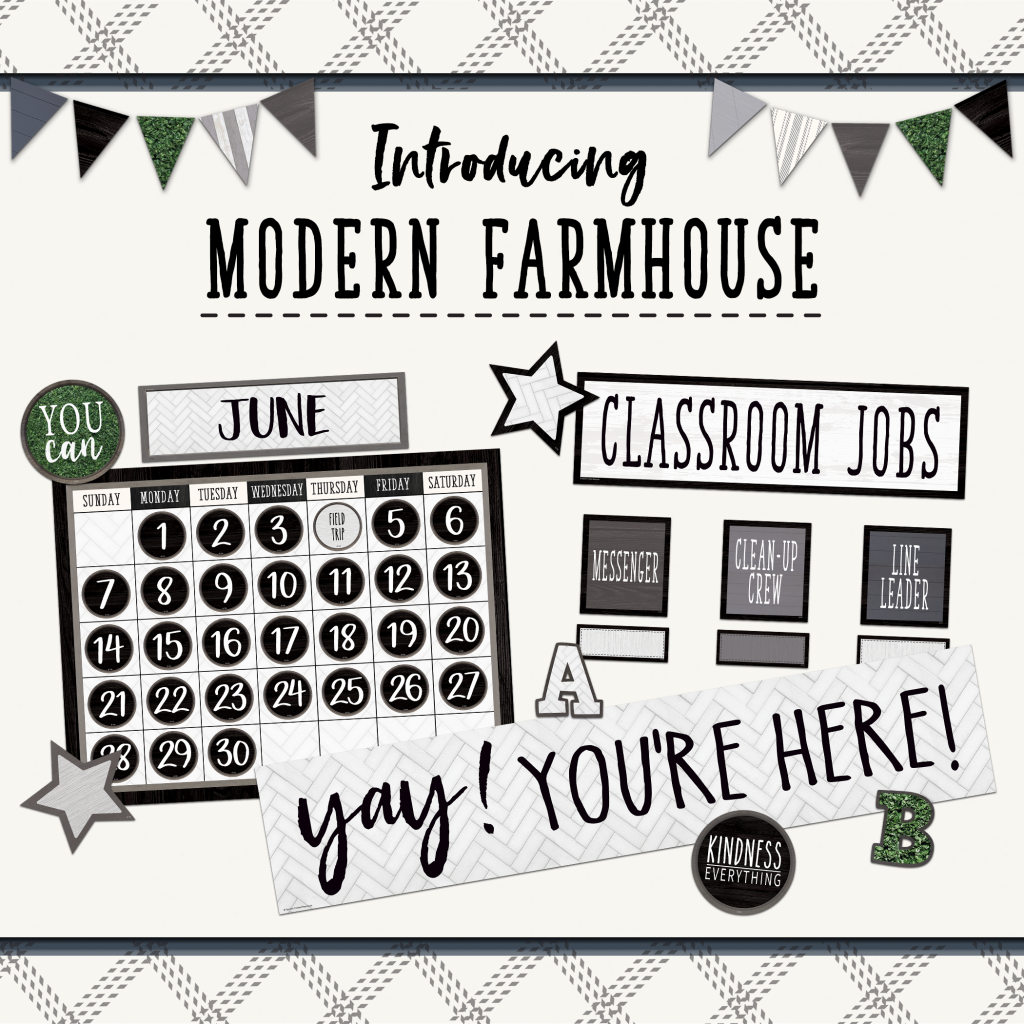
Contest ends Friday (5/7/21 11:59 PM PDT). Winners will be announced Monday. Good Luck!
Easy Easter Paper Crafts 26 Mar 2021 12:42 PM (4 years ago)
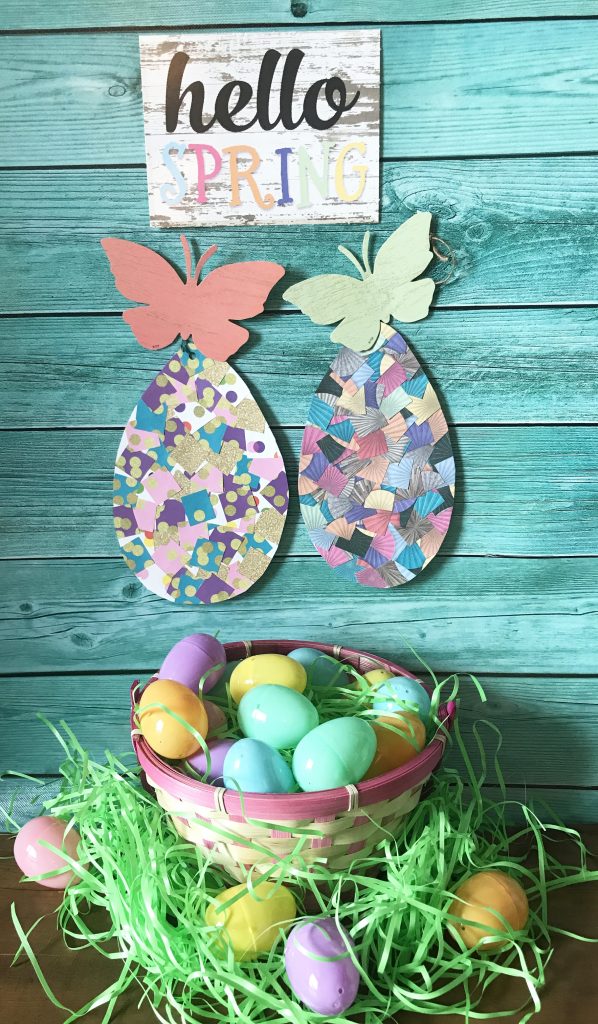
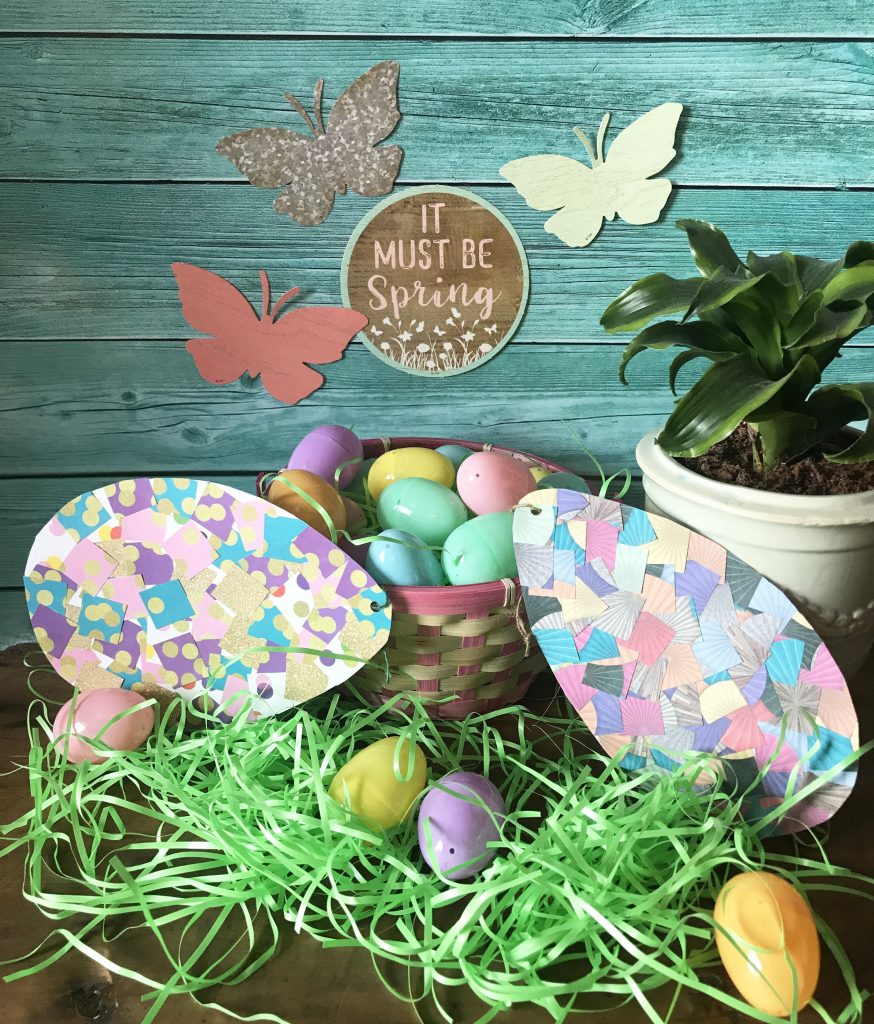
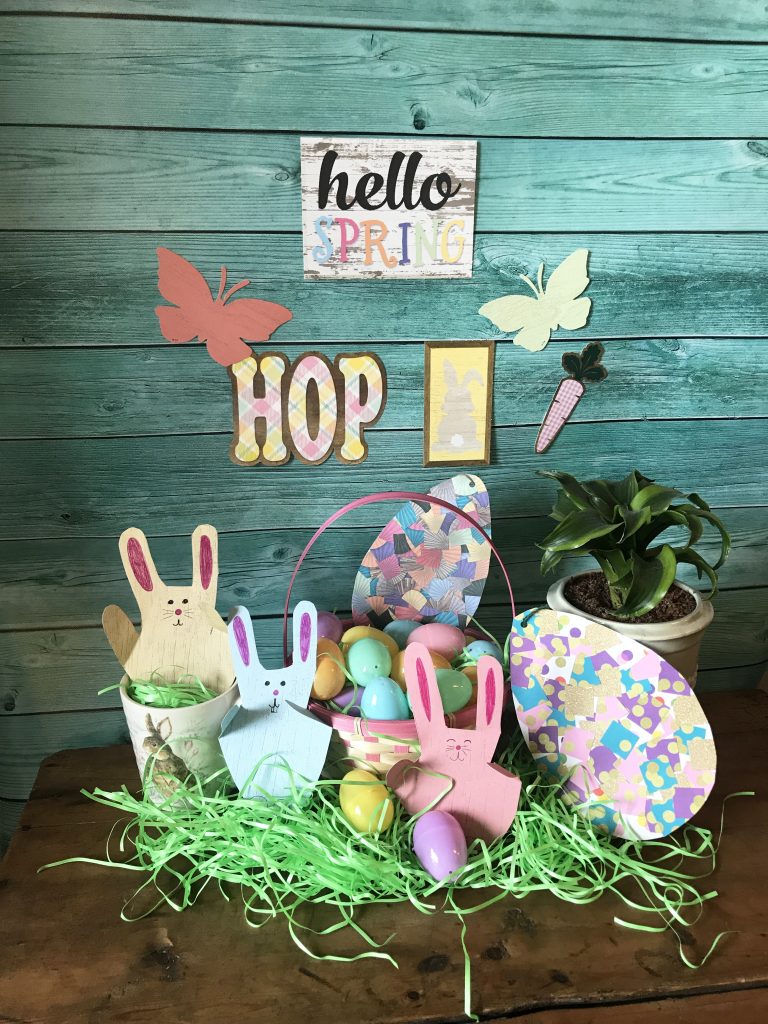
Here are two easy Easter crafts you can do with your kiddos using materials that you most likely already have. We’ve included directions for handprint bunnies and mosaic eggs.
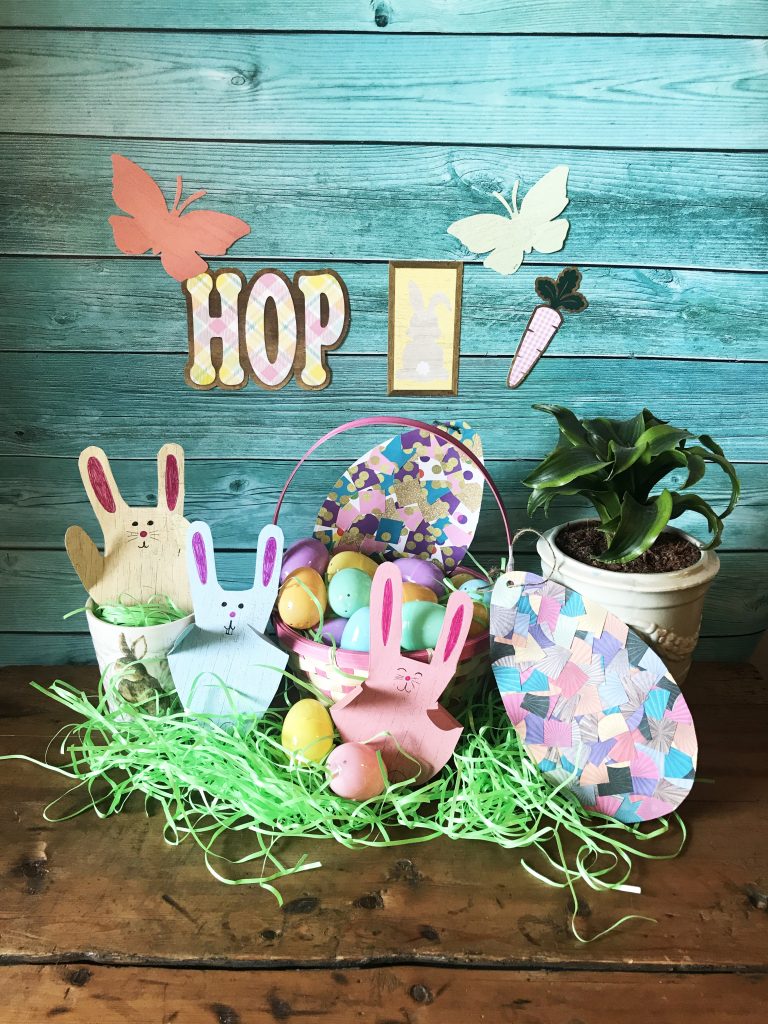
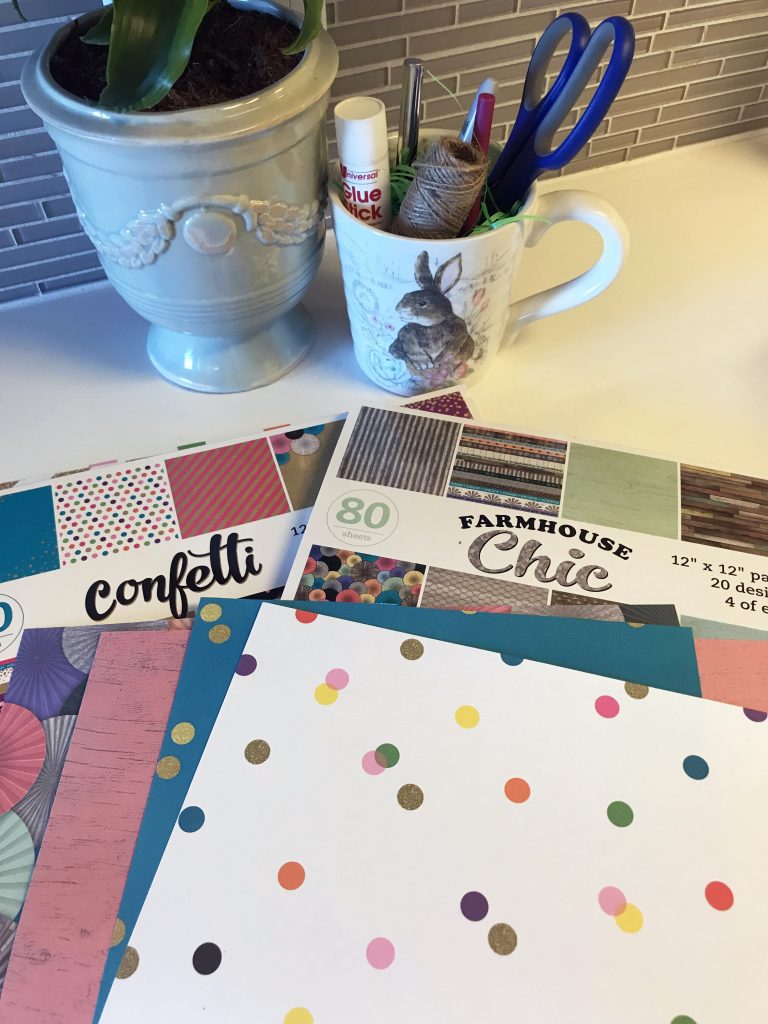
You’ll need just a few materials for each craft:
- construction paper or craft paper
- scissors
- glue stick
- pencil, pen, and marker
- hole punch and string (optional)
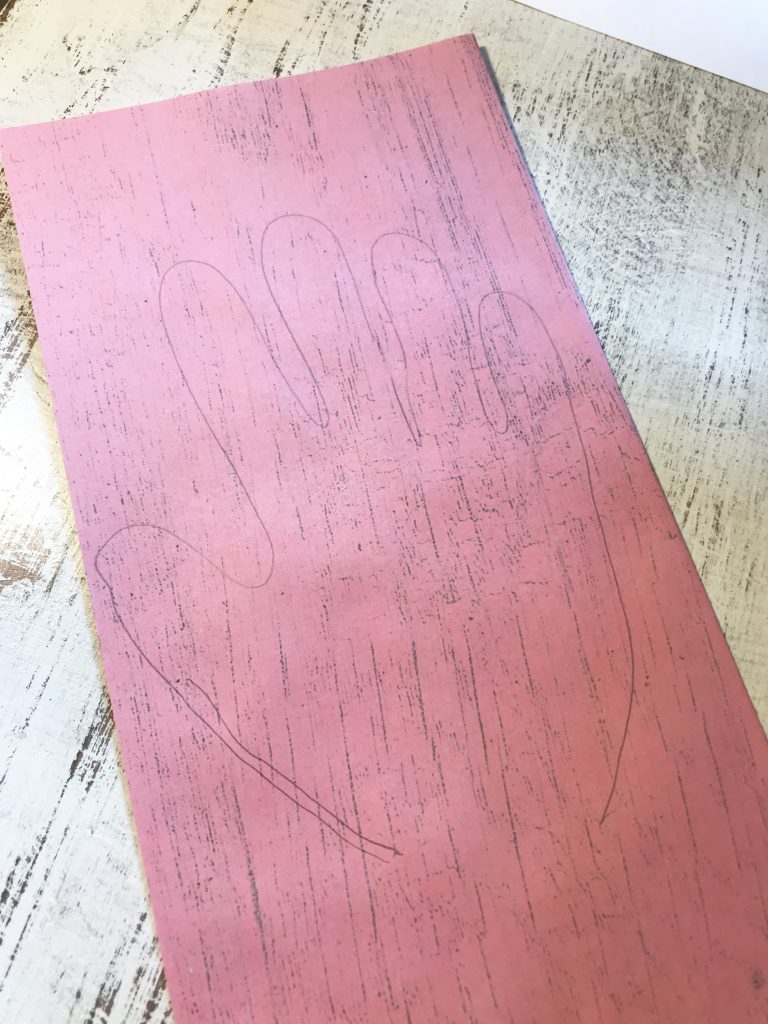
We got the idea for this cute handprint bunny activity from the One Little Project blog. To make the bunnies, start by tracing your hand on the paper. (Note, if you’re using craft paper, you may need to fold the paper in half and glue it together if the design is only on one side.)
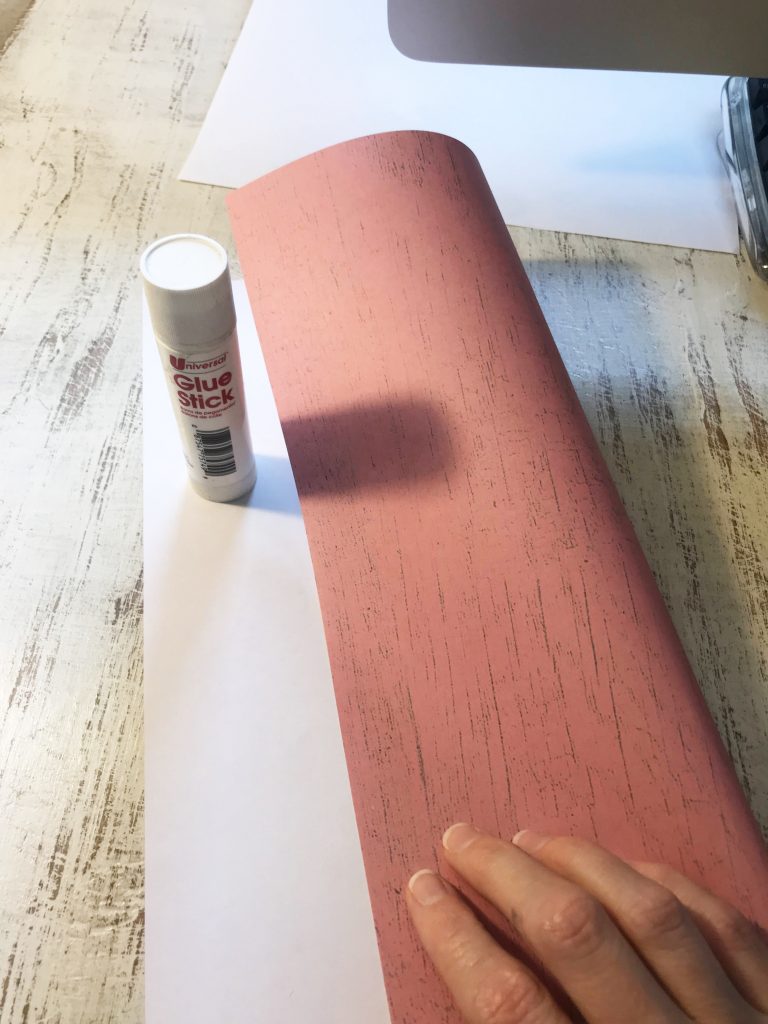
Tip: Trace your fingers wider than they are; otherwise the ears and paws of the bunnies will be too skinny.
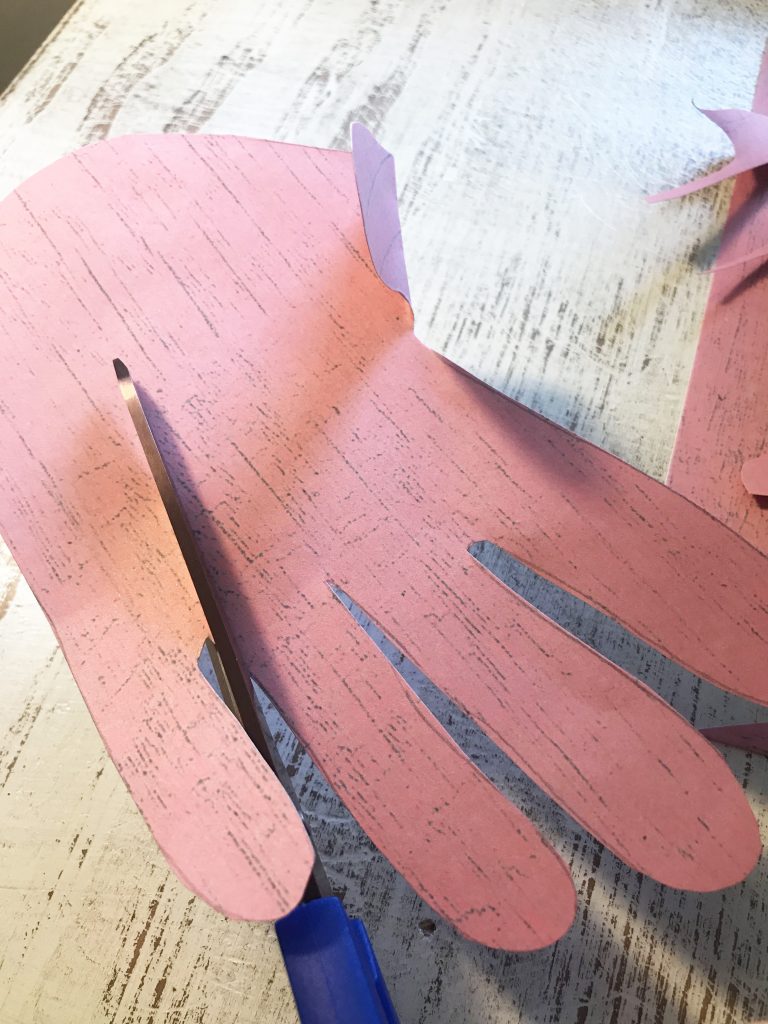
Cut out the handprint. Make a deeper cut between the pinky and ring finger so the space lines up with the space in between the thumb and index finger:
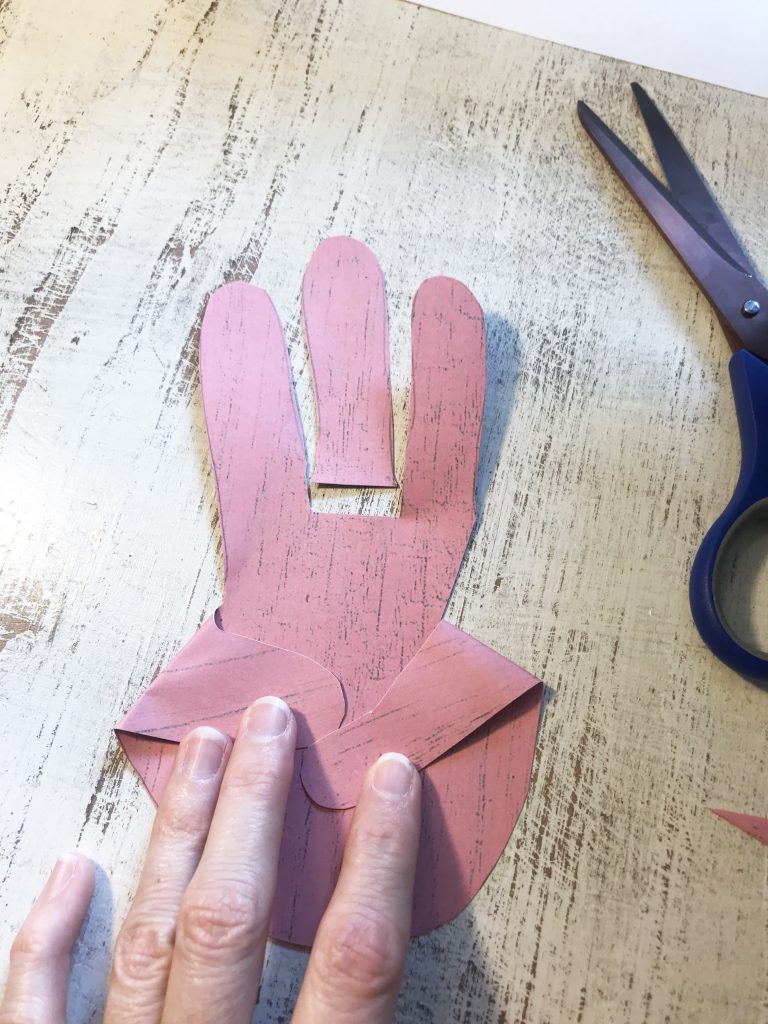
You may need to cut the other spaces between fingers a bit so they line up with other. Then fold the thumb and pinky fingers down to create the rabbit’s “arms.” Then cut off the middle finger so you’re left with two bunny “ears”:
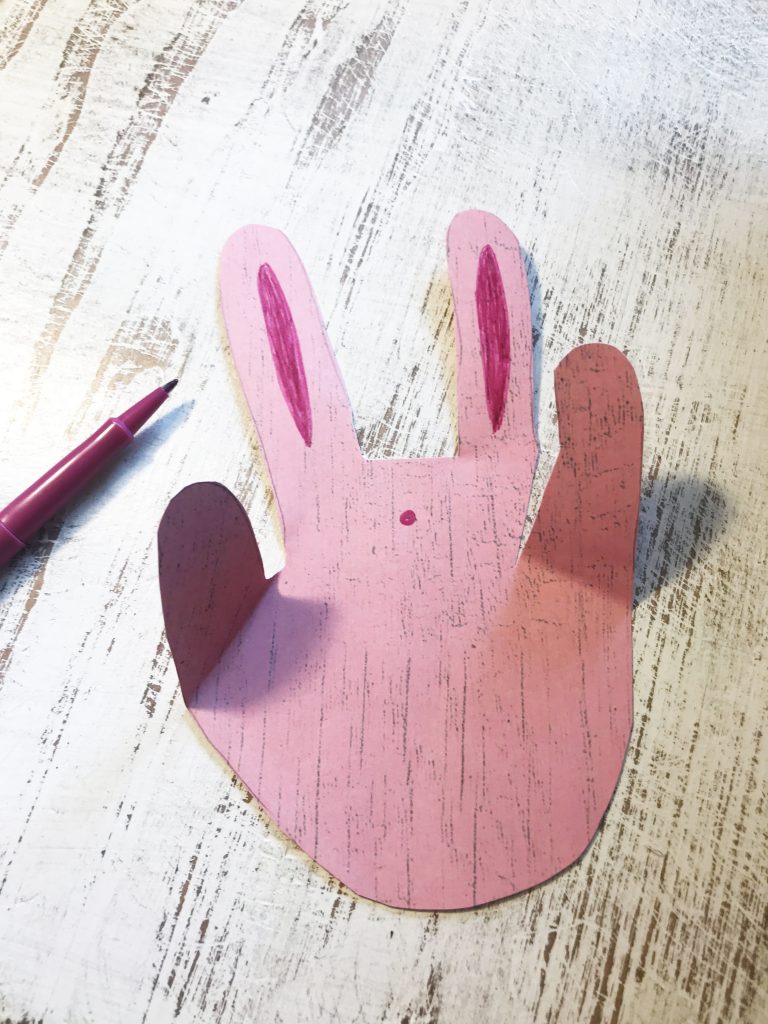
Using a marker, draw the nose and insides of ears:
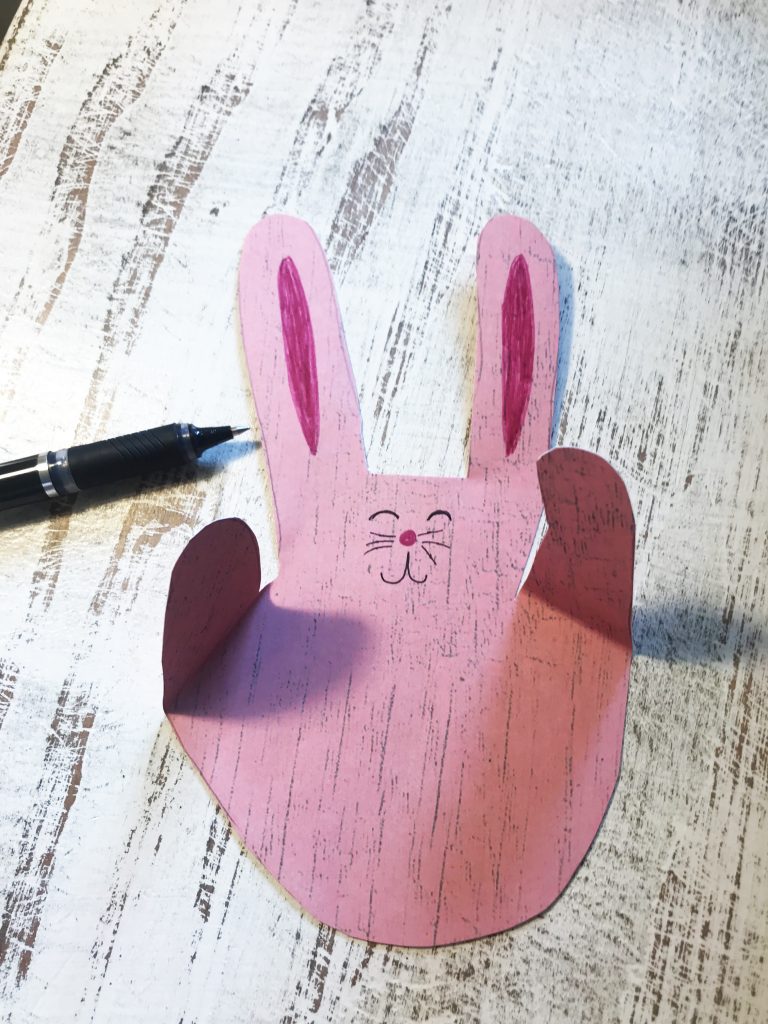
Next, use a dark pen to draw in the eyes, whiskers, and mouth:
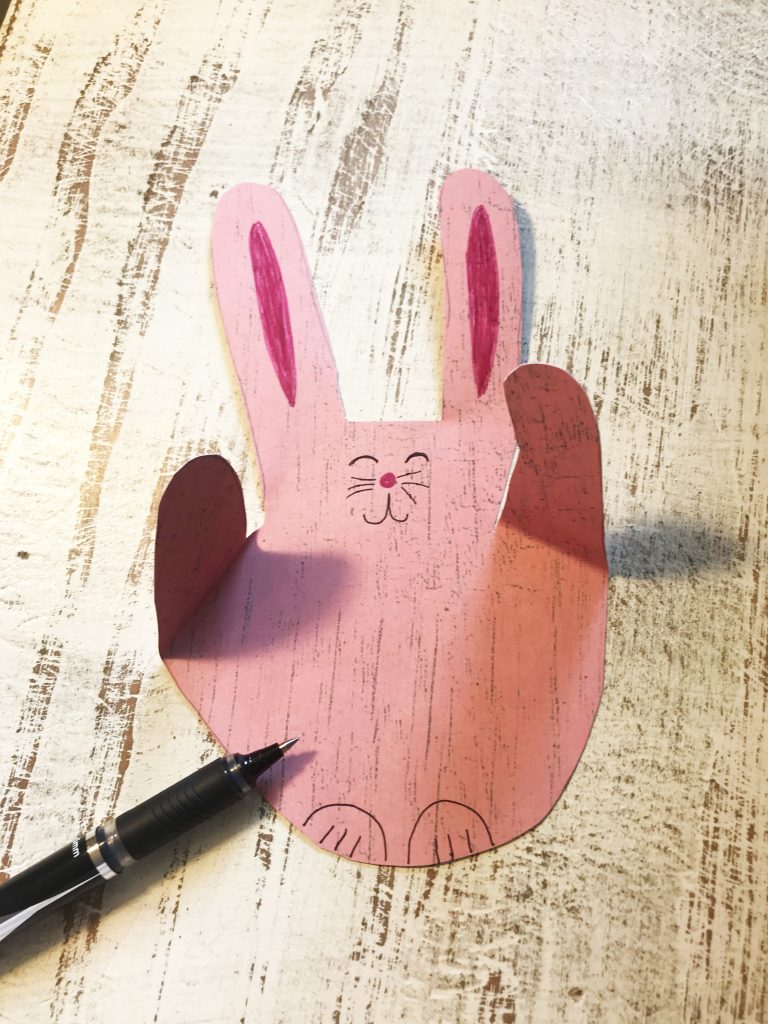
Finally, use the pen to draw “feet”:
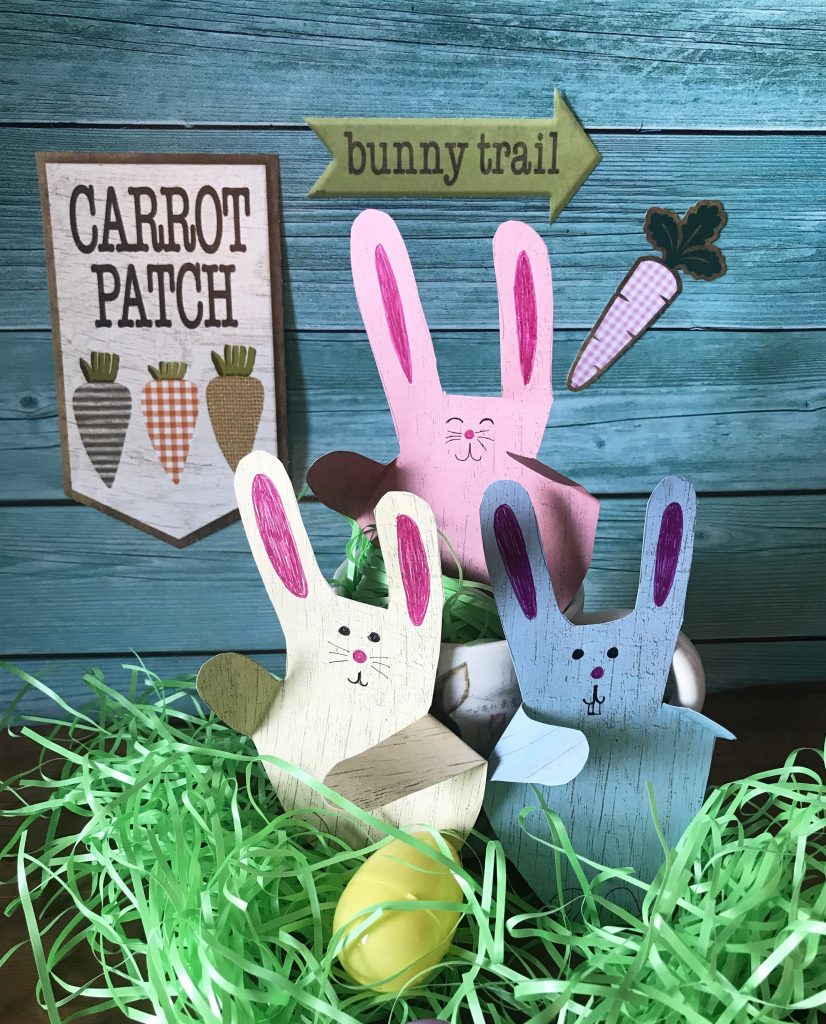
For the mosaic eggs, draw an egg shape on paper and cut it out. Also cut small squares of construction paper or craft paper.
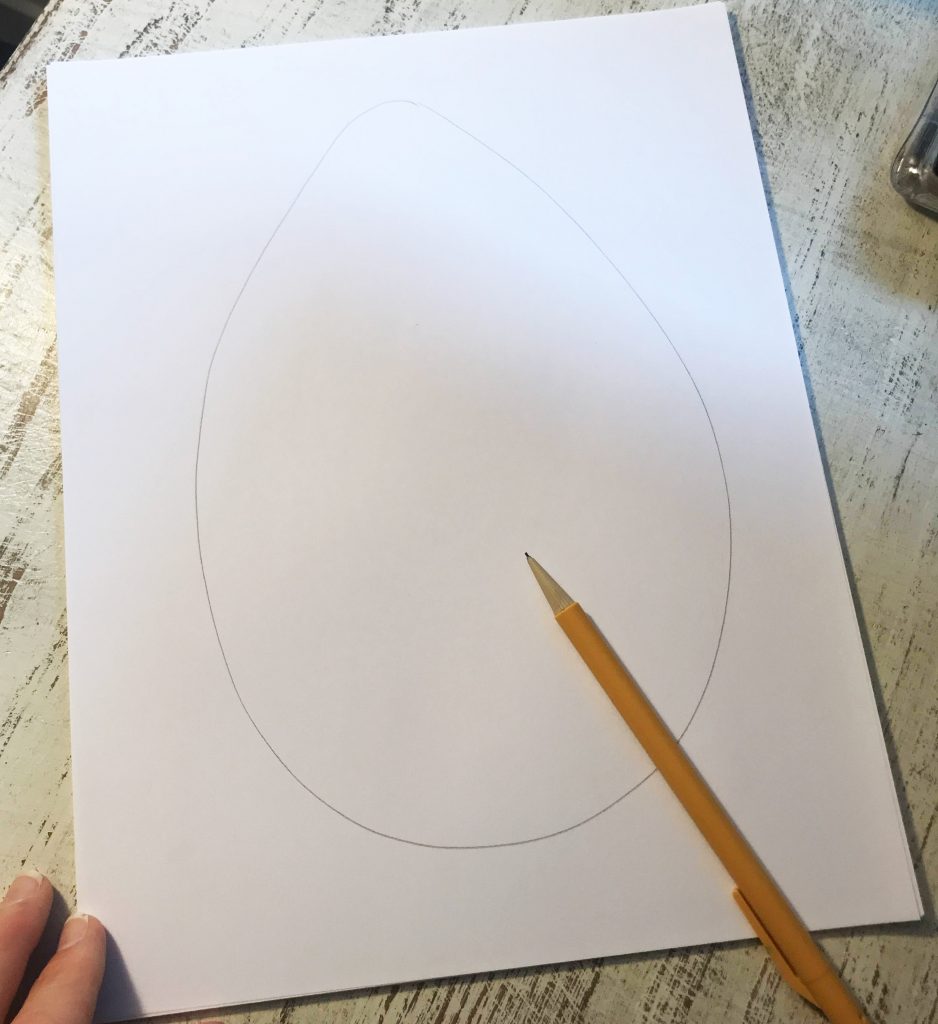
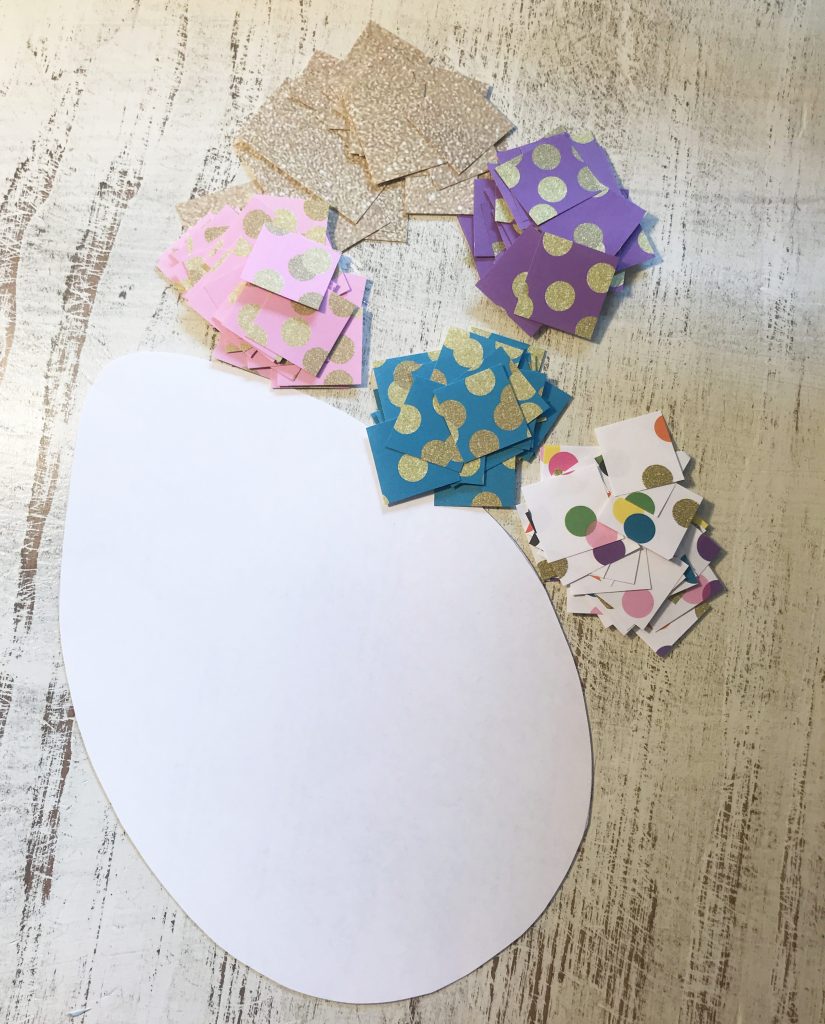
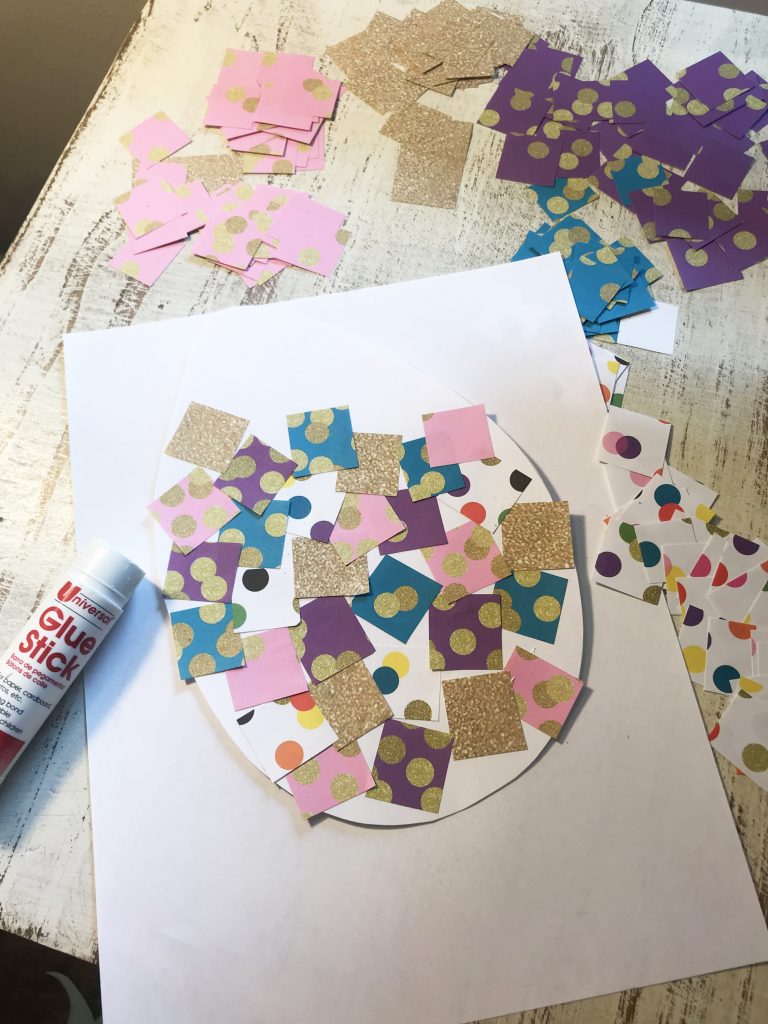
Glue squares to the egg shape. Don’t worry if some of the squares go past the outline of the egg; just trim them off at the end.
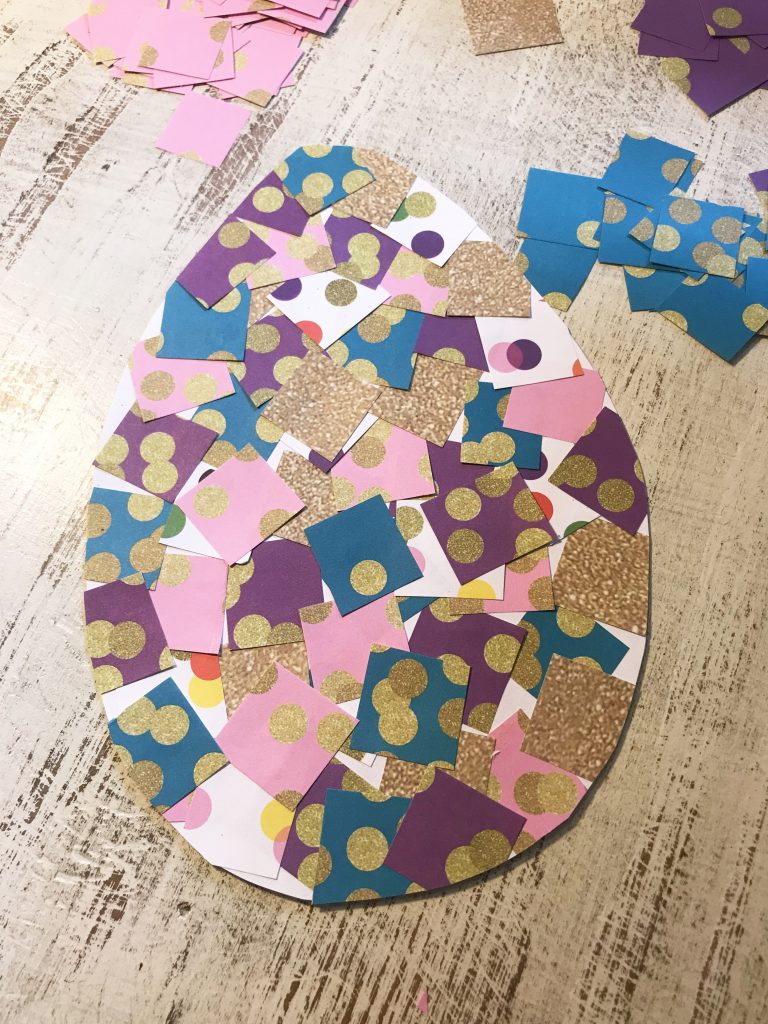
Once the egg is covered in squares, trim any excess square edges off. You may wish to punch a hole at the top of the egg and hang it from a window or wall.
Family Fun Science Activity for the Holidays 15 Dec 2020 8:08 AM (4 years ago)
Looking for a fun, easy craft to do with your kiddos this season? Here is a super simple activity that parents can do with materials that are most likely already around the house. Salt crystal ornaments are pretty to decorate with, and you can also discuss the science behind the growth of the crystals.

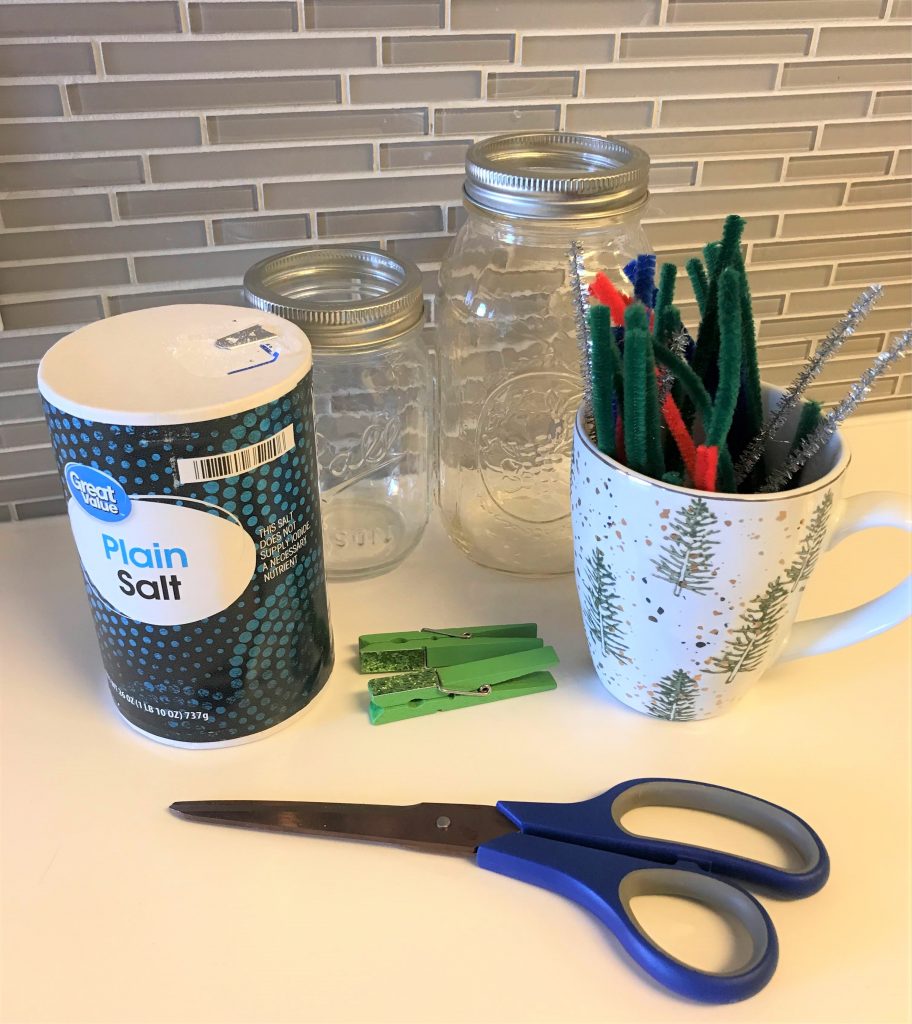
The only materials you need are
- salt
- chenille stems
- scissors
- jars or other containers
- clothespins
- a pot for heating water (you can also just use hot tap water)
Start by creating designs with the chenille stems by bending and cutting them into different shapes.
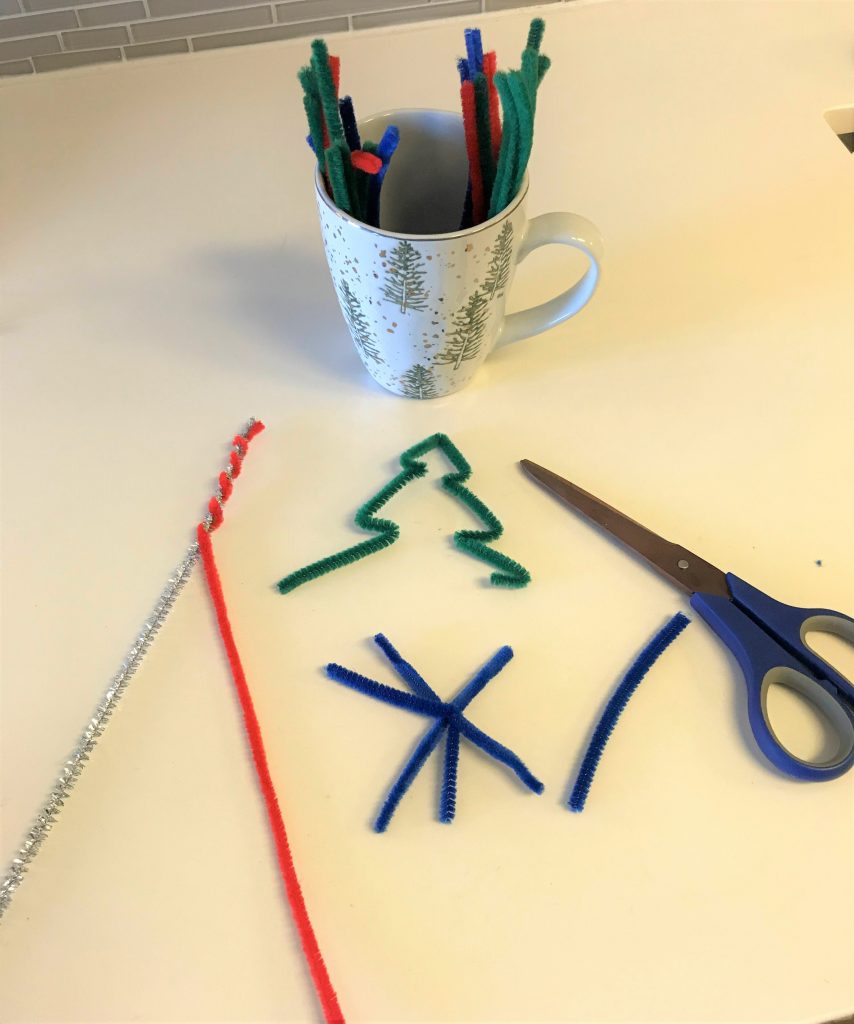
You can get creative and use multiple stems to create 3D shapes:
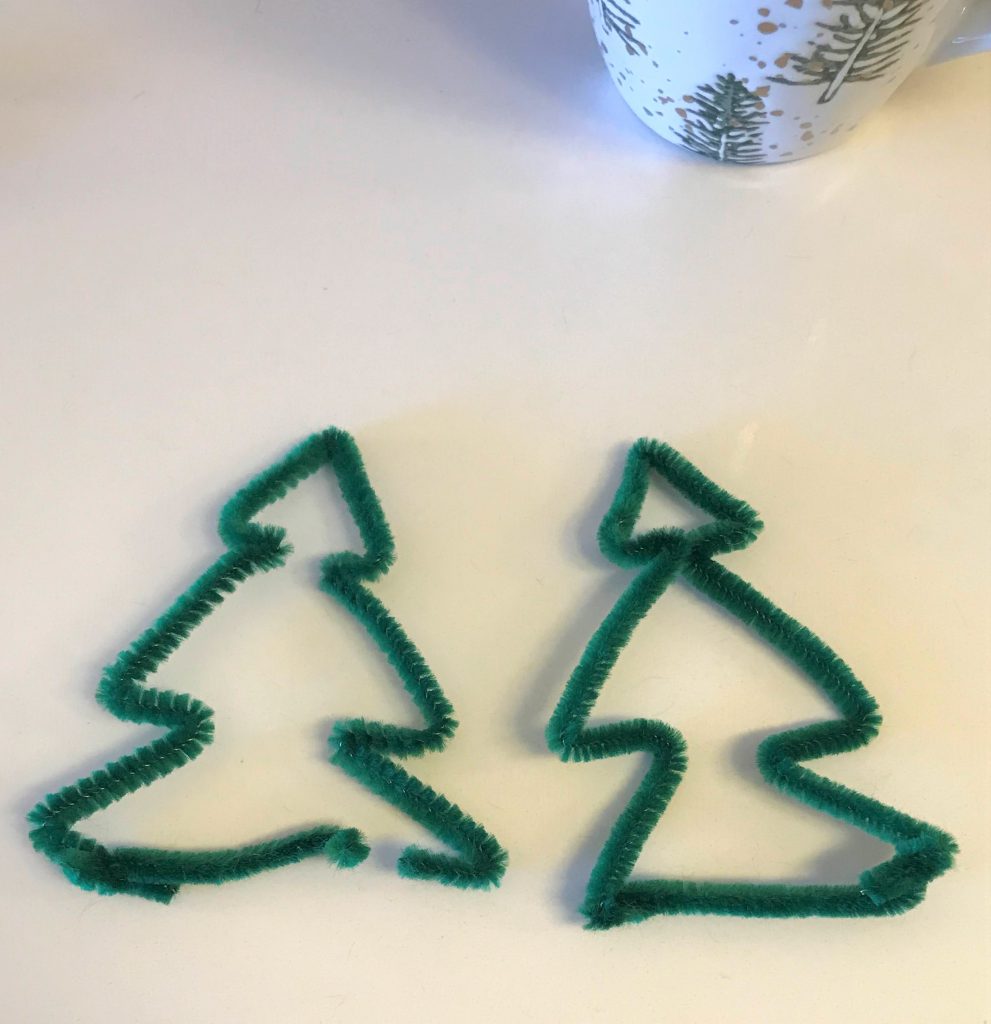
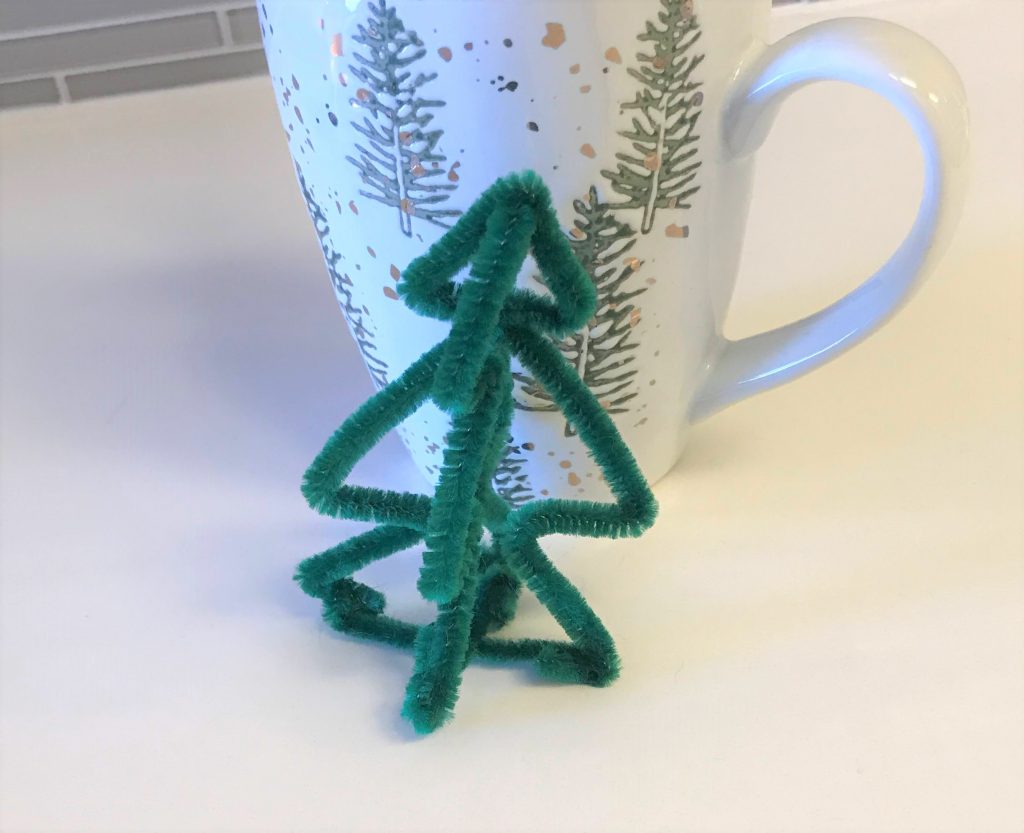
Add an extra piece of a chenille stem on the end of your ornament so that the clothespin has something to hold onto while still being able to submerge your ornament completely in the water. You could also just attach an ornament hanger at this point.
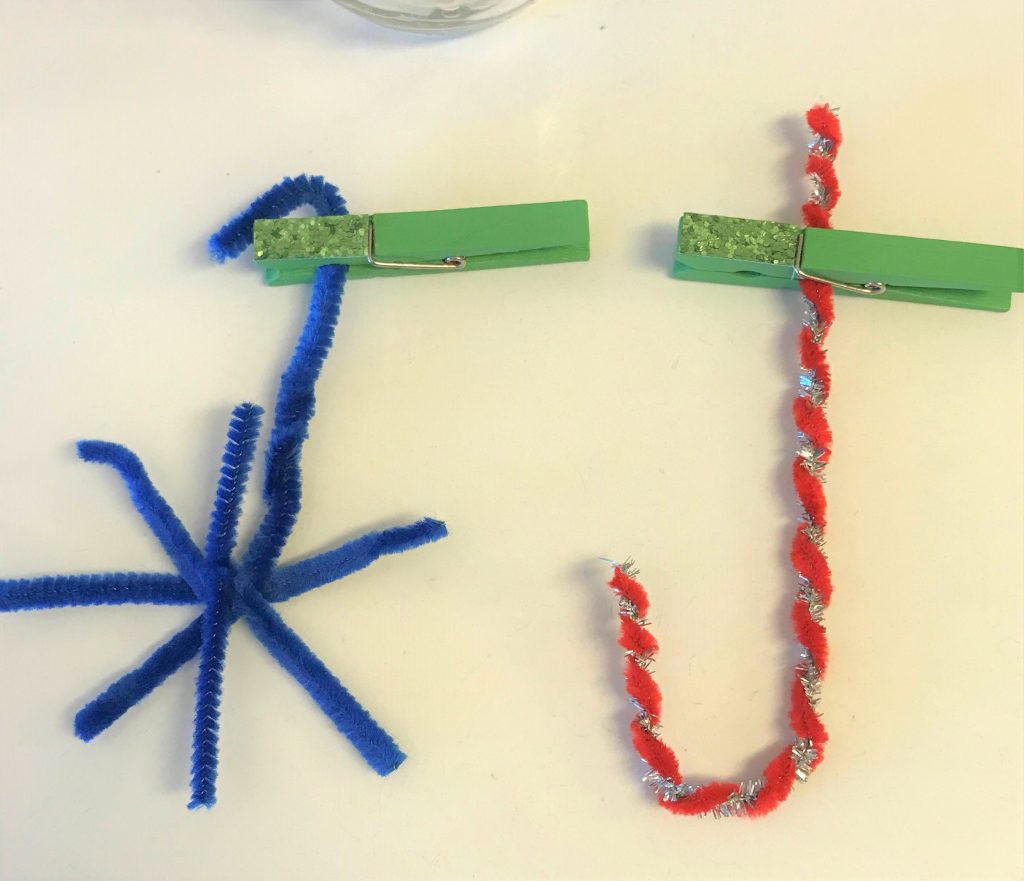
Prepare the salt water solution. (Heating water on the stove makes the process go more quickly, but you can also use hot tap water.) Use as much water as you need to be able to completely fill the jars. As the water heats up, pour salt in a bit at a time and stir to dissolve.
As more and more salt is added, the water will eventually not be able to dissolve any more salt. You will see the salt stay at the bottom of the pan. It’s now ready.
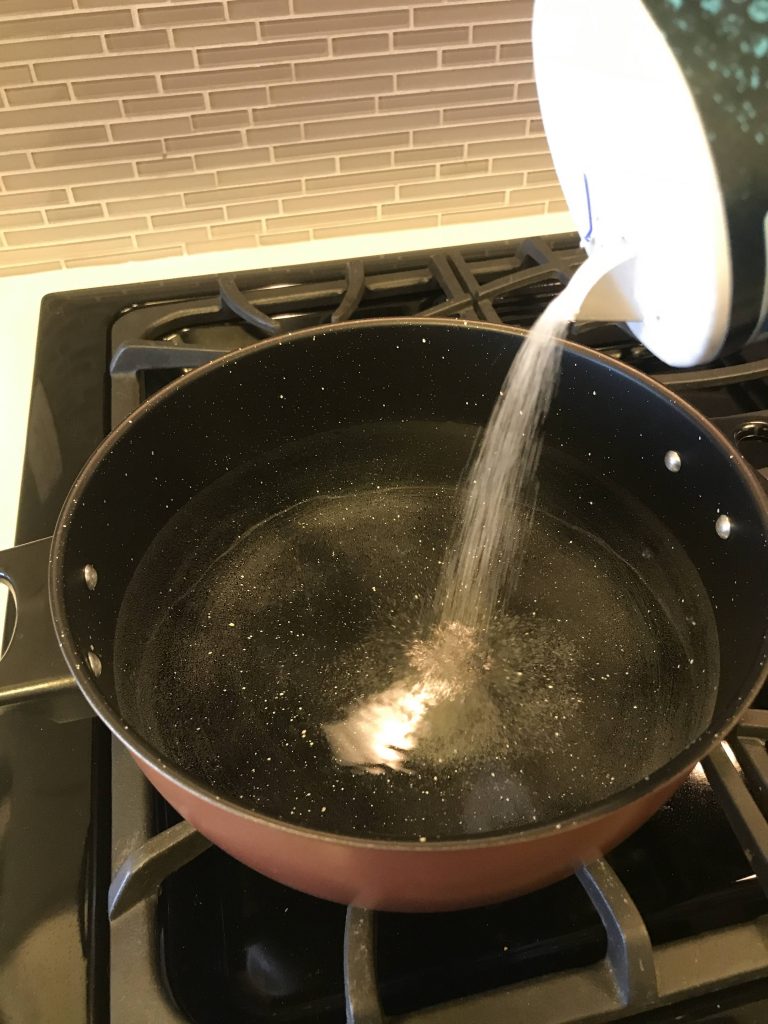
Pour the salt water solution carefully into the jars. (Please note, if you heated the water on the stove, the jars will be VERY hot once the water is poured in. Please use caution when touching them.) Carefully add the ornaments, one per jar. Make sure the clothespin rests at the top of the jar to keep the ornament suspended in the solution.
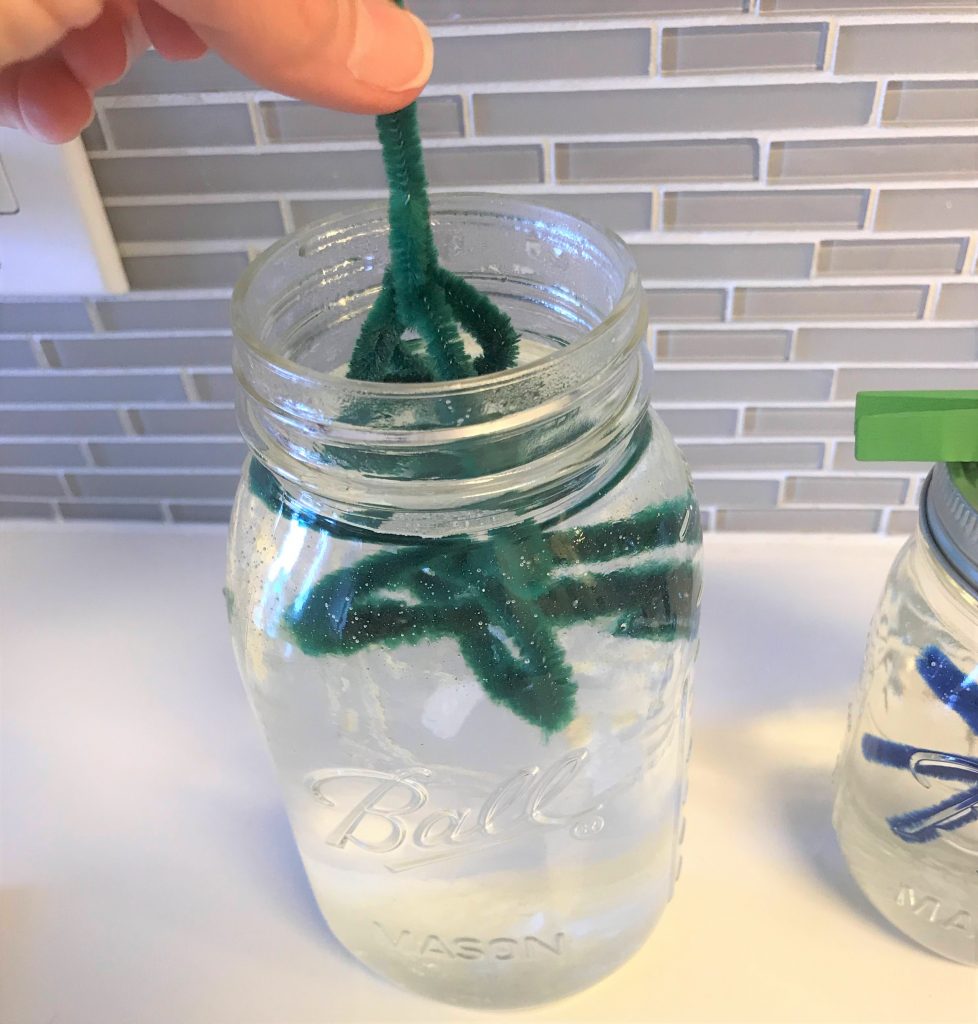
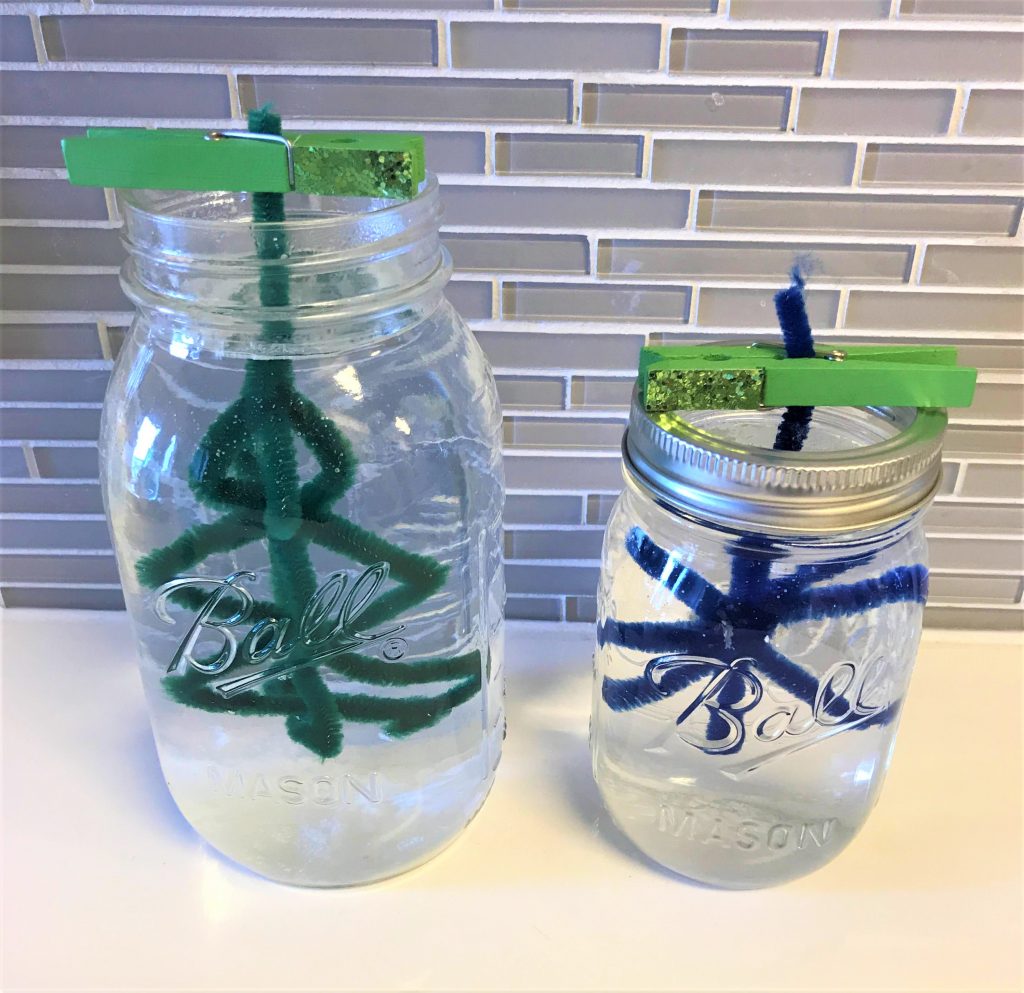
Salt crystals start forming pretty quickly on the ornaments. You should be able to see a nice layer of crystals after about an hour.
Why is this happening?
When salt is dissolved in water, the water molecules separate the salt molecules. The added energy (heat) is what helps break the bond apart. As the water starts to evaporate in the jars, the salt molecules start to bond together again. This is called ionic bonding. As the salt crystals form and fall to the bottom of the jar (because they are heavier than the water), some cling to the chenille stems.
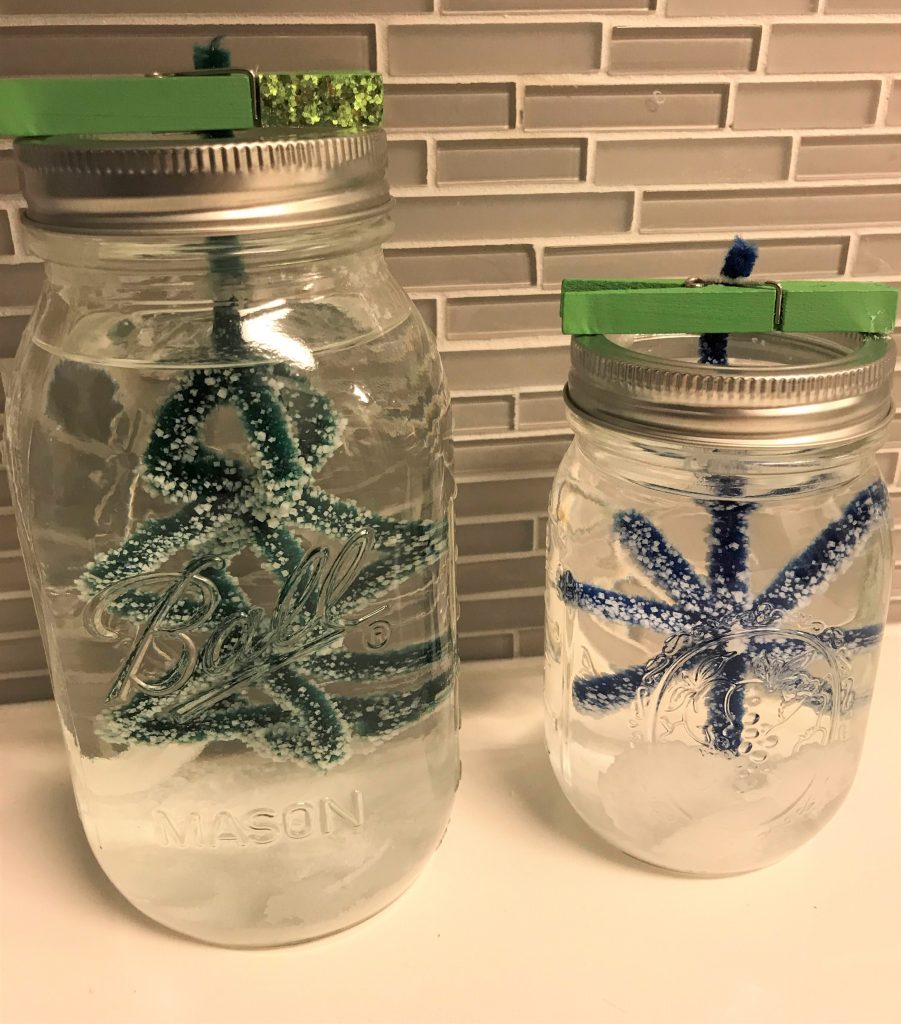
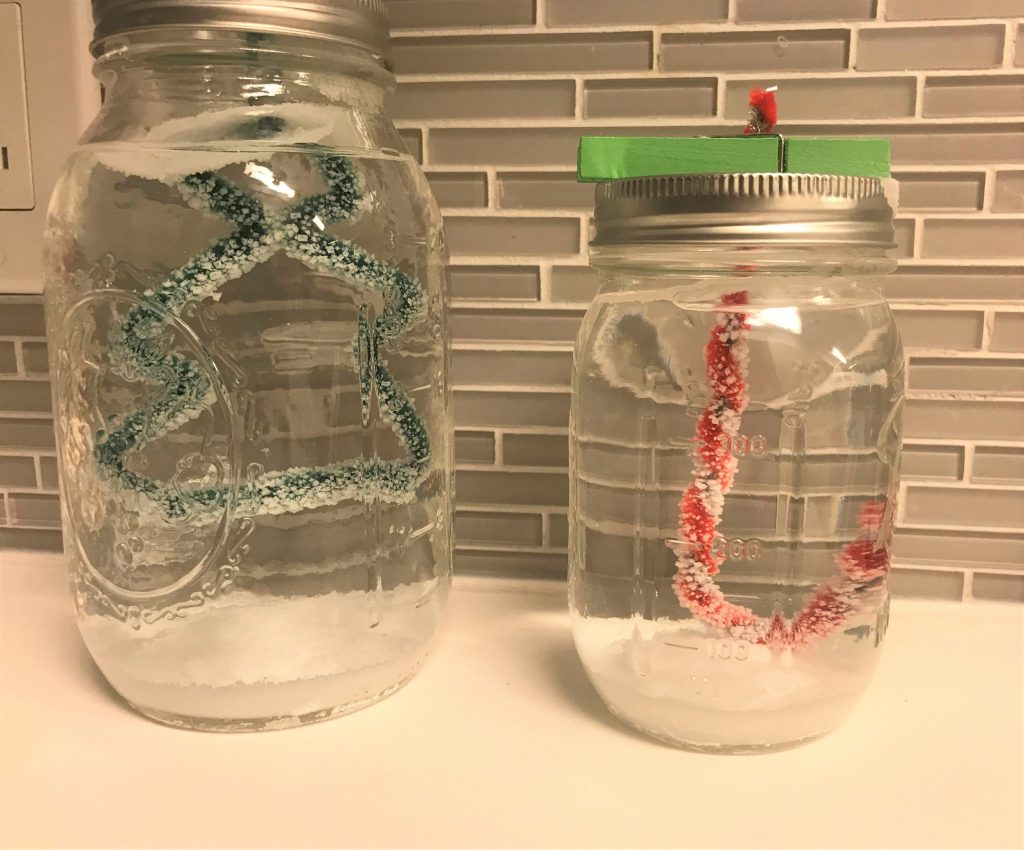
Leave the ornaments in the jars for about 24 hours. You can also try different lengths of time to see if that changes the amount of crystals that form. Then gently remove the ornaments and let dry completely.
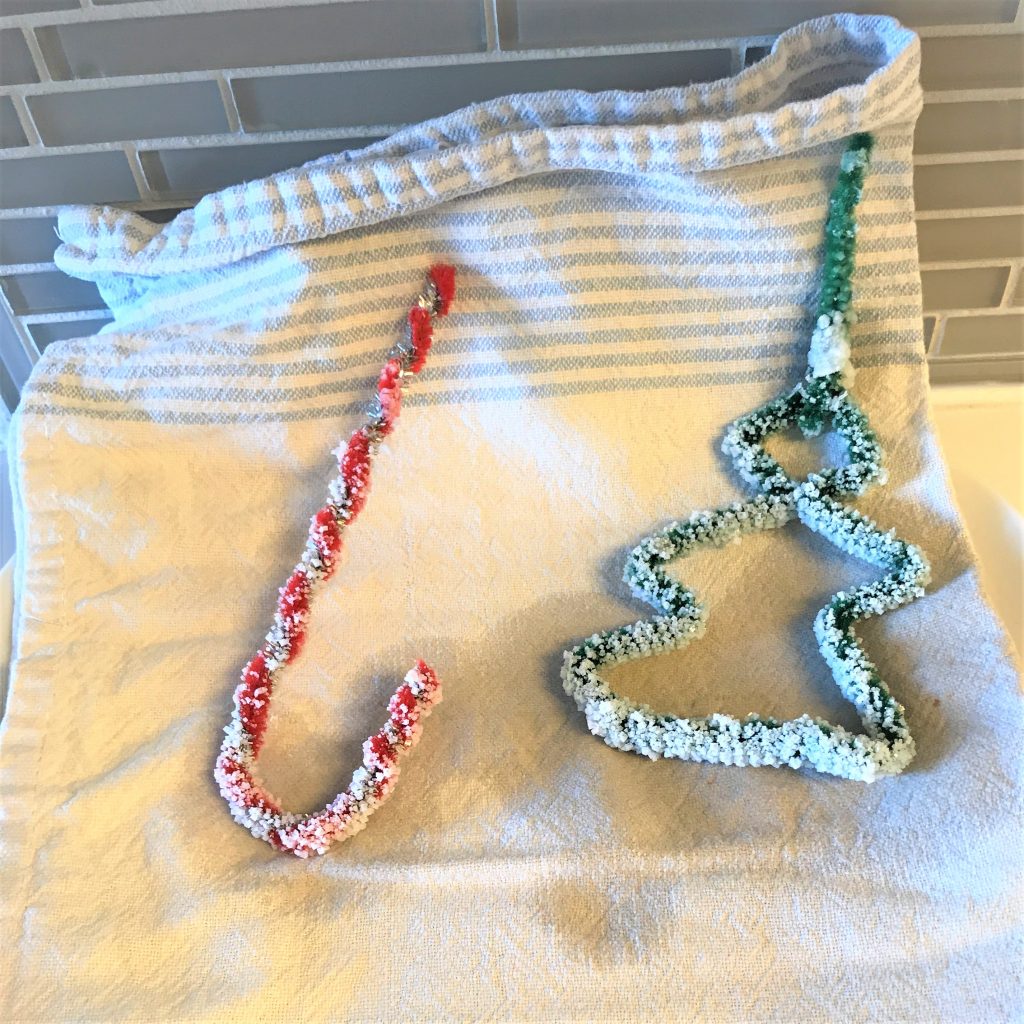
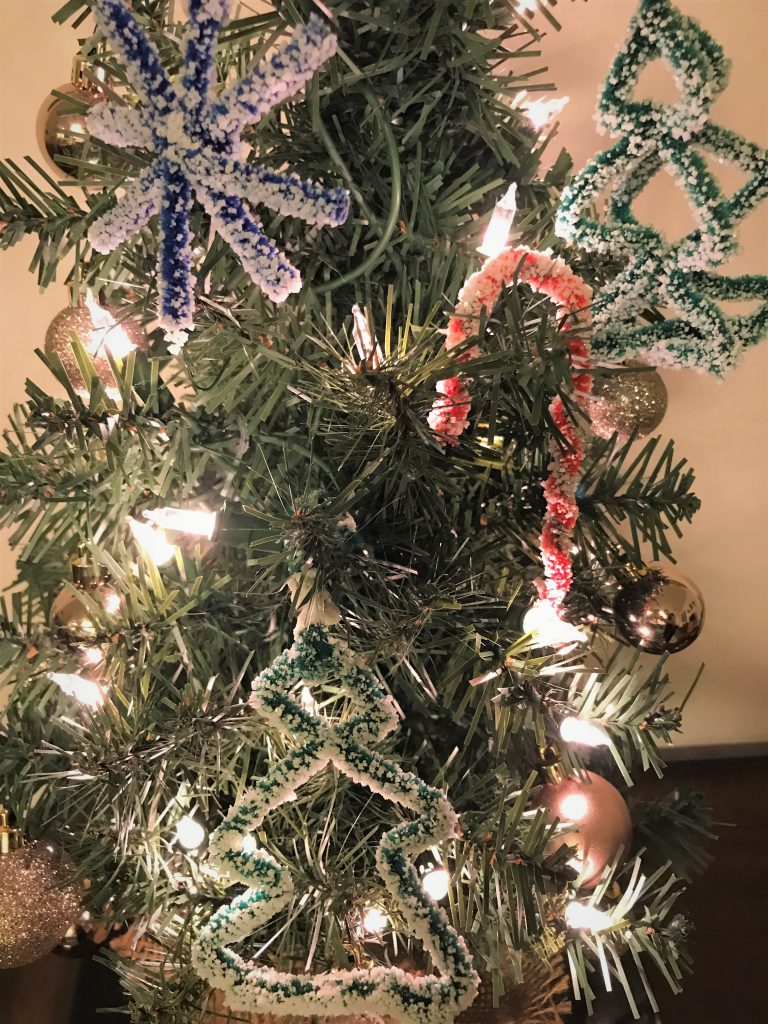
Once dry, hang the ornaments on your tree using the long stem that was used for the clothespin, or attach ornament hangers. You can also hang them in windows or other areas to add some fun holiday décor around the house.


Spooky Spider Craft for Halloween 28 Oct 2020 1:26 PM (4 years ago)
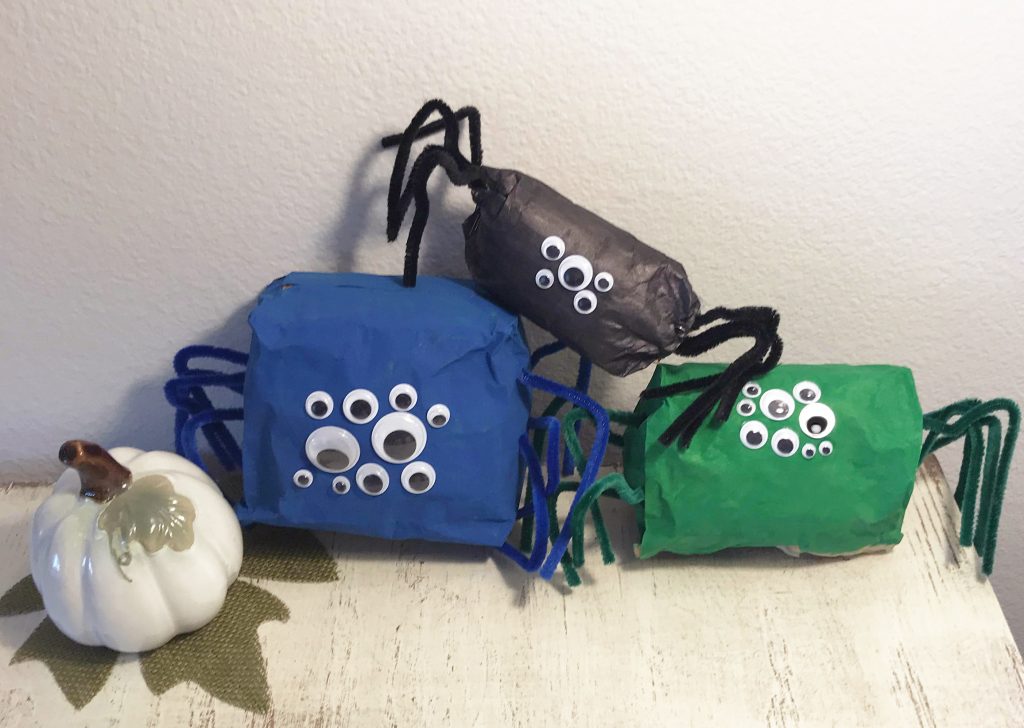
Halloween is almost here! Yes, it will most likely look a lot different than years past, but that doesn’t mean you can’t still have fun. If you’re looking for a quick and easy craft to do with kids, we have one for you that uses materials you probably already have lying around the house.
Paper bag spiders!
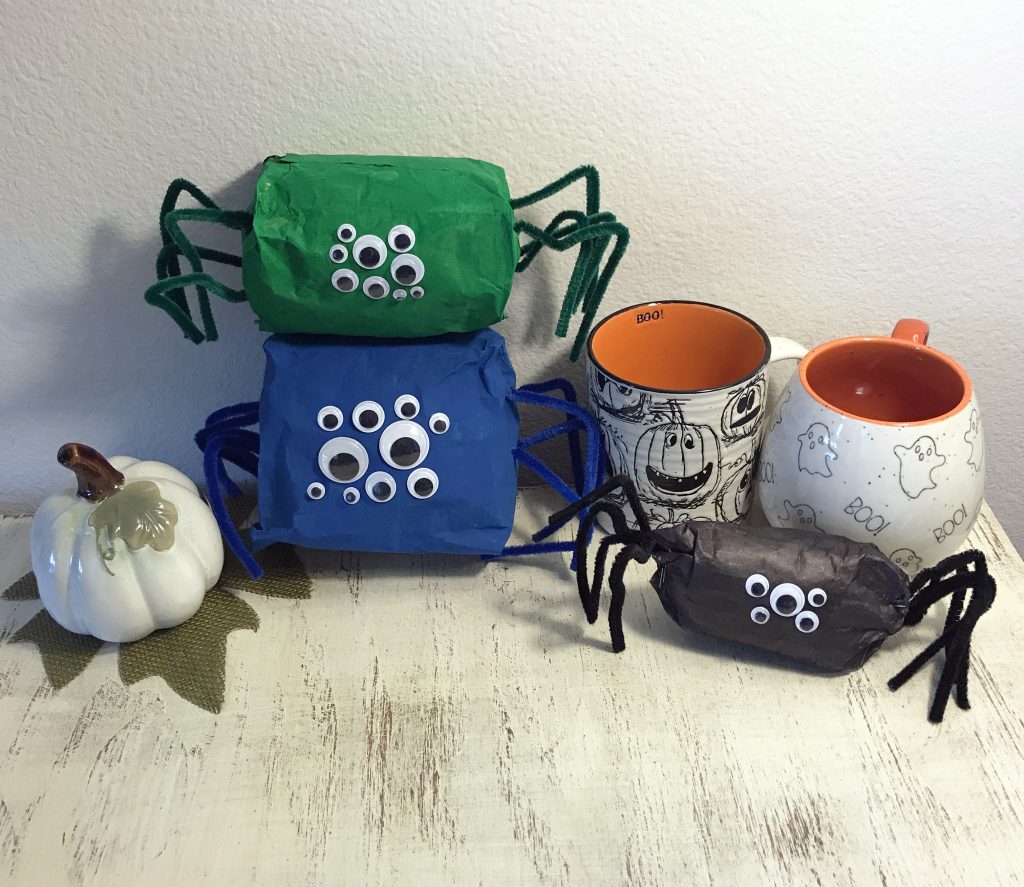
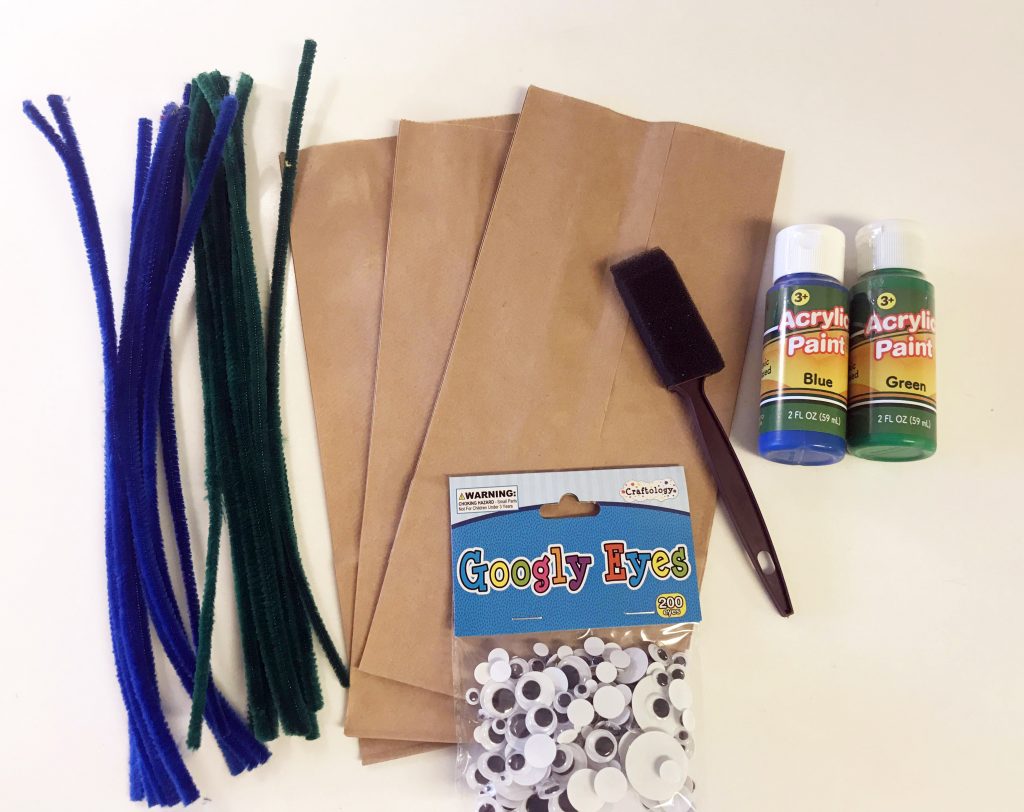
Materials needed:
- paper lunch bags
- paint/paintbrush or markers
- chenille stems
- googly eyes
- glue
- pencil or toothpick for poking holes
- newspapers or plastic bags
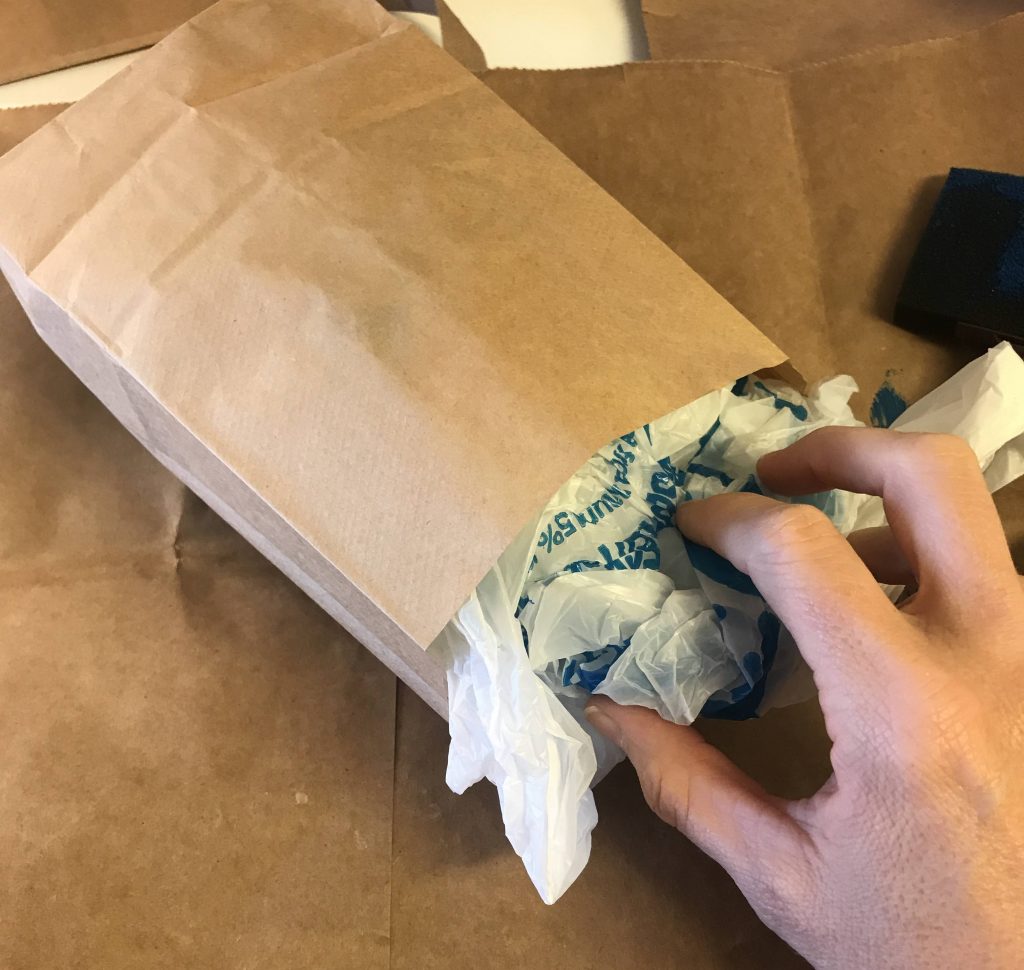
Fill the paper bag with newspaper or plastic bags until almost full. Leave a bit of room for stapling. If you are making multiple spiders, you may wish to cut the paper bags to different sizes.
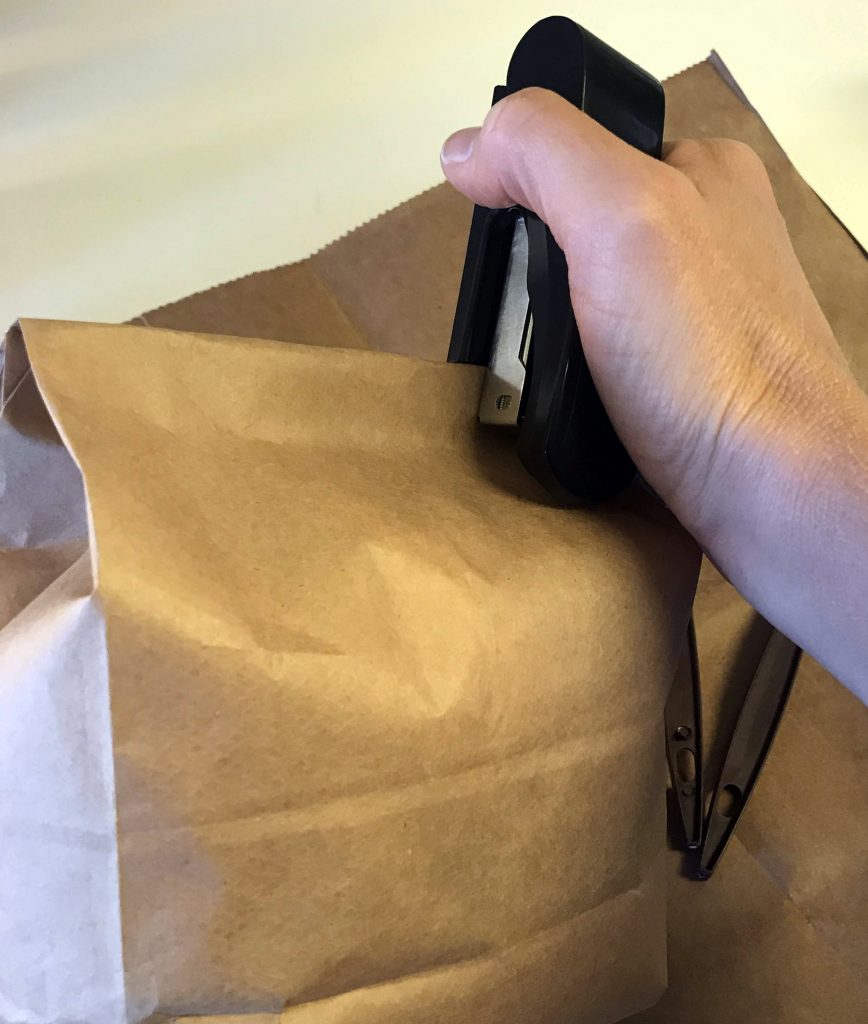
Fold over the top of the bag and staple it closed. When you create your spider, make sure the stapled side is on the bottom so it doesn’t show.
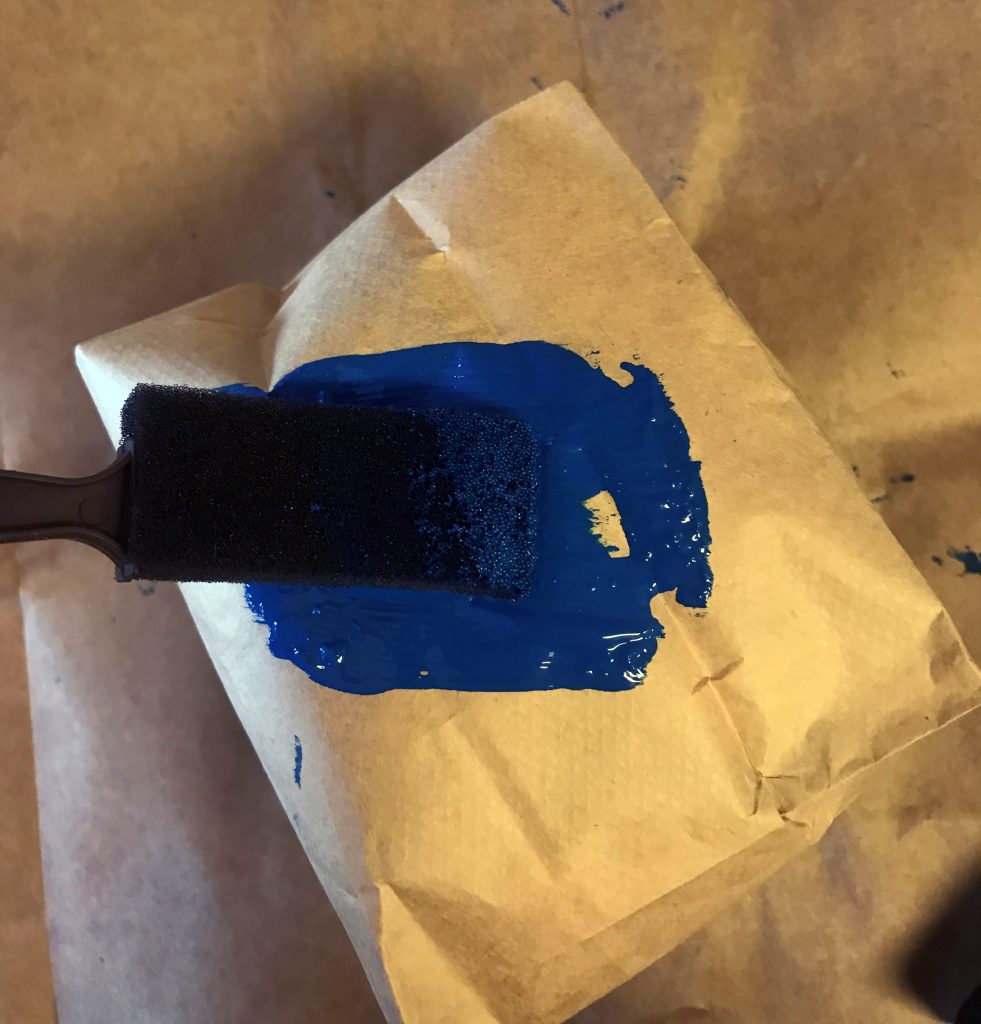
Paint or color each side of the paper bag.
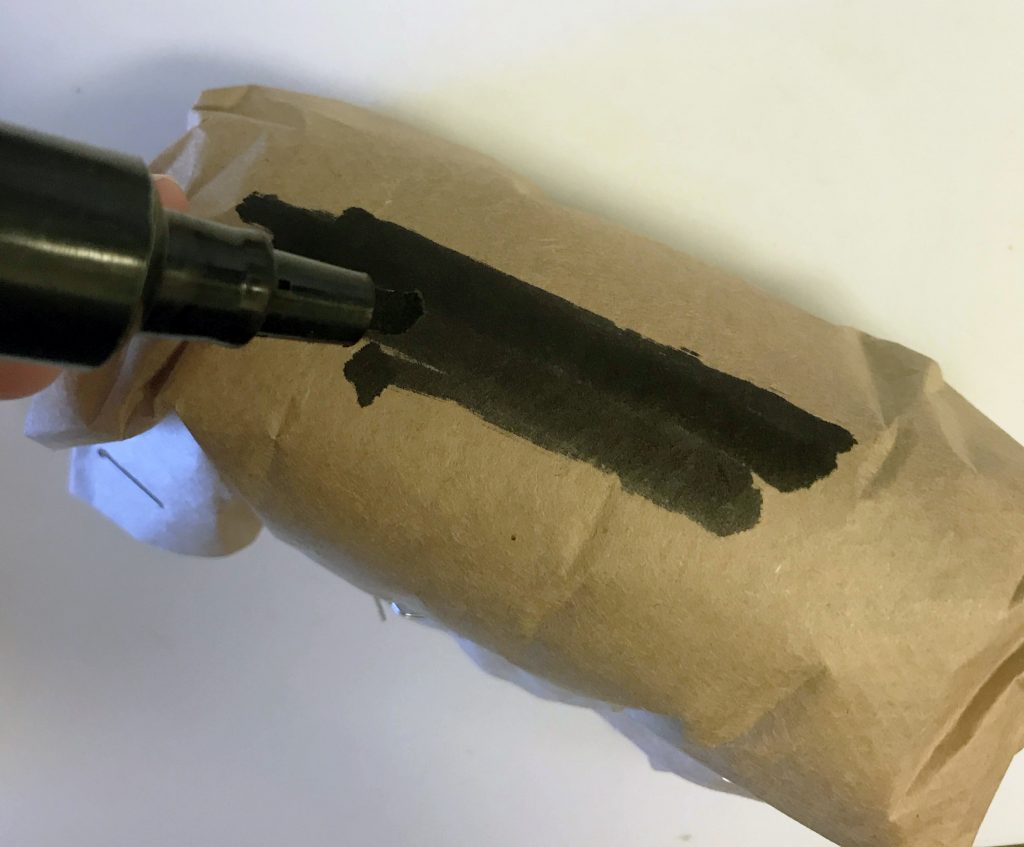
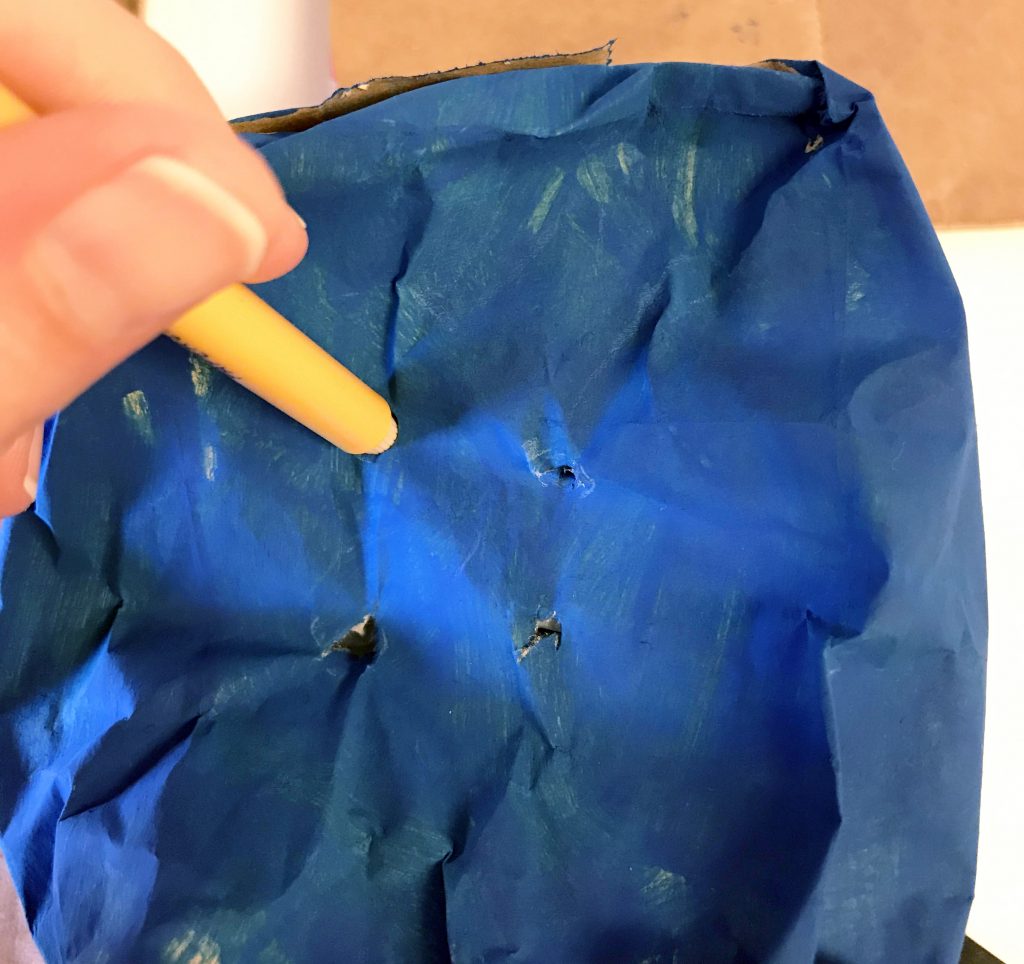
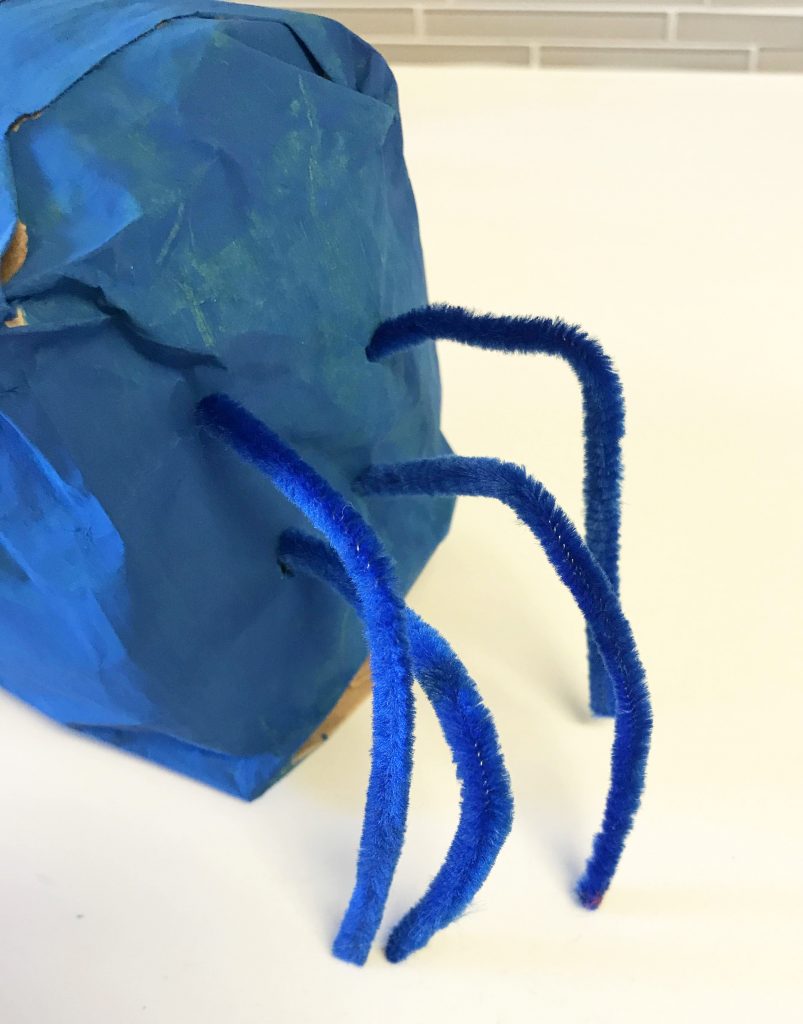
Take a pencil or toothpick and poke 4 holes on two opposite sides of the bag. Cut chenille stems in half and push one into each hole. Bend the stems so they touch the same level as the ground/bottom of the spider.
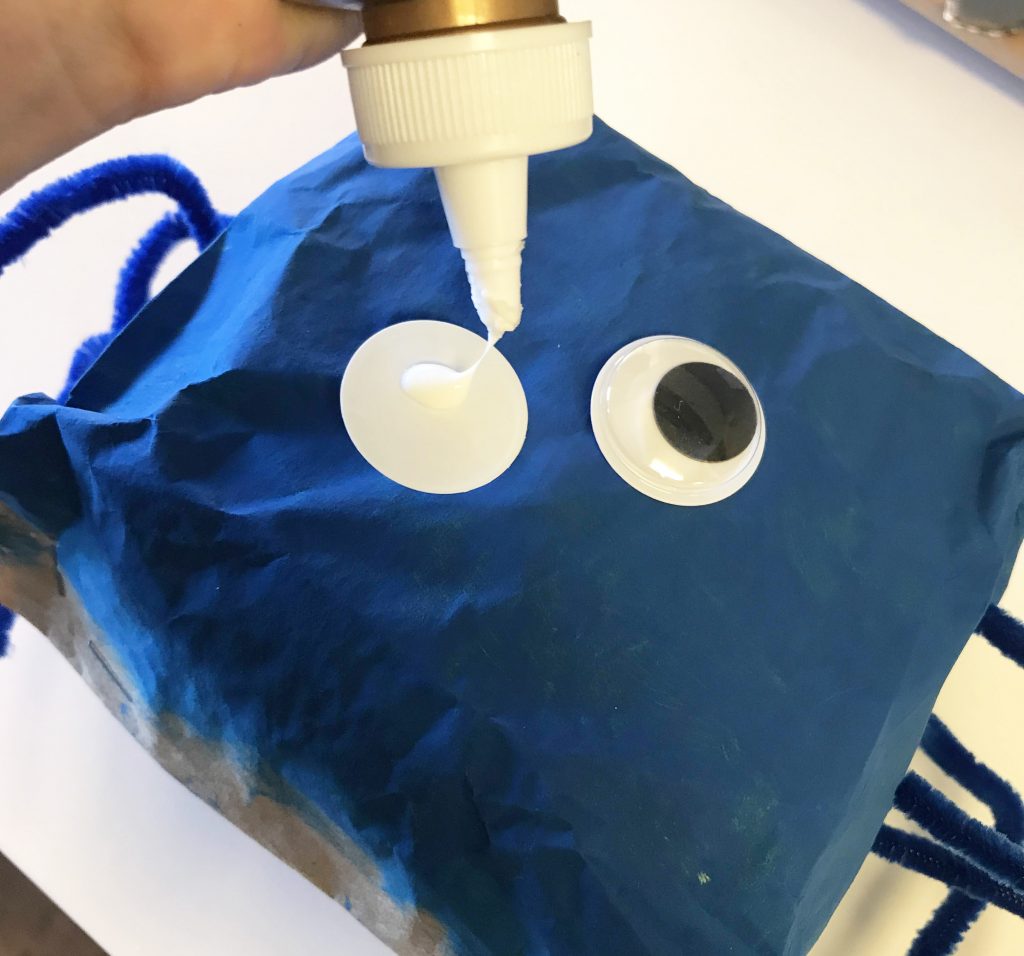
Glue googly eyes on the front of the bag. Spiders usually have eight eyes, but you can glue as few or as many as you’d like.
Display your spiders for a fun Halloween vignette. You can also use full-sized grocery paper bags and put them on your porch with your pumpkins!
This can be done as a stand-alone craft activity, or in conjunction with doing research and learning more about spiders and other creepy crawly critters.
For more fun Halloween crafts and other holiday activities, check out our holiday books.
Five Tips for Standards-Based Learning at Home 25 Aug 2020 11:13 AM (4 years ago)
The beginning of this school year probably looks a lot different than what you imagined, whether your children are starting remotely, going back in the classroom, or a hybrid of the two. Yet, regardless of how the actual school day looks, both teachers and students are still being held to the normal grade-level standards of your district. That’s why it’s important to make sure your students are performing at grade level and using products that are standards based to keep them on track and prepare them for the next year.
What exactly is standards-based learning? The term refers to instruction, grading, and assessment based on students demonstrating an understanding of the skills and knowledge they are expected to learn in each grade. Schools and districts determine goals of each grade level and subject at that grade level, (often based on state standards), and teachers determine how to teach students so they achieve those goals and expectations.
For parents, we understand that you may be concerned about keeping your child up to grade level given the unusual circumstances of the school year. That’s why we put together Learning Together sets. They include products that focus on essential standards-based, grade-level skills and provide daily practice to supplement classroom instruction. Plus, they are easy to use and require very little supervision, allowing children to learn and review independently. Below are five tips to help you incorporate these kits into your child’s learning day without making more work for you.
- You may wish to start with a grade level below the one your student is starting this fall. Summer learning loss is real, and given that the end of the last school year was so chaotic, it’s a great idea to review skills to bolster your child’s confidence as well as reinforce the building blocks needed for their new grade level. Plus, since this will most likely be review, children can probably do most of the activities on their own.
- Check your child’s coursework, (either online or what they bring home from school) and see what topics they are being introduced to in each subject. (Often the teacher will address which standards are being taught and list them somewhere in the classroom or online.) You can then peruse the activities in the various books of the Learning Together set and find some to match/reinforce what is being taught in class.
- You can also check the school’s or district’s website to see the standards for your child’s grade level and find activities in the Learning Together set that reinforce the standards. If you’re unsure of whether the standard has been addressed yet, check with your child’s teacher.
- Encourage your child to peruse the activities during their independent-work time, especially if they are learning remotely for now. They might finish their classwork early, and the activities in the books from the Learning Together set will keep them on task as well as reinforce what the teacher is demonstrating.
- Get to know your children as learners. These materials can help you see areas in which your child shines and conversely, where they need more help. You can also monitor how they approach the activities; do they need more time for reflection? Do they like one format better than another? Do they need to take an academic break before finishing and come back later in order to better process the activity? This is valuable information for when they are required to do classwork on their own. You can discuss their learning methods with them and help them self-regulate according to their own academic styles and needs.
Bonus tip: Go easy on yourself and remind yourself that you are doing your best. You and your children are navigating this unfamiliar territory as well as you can. Not only will you get through this, but you’ll also have a better understanding of standards-based education as well as your individual children’s learning styles. By giving you and your children grace for a gigantic learning curve, you are also helping them stay calmer and more focused, and they’ll know you’ll be proud of them for piloting this learning journey to the best of their ability.
