Kingfish Ceviche 31 Jul 2024 10:11 PM (8 months ago)
Last Updated on August 1, 2024 by Sneh
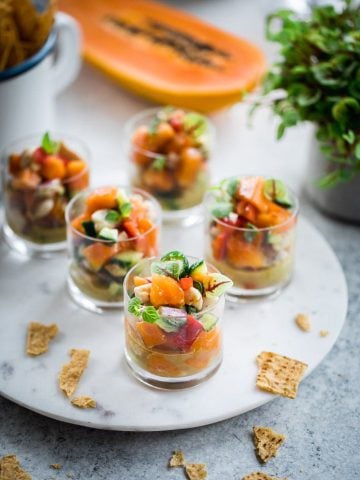
Add that wow factor to dinner parties by plating up this simple, restaurant-style Kingfish Ceviche in just 20 minutes! Incredibly easy to make with sashimi-grade Kingfish and a delightfully creamy coconut, chilli and lime Thai Nahm Jim dressing. A definite crowd-pleaser!

🐟 What is Ceviche?
Ceviche is a cold starter dish of raw fish or shellfish marinated and "cooked" in a citrus dressing. The acid from the citrus gently cooks the raw fish to a velvety, creamy consistency in minutes.
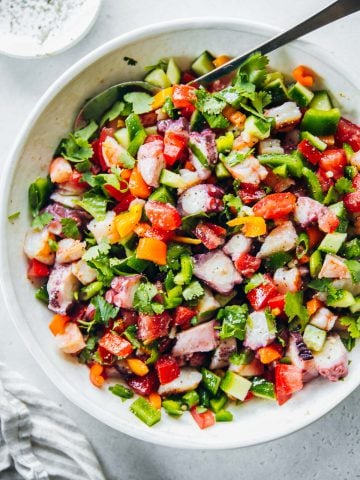
Ceviche, also known as cebiche, cerbiche, seviche, or sebiche is traditionally known to have originated in Peru (the world-famous Peruvian Ceviche!) but is also popular in many South American countries like Mexico, Columbia, Chile, Ecuador, Guatemala and Costa Rica.
Sashimi-grade boneless fish is cut into thin slices or diced into cubes and macerated in a dressing made of lime or lemon juice, chilli and garlic. It is tossed with salad veggies like onion, tomato and avocado and lots of fresh coriander (cilantro). Traditional ceviche was "cooked" in the citrus dressing for at least three hours. Modern versions use thinner cuts of sashimi-grade fish which is safe to eat raw and therefore the marinating time is very short - just a few minutes or as long as it takes to mix the dressing.
⏱️ Why make my Kingfish Ceviche?
- No cooking required! Just slice fish, mix dressing and drizzle.
- Packed with incredible flavours.
- High in protein.
- Elegant and easy entertaining dish. Perfect make-ahead appetizer.
- Looks gorgeous plated up.
📝 Ingredients & Substitutions
Here are some ingredients you will need to make Kingfish Ceviche,
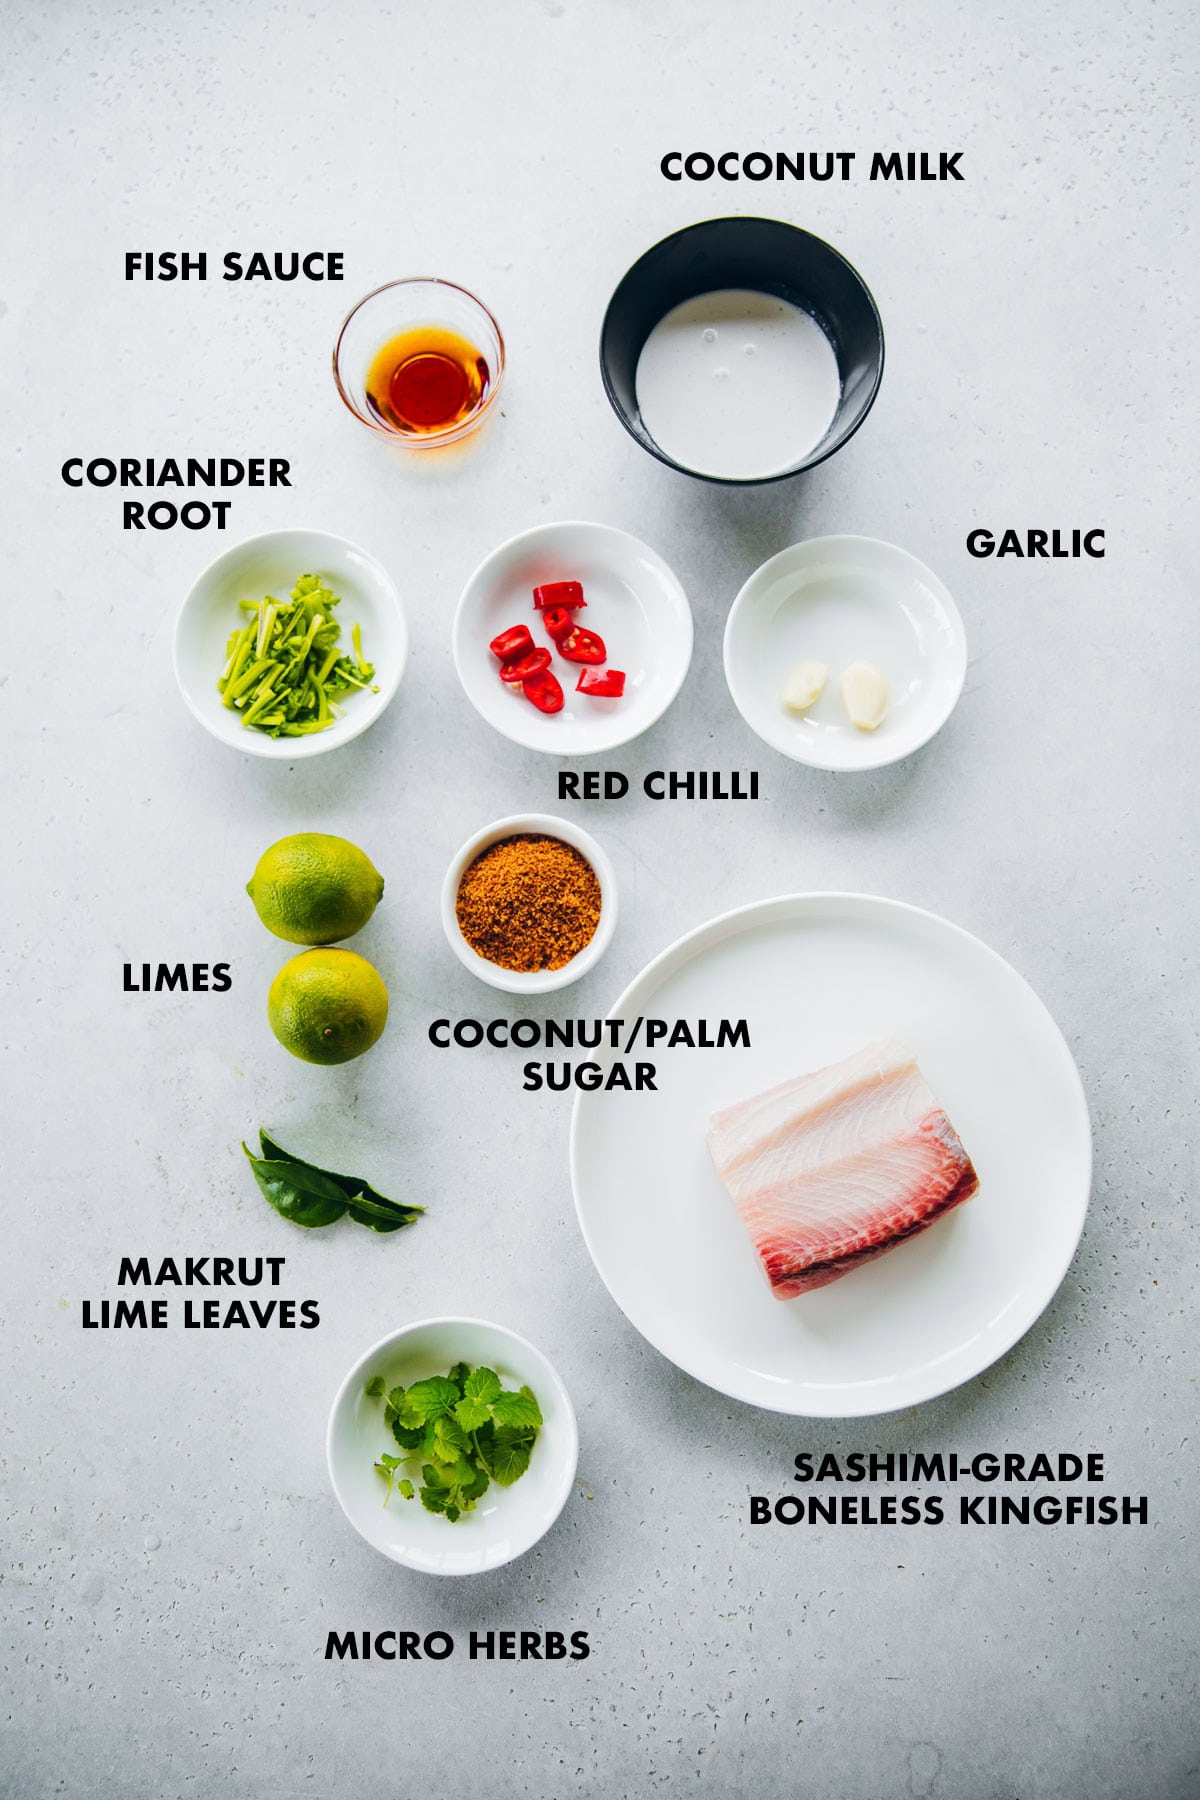
- Kingfish - Make sure your fish is sashimi-grade which is safe to eat even raw. The marinating time of this recipe is very short and using sashimi-grade fish ensures that it is not only delicious to eat but also very safe. Kingfish can be substituted with other white fish like Cod, Trevally or Snapper. Make sure they are sashimi-grade, ask your fishmonger, and they will guide you.
- Chilli - Red cayenne chilli (long red chilli) is a great medium-strength chilli with a lovely gentle heat. If you can handle a lot more heat, Thai bird's eye chilli is a great substitute but be warmed, these can be really spicy.
- Garlic - Use fresh garlic cloves for this recipe.
- Coriander - You will need the root of the coriander for the dressing. There is no appropriate substitute for this ingredient.
- Makrut lime leaves - Also known via their more controversial name of Kaffir Lime, these are the leaves of the Makrut lime tree and are used widely in Thai cooking. They have a beautiful lime aroma. If you can't find them, substitute with lime zest.
- Lime Juice - Can be substituted with lemon juice.
- Fish Sauce - If you can't find or use fish sauce which is predominantly used for that umami salty and sour flavour, substitute with a tablespoon of lime juice and a teaspoon of soy sauce.
- Coconut Sugar - You can substitute with grated palm sugar. It has to be dark/brown sugar to achieve that caramel sweetness in this Kingfish Ceviche recipe.
- Coconut milk - Use full-fat coconut milk for that delightfully creamy dressing.
🔪 How to make Kingfish Ceviche?
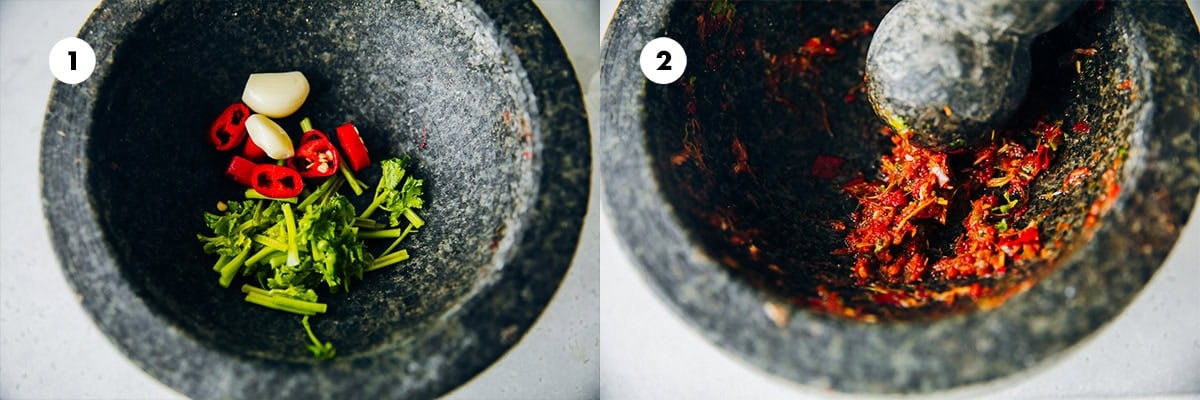
- Start by preparing the Nahm Jim dressing. Add red chilli, garlic and coriander root to a mortar.
- Pound with a pestle until the aromatics become a coarse paste.
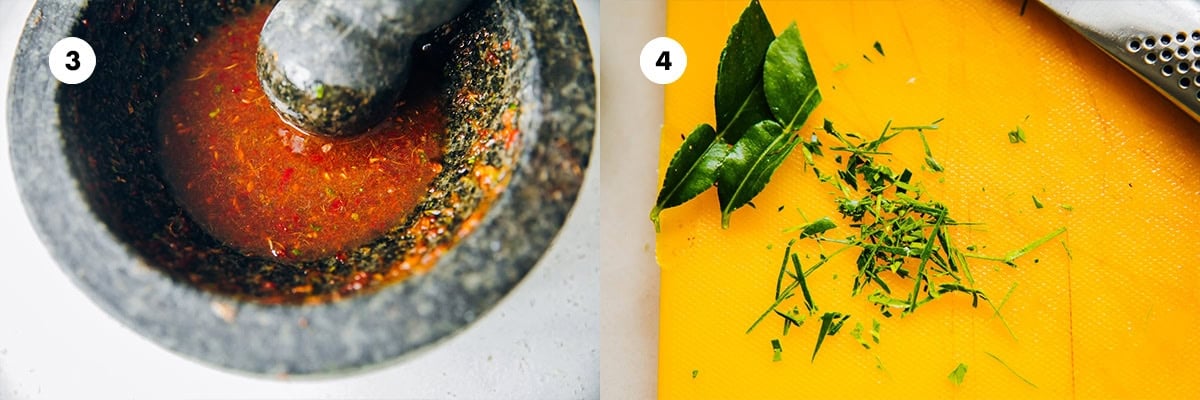
3. Add coconut sugar, lime juice and fish sauce. Gently mix with the pestle pressing down on the coconut sugar until dissolved.
4. Prep Makrut lime leaves by removing the centre stem and slicing the leaves very thinly.
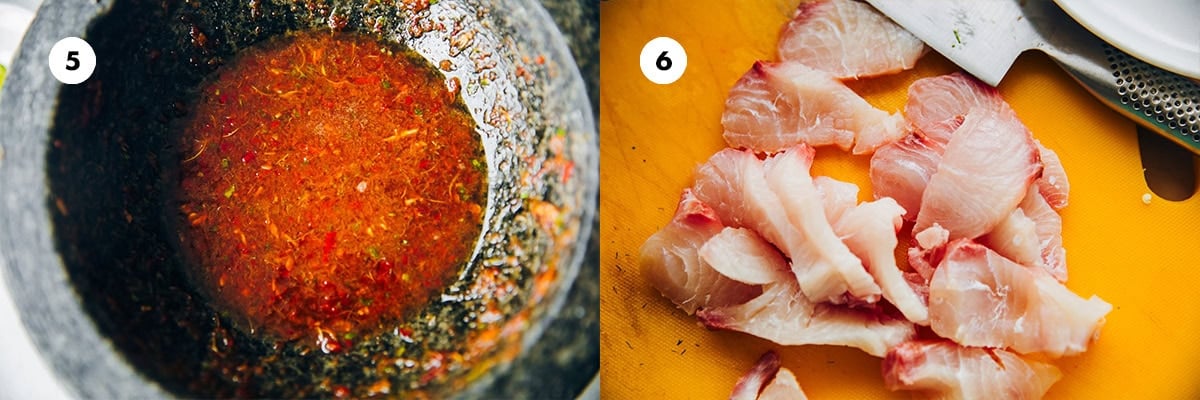
5. Add Makrut lime leaves to the Nahm Jim dressing and mix well.
6. Slice the Sashimi-grade Kingfish fillet thinly.
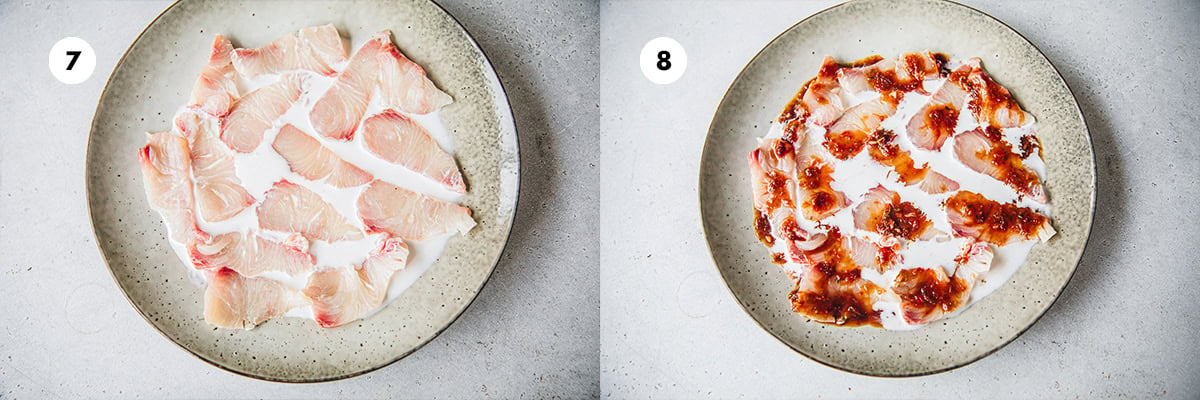
7. Arrange kingfish slices on a rimmed serving plate. Drizzle coconut milk over the slices.
8. Drop spoonfuls of the Nahm Jim dressing over the slices.
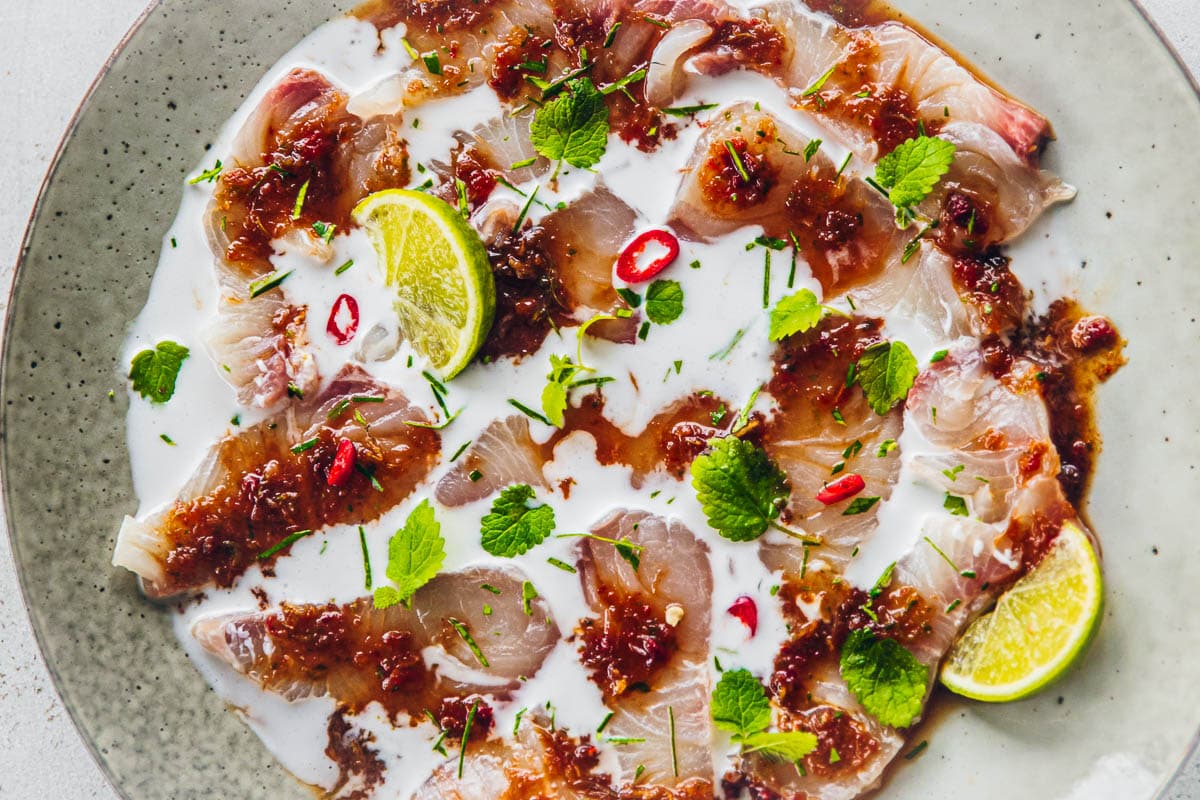
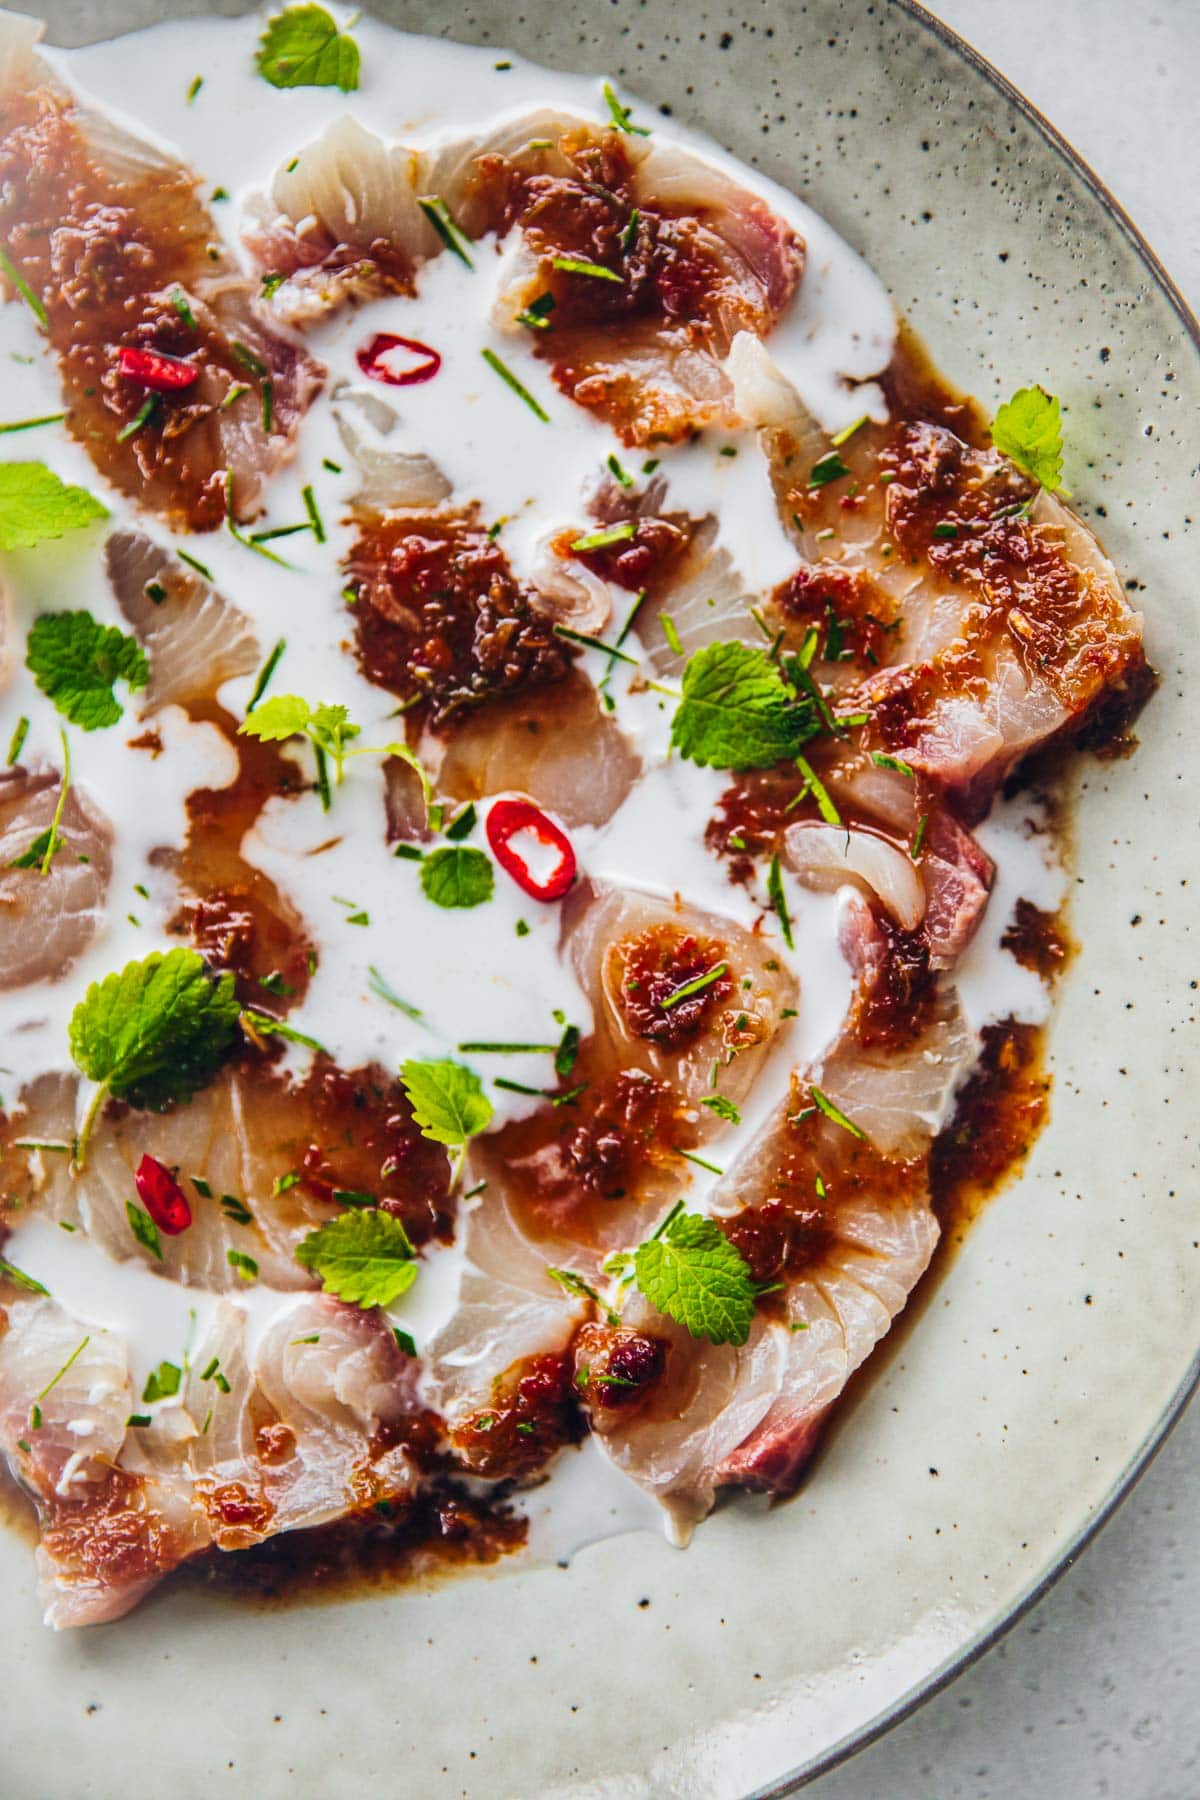
Garnish Kingfish Ceviche with extra red chilli slices, Makrut lime leaf strips, micro herbs and lime wedges. Serve immediately.
🍽️ Serving Suggestions
This beautiful Kingfish Ceviche is a fresh, cold starter that goes well with a glass of chilled Reisling or a delicious Avocado Margarita.
Serve these complimenting Thai dishes to complete your feast.
Oven Baked Thai Green Chicken Curry
👩🏻🍳 Recipe FAQs
Sashimi-grade Kingfish is the best choice for this Ceviche recipe inspired by Thai flavours. The clean, slightly sweet flesh of Kingfish goes well with the sweet, sour, spicy and salty flavours of the dressing.
Other good fish varieties for this recipe are sashimi-grade white fish like Cod, Trevally and Snapper.
Chilling the sashimi-grade boneless fish fillet in the freezer for just 20 minutes before prep is a great way to ensure neat and thin slices that are easy to cut with a sharp knife. It also chills the fish, further elevating the taste and texture of the ceviche on presentation.
❤️ More Cold Seafood Starter Recipes
Recipe
Hungry For More Recipes? Subscribe to my newsletter. Check out Facebook, Instagram and Pinterest to see everything I share! And if you love cooking and new cookbooks, join my free Cooking Club on Facebook!

Kingfish Ceviche
Ingredients
For the Nahm Jim dressing
- 2 garlic cloves minced
- 1 tablespoon coriander root finely chopped
- 1 tablespoon red cayenne chilli finely diced
- 1 tablespoon fish sauce
- 1 ½ tablespoons lime juice
- 2 tablespoons coconut sugar
For the Ceviche
- 200 g kingfish fillet sashimi-grade, boneless and skinless
- ¼ cup coconut milk full-fat and lump-free
- 2 Makrut lime leaves destemmed and finely chopped
- ½ red cayenne chilli thinly sliced
- Micro herbs to serve
Instructions
- To prepare the Nahm Jim dressing, place garlic, coriander roots and chilli in a mortar and crush with a pestle to a coarse paste consistency. Add fish sauce, lime juice and coconut sugar. Mix well and set aside.
- Place kingfish fillet in the freezer for 20 minutes to firm up. Remove and slice into ½ cm thick slices.
- Drizzle coconut milk onto a rimmed serving plate. Arrange the Kingfish sashimi on top.
- Add Makrut lime leaves and chilli slices. Drizzle evenly with the Nahm Jim dressing.
- Garnish with micro herbs and serve immediately.
Notes
Nutrition
The post Kingfish Ceviche appeared first on Cook Republic.


Hoisin Beef Noodles 1 Jul 2024 11:03 PM (9 months ago)
Last Updated on September 24, 2024 by Sneh
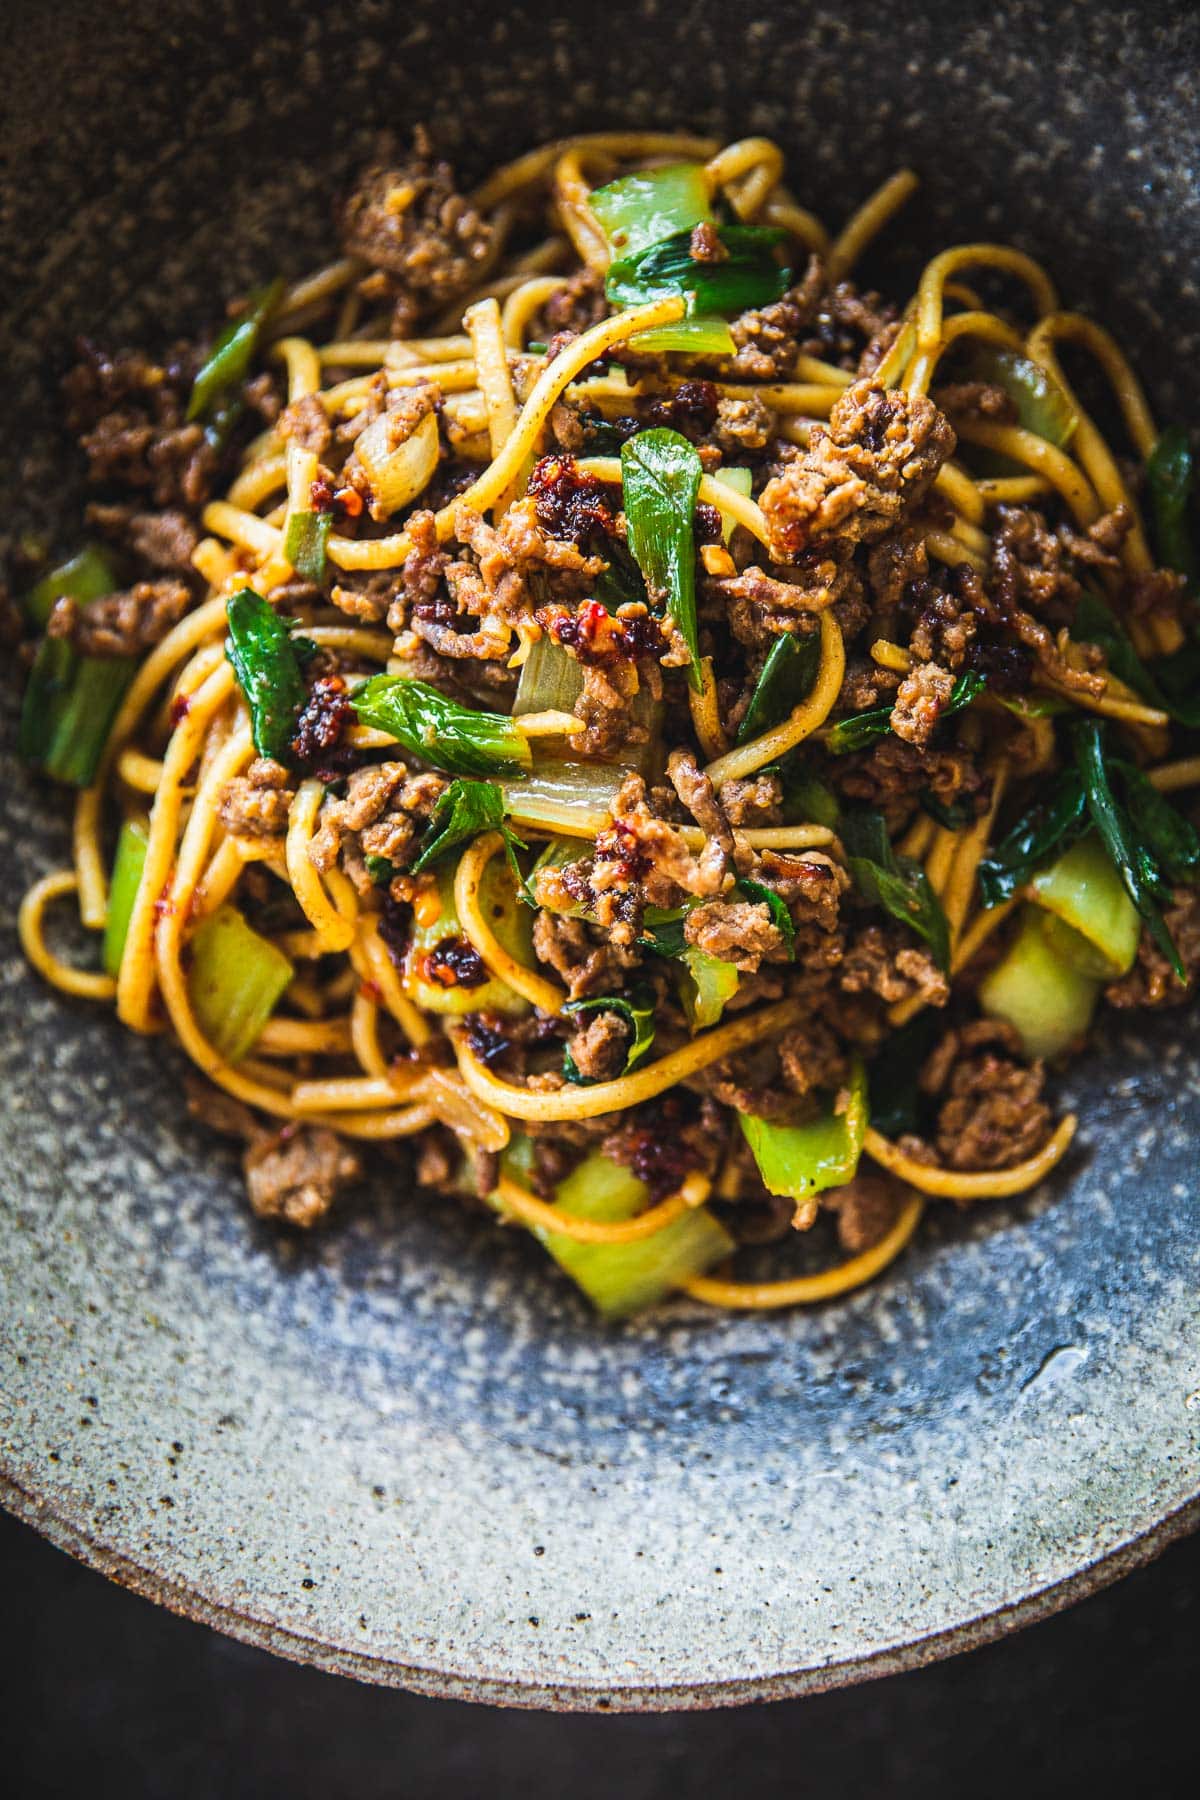
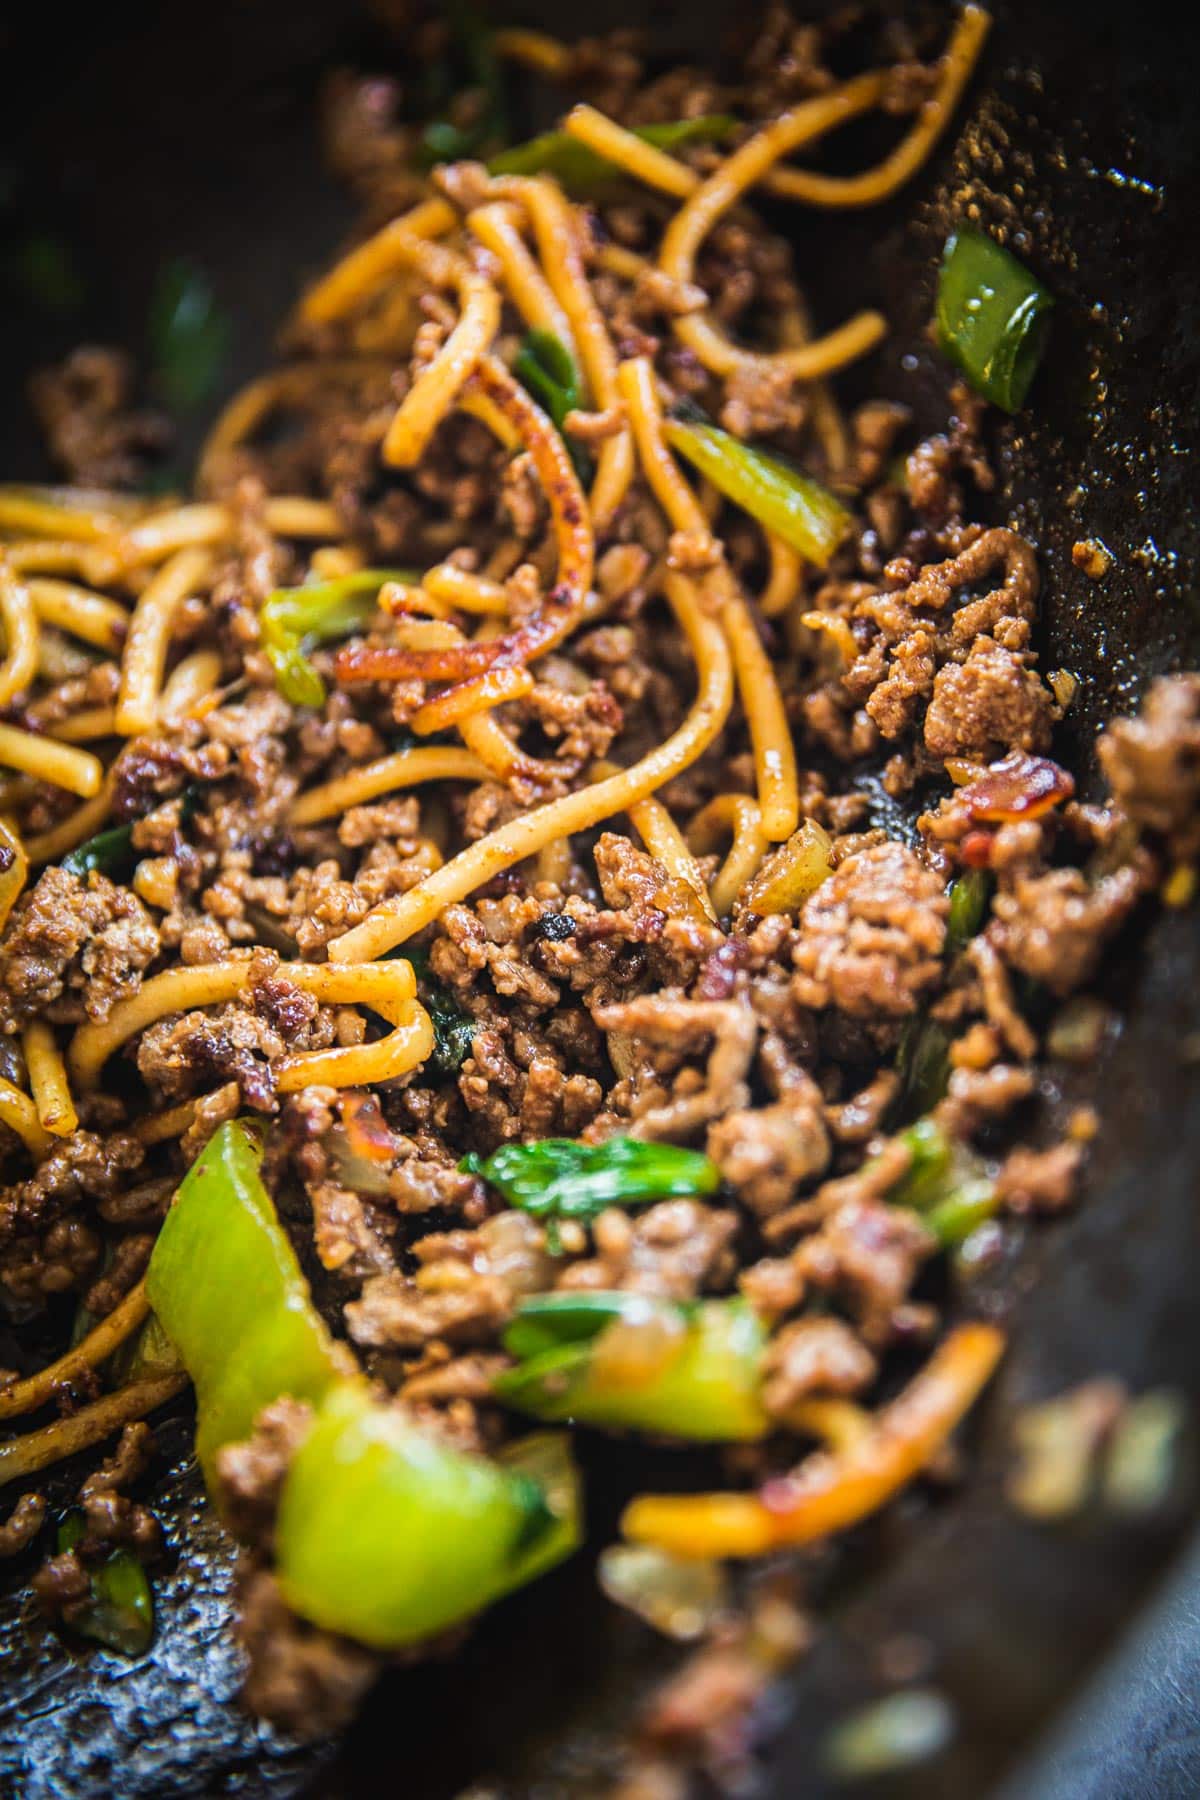
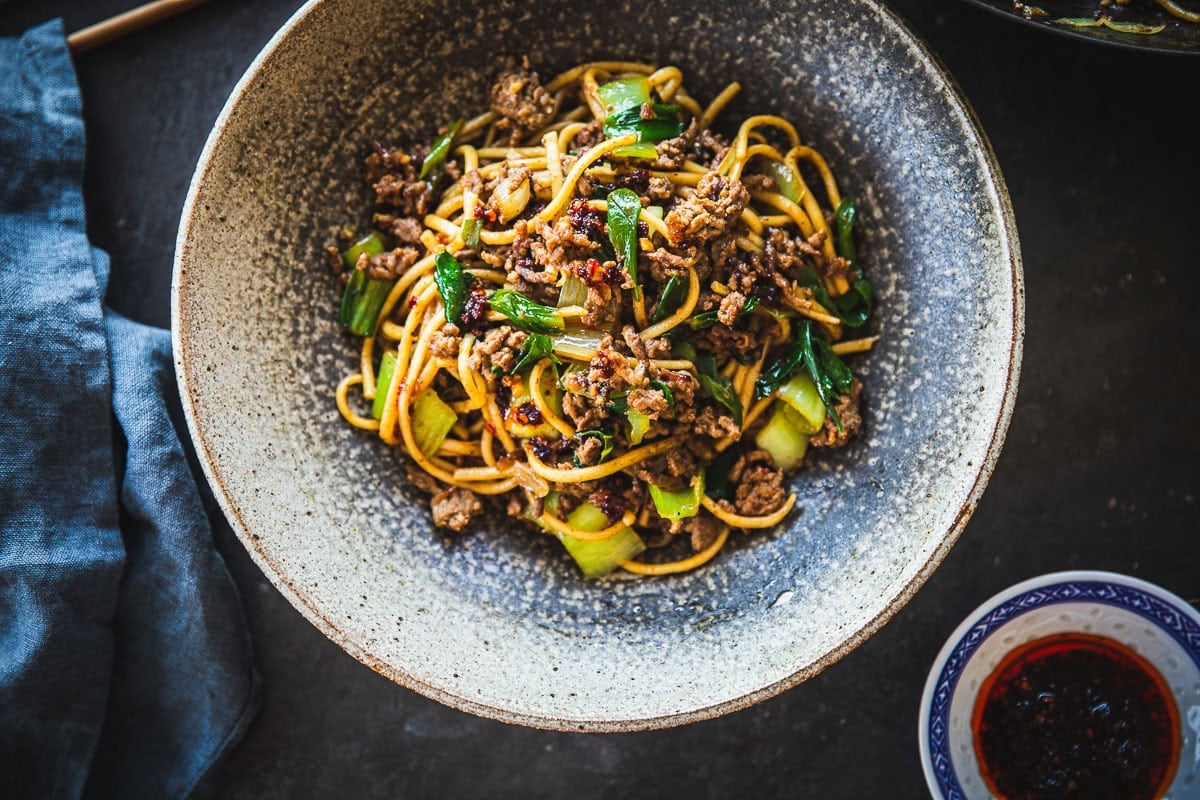
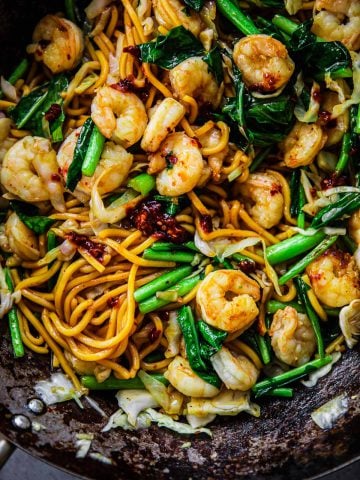
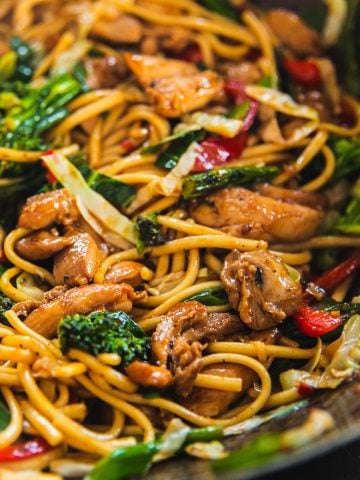
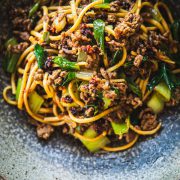
Get ready to make dinners instantly more exciting! Hoisin Beef Noodles with caramelised beef tossed in glossy udon noodles and a deliciously thick Chinese sauce. Lots of ginger and garlic and greens to deliver a world of flavour. Better than takeout (healthier too!) and ready in 20 minutes!
🍜 Why Make My Hoisin Beef Noodles?
Everyone loves a fast, cheap weeknight dinner that is not only incredibly delicious but super low effort too. If you have already tried my Chicken Hoisin Noodles, you will know why I love cooking with hoisin noodles. Here is why you need to make my Hoisin Beef Noodles ASAP!
- Ready in 20 minutes.
- Packed with authentic flavour but better than takeout (and healthier too!).
- A crowd-pleaser.
- Can be easily doubled.
- These noodles are great for packed lunches and travel well.
- Can be made up to 2 days ahead and stored in the fridge.
📝 Ingredients
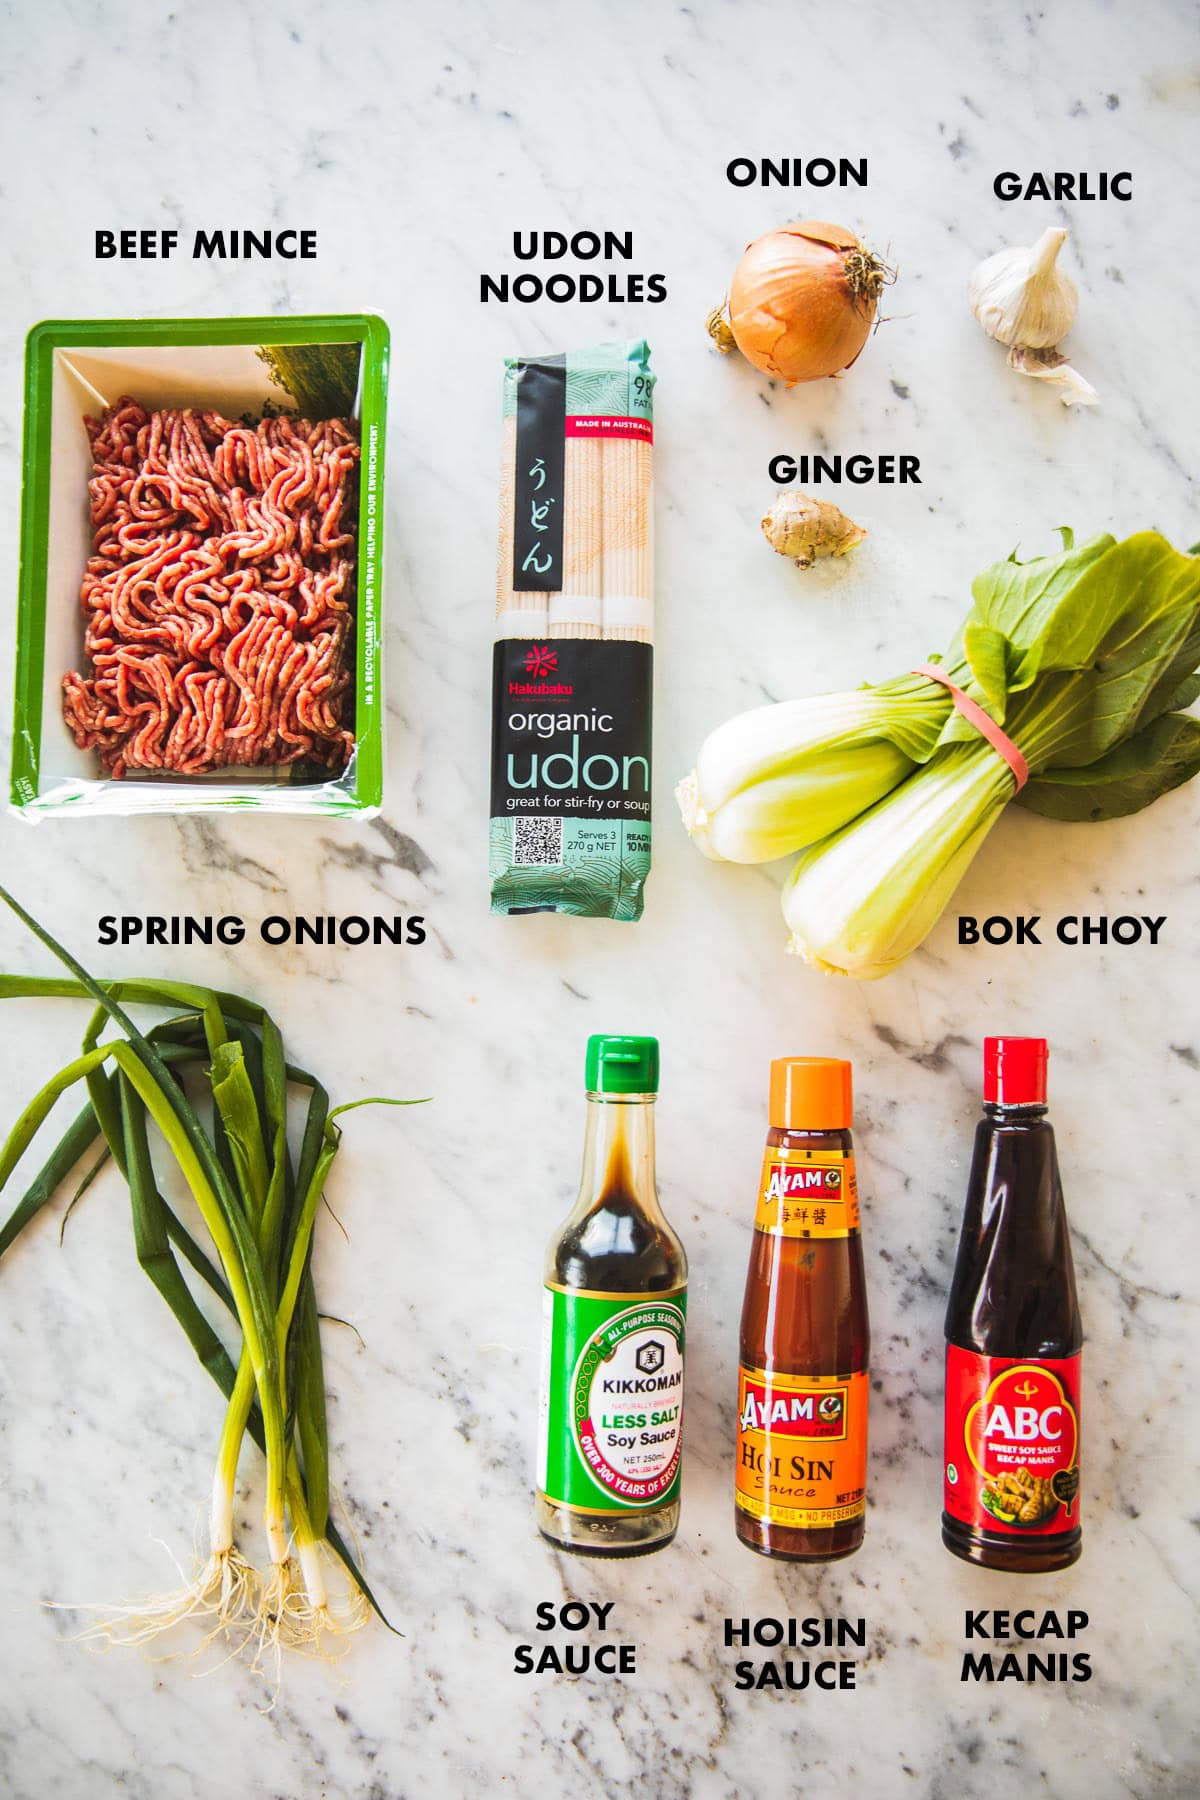
Noodles - Any thick noodle like Hokkien or udon works well in this recipe. I use dry udon noodles. They are easily available and a staple in my pantry. They cook in just 4 minutes and are instantly ready to use in stir-fries.
Beef - I use organic lean beef mince. It cooks quickly and caramelizes well.
Aromatics - You will need brown onion, ginger and garlic for the stir-fry base and spring onions for garnish.
Vegetables - Any quick-cooking Asian greens will work well in this recipe. I use Bok Choy.
Soy Sauce - This recipe uses light soy sauce (preferably salt-reduced). Tamari is a good substitute.
Kecap Manis - Kecap manis is a sweetened dark soy sauce that adds incredible colour and flavour to the stir-fry. It is aromatic, and viscose and has a molasses-like flavour due to adding palm sugar or jaggery.
Hoisin Sauce - Hoisin sauce is a thick, caramel-coloured, fragrant sauce often used in Chinese cooking to boost flavour. It has a sweet and salty taste and is made of soybeans, fennel, chilli and garlic.
Oil (not pictured) - Any neutral oil (like grapeseed oil) or peanut oil is good for this stir-fry.
🔥 How to make Hoisin Beef Noodles
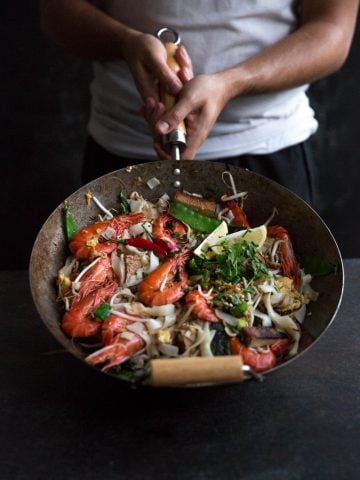
One of the key things to remember when making these noodles is to use a large carbon steel wok on very high heat. A thinner metal wok like carbon-steel gets hot lightning fast and retains heat well throughout the stir-frying.
The large size means the beef mince isn't overcrowded and has room to cook (overcrowding mince in a pan sweats and steams it instead of browning and caramelizing it). And the high heat ensures the beautiful caramelization of the meat.
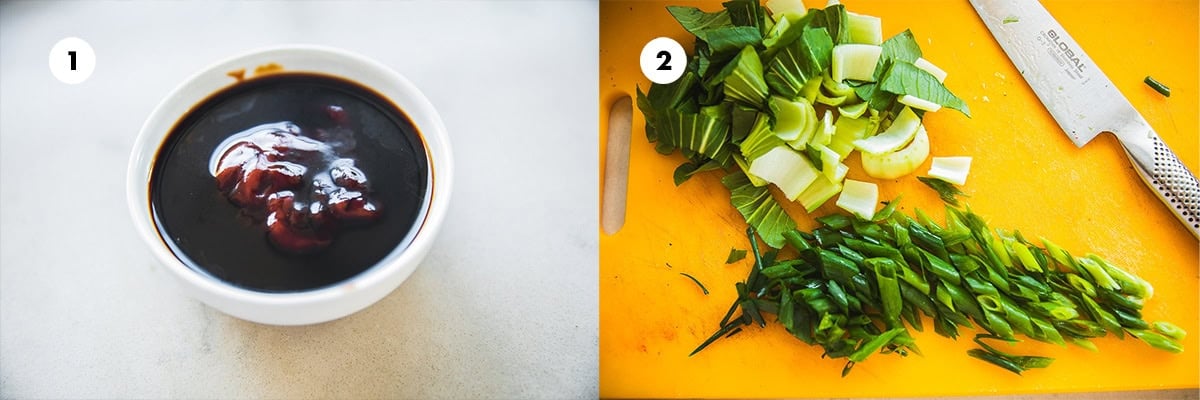
- Mix soy sauce, hoisin sauce and kecap manis in a bowl to make the stir-fry sauce.
- Slice spring onion and bok choy for the stir-fry.
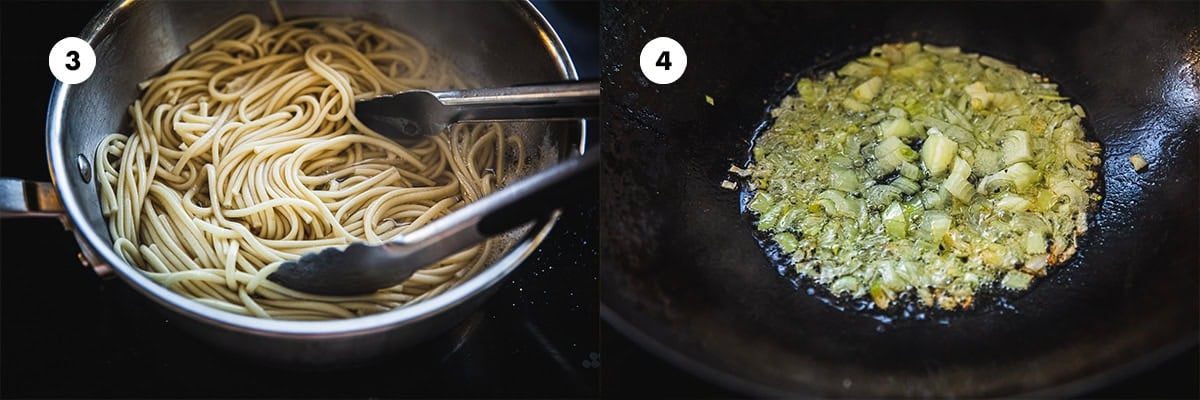
3. Cook udon noodles as per packet instructions. Drain and set aside.
4. Heat oil in a large wok on high heat and stir-fry onion for 1-2 minutes until translucent.
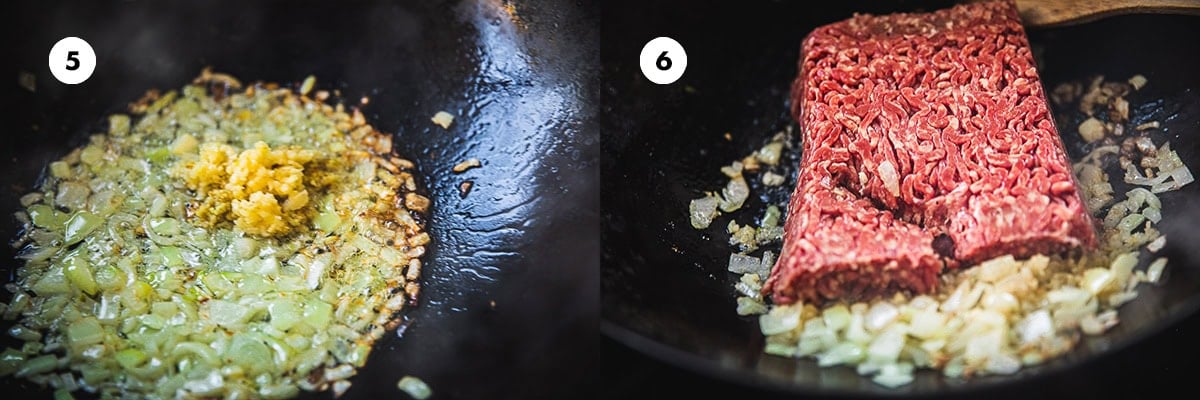
5. Fry ginger and garlic for a few seconds until fragrant.
6. Add beef mince and break it up with a wooden or metal spatula.
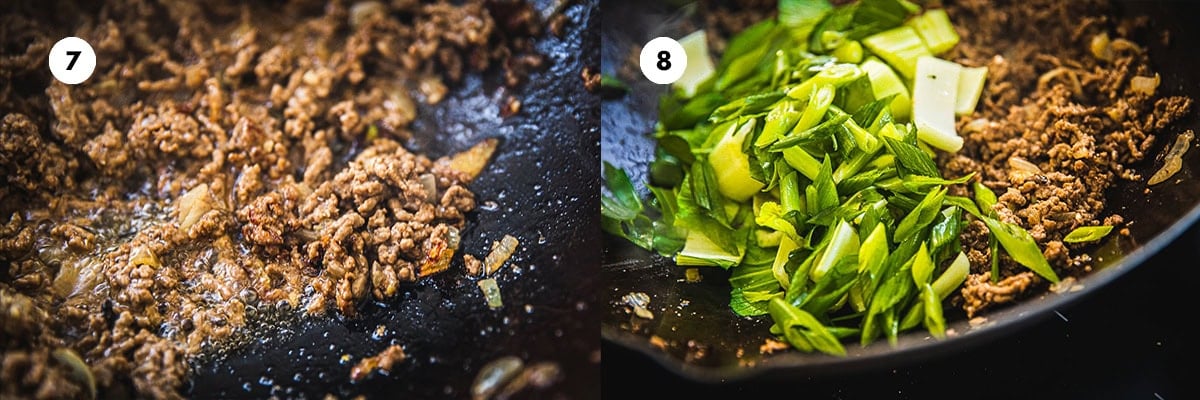
7. Spread beef mince in the wok and allow it to cook for 5-6 minutes without tossing, so the beef crisps, chars and caramelizes.
8. Add the greens and cook for 30 seconds until just wilted.
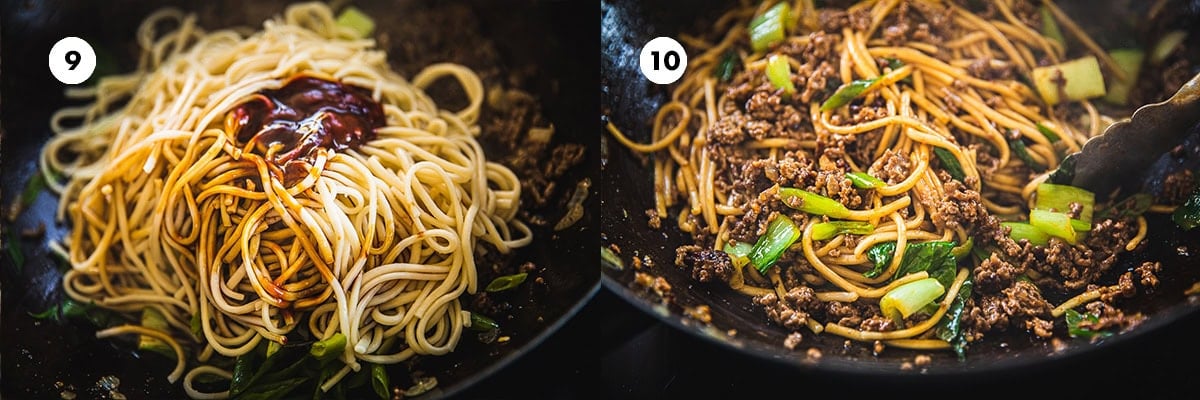
9. Add cooked noodles and stir-fry sauce to the wok.
10. Toss and stir-fry on high for a couple of minutes until heated through.
🍴Storage & Serving Suggestions
The Hoisin Beef Noodles keep well in the fridge in an air-tight container for up to 2 days. I wouldn't recommend freezing as cooked noodles don't thaw and reheat well, they tend to disintegrate and become mushy.
Serve these delicious noodles as part of a larger Asian meal with the following recipes
Indo-Chinese Sweet Corn Chicken Soup
👩🏻🍳 Recipe FAQs
Make sure you are cooking in a large wok at the highest heat you can go to. When the wok is smoking, start adding ingredients in intervals as per the recipe, allowing each ingredient to cook before proceeding. Don't overcrowd ingredients in the pan as this leads to sweating and steaming.
Cook beef mince at a very high temperature in a hot wok for a few minutes. Break up the mince and spread it. Don't toss, allow chunks of the beef mince to cook, brown and caramelize to perfection.
🧡 More Noodle Recipes To Make

Recipe
Hungry For More Recipes? Subscribe to my newsletter. Check out Facebook, Instagram and Pinterest to see everything I share! And if you love cooking and new cookbooks, join my free Cooking Club on Facebook!
Hoisin Beef Noodles
Ingredients
for the stir-fry sauce
- 1 tbsp soy sauce
- 1 tbsp kecap manis (sweet dark soy sauce)
- 2 tbsps hoisin sauce
for the stir-fry
- 1½ tbsps neutral oil
- 1 brown onion peeled and diced
- 4 garlic cloves minced
- 1 tbsp grated ginger
- 2 cups bok choy chopped
- 500 g beef mince
- 2 spring onions sliced
- 270 g Udon noodles (dry)
Instructions
- Mix soy sauce, hoisin sauce and kecap manis in a bowl to make the stir-fry sauce.
- Slice spring onion and bok choy for the stir-fry.
- Cook udon noodles as per packet instructions. Drain and set aside. (see notes)
- Heat oil in a large wok on high heat and stir-fry onion for 1-2 minutes until translucent.
- Fry ginger and garlic for a few seconds until fragrant.
- Add beef mince and break it up with a wooden or metal spatula. Spread beef mince in the wok and allow it to cook for a 5-6 minutes without tossing, so the beef crisps, chars and caramelizes. When all liquid has evaporated, toss the cooked beef around.
- Add the greens and cook for 30 seconds until just wilted.
- Add cooked noodles and stir-fry sauce to the wok.
- Toss and stir-fry on high for a couple of minutes until heated through. Serve
Notes
Nutrition
The post Hoisin Beef Noodles appeared first on Cook Republic.
Chicken Fried Rice 19 May 2024 8:32 PM (10 months ago)
Last Updated on September 24, 2024 by Sneh
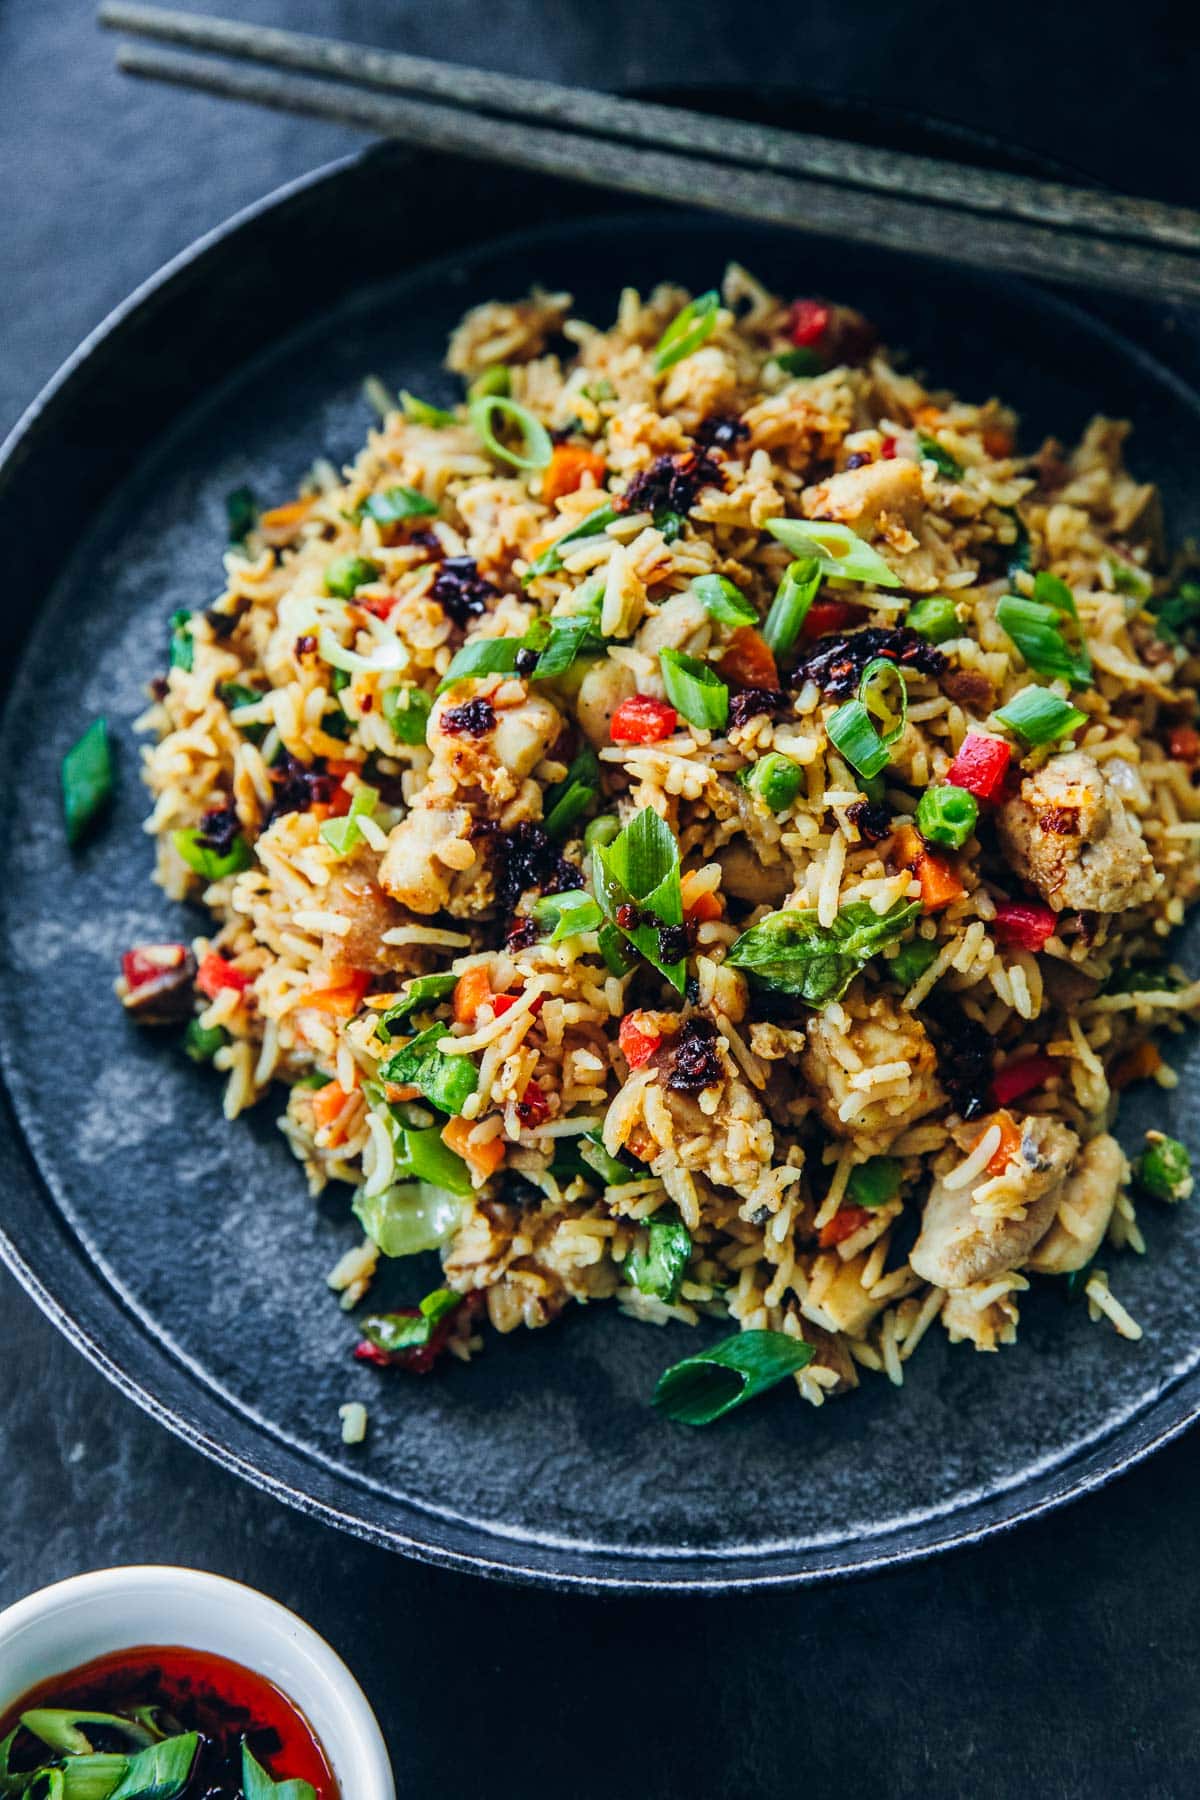
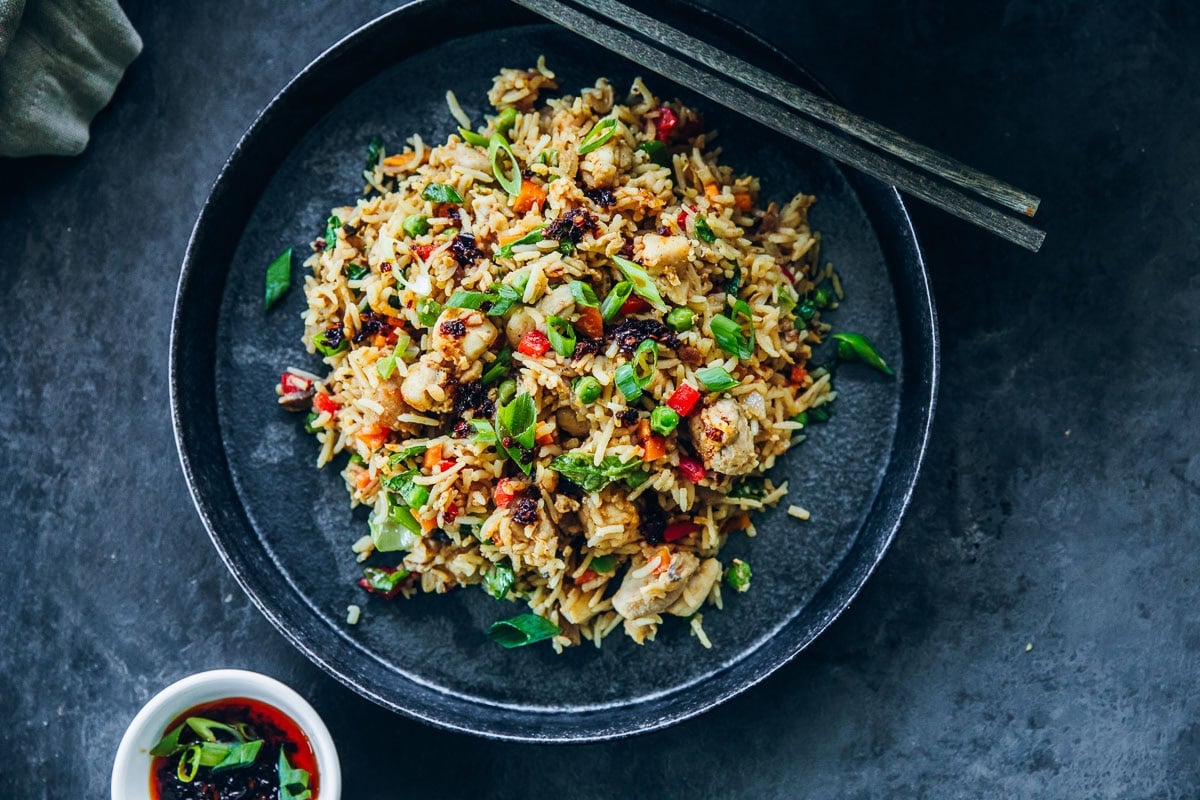
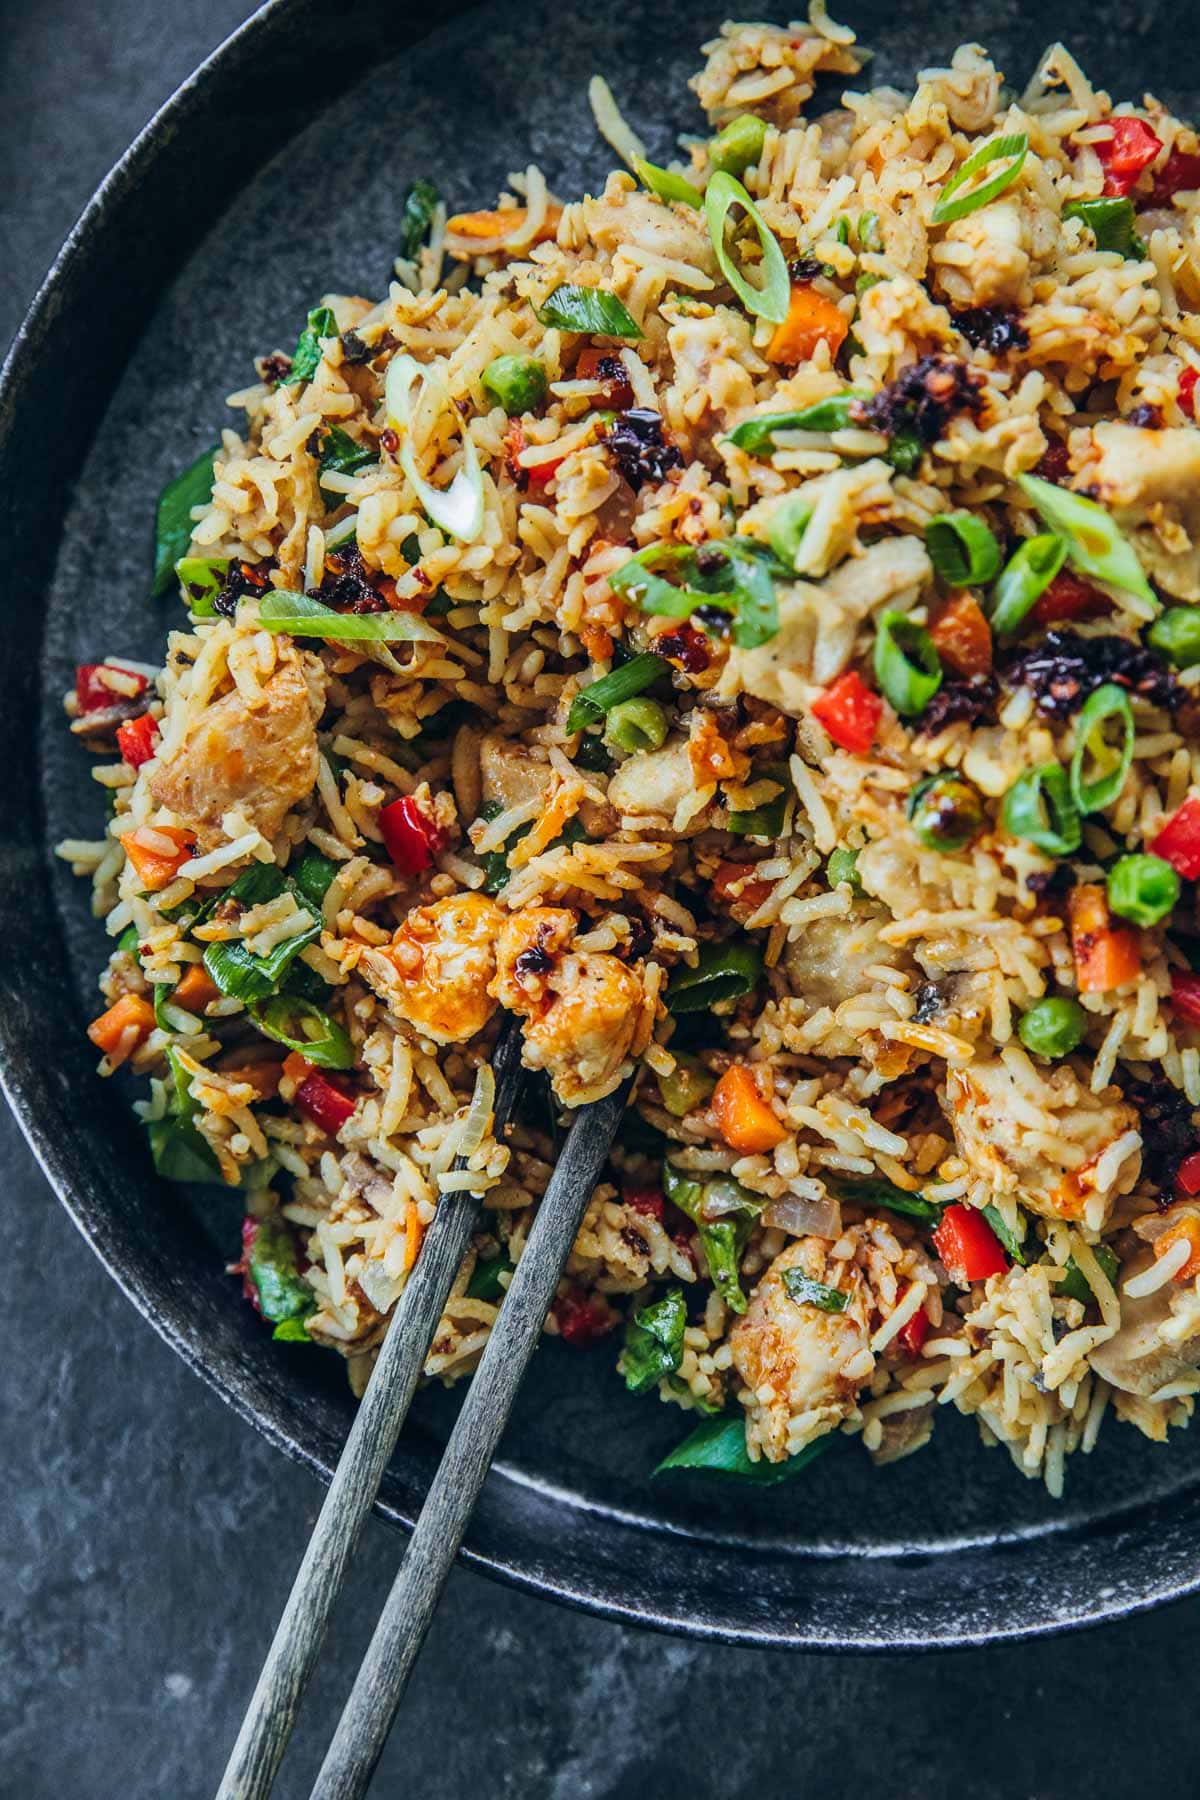
Everybody loves the smoky Chicken Fried Rice from their favourite Chinese restaurant. Now you can easily make it at home with my easy, fool-proof, authentic, restaurant-style recipe. Ready in just 20 minutes, absolutely delicious and the perfect weeknight dinner for the whole family!
🍚 Why make my Chicken Fried Rice?
We love a bowl of good fried rice. And this Chicken Fried Rice is a house favourite. It is great on its own or the perfect accompaniment to so many quick Asian dishes. Here is why you should make this fried rice,
- Easy one-wok recipe. Minimal clean-up and fuss.
- It is a meal prepper's dream. Cook the rice and store it in the fridge (Did you know that cooking and cooling rice increases its resistant starch which is very beneficial for your health?). Prep veggies and mix the stir-fry sauce. When you are ready to cook the rice, it will take 10-15 minutes tops!
- It travels well in lunch boxes and makes a satisfying school or work lunch.
- It is packed with veggies and protein.
- The recipe can be easily doubled.
- Freezes well.
📝 Ingredients & Substitutions
To make a batch of the most delicious Chicken Fried Rice you will need some everyday, easily available pantry and fresh ingredients. Here is what you need,
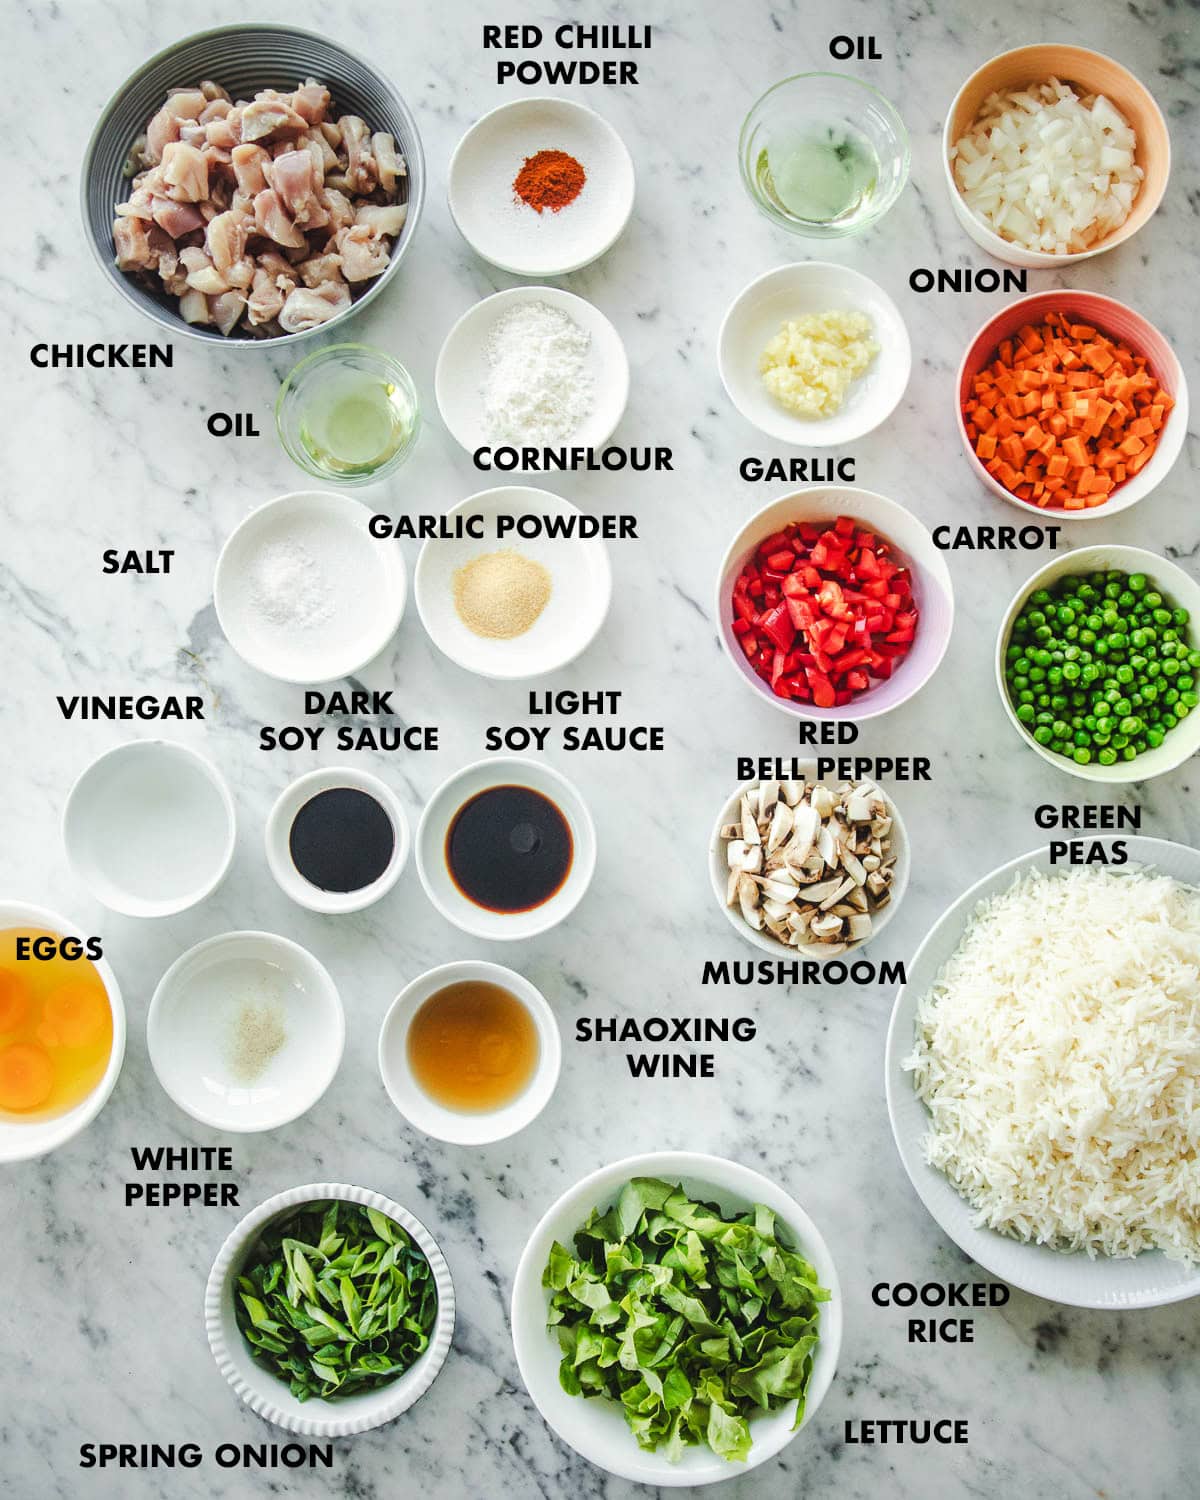
- Chicken - Boneless chicken thigh is the best cut for this chicken fried rice. It cooks quickly and turns out juicy and succulent. You can use boneless chicken breast (the meat will be drier) or chicken tenderloins (this is a great substitute for chicken thigh).
- Rice - Traditionally, a Chinese fried rice recipe would use short-grain rice. I love using basmati rice because it gives a beautiful consistency to the fried rice with each grain separate and fluffy without being stodgy or using too much oil. Cook the rice up to a day in advance and always use cold and cooked rice to make fried rice.
- Vegetables - I use onion, carrot, red bell pepper (capsicum), green peas, shiitake mushroom and lettuce in this recipe.
- Aromatics - Garlic and spring onion add a lovely flavour.
- Vinegar - Use white vinegar for this recipe. Can be substituted with rice wine vinegar,
- Soy sauce - I use a combination of light soy sauce and dark soy sauce for saltiness and colour. Make sure your dark soy sauce is the non-sweetened version (either plain or mushroom flavoured). Do not use kecap manis which is the sweetened dark soy sauce.
- Shaoxing wine - This is Chinese cooking wine and is key to that wonderful fried rice flavour. Do not skip it.
- White pepper - You only need a little but adds a hit of complex flavour. Can be substituted with black pepper.
- Eggs - Use fresh, medium eggs (each weighing approximately 65g whole)
- Cornflour - This is known as cornstarch outside of Australia and is the silky, fine, white powder used to thicken sauces.
- Garlic and red chilli powder - I use garlic and red chilli powder to marinate the chicken so that it remains reasonably dry and smooth. You can substitute garlic powder with freshly minced garlic (2 cloves) and red chilli powder with Gochugaru or sweet paprika.
🔥 How to make Chicken Fried Rice?
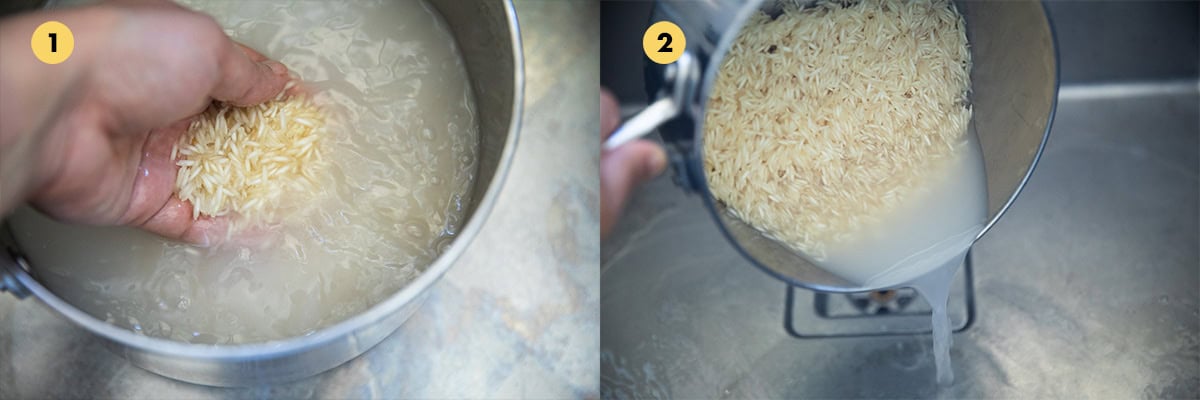
- Wash and rinse white rice in water.
- Wash until water runs clean and drain completely.
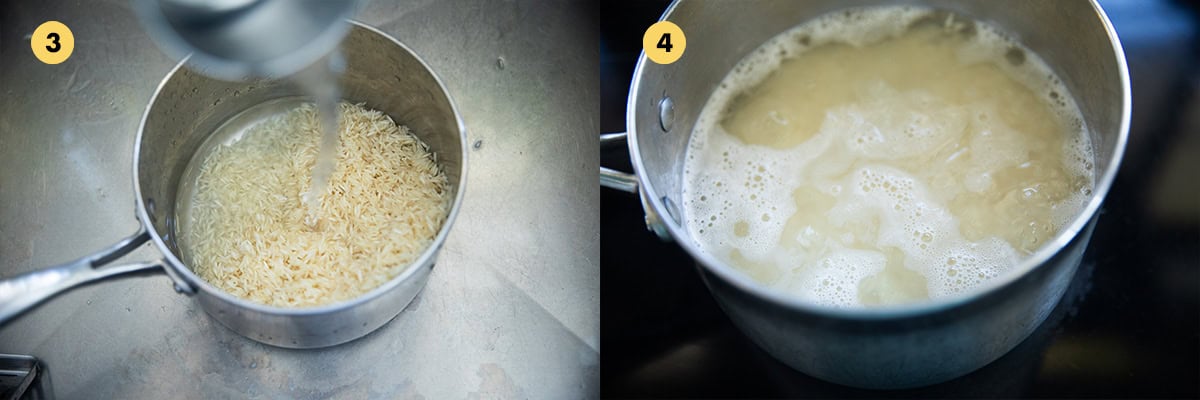
3. Add fresh water to the washed rice.
4. Cook on high heat for a couple of minutes and bring to a boil
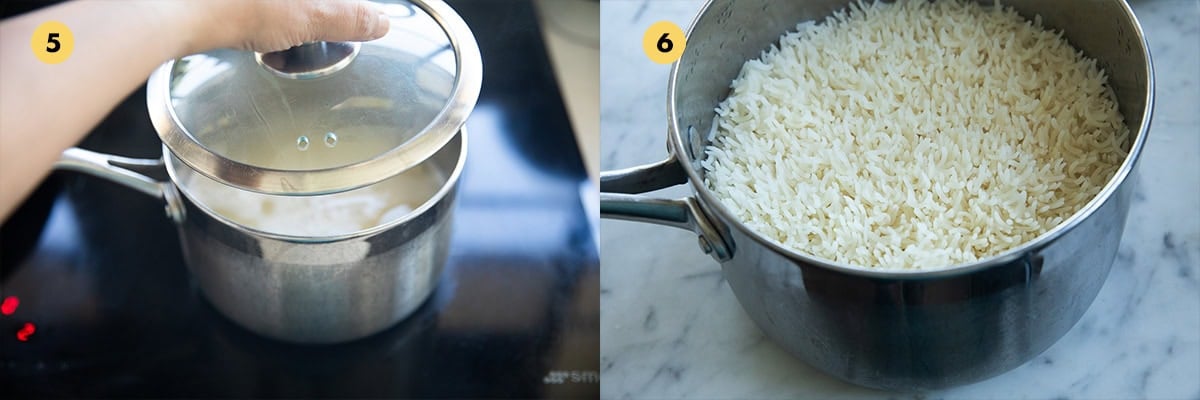
5. Reduce heat to low and cover with a lid.
6. Cook for 10-12 minutes until rice is done.
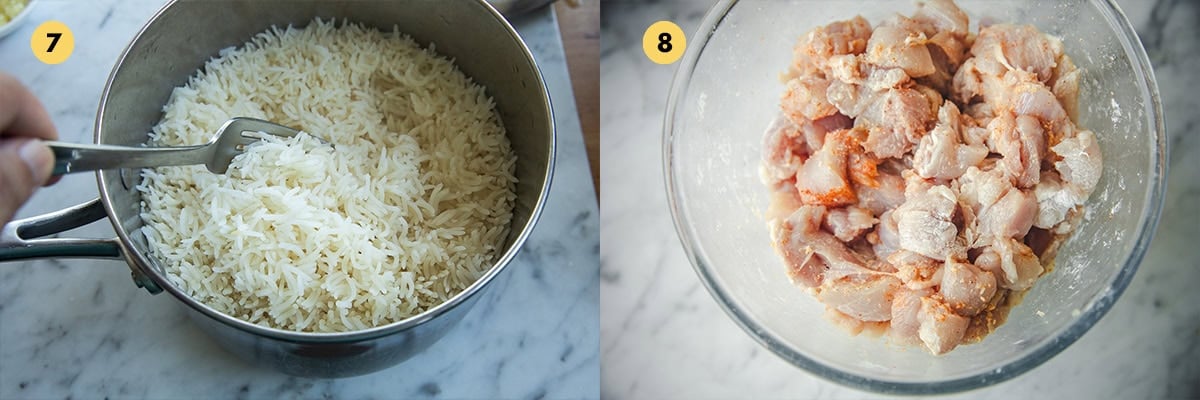
7. Fluff up the cooked rice with a fork to cool it. Alternatively, store in the fridge overnight and use cold rice for the fried rice.
8. Marinate chicken in a bowl with salt, garlic powder, red chilli powder and cornflour.
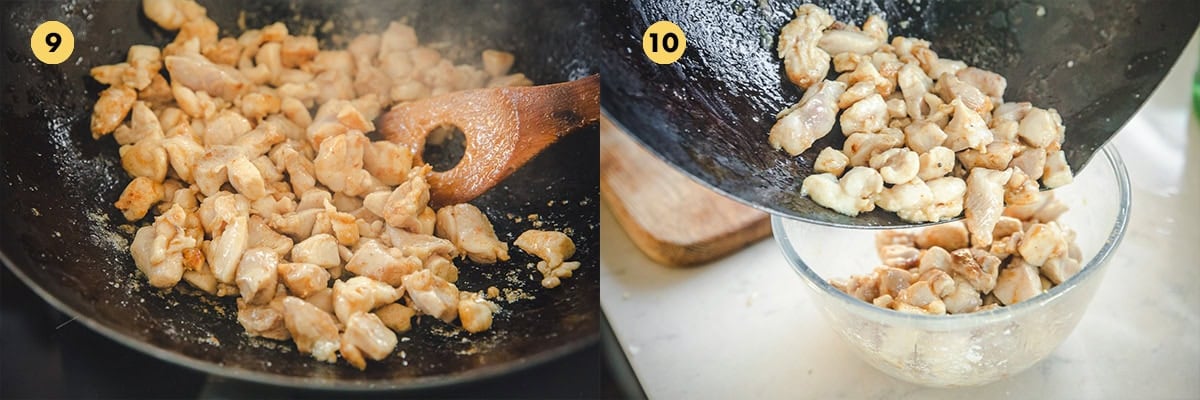
9. Stir-fry chicken in oil in a hot wok until golden.
10. Remove and set aside.
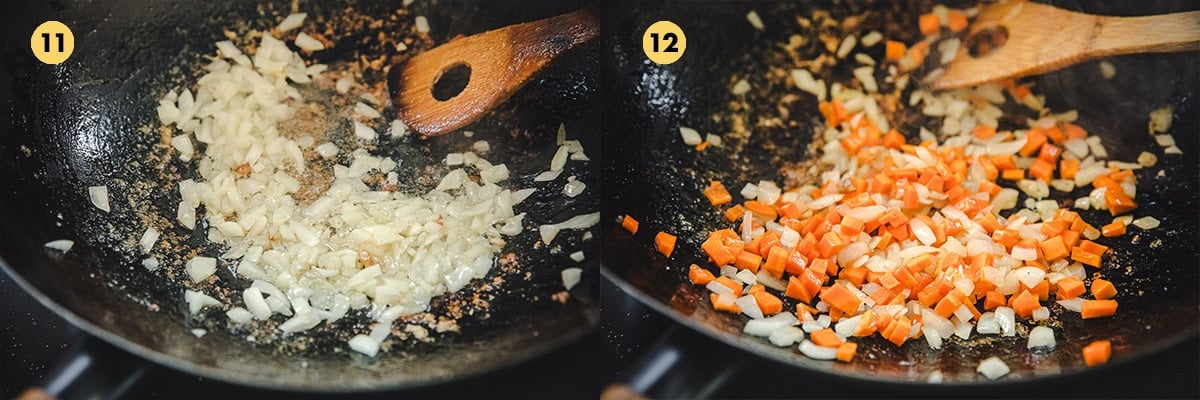
11. Stir fry onion until translucent.
12. Add carrot and stir-fry for a few minutes.
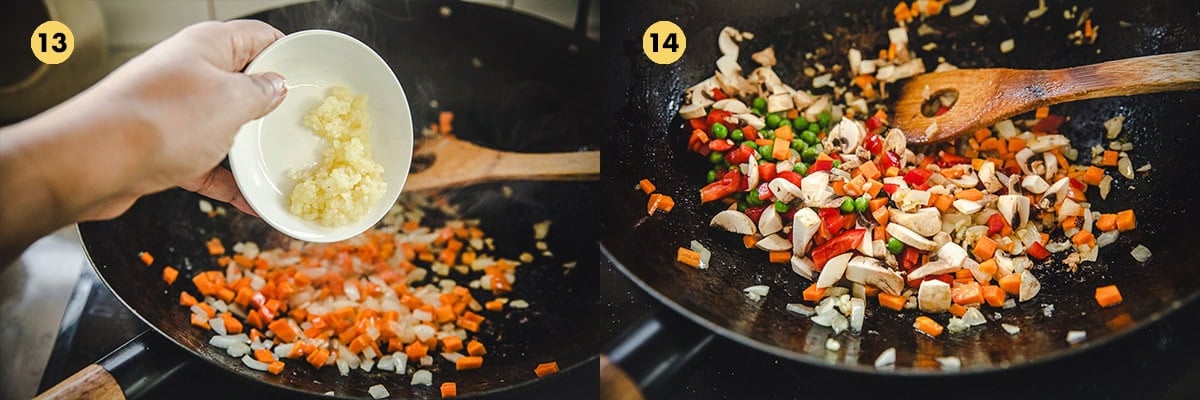
13. Add garlic and stir-fry for a few seconds until fragrant.
14. Add mushroom, red bell pepper and green peas. Stir fry briefly.
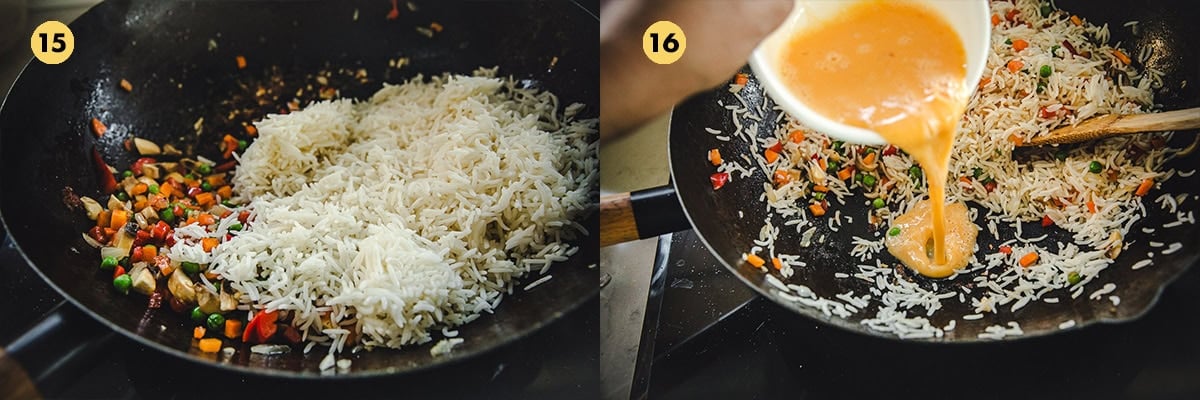
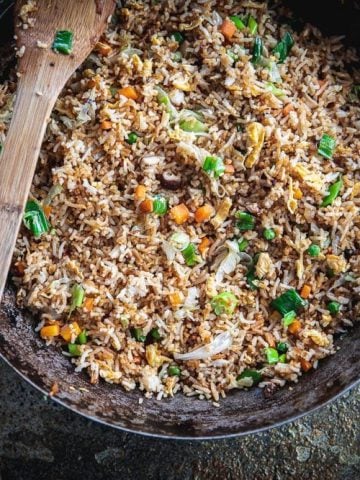
15. Add cold, cooked rice. Stir and move everything to one side of the wok.
16. Add whisked egg in the gap.
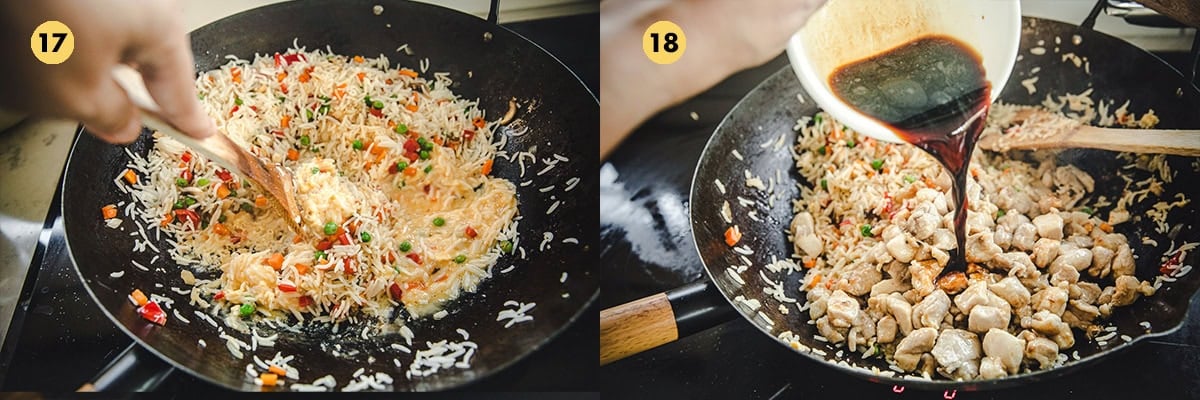
17. Allow to cook for a few seconds and then stir and toss through the rice.
18. Add the stir-fry sauce and cooked chicken. Stir-fry on high until mixed through and hot.
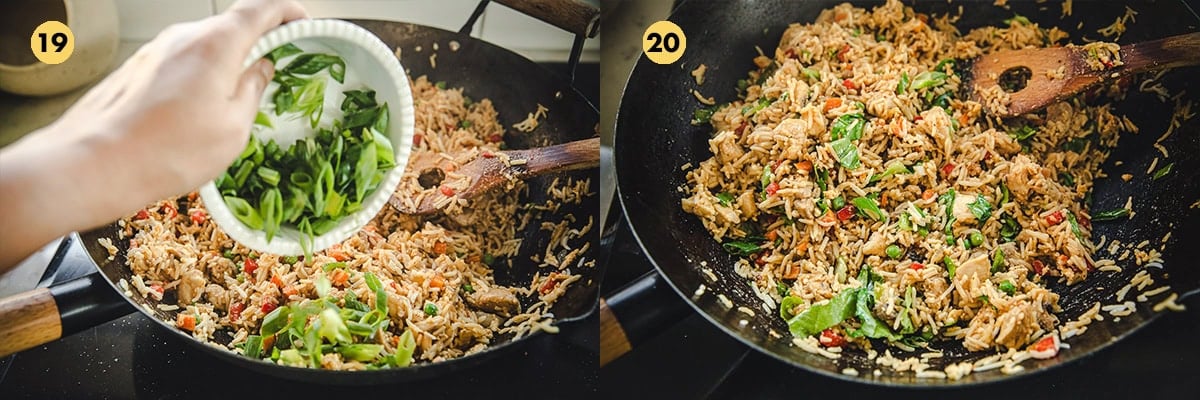
19. Add lettuce and spring onions.
20. Mix well and remove from heat.
Serve on a plate with extra spring onions and chilli oil.
🥢 Serving Suggestions
Serve this Chicken Fried Rice as part of an Asian banquet with the following dishes
- Chinese Cashew Chicken
- Vegan Mushroom Ma Po Tofu
- Asian Smacked Cucumber Salad
- Tomato Egg Drop Soup
- Vegan Chinese Chilli Eggplant
🥡 More Fried Rice Recipes


Recipe
Hungry For More Recipes? Subscribe to my newsletter. Check out Facebook, Instagram and Pinterest to see everything I share! And if you love cooking and new cookbooks, join my free Cooking Club on Facebook!
Chicken Fried Rice
Ingredients
for the stir-fry sauce
- 1 tablespoon light soy sauce
- 1 teaspoon dark soy sauce
- 1 teaspoon sugar
- 2 teaspoons flaky salt
- 2 tablespoons vinegar
- 1 tablespoon Shaoxing wine
- ¼ teaspoon white pepper
for the chicken
- 500 g boneless chicken thigh cut into 2cm pieces.
- 1 teaspoon garlic powder
- ½ teaspoon red chilli powder
- 1 teaspoon flaky salt
- 1 tablespoon corn starch
- 1 tablespoon oil
for the stir-fry
- 1 tablespoon oil
- ½ cup finely diced brown onion
- ½ cup diced carrot
- 1 tablespoon minced garlic
- ½ cup green peas fresh or frozen
- ½ cup diced mushroom
- ½ cup diced red capsicum
- 5 cups cooked rice basmati or short grain
- 3 eggs whisked
- ½ cup spring onion
- 1 cup chopped lettuce
Instructions
- Stir-Fry Sauce - Make the stir fry sauce by mixing light and dark soy sauce, sugar, salt, vinegar, Shaoxing wine and white pepper in a bowl.
- Chicken - Add chicken, garlic powder, chilli powder. Salt and corn starch to a bowl. Mix well and set aside for 10 minutes. Heat oil in a large wok on high heat. Add chicken and stir-fry on high for approximately 6 minutes until just cooked. Remove and set aside.
- Heat another tablespoon oil in the wok on high. Add onion and carrot and stir fry for 30 seconds until glazed and starting to caramelize. Add garlic and stir fry for a few seconds until fragrant. Add peas, mushroom and capsicum. Toss and stir fry for 30 seconds.
- Add rice and mix well. Push rice to the side of the wok and add the whisked egg in the gap. Cook for a few seconds, then push and toss the egg with a wooden/metal turner, slowly mixing it into the rice until the rice takes on a yellow hue.
- Drain all the liquid from the chicken. Add the cooked chicken and sauce to the rice and mix well. Tossing constantly, stir fry for a minute until everything is heated through.
- Add spring onion and lettuce. Toss to mix well and stir fry for a further 30 seconds until greens are just glazed.
- Remove from heat. Rest for a couple of minutes and serve hot.
Nutrition
The post Chicken Fried Rice appeared first on Cook Republic.
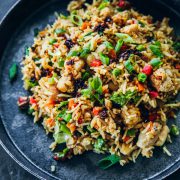
Sauteed Spicy Chickpeas 24 Mar 2024 8:37 PM (last year)
Last Updated on March 25, 2024 by Sneh
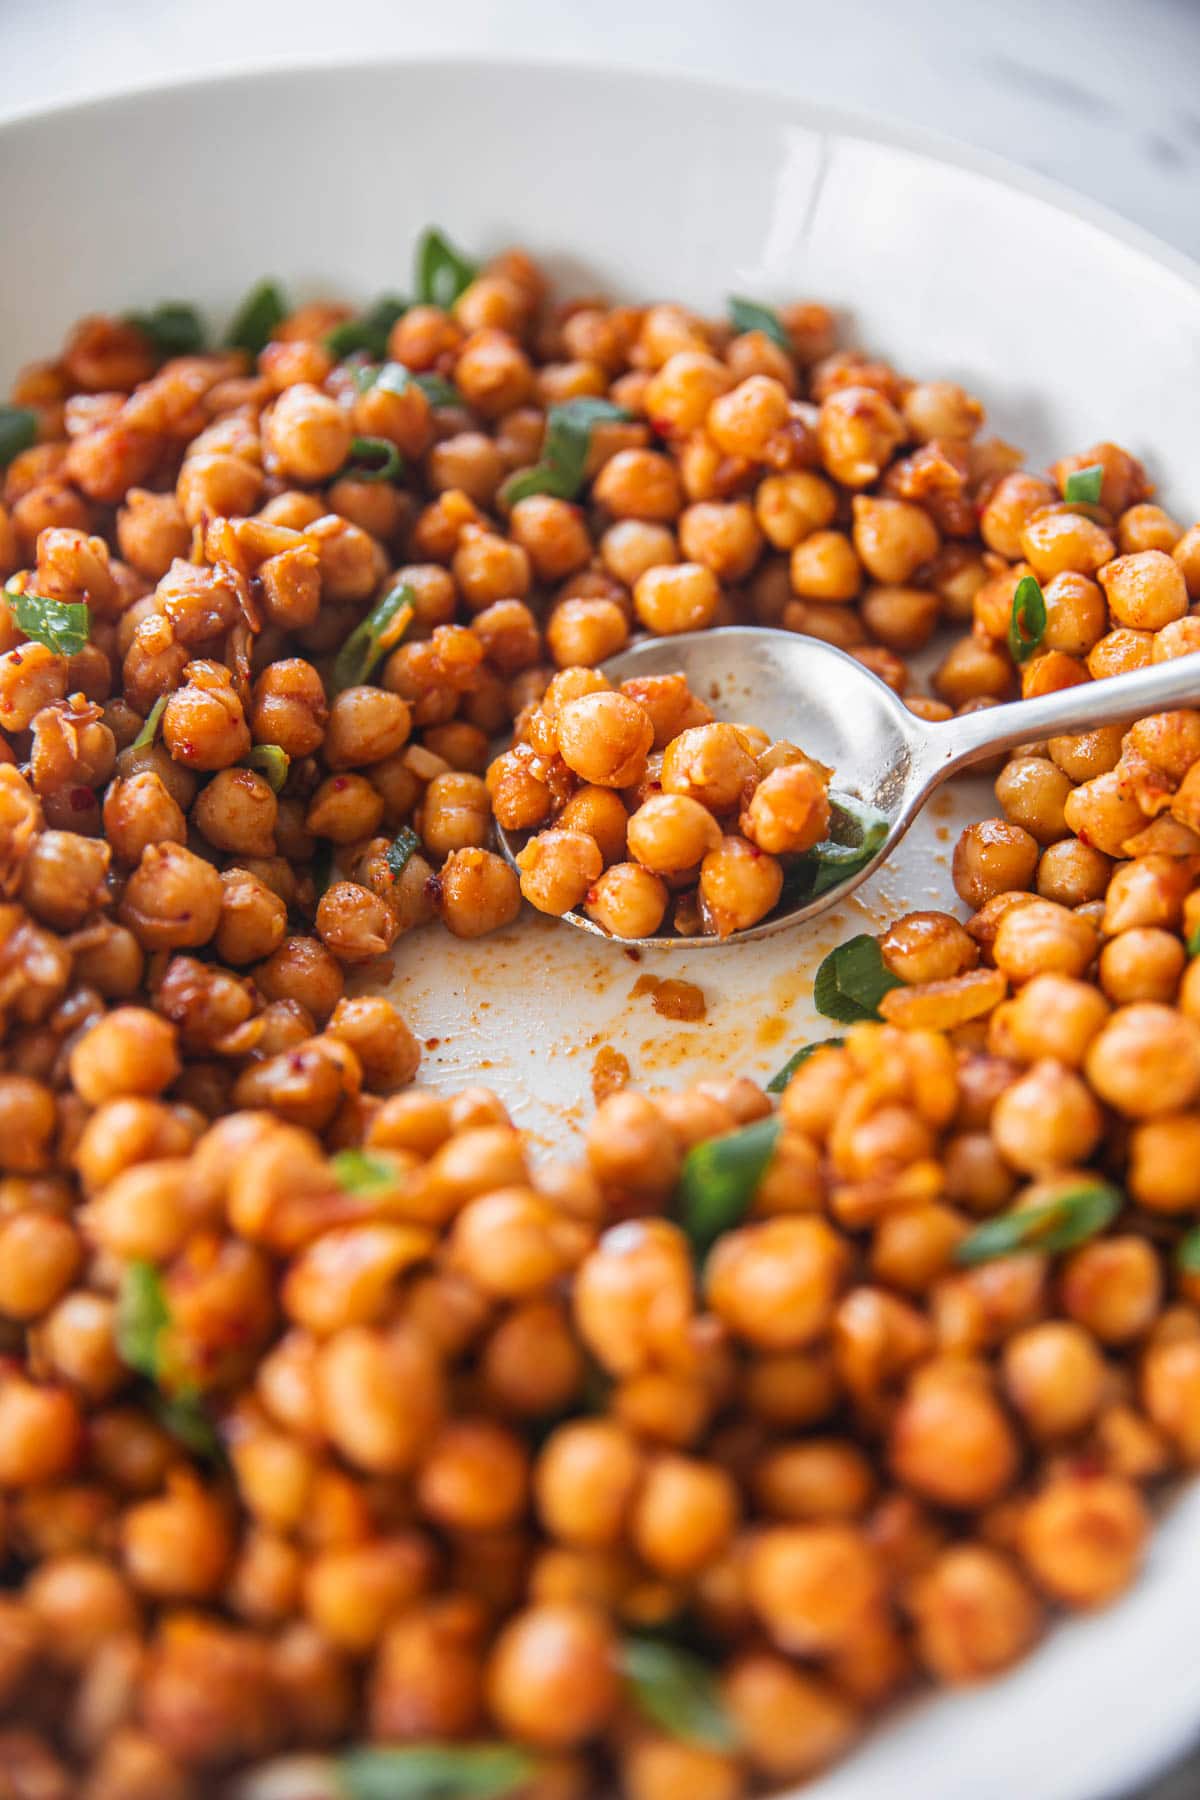
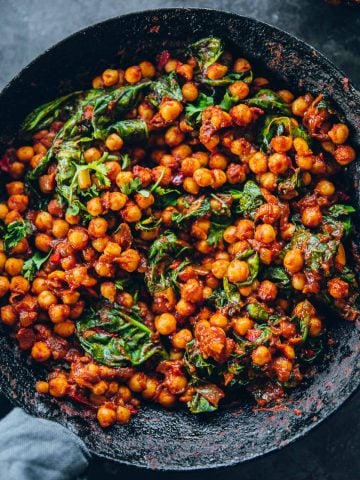
If you are looking to boost your daily protein intake effortlessly, you need my Sauteed Spicy Chickpeas in your life. These easy, delicious chickpeas are pan-fried, ready in 15 minutes and can be made ahead. Eat them on their own or add them to a fabulous Jennifer Aniston Salad or a Roasted Cauliflower Salad.
🌶️ Why make these Sauteed Spicy Chickpeas?
My Spicy Chickpeas are bursting with flavour and make an excellent light meal for one (or two!). Here is why you'll love them,
- Super easy and only 15 minutes to make.
- Packed with beneficial spices and aromatics.
- Great way to boost your daily plant protein intake.
- Can be made ahead on meal prep days and stay fresh in the fridge for days. These chickpeas also freeze well.
📝 Ingredients & Substitutions
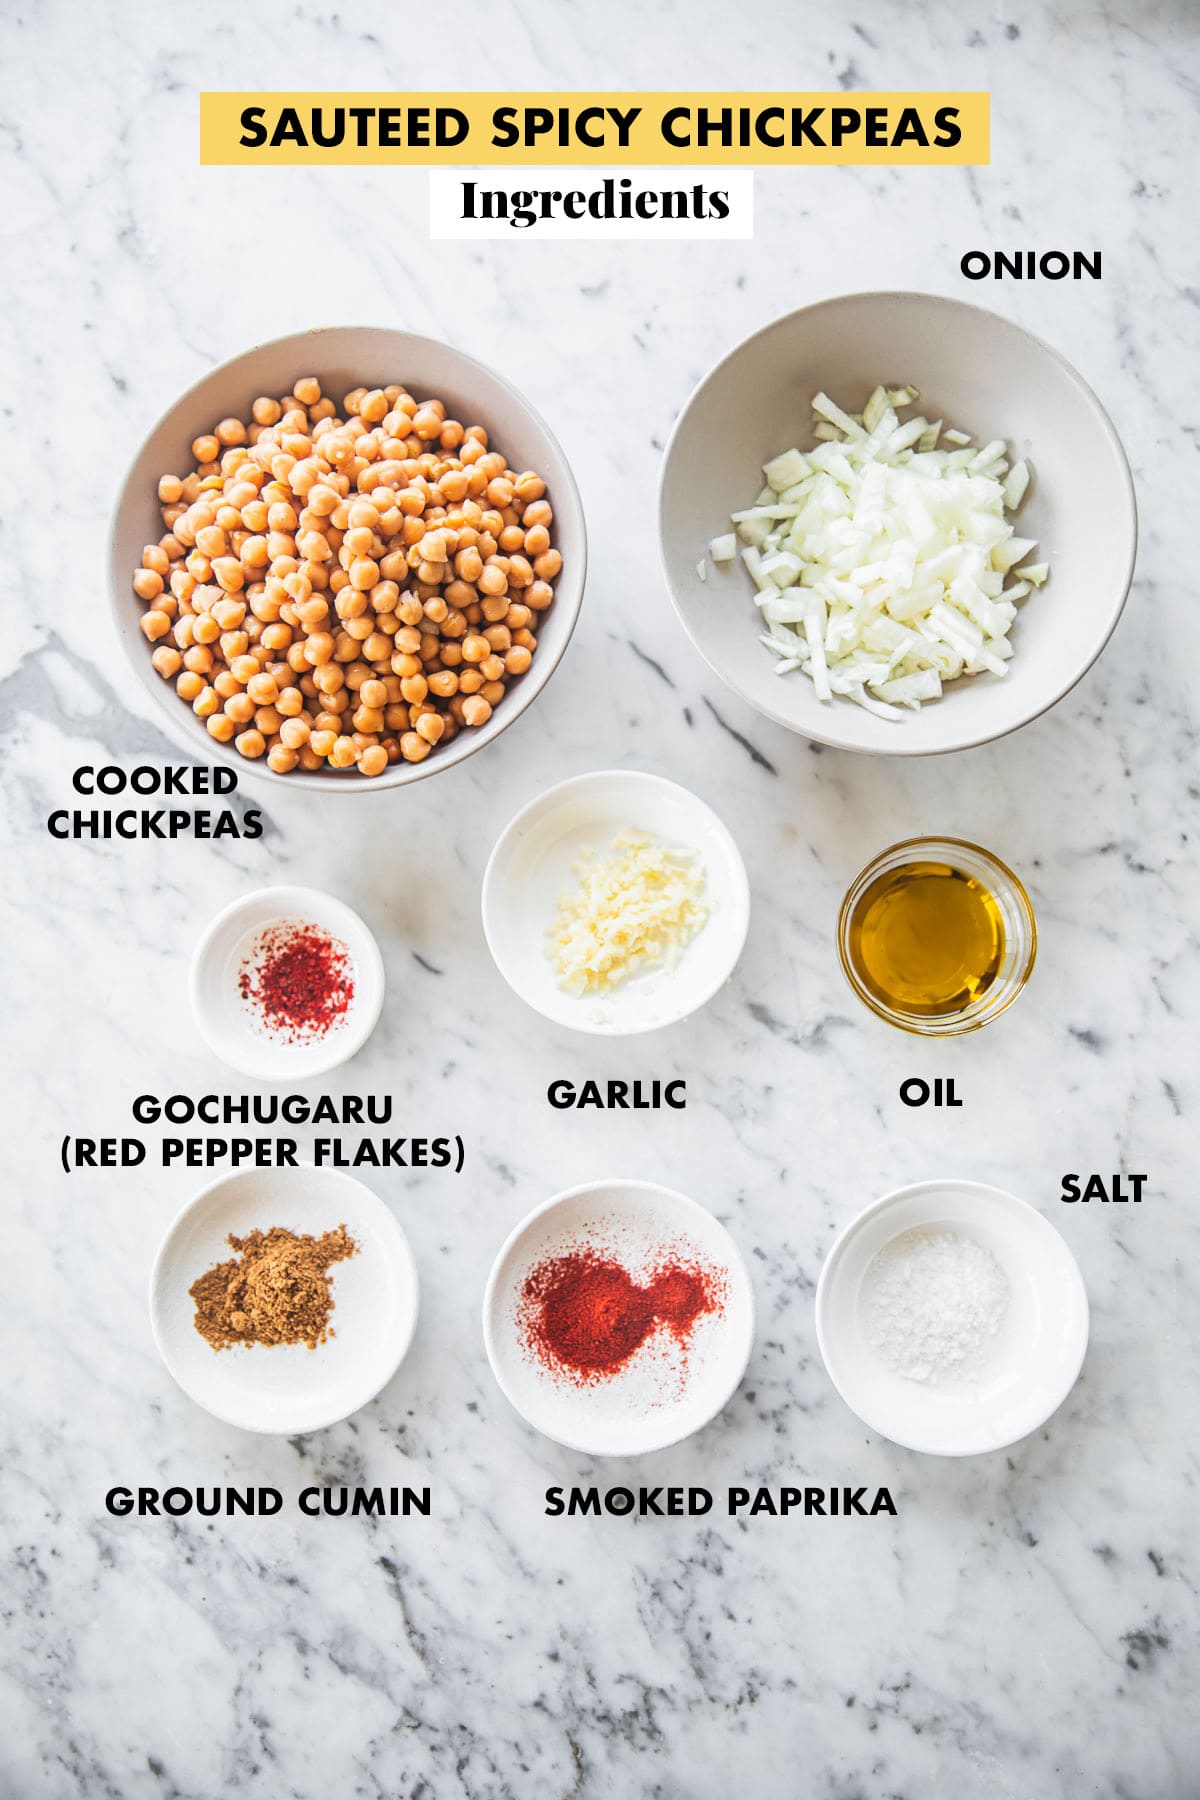
Chickpeas - You will need cooked chickpeas for this recipe. You can either soak and cook chickpeas from scratch or use canned chickpeas.
Onion - Brown onion is sweeter and caramelizes well. You can substitute with red onion or leek.
Spices - Gochugaru (red pepper flakes) add a delicious mild heat and a lovely colour to the spicy chickpeas. You can substitute with sweet paprika or cayenne chilli powder. Smoked paprika is a must for this recipe for that amazing smoky flavour. Cumin adds a wonderful earthiness.
Herbs/Alliums - You can use any herbs you have on hand - parsley and coriander/cilantro will complement the flavours in these spicy chickpeas perfectly. I have used spring onions because they taste the best in this recipe!
Garlic and lemon - These add a zing and pop, really lifting all the flavours.
🔥 How to make Sauteed Spicy Chickpeas?
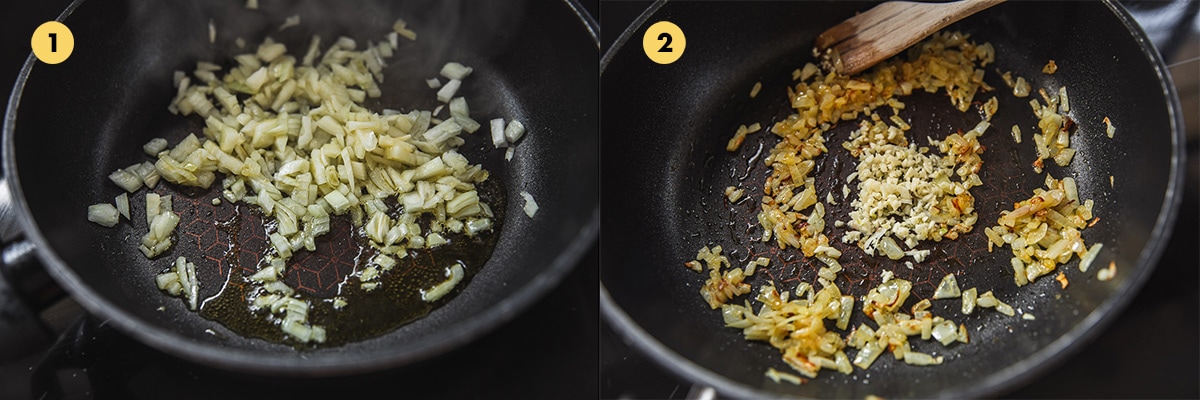
- Saute onion in oil until caramelized.
- Add garlic and saute for a few seconds until fragrant.
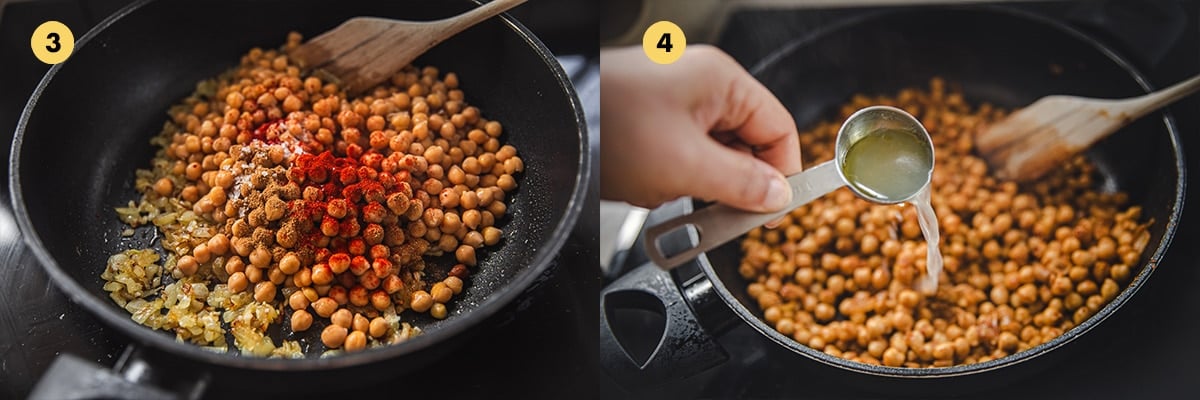
3. Add chickpeas, smoked paprika, ground cumin, Gochugaru and salt. Mix and cook until heated through.
4. Add lemon juice to the chickpeas.
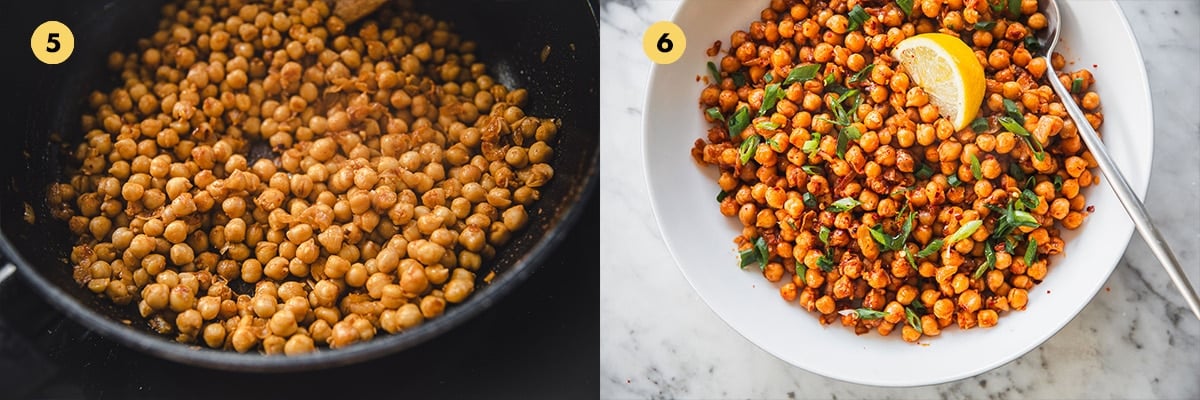
5. Mix and cook until heated through. Add spring onion and remove from heat.
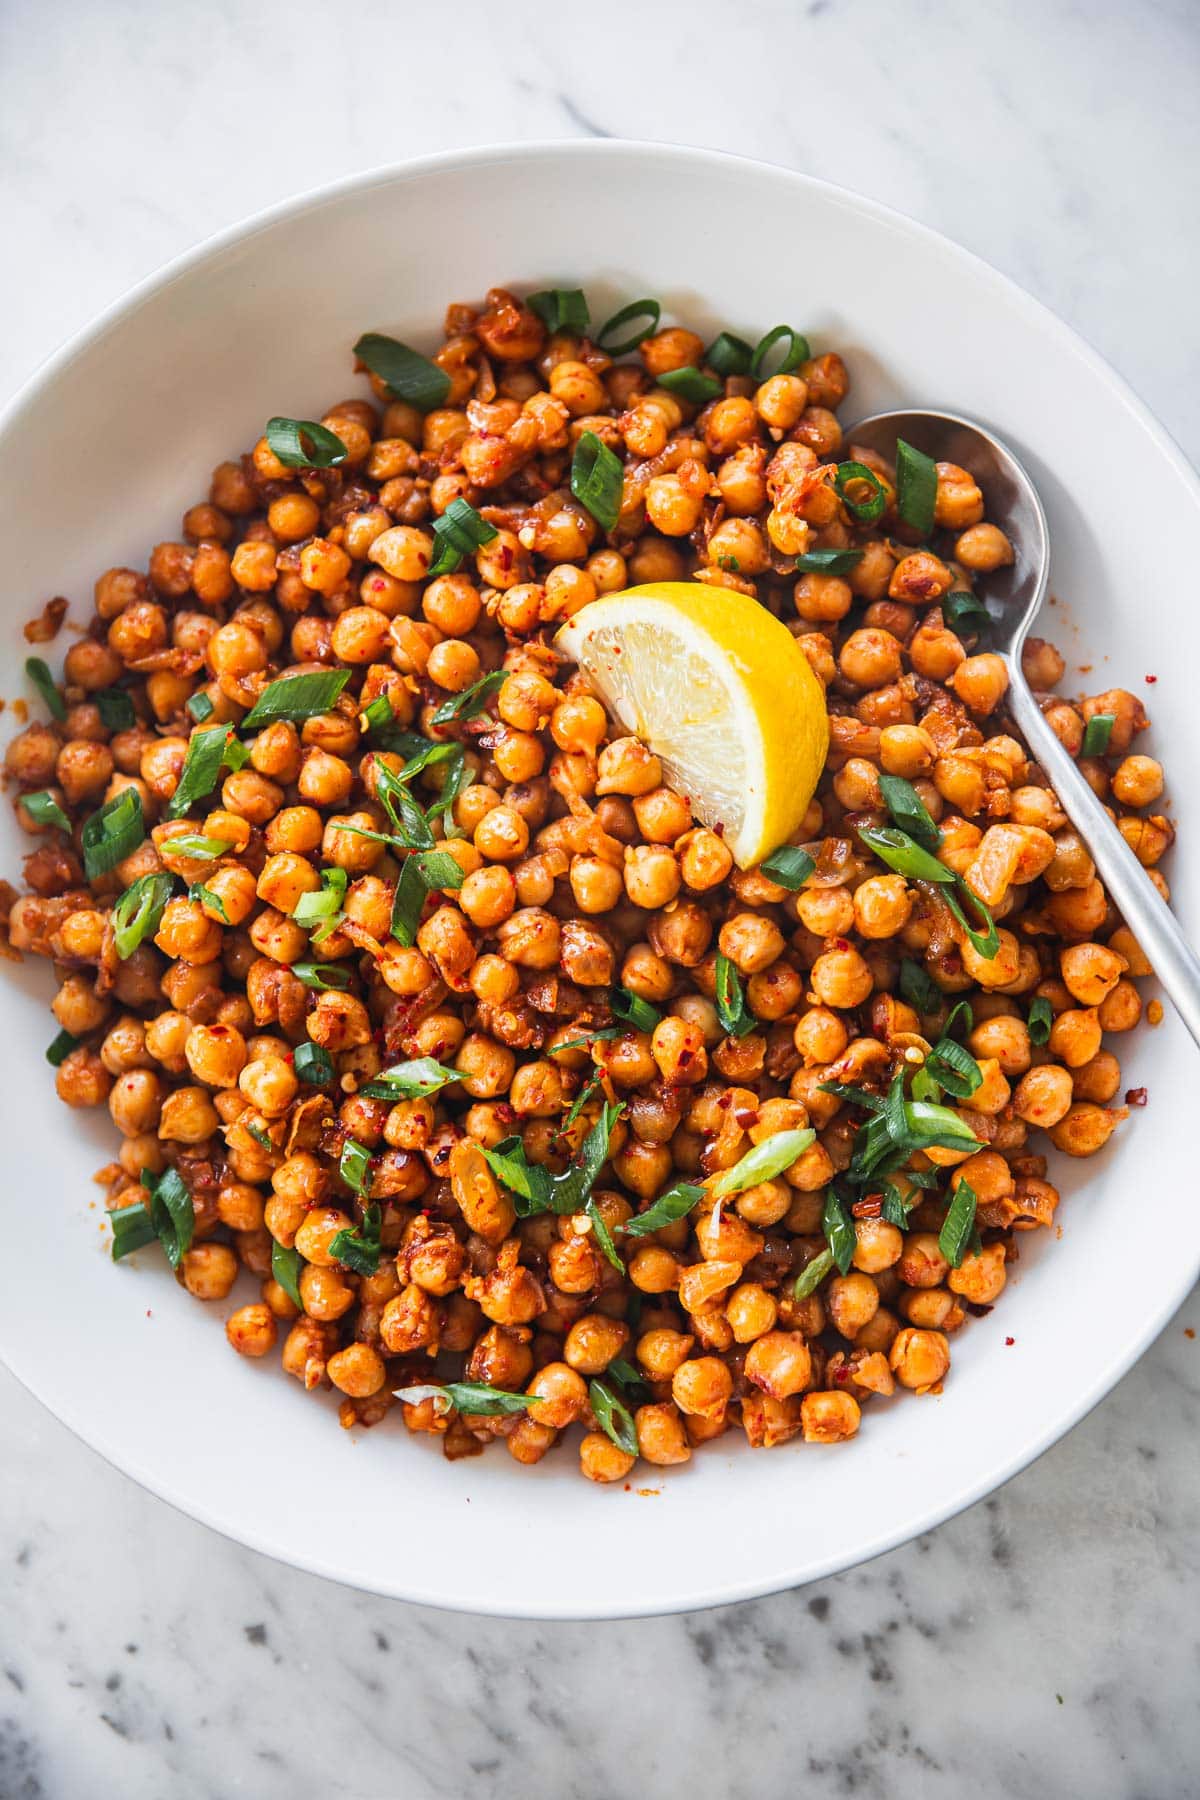
6. Serve drizzled with extra oil, some chilli flakes and a lemon wedge.
🍽️ Serving Suggestions
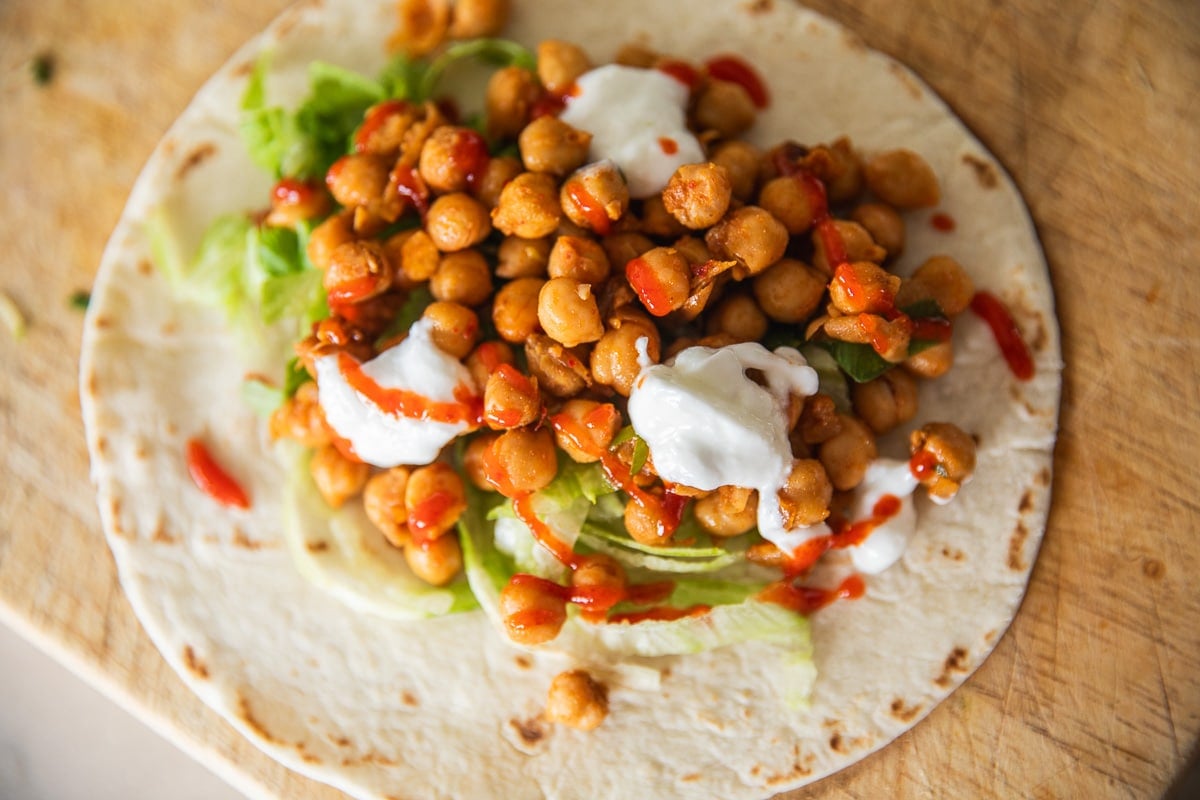
One of my favourite ways of eating these Sauteed Spicy Chickpeas (besides, just with a spoon - delicious!) is in a taco. Make a yummy Spicy Chickpea Taco by adding these chickpeas to a tortilla and topping with some shredded lettuce, smashed avo, Greek yoghurt and hot sauce. It is truly delicious!
These Spicy Chickpeas can be added to so many recipes and eaten in so many different ways - in wraps, tossed through salads, heaped over dips and smooshed in sandwiches.
💛 More Chickpea Recipes


Recipe
Hungry For More Recipes? Subscribe to my newsletter. Check out Facebook, Instagram and Pinterest to see everything I share! And if you love cooking and new cookbooks, join my free Cooking Club on Facebook!

Sauteed Spicy Chickpeas
Ingredients
- 1 tablespoon olive oil
- 1 brown onion diced
- 3 garlic cloves minced
- 500 g cooked chickpeas
- 1 teaspoon smoked paprika
- 1 teaspoon ground cumin
- ¼ teaspoon Gochugaru
- 1 teaspoon flaky salt
- 1 tablespoon lemon juice
- 1 spring onion sliced – green and white
To Serve
- Olive oil for drizzling
- red chilli flakes
- Lemon wedges
Instructions
- Heat oil in a medium cast iron frying pan on medium-high.
- Add onion and sauté for 6-8 minutes until softened and caramelized. Add garlic and sauté for a few seconds until fragrant.
- Add chickpeas, paprika, cumin, Gochugaru and salt. Reduce heat to medium. Mix well and cook for 6-8 minutes, tossing occasionally.
- Add lemon juice and spring onion mix well. Remove from heat.
- Drizzle with extra olive oil, sprinkle chilli flakes and serve with lemon wedges.
Notes
Nutrition
The post Sauteed Spicy Chickpeas appeared first on Cook Republic.
Thai Fish Cakes (Tod Mun Pla) 22 Feb 2024 8:41 PM (last year)
Last Updated on September 24, 2024 by Sneh
Thai Fish Cakes (known as Tod Mun Pla) are not only super popular in Thailand but also across the world. If you love the fish cakes at your favourite local Thai restaurant, then try my easy authentic 20-minute version. All you need is fish, red curry paste, egg, corn starch and fish sauce.
Packed with flavour and is much cheaper and better than takeout! I love having these with Tofu Pad See Ew for Thai night at home.

🐟 What are Thai Fish Cakes?
Thai Fish Cakes are Thailand's most beloved entree. Known as Tod Mun Pla in Thai, these are golden fried, spicy and chewy fish patties that have a springy, bouncy texture. In Thai "Tod Mun" means deep fry and "Pla" means fish.
Traditionally, in Thailand, these are made with Clown Featherback fish (known as Pla Grai) because of their unique elastic flesh. The flesh is beaten and whacked with a wooden baton or slapped against a bowl to activate the starch and create a bouncy, springy texture that makes Thai fish cakes so unique.
The fish paste that is created as a result is flavoured with red curry paste, Makrut lime leaves and fish sauce. It is then formed into patties and deep-fried. It is served with a cucumber and sweet-chilli sauce relish.
🦐 Best fish for Thai Fish Cakes
In the absence of Pla Grai, you can use a white fish that has firm, dense and reasonably elastic flesh. Adding 6-8 raw, peeled prawns also increases the elasticity of the resulting fish paste. Your fish must also be slightly fatty as this helps bind the fish paste.
You want to avoid small, lean or flaky fish. Try not to use red fish.
These are the best white fish to use,
- Ling (my recipes use this)
- Basa (great for Thai fish cakes and what I use for my Thai Green Curry Fish Cakes),
- Barramundi
- Catfish
- Cod
- Grouper
- Trevalla
- Mahi Mahi

🧡 Why you'll love this recipe
- You don't need Thai fish paste or any special, hard to find ingredients for this recipe.
- They taste just like your favourite Thai takeout.
- They are super easy to make. Just blend a handful of ingredients in the processor, make patties and pan-fry. Done!
- Pan-fried, not deep-fried!
- Makes a big batch of 18. Super cost-effective and everyone can enjoy generous portions.
📝 Ingredients & Substitutions
Traditional Thai Fish Cakes are made with fish paste. Fish paste is made by beating white fish flesh (like Pla Grai / Clown Featherfish of the Knifeback family) with red curry paste and aromatics until it is starchy, elastic and firm.
To create this same authentic texture and flavour, we only need a handful of easily available ingredients.
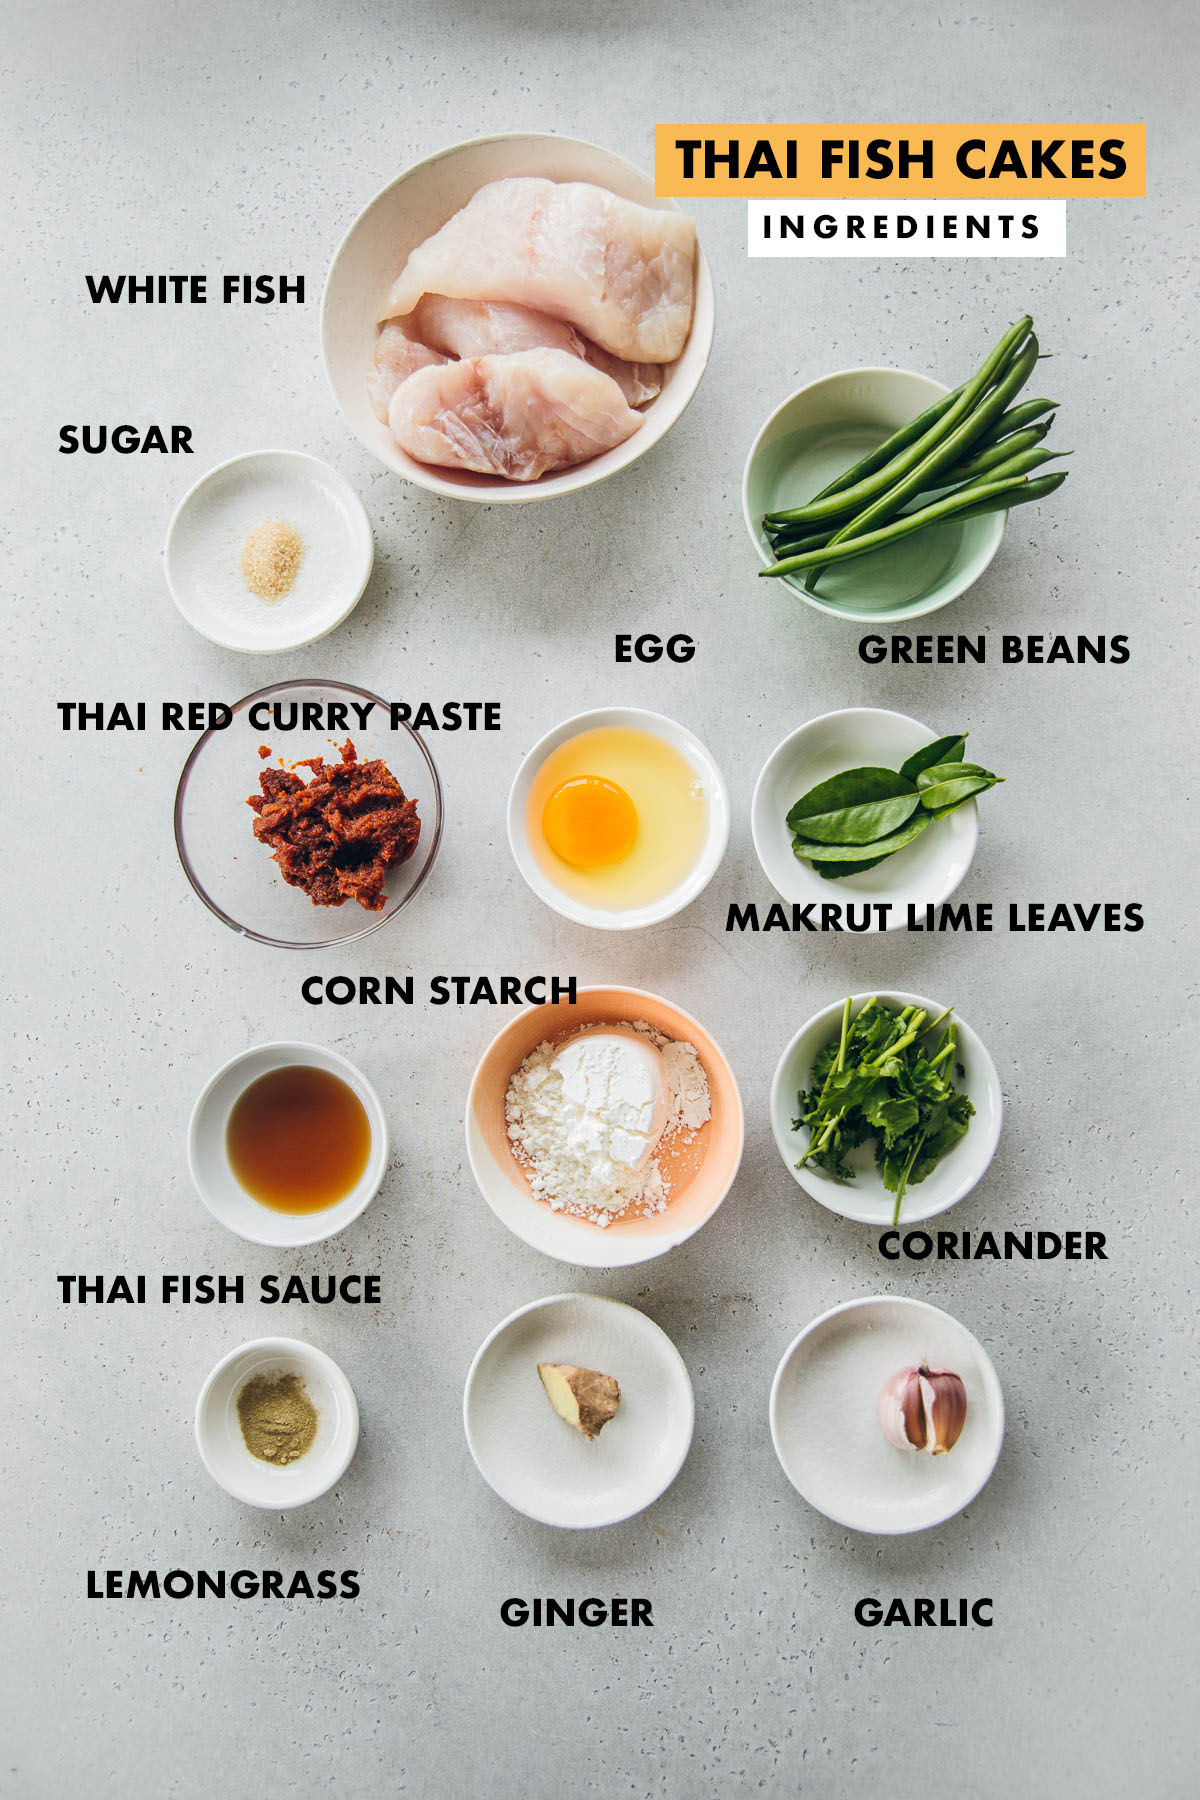
- Fish - I use Ling for my recipe. It is firm and has dense, elastic flesh. Basa is a great substitution. You want a fish that is not lean and slightly oily/fatty as this helps bind the fish paste. Other firm textured, non-flaky white fish to use are Barramundi, Grouper, Cod, Catfish, Trevalla and Mahi Mahi.
- Red Curry Paste - This is the most important ingredient for the fish cakes. I use the Maesri brand of red curry paste. It is a good amount of spicy, salty and savoury. It adds a delicious kick to the fish cakes without being overtly spicy. If you use another brand like Ayam, your fish cake will be less spicy. You can, of course, use any Thai red curry paste you like. Some other good brands are Marion Grasby (this one is properly spicy!) and Mae Ploy
- Thai Fish Sauce - This is a Thai condiment that adds saltiness and umami to the fish cakes. If you don't have fish sauce, substitute with half light soy sauce and half lime juice.
- Makrut Lime leaves - Also known as Kaffir lime leaves. Traditionally, chiffonade (leaves cut into very thin slivers) of lime leaves is added to the fish cakes. If you can't find lime leaves, substitute with a teaspoon of lime zest.
- Beans - Snake beans are thinly sliced and added to the fish cakes. These produce those famous little green circles in the Thai fish cakes that look like green chilli slices. If you can't find snake beans, substitute with regular green beans.
- Corn starch and Egg - These are both essential to creating a starchy fish paste that can be shaped into patties. Corn starch (also known as corn flour) is the superfine white powder that is used to thicken Asian sauces.
- Garlic, Ginger, Coriander, Lemongrass - These are traditionally not added to the fish cakes. But my local Thai restaurant adds some of these and boy does it elevate the flavour. These four aromatics enhance the other flavours in the fish cakes. If you don't have lemongrass powder, you can substitute it with a teaspoon of finely chopped white part of lemongrass or leave it out. But make sure you add garlic, ginger and coriander.
🥣 How to make Thai Fish Cakes?

- Destem and chop Makrut Lime leaves very finely.
- Slice green beans thinly.
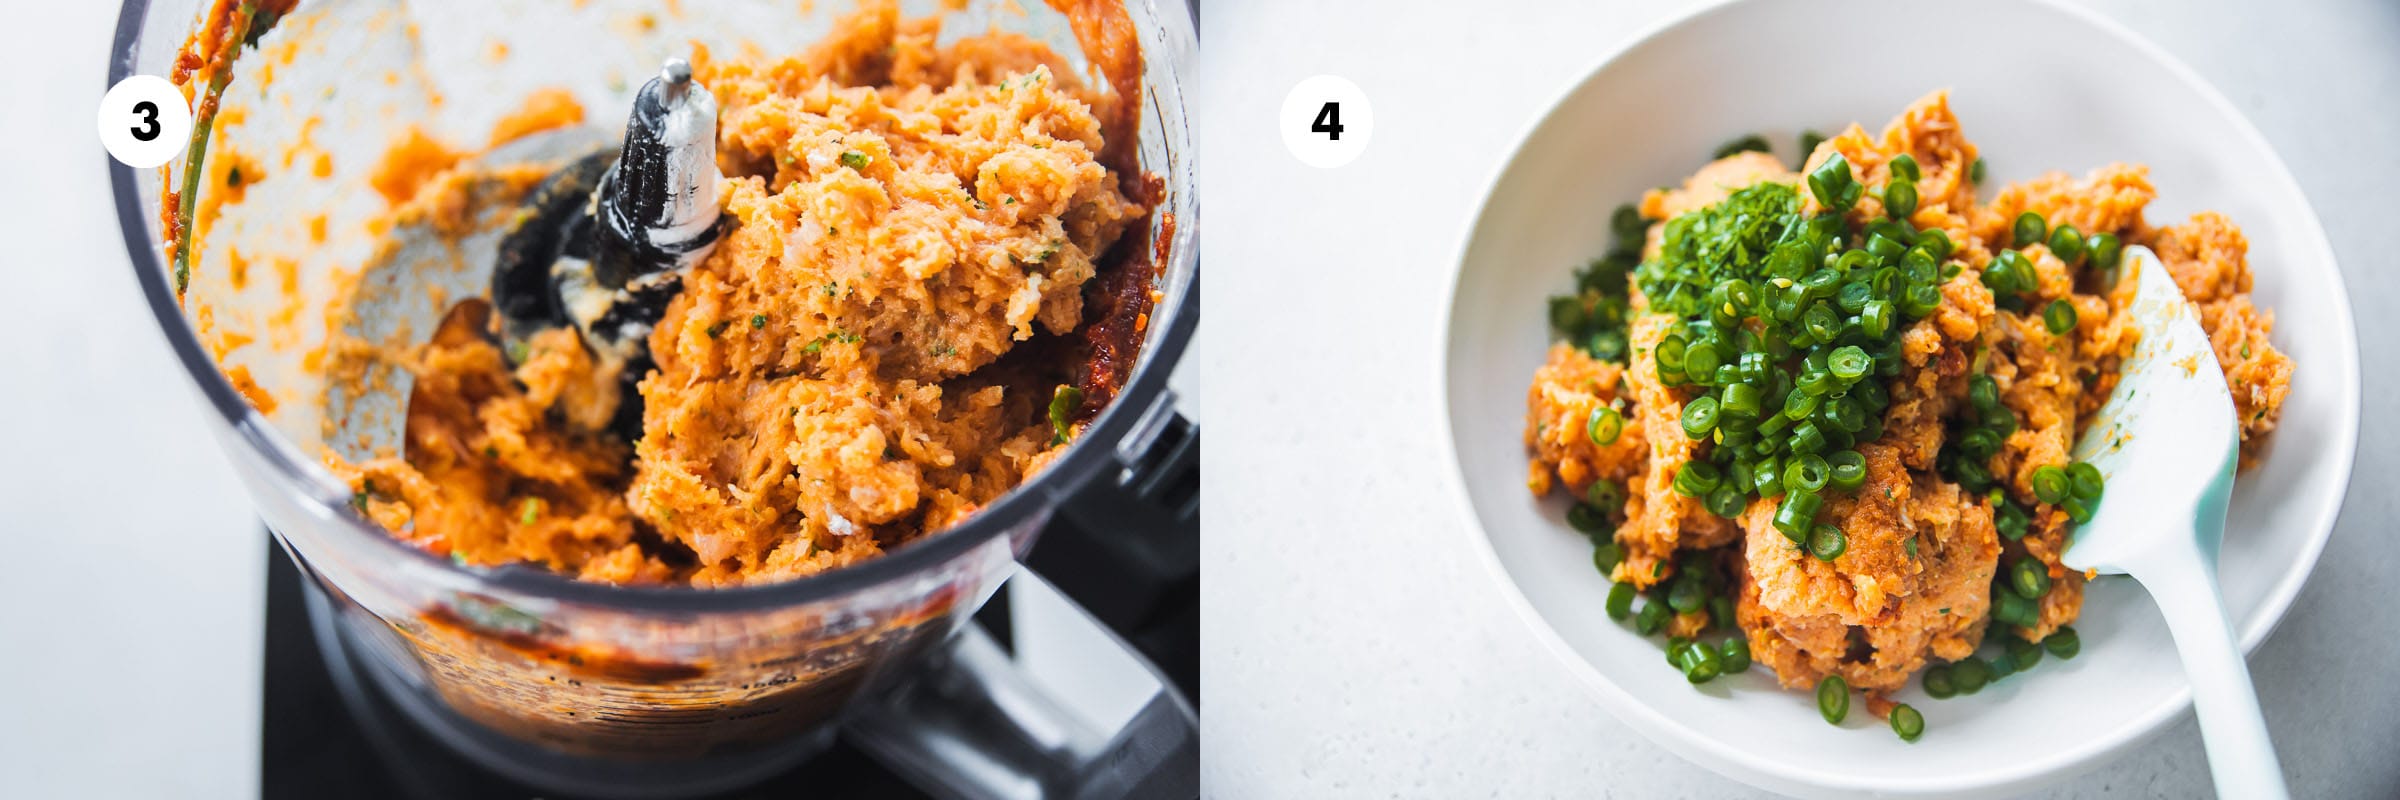
3. Add fish, red curry paste, egg, cornflour, fish sauce, coriander, garlic, ginger and lemongrass to the bowl of a food processor and process until it forms a smooth and sticky paste.
4. Transfer fish paste to a bowl and add Makrut lime leaves and green beans.

5. Mix the fish paste very well, kneading and slapping it against the bowl to create a smooth texture. Using damp hands, make 1cm thick patties from 1/4 cup fish paste.
6. Fry patties in shallow oil in a hot pan until cooked and golden on both sides.
Serve with sweet chilli sauce and Cos lettuce leaves.

🍽️ Serving Suggestions
These Thai Fish Cakes are delicious on their own and served as appetizers at the start of an Asian meal. Serve them with Thai cucumber and sweet chilli dipping sauce along with some fresh Cos lettuce leaves and shredded carrot.
But they can be also served as a main dish with some steamed jasmine rice. Serve these delicious fish cakes alongside these delicious Thai dishes.
- Tofu Larb
- Prawn & Tofu Pad Thai
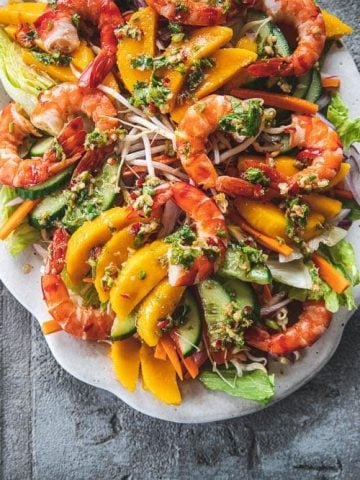
- Thai Prawn And Mango Salad
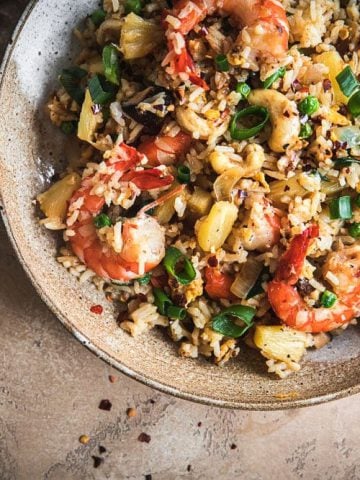
- Thai Pineapple Fried Rice
- Thai Cabbage Salad
- Thai Red Curry Tofu Soup
- Thai Chicken Noodle Salad
- Noodle Free Pad Thai
Cooked fish cakes will keep in the fridge for up to 2 days. Gently heat in the microwave before eating. Freezing these fish cakes is not recommended as they can get water-logged and rubbery after thawing.

👩🏻🍳 Recipe FAQs
Freezing is not recommended as the fish cakes can get waterlogged and become rubbery after thawing.
Traditionally these are made with Pla Grai (Clown Featherfish). Best substitutes are a firm, white fish with a dense and elastic flesh like Ling or Basa. You can also use Grouper, Mahi Mahi, Trevalla, Catfish, Cod or Barramundi.
🇹🇭 More Thai Recipes


Recipe
Hungry For More Recipes? Subscribe to my newsletter. Check out Facebook, Instagram and Pinterest to see everything I share! And if you love cooking and new cookbooks, join my free Cooking Club on Facebook!

Thai Fish Cakes
Ingredients
- 500 g white fish fillets skinless and boneless, (ling, basa or see notes for other varieties)
- 3 tablespoons Thai red curry paste
- 1 tablespoon fish sauce
- 1 tablespoon fresh coriander root and leaves
- 1 egg
- 1 teaspoon sugar
- ¼ cup corn starch
- 2 garlic cloves minced
- 1 teaspoon grated ginger
- ½ teaspoon lemongrass powder optional
- 5 Makrut lime leaves destemmed and thinly sliced
- 10 green beans ends trimmed and thinly sliced
- Vegetable oil for frying (approximately ¼ cup)
To Serve
- Sweet chilli sauce
- Lime wedges
- Cos lettuce leaves
Instructions
- To destem Makrut lime leaves, remove the center stem using a sharp paring knife. Slice the leaf into very thin slivers. You can leave them as these slivers or chop them further.
- Place fish fillets, red curry paste, fish sauce, coriander, egg, sugar, corn starch, garlic, ginger, lemongrass (if using) in the bowl of a food processor.
- Pulse and process to a smooth paste.
- Transfer to a medium bowl. Add Makrut lime leaves and green beans.
- Mix well using your hands to get a smooth, bouncy, lump-free fish paste. Pick up the paste and slap it against the bowl a couple of times until firm.
- Have a small bowl of cold water ready. Dampen your hands by dipping your fingers in the water bowl. Scoop ¼ cup of the fish mixture and form 1cm high, round patties. Repeat with the remaining paste, wiping your hands with a tea towel and wetting them after every 2-3 patties. You will get approximately 18 patties.
- Heat enough vegetable oil on medium-high heat in a skillet to cover the base. Add 5-6 patties to the hot oil at a time. Cook for 2-3 minutes then gently turn them over and cook for 2-3 minutes until golden brown.
- Remove onto a plate lined with a paper towel. Repeat with the remaining patties. If they start browning too quickly, reduce the heat slightly. If they take too long to brown, increase heat slightly.
- Serve hot with sweet chilli sauce, lime wedges and fresh Cos lettuce leaves.
Notes
Nutrition
The post Thai Fish Cakes (Tod Mun Pla) appeared first on Cook Republic.
Roasted Cauliflower Soup 18 Feb 2024 8:55 PM (last year)
Last Updated on February 19, 2024 by Sneh
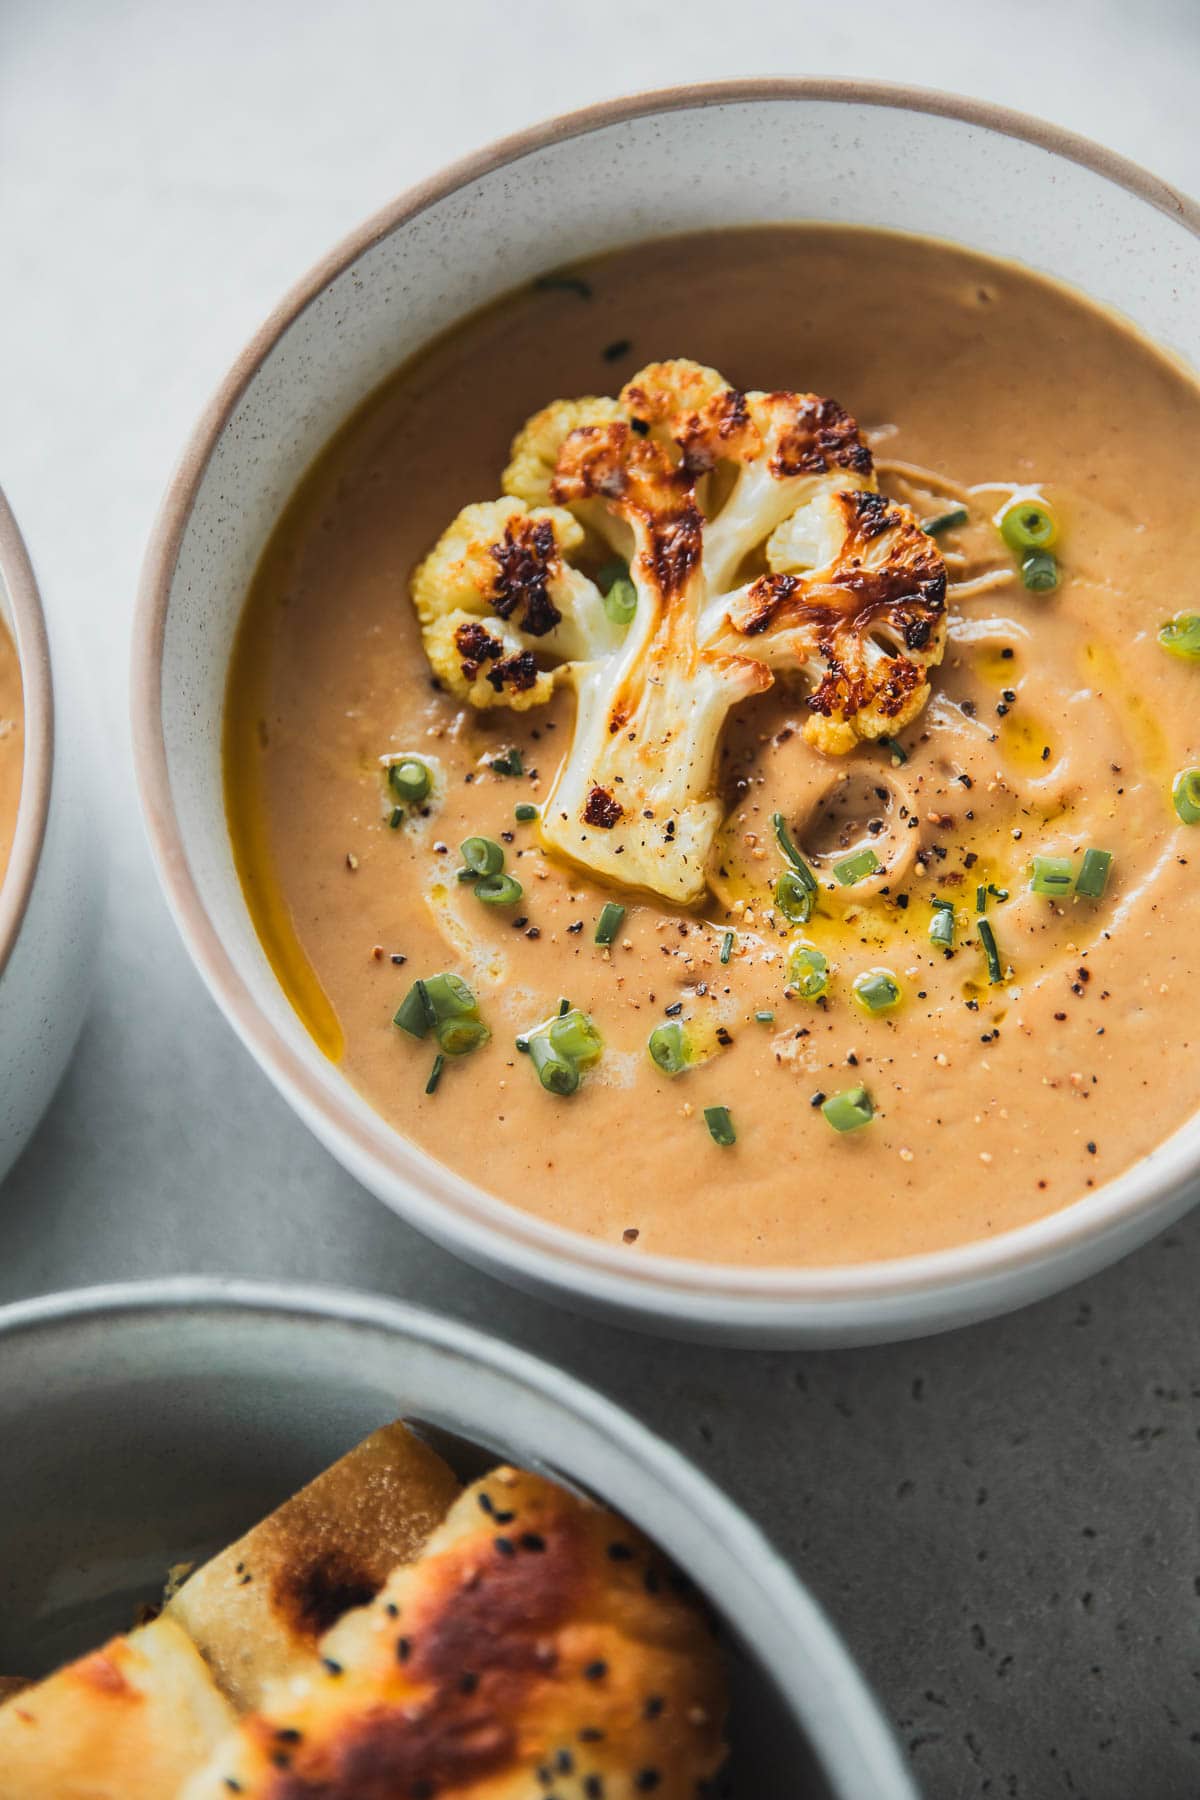
The secret to silky, smooth, luscious cauliflower soup is to roast the vegetable until tender and golden. You have to try my easy Roasted Cauliflower Soup recipe. Made in a blender, this quick and healthy recipe is packed with loads of nutrients and flavour. Perfect for dinner with this Pesto Foccacia!
🫕 Why make this Roasted Cauliflower Soup?
Easy to make! - Roast a whole head of cauliflower, cook some onion and garlic and blend it all for an easy nutritious meal.
Loads of flavour - This gorgeous soup is built on layers of flavour. Caramelized roasted cauliflower, golden fried onion and garlic and a sneaky secret ingredient - porcini mushroom powder! Together, these ingredients create a swanky restaurant-style creamy cauliflower soup that feels decadent, delicious and luscious.
Dairy-free and light! - This Roasted Cauliflower Soup is creamy, yet has no cream or cheese. Which makes it a lovely, light meal that won't make you feel bloated and full. The butter drizzle at the end is purely optional. The soup is delicious with or without it.
Make-ahead and Meal-Prep gold! - This creamy cauliflower soup is an excellent meal prep recipe. I like to roast the cauliflower and make the onion base. This keeps fresh in the fridge for up to 2 days. When I want to eat the soup, I warm it up with some stock, blend it and have a piping hot meal ready in mere minutes.
📝 Ingredients & Substitutions
My creamy Roasted Cauliflower Soup is made with simple, everyday ingredients. Chances are that you have most of them in your pantry and veggie box. Here is what you will need,
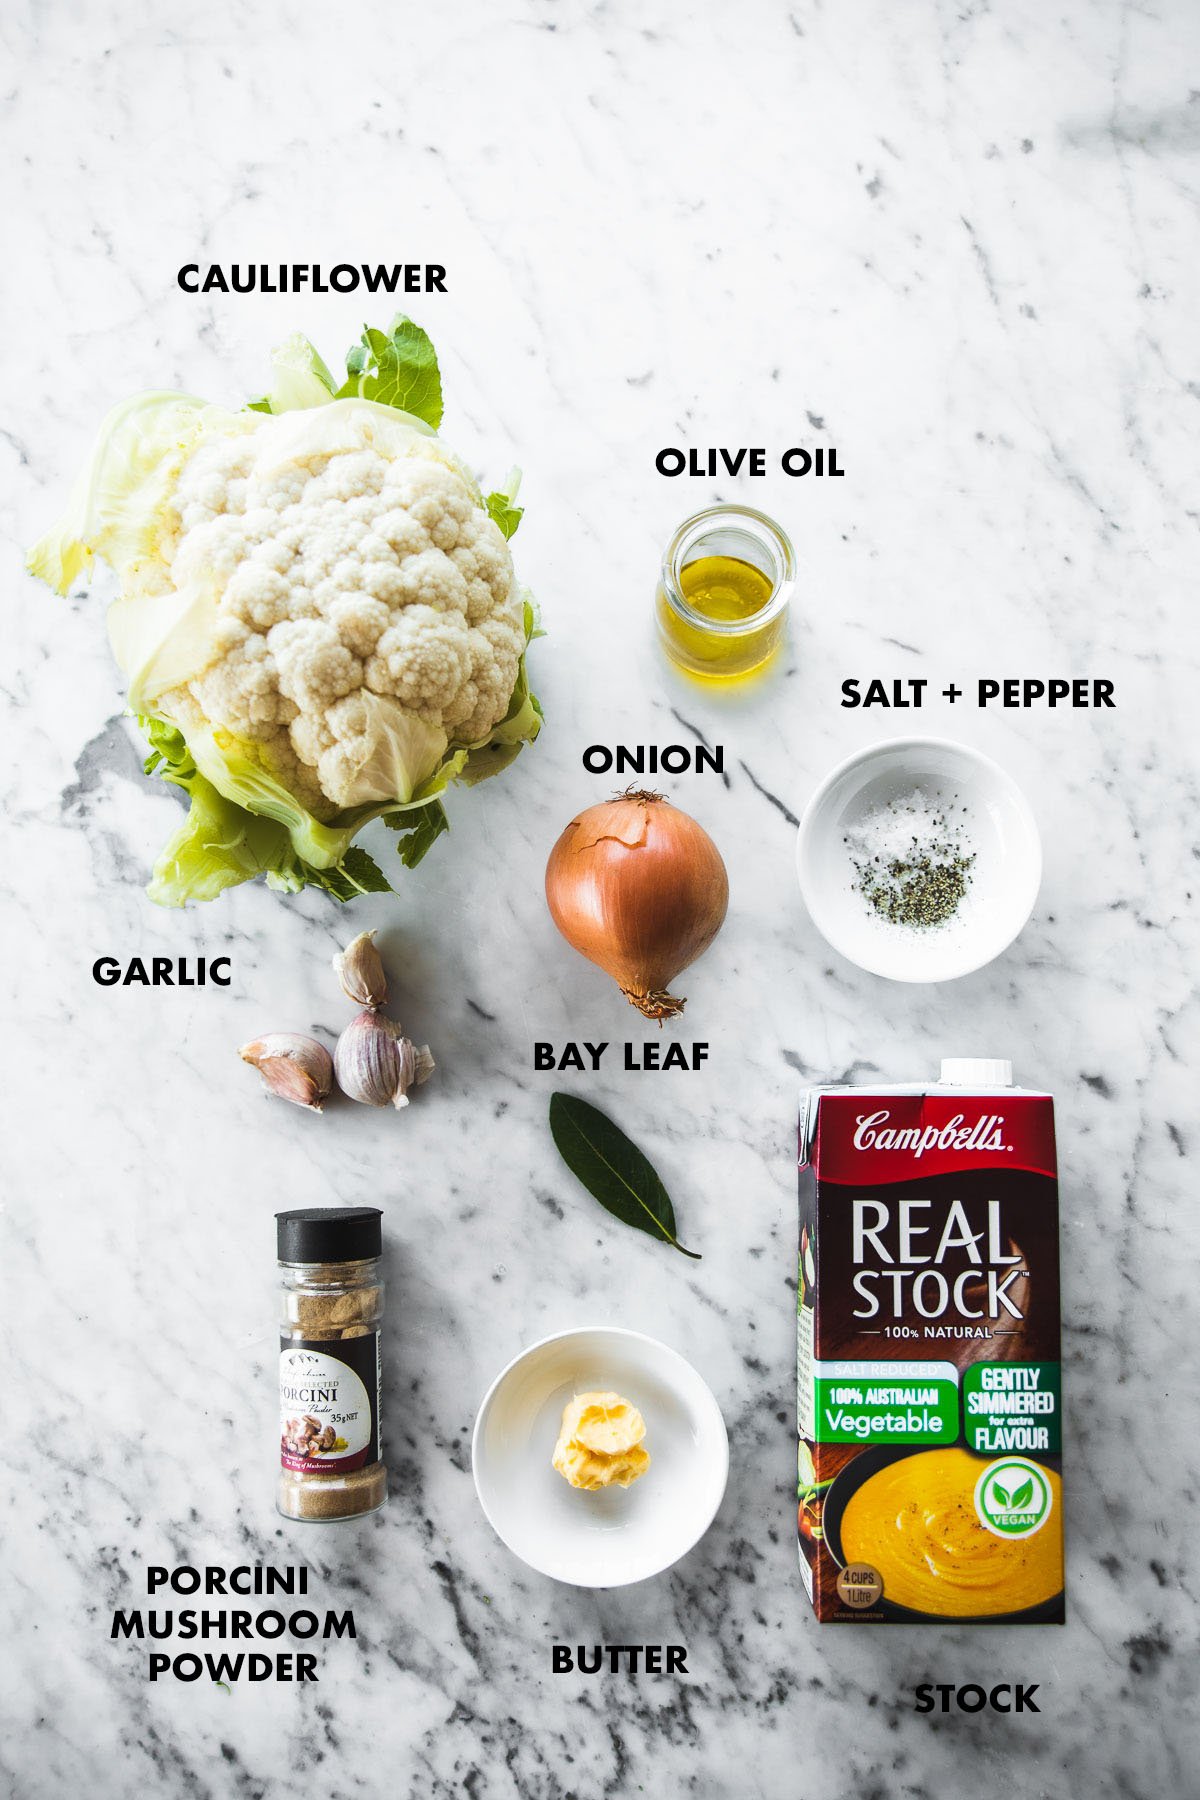
- Cauliflower - Use fresh, firm cauliflower for this recipe. And make sure you roast it for the said amount of time for that beautiful, rich, caramelized cauliflower flavour. When cutting florets for roasting, I cut them into thick slabs (mini steaks). This creates more surface area for the cauliflower florets to lie flat on while roasting. This in turn creates more caramelized bits. These flatter roasted florets also make beautiful garnishes.
- Onion - Use yellow/brown onion if possible. This adds a lovely sweetness to the recipe. Red onion or leeks are good substitutes.
- Garlic - Use big cloves. Peel and smash them before adding to the pan. If you don't have fresh garlic, you can substitute it with garlic granules or garlic powder. You will roughly need 1 teaspoon. Add this at the end of the onion frying phase, just before you add cauliflower. This prevents the garlic granules or powder from burning and becoming bitter.
- Vegetable Stock - I use salt-reduced vegetable stock as there is already salt in the roasted cauliflower. This helps keep the sodium levels of the soup in check. If your stock is not salt-reduced, skip salting the cauliflower before roasting.
- Bay Leaf - This is key to that earthy, warm flavour of the soup. One dried or fresh bay leaf is sufficient. I don't discard it, instead I blend it with the soup.
- Porcini mushroom powder - This is available in all supermarket spice aisles and is a great way of boosting the umami flavour of this roasted cauliflower soup. It gives it a truffle-like rich and luxurious flavour. If you can't find it, leave it out or substitute with a tablespoon of dried porcini mushrooms.
- Olive oil - I use a medium-bodied, extra virgin olive oil that has a fruity taste. Use a lighter-tasting olive oil or a neutral oil like grapeseed oil.
- Chives - Chives, spring onion or parsley make good garnishes for this recipe.
🔥 How to make Roasted Cauliflower Soup
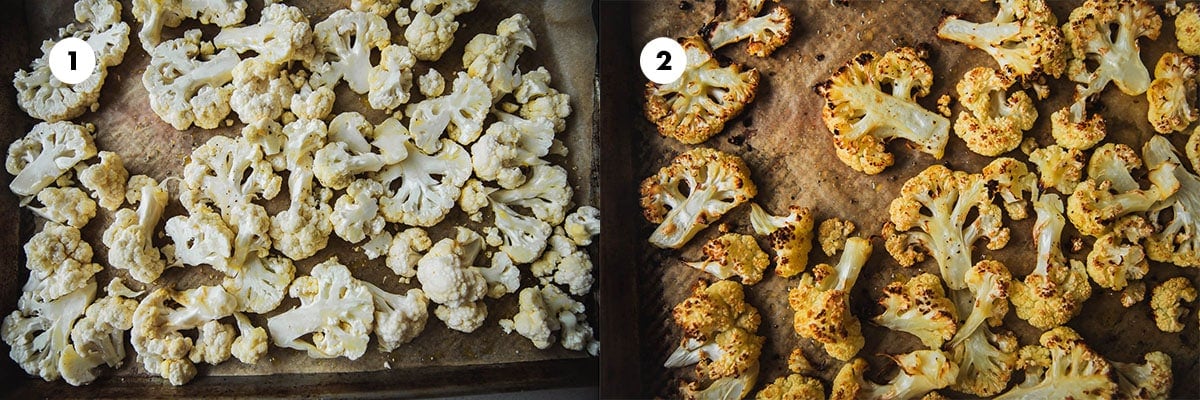
- Place cauliflower florets on a large, rimmed baking tray.
- Drizzle with olive oil and sprinkle salt and pepper. Roast until golden and caramelized.
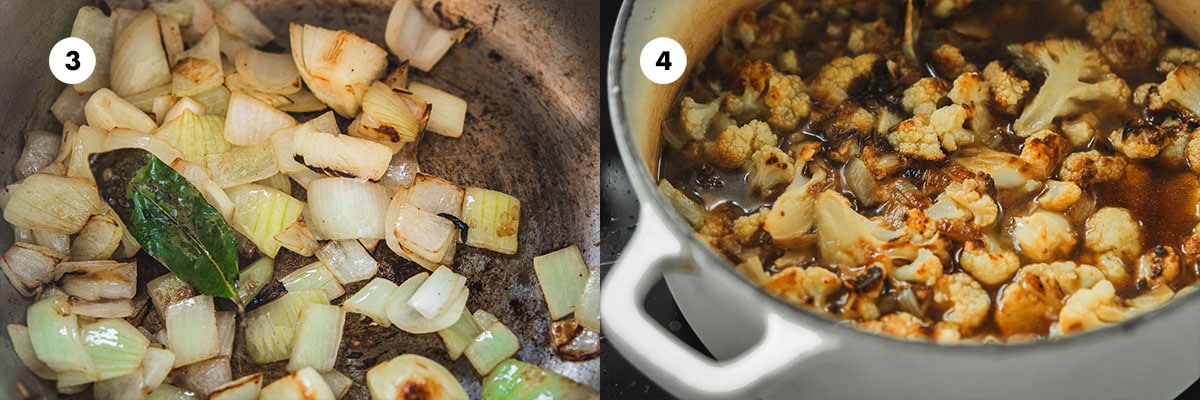
3. Saute onion, garlic and bay leaf in oil in a pot.
4. Add roasted cauliflower, stock and porcini mushroom powder and cook until soft.
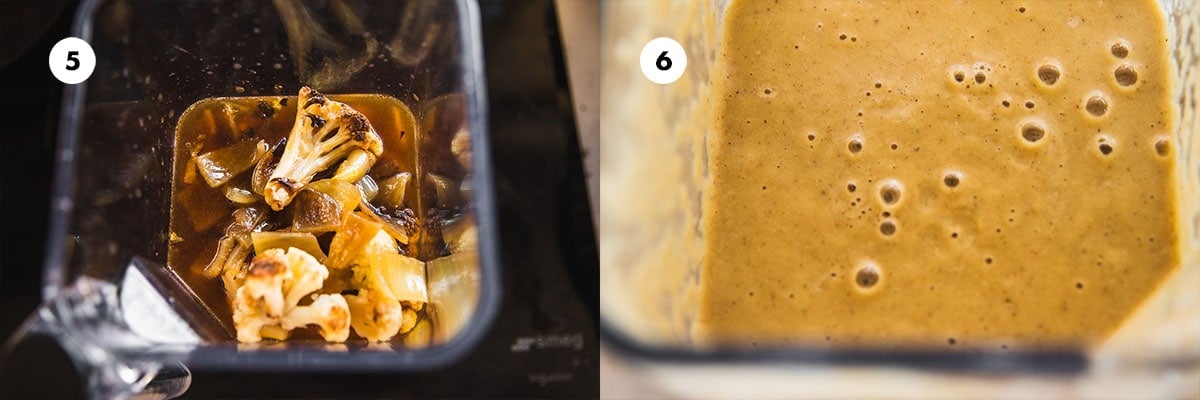
5. Add soup base to the jug of a blender.
6. Blend until smooth and creamy.
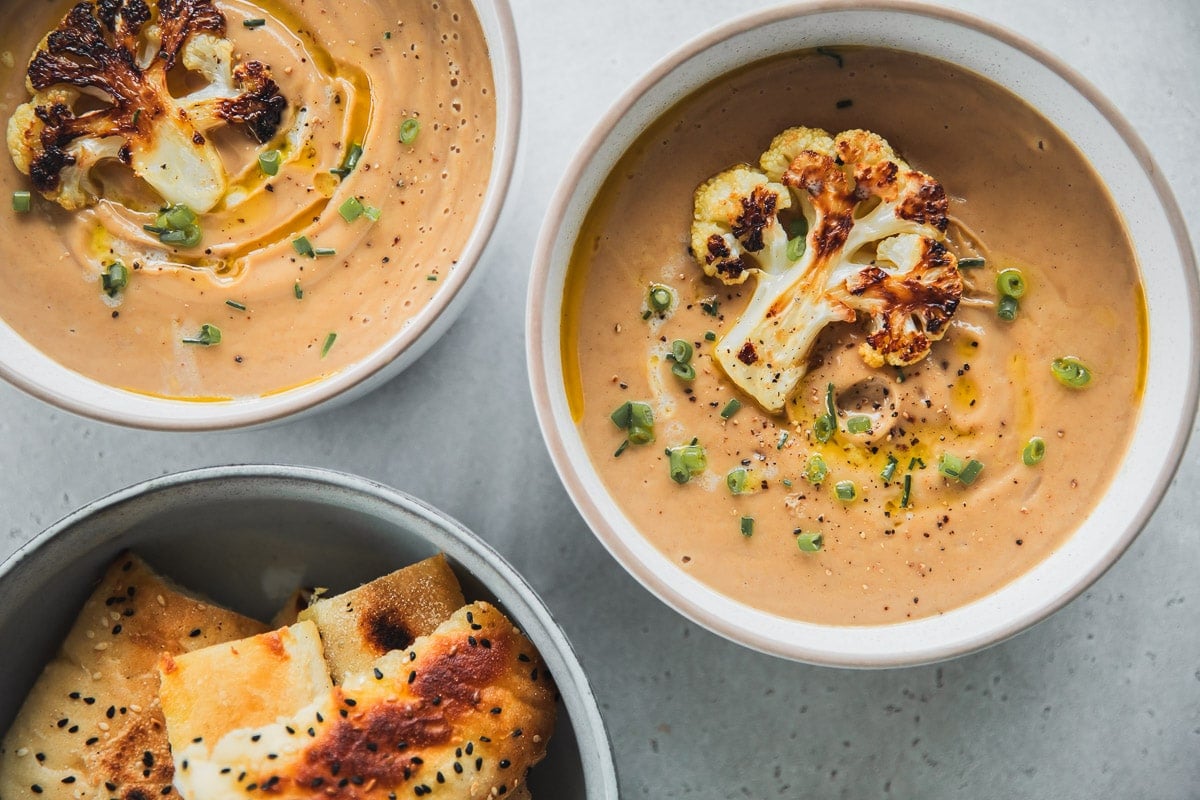
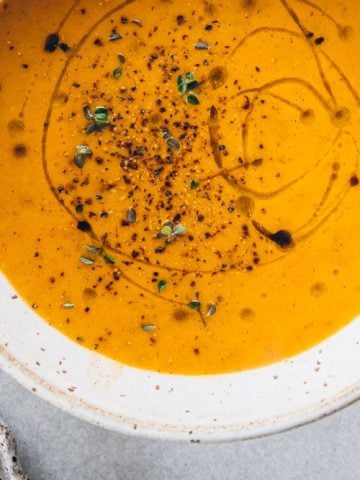
Ladle soup in bowls. Garnish with roasted cauliflower. Pour melted butter and top with chives and extra black pepper.
🥄 Serving Suggestions
Serve this beautiful Roasted Cauliflower Soup along with these beautiful breads, pasta and salads.
- Pesto Focaccia
- Turmeric Sourdough
- Healthy Chicken Meatballs
- Roast Pumpkin Salad With Quinoa Feta & Pomegranate
- Halloumi Lentil And Roasted Eggplant Salad
- Sardine Pasta
👩🏻🍳Recipe FAQs
This soup can be frozen in a freezer-safe, air-tight container (after cooling completely). It keeps in the freezer for up to a month. To eat, thaw in the microwave and add an extra quarter cup of vegetable stock to loosen it.
Smooth vegetable soup often become grainy if they haven't been cooked and softened enough or if they haven't been blended properly. If you cauliflower soup is grainy, pop it back on heat and cook it covered for 10 minutes on low heat. Then blend it again until smooth.
💛 More Soup Recipes


Recipe
Hungry For More Recipes? Subscribe to my newsletter. Check out Facebook, Instagram and Pinterest to see everything I share! And if you love cooking and new cookbooks, join my free Cooking Club on Facebook!

Roasted Cauliflower Soup
Ingredients
For the Cauliflower
- 800 g cauliflower florets (1 medium head of cauliflower)
- ½ teaspoon flaky salt
- ¼ teaspoon crushed black pepper
- 2 tablespoons olive oil
For the soup
- 1 tablespoon olive oil
- 1 bay leaf
- 1 yellow onion peeled and diced
- 3 garlic cloves peeled and smashed
- 750 ml vegetable stock
- ¼ teaspoon porcini mushroom powder
- 1 tablespoon chopped chives to serve
- 1 tablespoon melted butter to serve
- Crushed black pepper to serve
Instructions
- Preheat oven to 220°C (200°C fan-forced) / 428°F (392°F fan-forced).
- Spread cauliflower florets on a large, rimmed baking sheet. Sprinkle salt and pepper. Drizzle olive oil and mix and rub the florets to ensure they are coated with the oil.
- Roast in preheated oven for 30 minutes. Remove and set aside.
- Heat oil in a heavy bottomed pot on medium-low.
- Add bay leaf, onion and garlic. Sauté for 8-10 minutes until onion are soft and starting to caramelize.
- Reserve 2-4 roasted cauliflower florets for garnish and add the rest to the pot. Add vegetable stock and porcini mushroom powder and mix well. Cover and cook on medium-low heat for 10 minutes.
- Remove from heat and carefully ladle into a heat-proof blender jug and blend until smooth.
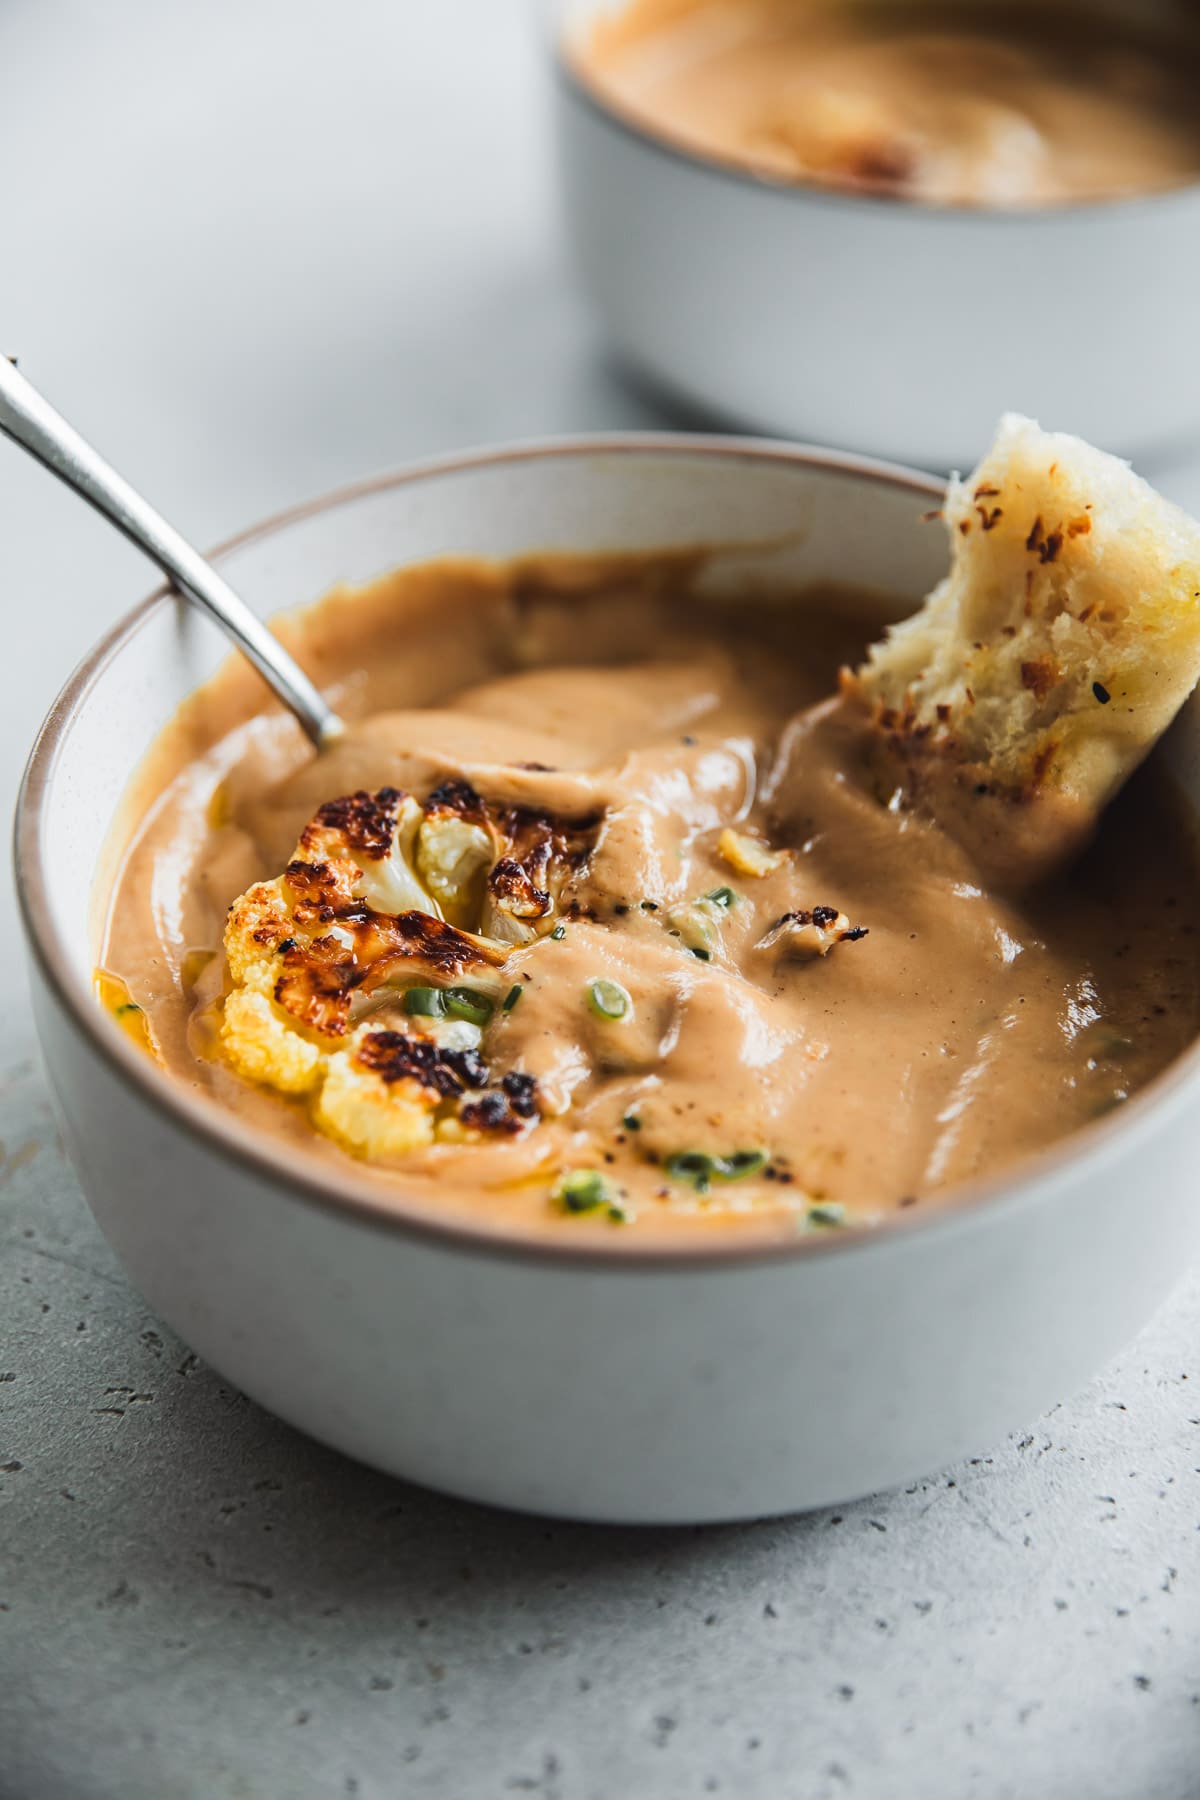
- Ladle in two soup bowls. Drizzle with melted butter. Add reserved roasted cauliflower florets as garnish. Sprinkle with chives, extra black pepper and serve hot with crusty bread.
Notes
- Cauliflower - Use fresh, firm cauliflower for this recipe. And make sure you roast it for the said amount of time for that beautiful, rich, caramelized cauliflower flavour. When cutting florets for roasting, I cut them into thick slabs (mini steaks). This creates more surface area for the cauliflower florets to lie flat on while roasting. This in turn creates more caramelized bits. These flatter roasted florets also make beautiful garnishes.
- Onion - Use yellow/brown onion if possible. This adds a lovely sweetness to the recipe. Red onion or leeks are good substitutes.
- Garlic - Use big cloves. Peel and smash them before adding to the pan. If you don't have fresh garlic, you can substitute it with garlic granules or garlic powder. You will roughly need 1 teaspoon. Add this at the end of the onion frying phase, just before you add cauliflower. This prevents the garlic granules or powder from burning and becoming bitter.
- Vegetable Stock - I use salt-reduced vegetable stock as there is already salt in the roasted cauliflower. This helps keep the sodium levels of the soup in check. If your stock is not salt-reduced, skip salting the cauliflower before roasting.
- Porcini mushroom powder - This is available in all supermarket spice aisles and is a great way of boosting the umami flavour of this roasted cauliflower soup. It gives it a truffle-like rich and luxurious flavour. If you can't find it, leave it out or substitute with a tablespoon of dried porcini mushrooms.
- Storage - Fully cooked soup stays fresh in the fridge for up to two days.
- Freezing - Soup can be frozen in a freezer-safe, air-tight container (after cooling completely). It keeps in the freezer for up to a month. To eat, thaw in the microwave and add an extra quarter cup of vegetable stock to loosen it.
Nutrition
The post Roasted Cauliflower Soup appeared first on Cook Republic.