Droid Speeders
9 Apr 4:39 AM (23 hours ago)

I've discovered a brilliant technique for painting B1 battle droids using Skeleton Horde contrast paint. Simply watered down slightly and wash over white, the results are spot on. This new discovery has led to B1 factories starting up again and the droid production line has begun in earnest. These little figures are a joy to paint as I keep saying because most of them are so simple to do.
These 'STAP' speeders were easy too once I had cross referenced the colours from a source book. They did come on blocky, printed bases but I had the idea of mounting them on transparent brush bristles. This worked well, as I could make them fly a lot higher and adjust the flying height too with different lengths of bristle.
Simple little paint jobs but effective.
The stones add character to the base and give it so weight. They also help to secure the bristles.
The skeleton horde contrast technique works really well, any touch ups can be done with iraqi sand from Vajello.


These scratch built heavy repeaters should address the balance against the endless waves of droids.
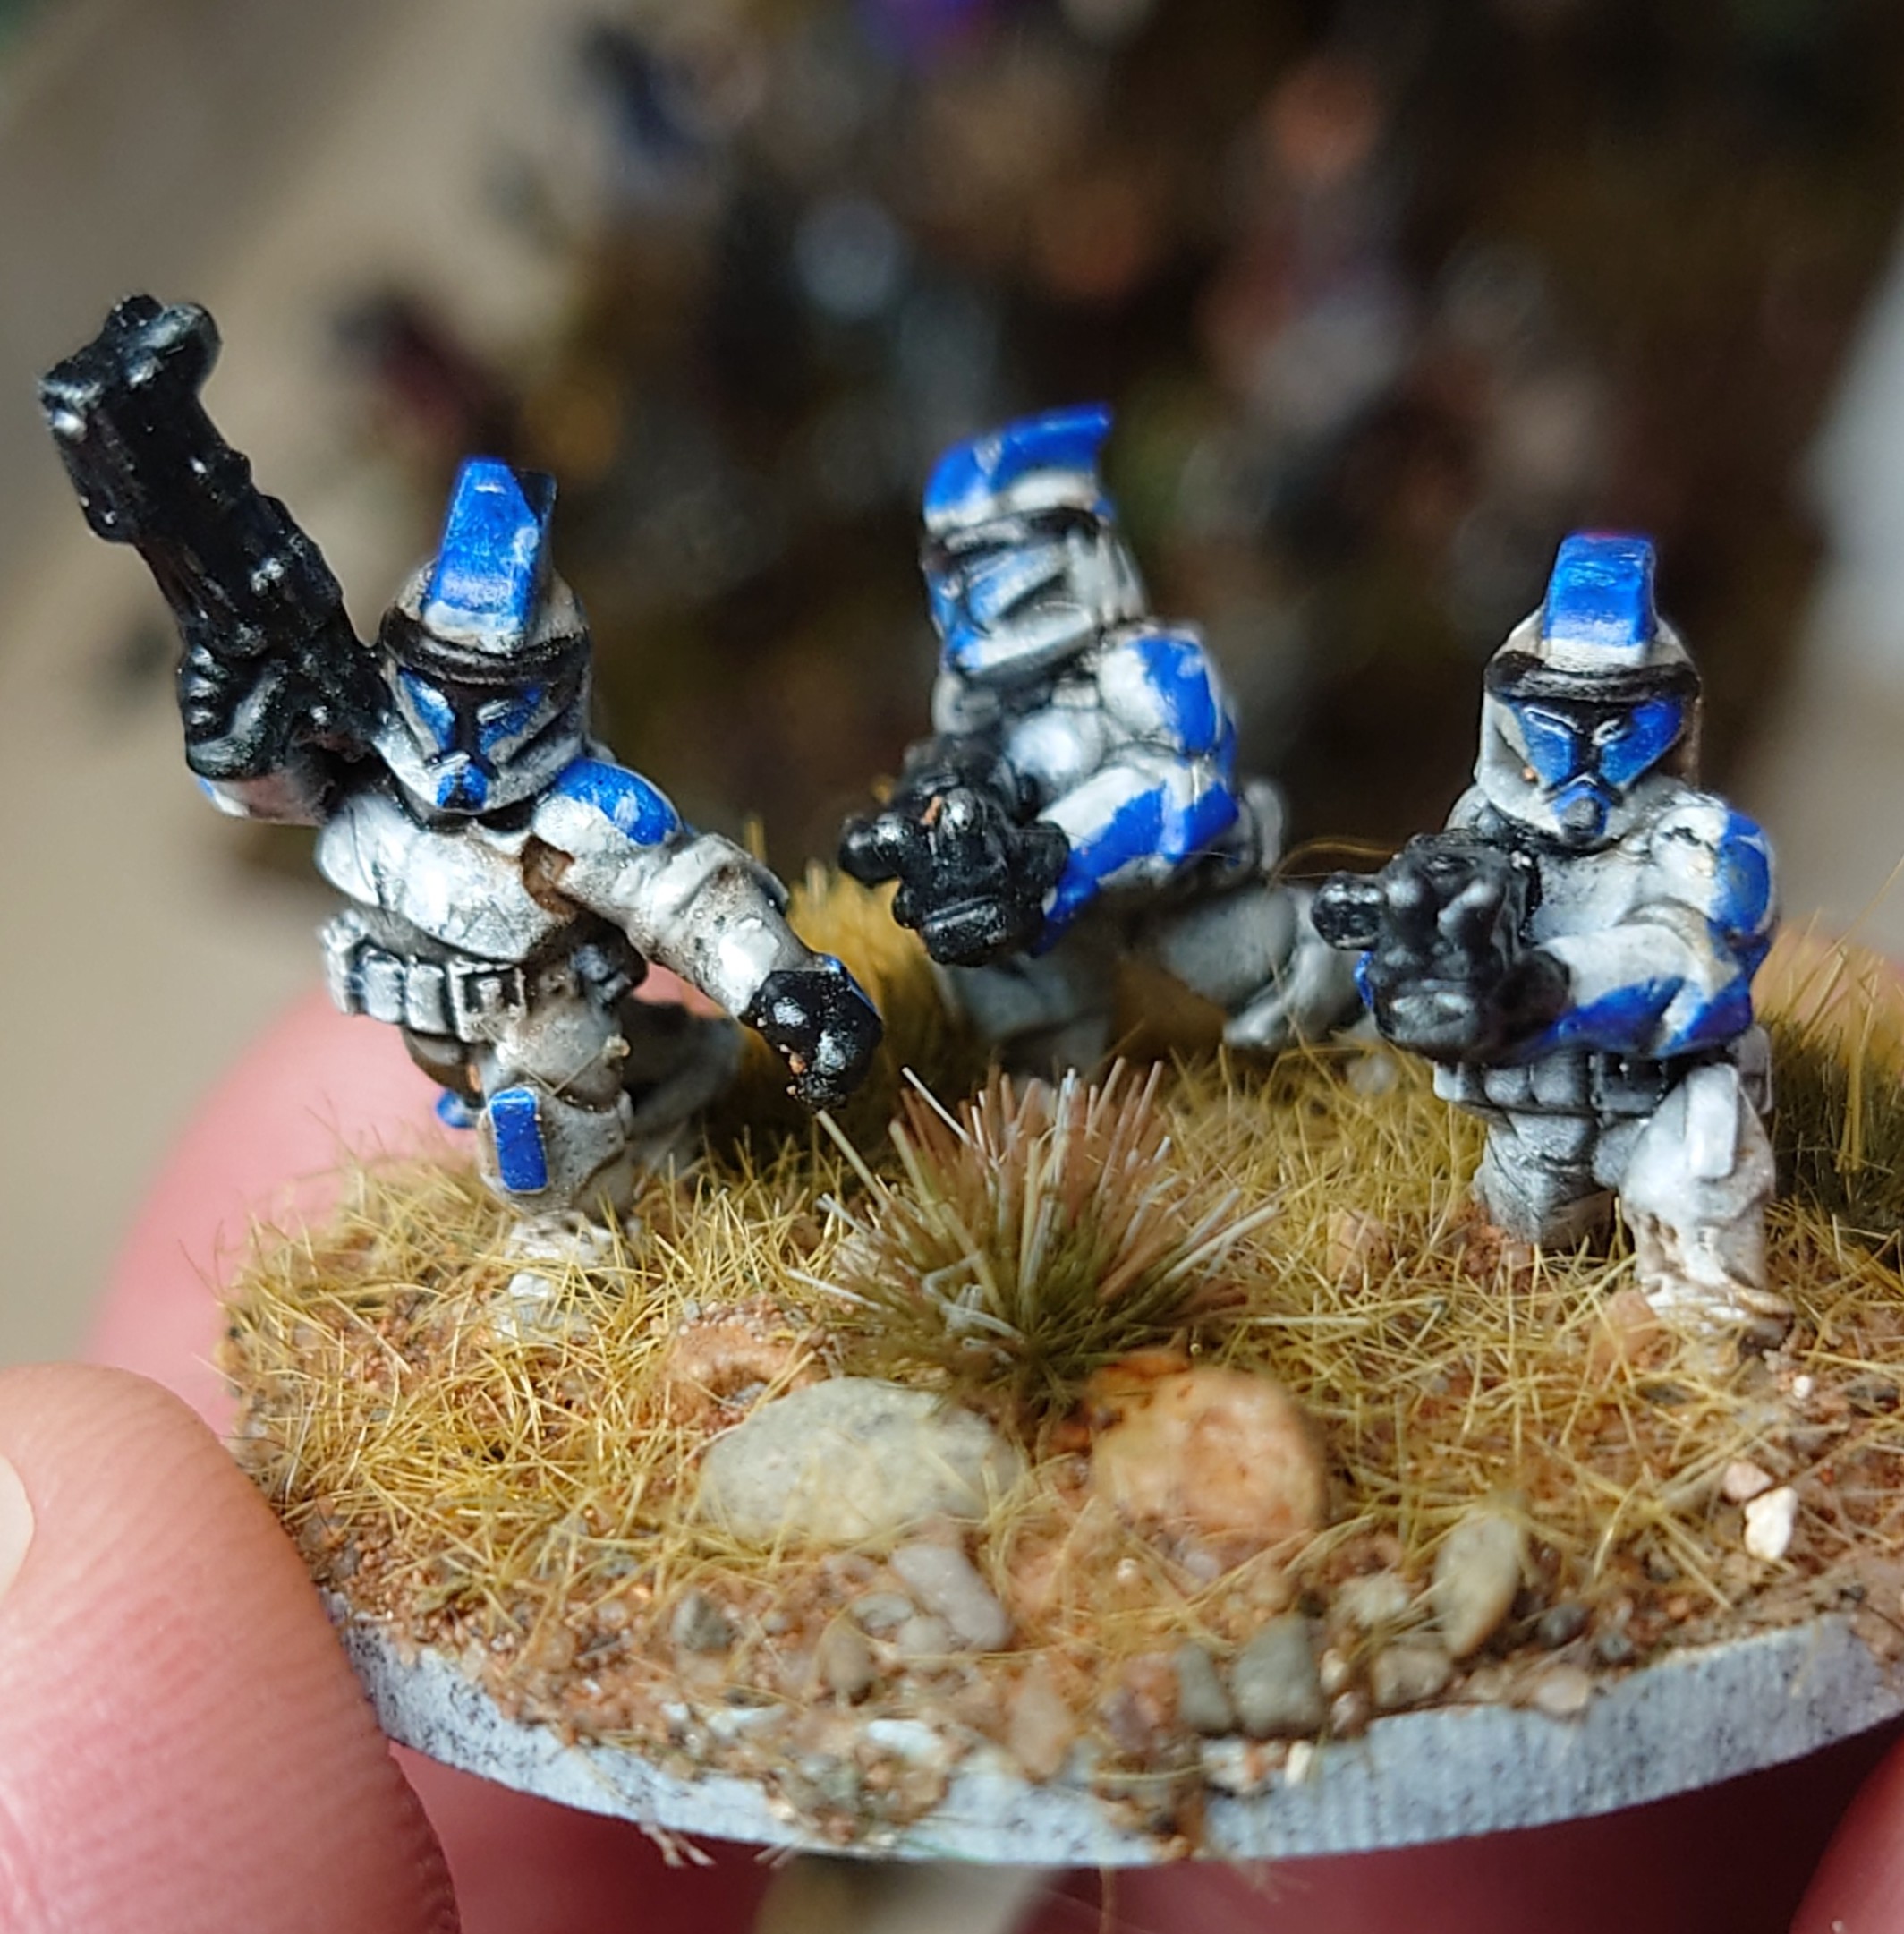
I've decided to keep the clones in their basic colour scheme and not go for one of the colourful legions. In a way I think they are more striking in their white armour.
This is probably an early version of a type of E-Web repeating blaster.
The armour was given a coat of gloss varnish to make it shine. The gloves and blaster were Matt varnished. I gave the gun a bit of bronze colour to make it pop.

The unit is now complete. I'm really liking the new buff clad troopers, much less 'fuss and feathers' of the others.
The figures in the unit are Dixon, Redoubt and Foundry.
Plastic horses from warlord games and Wargames Atlantic, they both work well together.
Just one broad brimmed hat, not too many.
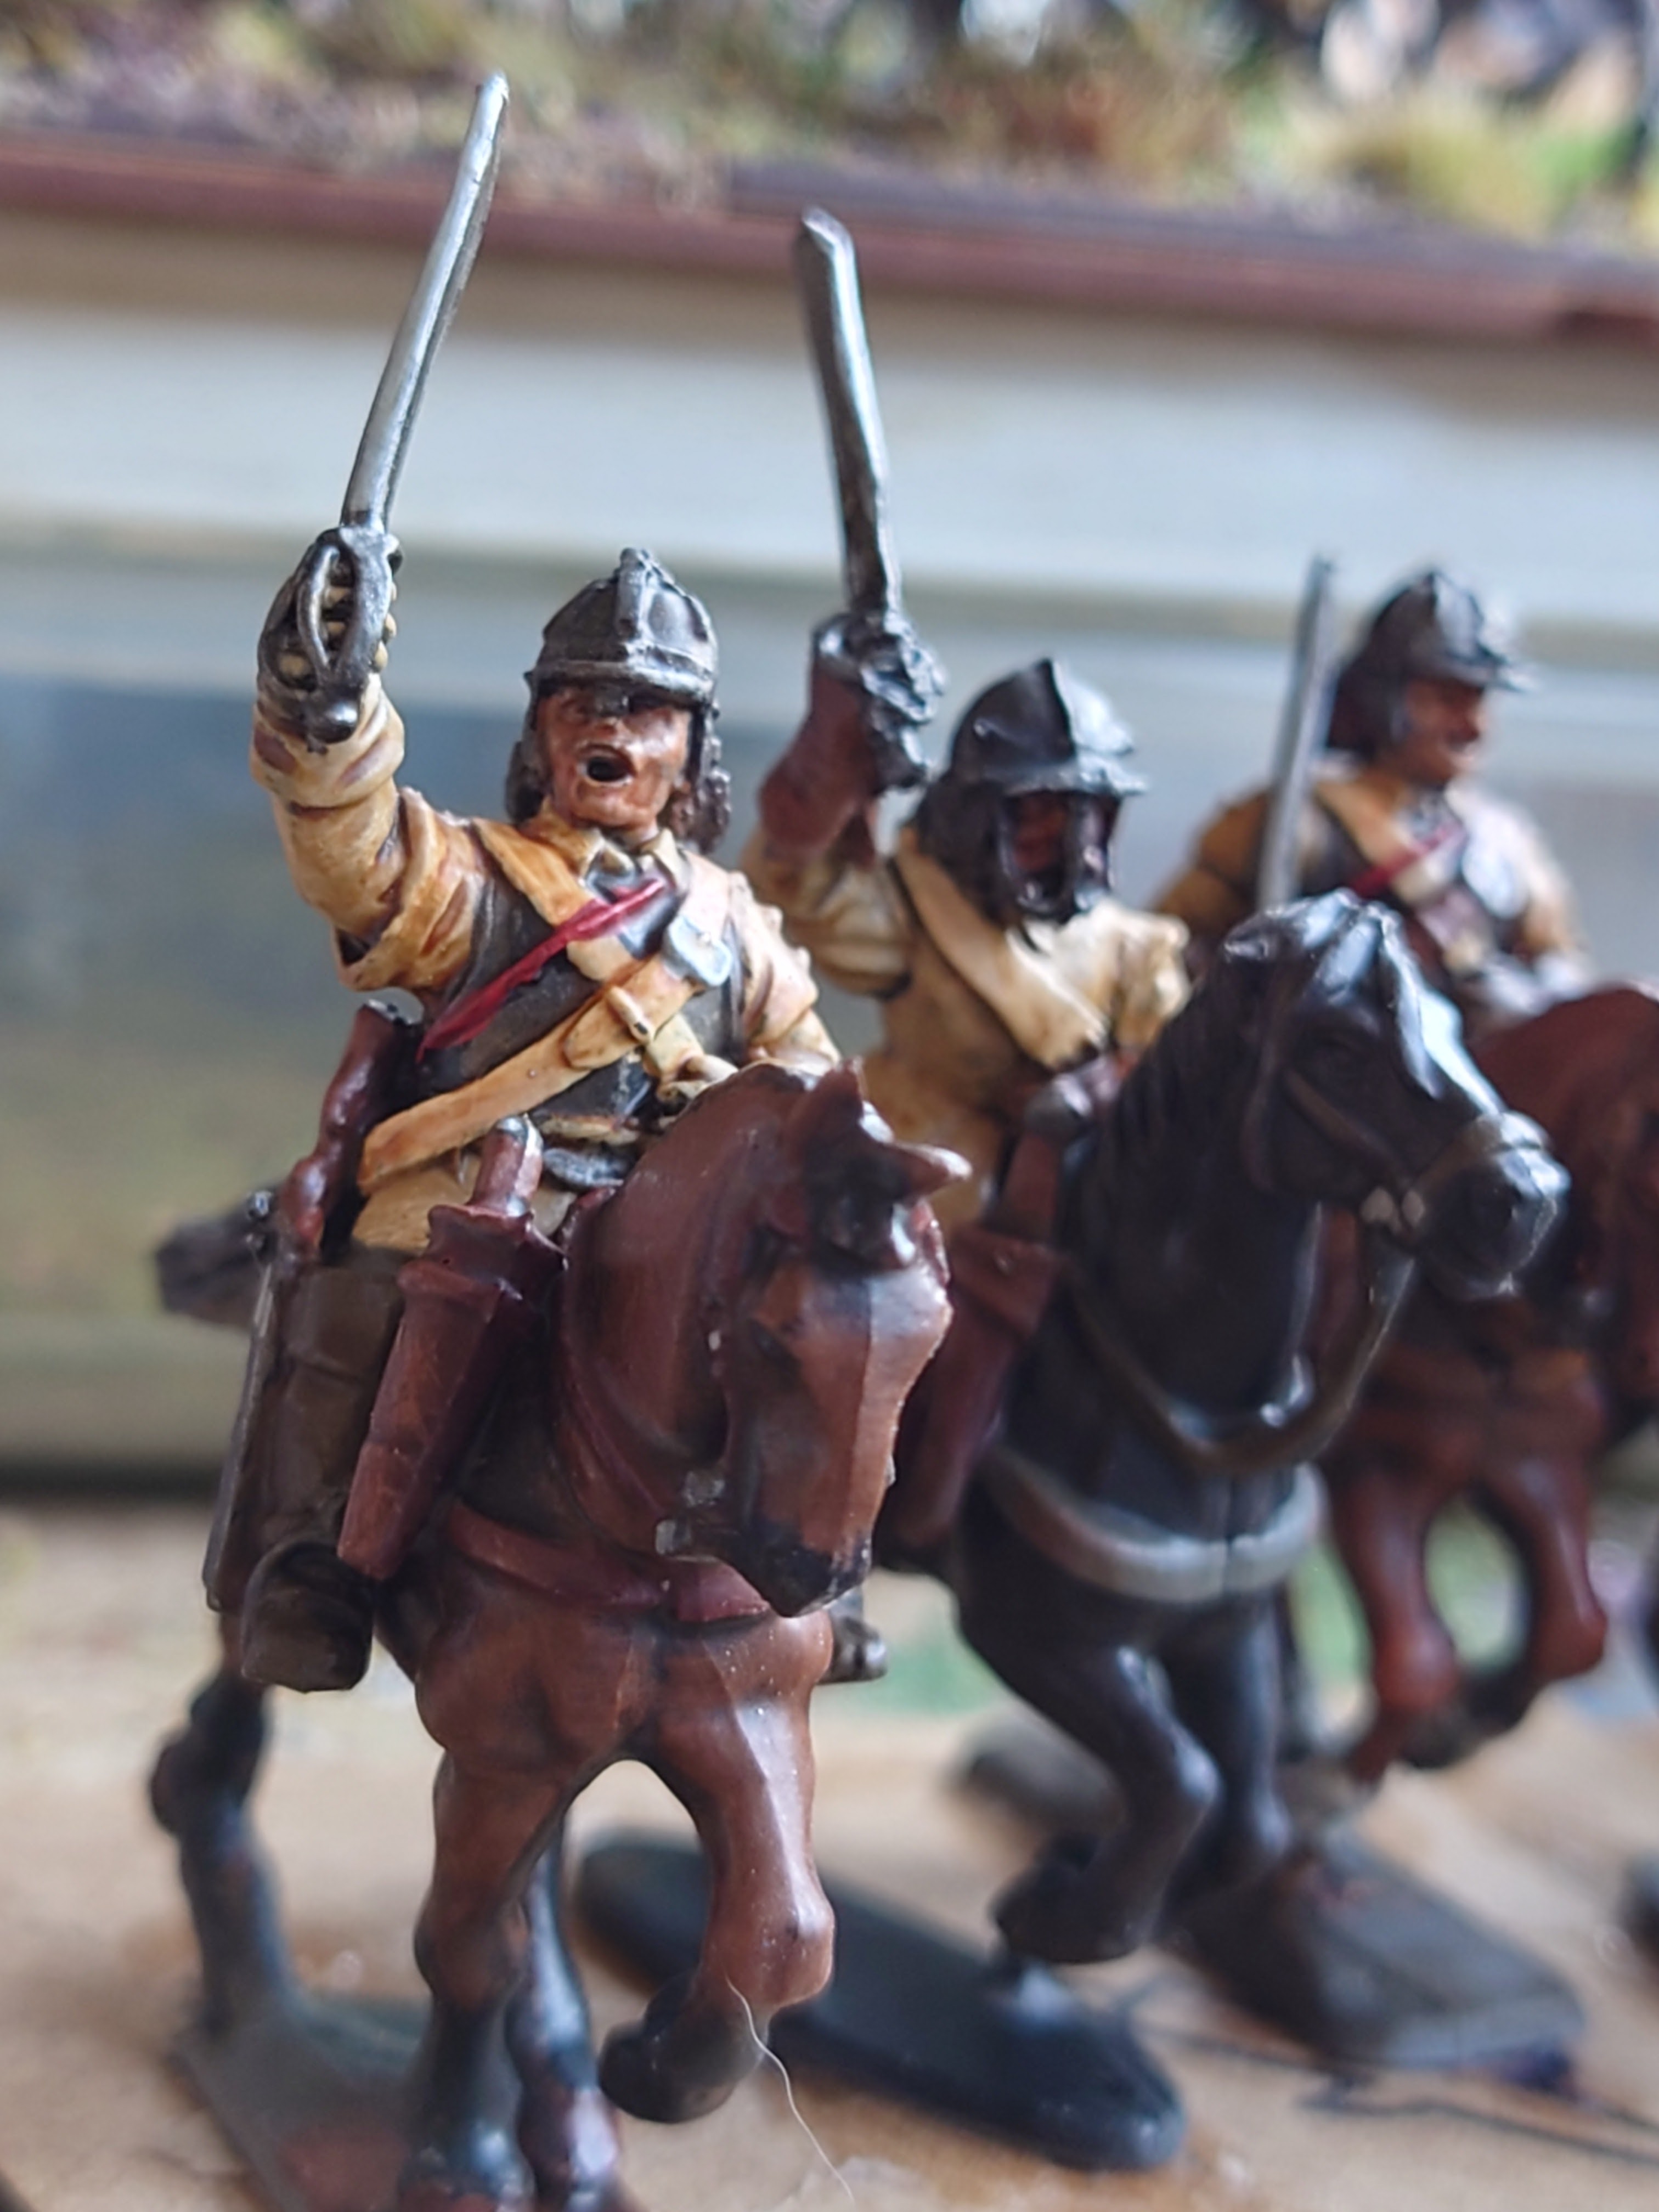
The Royalist cavalry so far, three squadrons of cavaliers.
I like the Foundry figure here in amongst the others, mounted on a bigger horse he fits in just fine.
A more staggered formation should hopefully make them look like they've moving at speed.
Update: All based now with the cornet ammended too.
The basing is three layers of flock then mud added with a brush. The mud effect is 'Thick mud' from Vallejo.

As I'm painting more cavalry units, I thought it was time to update the ones I had done already. I placed an order with Flags of war and as I have two squadrons in each regiment, I doubled the sheet order. This should give me two standards for four regiments.
The newer cornets are so much more colourful they really pop. I just thought my old flags were looking a bit washed out.
I like this unknown black standard. However, it was a last minute swop and now I need to change the trumpet pennant to match.
Anything for speed, I used a Sharpe to colour in the white gaps around the borders of the cornet.
More red colouring, a much easier method than using a brush.
The new cavalry command has it's cornet and is now ready for basing.
Much nicer, clear colours. Well worth the effort.

Another Elf company joins the army to protect the borders of Mirkwood.
This heroic leader figure is from Reaper Miniatures, while most of the others are from the Oathmark range.
This company has a few more greens in than normal, just to make them stand out a bit.
Holding back the tide...
The other base has quite a range of figures, mostly Oathmark again but also a few unknown makes.
Looking at these photos I might make a few tweaks and add a couple more spearmen to the rear ranks. Swordsmen are good but they don't really say shieldwall like a row of ash spears.

These veteran Royalist horse received a little extra love today in the form of campaign booty. As well as improving the character of the figures, the bundles also help to balance out the models too. The Essex troopers don't have the big buff coats of the Renegade sculpts, so a little bit more at the rear of the saddle looks good I think.
These are hard, well travelled squadrons of horse and have collected a fair few things on their way down south.
The Northern horse have always captured my imagination for some reason. So it's good to be creating them after all these years.
I bashed through these simple green stuff sculpts as I had a lot to do. They should look the part when painted and will certainly make the unit look different.
I swapped out the bendy lead flag pole for a brush bristle too, now this figure is a lot more serviceable than before.
Update: So after saying I was going to take it slow, I've ended up putting together quite a few troopers.
It's good to put a load together at once as it makes it easier for adding the greenstuff pouches and blankets. Painting wise though not so good as a sight like this is enough to freeze the project in its tracks. So after everything is dry and undercoated, I will put it away out of sight, accept for the four I'm going to paint.
This morning I dug out some old Foundry figures I bought in 1998. These too have been given bigger mounts and have now joined the Royalist ranks.
There's enough cavaliers here to last me a while.
Here is a Foundry trooper on a new mount. It's nice to mix a few three bar pot helmets in with all of the others.
The units are now given their black undercoat.
Update:
So a day has passed and I've managed to get some paint on the new unit.
I do like this commander with his iron broad brimmed hat. The plastic horses look good too and add some nice variety to the ranks.
I found another good paint for buff and that is Tamiya desert yellow. It's always good to have a few colours that are subtly different for buff.
So far the first four have been painted and given a brush with Dark tone Army paint from the tin. The Dark tone drys over night more or less, which is a real advantage over the other shades.
I'm really enjoying this little project again after a couple of years away from it.
A bit of wheel lock reference, I just wanted to see if they had brass fittings.

Right, well this is something that has been eating away at me for a while.
A few years ago I had the idea of basing my Royalist cavalry on larger bases than the Roundheads. This was so I could spread them out and make them look like they were charging. It was only another 20mm on the depth of the base so I thought it would be okay.
The finished bases looked good with the horses spread out, very dynamic!
Well, recently I have been thinking about this decision as I gear up to paint some more squadrons of dashing cavaliers. I've made the hard but right decision to rebase these first four bases to match the ones of Parliament. Both sides have to be mounted the same, this will make things a lot clearer with movement rates etc. The big one is a routing unit being caught by a persuer. If the unit being chased is on deeper bases it could lead to confusion over measurements.
It was a pain to do, with a few casualties due to the thick basing mud paste. However, now it's done I feel a lot better. I will repair the chipped paint and match the basing as it was before. I will also improve a few things as I go.
I also dug out some plastic horses, the last of my oil painted batch. These were paired up with heavy troopers from Dixon miniatures.
A poor cavalier lost his sword in the carnage, so a shaped brush bristle was crafted for him. Now his sword is stronger than before.
A mix of Royalist troopers. The Essex figures have really nice detailing on their lobster pots. I sorted out all the ornate looking Dutch style helmets to use in the Royalist ranks. The Essex miniatures are a little stylised but they have a lot of excellent qualities, helmet detail being one.
A Bicorne miniature will add some variety with another classic Royalist helmet design.
Another reason I've sorted out a troop of heavy troopers in helmets, is to try and get away from the floppy hat look so loved by early historians. I love the idea of the sides looking identical apart from a few little touches. The Dutch helmets will look great pitted again the three bar pots of the Roundheads.
These Royalist horses are mostly cantering at speed, a nice contrast to the trotting mounts of the Parliamentarians.
I think these plastic horses will be a little bigger than the older Essex mounts of Parliament. However, this could just be the King and his gentlemen having access to better horse stocks early on in the war. I can live with it.
Some nice close ups showing the detailing on the Essex troopers. Nice heavy buff coats too making them a carbon copy of their Roundhead foes.
So here they are, the moment of truth, all rebased.
I had the idea that I could still make them look dynamic without adding the extra depth. The trotters of Parliament are riding knee to knee, so are in nice straight lines.
So, by simply staggering these troopers on their energetic horses the unit looks like it is moving at speed. Perfect, job done and everything is legal and above board. No tricky measuring nightmares to come in the future.
'Gallopers' living up to their name.
The thunder of heavy hooves.
Another idea I will use in the future is arranging a squadron in a wedge formation, this will lend itself to a charging look.
These mounts are definitely not trotting, their formation has broken up slightly as some mounts pull ahead of others in the dash.
Here is a before and after shot, the newer bases look a bit more in formation which I like, but still has the staggered look on a charge.
Full tilt now, nothing can stop these men of the King, not even a ragged shower of pistol shot.
It was a bit of a faff to do but it was a 'no brainer' in the end. The bases look great, both forces are now the same and I feel much better.
God save the King!

So, I recently found the 'Victory without Quarter' Face book group and it's put me back into the ECW era.
The group is very useful as it's full of expert rule masters, so any rule query can be answered. It has been quite hard for me cranking through different rules to get answers so finding this spring of knowledge is a real boon.
It's been a little time since I painted anything 17th Century so I need to get my head back into it. My main plan is to take it really easy and try not to burn out.
The plan is to paint four figures at a time, two of these batches will equal a squadron of eight models.
The figures selected are a Hodge podge of different makes to vary the look. This will probably give a very early war appearance.
Most of these troopers are old Renegade minis, with Perry's, Essex, Redoubt and Bicorne mixed in. As most of my Parliamentarian horse are Essex figures, I've included one in the mix just to check it works amongst the other larger ranges. I think he looks okay, which is lucky. Ironically, the sculpts are actually meant to be Royalist anyway, so I guess he will feel much more at home here.
I've also started to mix things up a bit to help the variety of the unit. Here is a Perry's figure on one of the Renegade horses, he works very well. At first I thought the Renegade horses were too big, but they have they're place. Also, after messing around with plastic horses, my opinion of them has changed a lot, I now like them!
Here is a plastic Warlord games trooper with a Redoubt head. This helps to bring him up to scale with the Renegade and Bicorne figures.
The idea is to use contrast paints and dip to speed through these...let's see how we get on.
Greenstuff Day
23 Mar 5:30 AM (17 days ago)

I just have a few little jobs to do today, these Elven stand bearers are one.
I've also been thinking about painting some Royalist horse. A couple of plastic horses should add some well needed variety to the unit. However, they need a bit of tweaking first.
Update: so now with the greenstuff dry, I can now add the wheel lock pistols.
These pistols are from Essex miniatures. Their equipment range is a gold mine for converting figures.
Royalist Northern horse with their stolen booty. Well, I say that, it could just be a campaign look with everything you own strapped to the saddle.

J

These are meant for 28mm figures, however they still make great supply crates for 15mm. They are Star Wars designs so fit in perfectly.
I messed around with spare bits and bobs to add clutter and detail. It should all tie together when painted.
15mm detailing was added to bring the scale down and tie it in with the figures.
Droids break through into the compound.
These super glue lids make great shield generators and I even have clear domes to go over these.
Toy robots were dug out of the sand pit to be converted into machinery.
This is a new product for me, I wasn't quite sure if I'd ever use it.
However, this Star Wars project is great for trying out new ideas. The chain makes for fantastic cabling running across the ground. I had to wait until the base was flocked though before adding them.
My Star Wars basing method. Base with Arid earth first, then with the base still wet with the PVA, give it a sprinkle of the Mars red sand. The result is a nice mix of the two,
Medical supplies
Mobile workshop

I had the idea of creating some heavy weapon positions for the Clones. These were very fun to do using a selection of bits from old projects.
The repeating blasters are resin guns from when I was creating my own Transformers. I selected a couple that looked about right for scale.
The ammo box's and crates were from years ago when I was collecting 15mm Sci-Fi stuff. I remember they weren't cheap, so I'm happy to be finally using some after all these years. Being 15mm they are the perfect scale for my Clone Wars project.
Gathering the bits and bobs together for the build. I also have some cabling that I will add to the base after the flocking is done.
I imagine in Xenos Rampant they will be heavy weapons with the armour piercing trait too. Great for cutting through droid battalions like a hot vibro blade through butter.
Not sure how will use these but they will be great for defending an objective or holding the line.
I used the lead sprue the boxes came on as a power cable. I just twisted it and inserted it into a hole on the side of the gun. This saved me messing around with cables and should look the part when painted.
Clones spill out of the crippled walker to set up a perimeter defense.
A couple of Clones were selected with positions that looked good servicing the gun.
The 1920's feel of the weapons matches the retro look of the Clones with their Flash Gordon style helmets.
Update: A nice white undercoat, almost finishes the figure.
Basing Day
14 Mar 10:56 AM (26 days ago)

Quite a few projects today, including sci-fi troopers to mediaeval warriors and even some ACW.
Above, Clone troopers get their red desert mix with tiny 2mm tufts. These tiny Tufts really do make all the difference with these 15mm figures.
Green 4mm tufts look great as grass clumps in the muddy English field look. I gave the grass a coating of the mud to help blend everything together.
This is a Confederate base for Bonnie Blue Flag, when a unit fails the 10% rule, this base can be put down. It shows a unit that has run out of ammo. It frantically searches for cartridges in empty pouches while others jeer and throw rocks. A really fun little scene to put together. Just needs a Matt varnish to finish it off.
The little 2mm tufts are perfect for these figures.
Update:

The crashed Republic ship is now finished. I added some carbon scoring with the Tamiya weathering kit. I also painted some magic 'shifter' paint on the view ports so the colour hue changed from different angles. Quite nice I thought for a polarised view port.
Droid command, a Super tactical droid briefs his subordinate.
A Super battle droid stands guard.
Super tactical droid and Tactical droid.
I was really impressed with little sculpts, the detail is very good for such a small printed figure.
I also finished off two more bases of Clones today, I just kept them in their white armour without any unit colour scheme. These can be used as 'shinys' or green units. Keeping them white and more generic lends them to many more theatres of war.
It's nice to see the Clone against the Republic ship.
The polarised view port.
This would make a great objective for a game, two Tactical droids in a downed ship.
Next up...basing.

I ordered this printed ship off eBay to use in the Clone Wars project. It's a kind of generic ship but did have definate nods towards a Star wars craft. This is good enough for me.
As it's printed with the printed lines still visible, I stuck on a few plasticard panels. This will be nice and smooth and should contrast well.
White Hawk down...I repeat White Hawk down!
The model was about £12 and is really 28mm in scale. This shouldn't matter as the bigger the better for tiny 15mm figures. It will make for a great objective with a platoon of Clones stranded in the middle of the board to rescue. Stick an injured Jedi in there and you really have a rescue mission on your hands.
The huge gaping hole in the vessel is great for putting bases of figures in and will take a few 40mm bases. Heavy cover from the laser fire amid the crashed wreckage for sure.
Once the craft is painted in the Republic colours it should look right at home crawling with Clones.
Republic colour scheme.
Once the glue was dry I gave it a spray with a white rattle can. I also gave the blast hole a spray of black. I ended up keeping this effect and just blocked in the colours around it.
Now we're getting somewhere, the Republic colour scheme really puts the ship into the Clone Wars setting.
"Take cover, watch those wrist rockets!"
Like I mentioned before, I didn't really change the black spray as it worked so well. Using the reference for the shuttle, I painted on the Republic colours picking out key panels for the different colours.
.
The real magic came when I gave it a wash with thinned oils. These ran all over the ship and into the recesses creating instant panel lines.
Space 1999 eat your heart out!
I'm pleased with this quite paint job, it was a lot quicker and easier than I had first thought.

I have been cramming an extra figure onto the odd base to use up the left overs.
The extra smaller Orc at the front helps with the scale of the boss, making him look even more formidable. It also adds to the packed horde look with hundreds of bodies crushed together.
This is the latest base and the last of the batch. These were the last in the painting qué and a couple that was finished long ago.
An extra blade shows the addition of a Nick Lund goblin to the mix.
On a different note, here are some beautiful Elves to chase away the darkness. These are the classic sculpts from Alternative Armies. I found myself just painting them in greens before I could stop myself.
The copper shield should tie these guys back into the autumnal look of the Silvan army. These were great fun to paint and are very nice figures.
Contrast paints are great for leather equipment. I think this is Gorgrunter fur painted over a white undercoat.
Simple green paint and ink washes over most surfaces helps give the character a woodland vibe. It's rude not to have a few green clad guys in amongst all the browns of autumn.
Update: A new Elf captain had stepped forward to lead the next company. He is a Reaper Miniatures figure and is quite large, but most of it is just cloak. Height wise he is good.
Beneath his drab cloak he is actually quite colourful. Going through my Elf names now to see if one sticks.
Another Vitrix Norman conversion.
I've just added some very small details to him like the hem of his tunic. Being an officer he gets a bit more time spent on him.
Their numbers are growing in the shadows. The mounted character has been painted for a while. Although, being resin I'm a little hesitant about putting him on a big 60mm base.
Resin figures are nicely sculpted and detailed but their fragile nature is still a real kicker. Maybe a display case would be okay but the rough and tumble of a wargames event...not so much.
Chrome paint is used to give his elven blade a razor edge. Once given a coat of floor varnish it gleams from every angle. For these woodelves I give the blades of green ink to echo their woodland magic.
Gorgrunter fur contrast paint was used to tweak the colour of the shield. The paint is great for enriching any bronze or gold work, creating lovely rich colours.

This little group of Elves popped out of the wood work today. I took a gamble on eBay as the picture was out of focus and I couldn't really make out the details. I very happy to say that the group is very nice indeed.
I know one is an old Grenadier sculpt but the others have me stumped. They are perfect for my army in their light jerkins and hooded cowls. The faces are very nice too.
These two can act as sharpshooters from the rear ranks of the shield wall.
The Elf lord is very eye catching with his fancy shield. Having cloaks is good too as once painted they will blend in with my assisting collection. Although these aren't spearmen, they can be peppered throughout the ranks to add some variety.
This crowned figure isn't quite right for my army but she will be perfect for my Sidhe forces. She will be giving up dirty Orcs in favour of smelly Fomorians to cull.
This leader figure will be given a company of spearmen to lead.
The axe wielding Elf reminds me of my favourite figure of all time, a Dark elf guard sculpted by the Perry's, back in 1984. It might be the simple round shield.
Update: So it turns out these nice sculpts are from Alternative Armies, and they are still available.
Update,
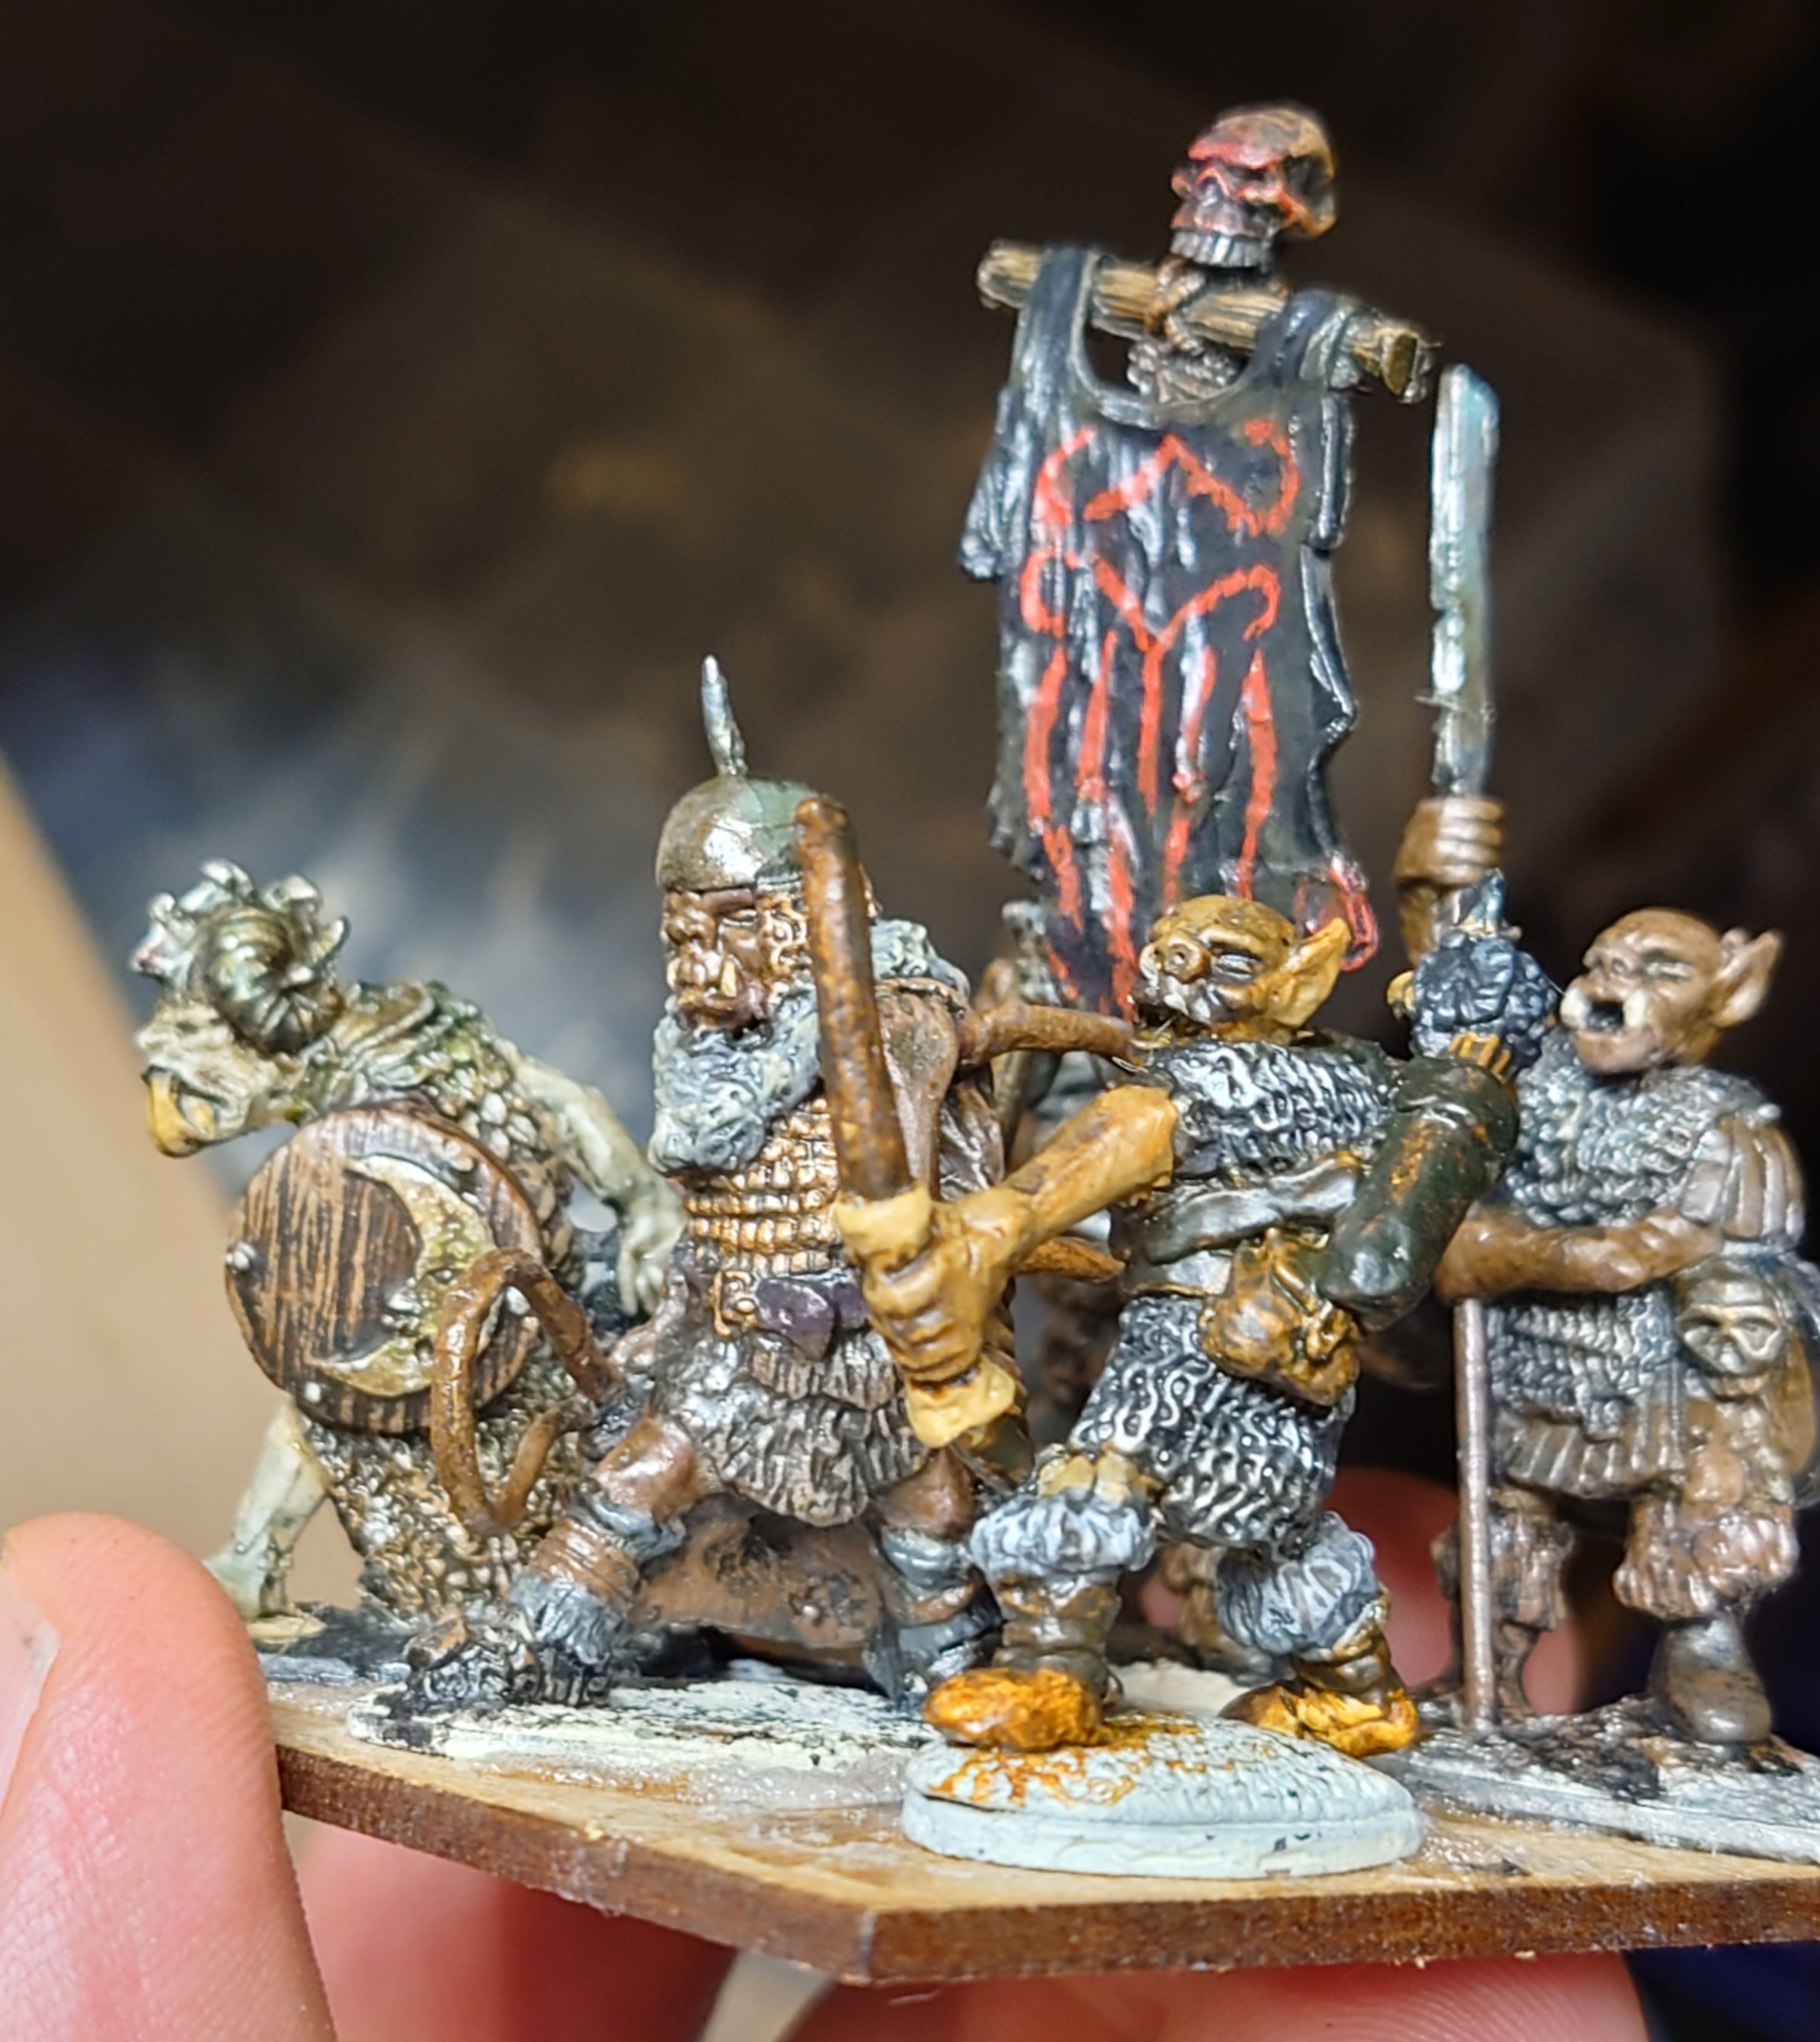
Orc Muster
13 Feb 3:58 PM (last month)

I decided I had enough Orcs to start sorting them onto bases. These are a few that missed the big Hobbit battle deadline and were left unfinished. Well, now they are all painted and just need some stones and sand to finish them off.
This base was actually finished ready for the big Hobbit battle but was somehow over looked when it came to basing. As a new battle date is being set for another event, this time he and his friends will be ready!
This base was painted up to be an option for Bolg. I'm not sure where the big Orc comes from but he certainly looks the part. He is large and very well armoured.
These bases are sporting lots of standards, very useful for mixing into big units.
A new greenstuff helmet amongst the lead sculpts.
I'm really pleased with the plasticard blade results. Shaping a crude blade from plasticard then gluing it to a brush bristle really looks good. The join was hidden by wrapping cotton around the two pieces. It makes me think a unit of Orc pikemen armed with these weapons would look great. The plastic weapons would be very tough too and virtually impossible to break, very useful for wargames figures.
A real mix of old and new. Reaper, Grenadier, Oathmark and Chronicle. This latest batch is also includes a mass of old Gremlin Miniatures.

Taking a break from tiny clones to finish up these grungy orcs.
These have been sitting on the worktop for a couple of months and need to be finished. Amongst them are those recently acquired figures from Gremlin Miniatures.
The horde slowly grows. It's nice to just paint the odd one or two between other projects.
A large orc from Reaper miniatures, at that size he has to be a leader. As he is a massive brute, I have given him dark blue/black skin, a black Uruk of Mordor.
These two figures were ones who's spears broke off and so we're promoted to standard bearer.
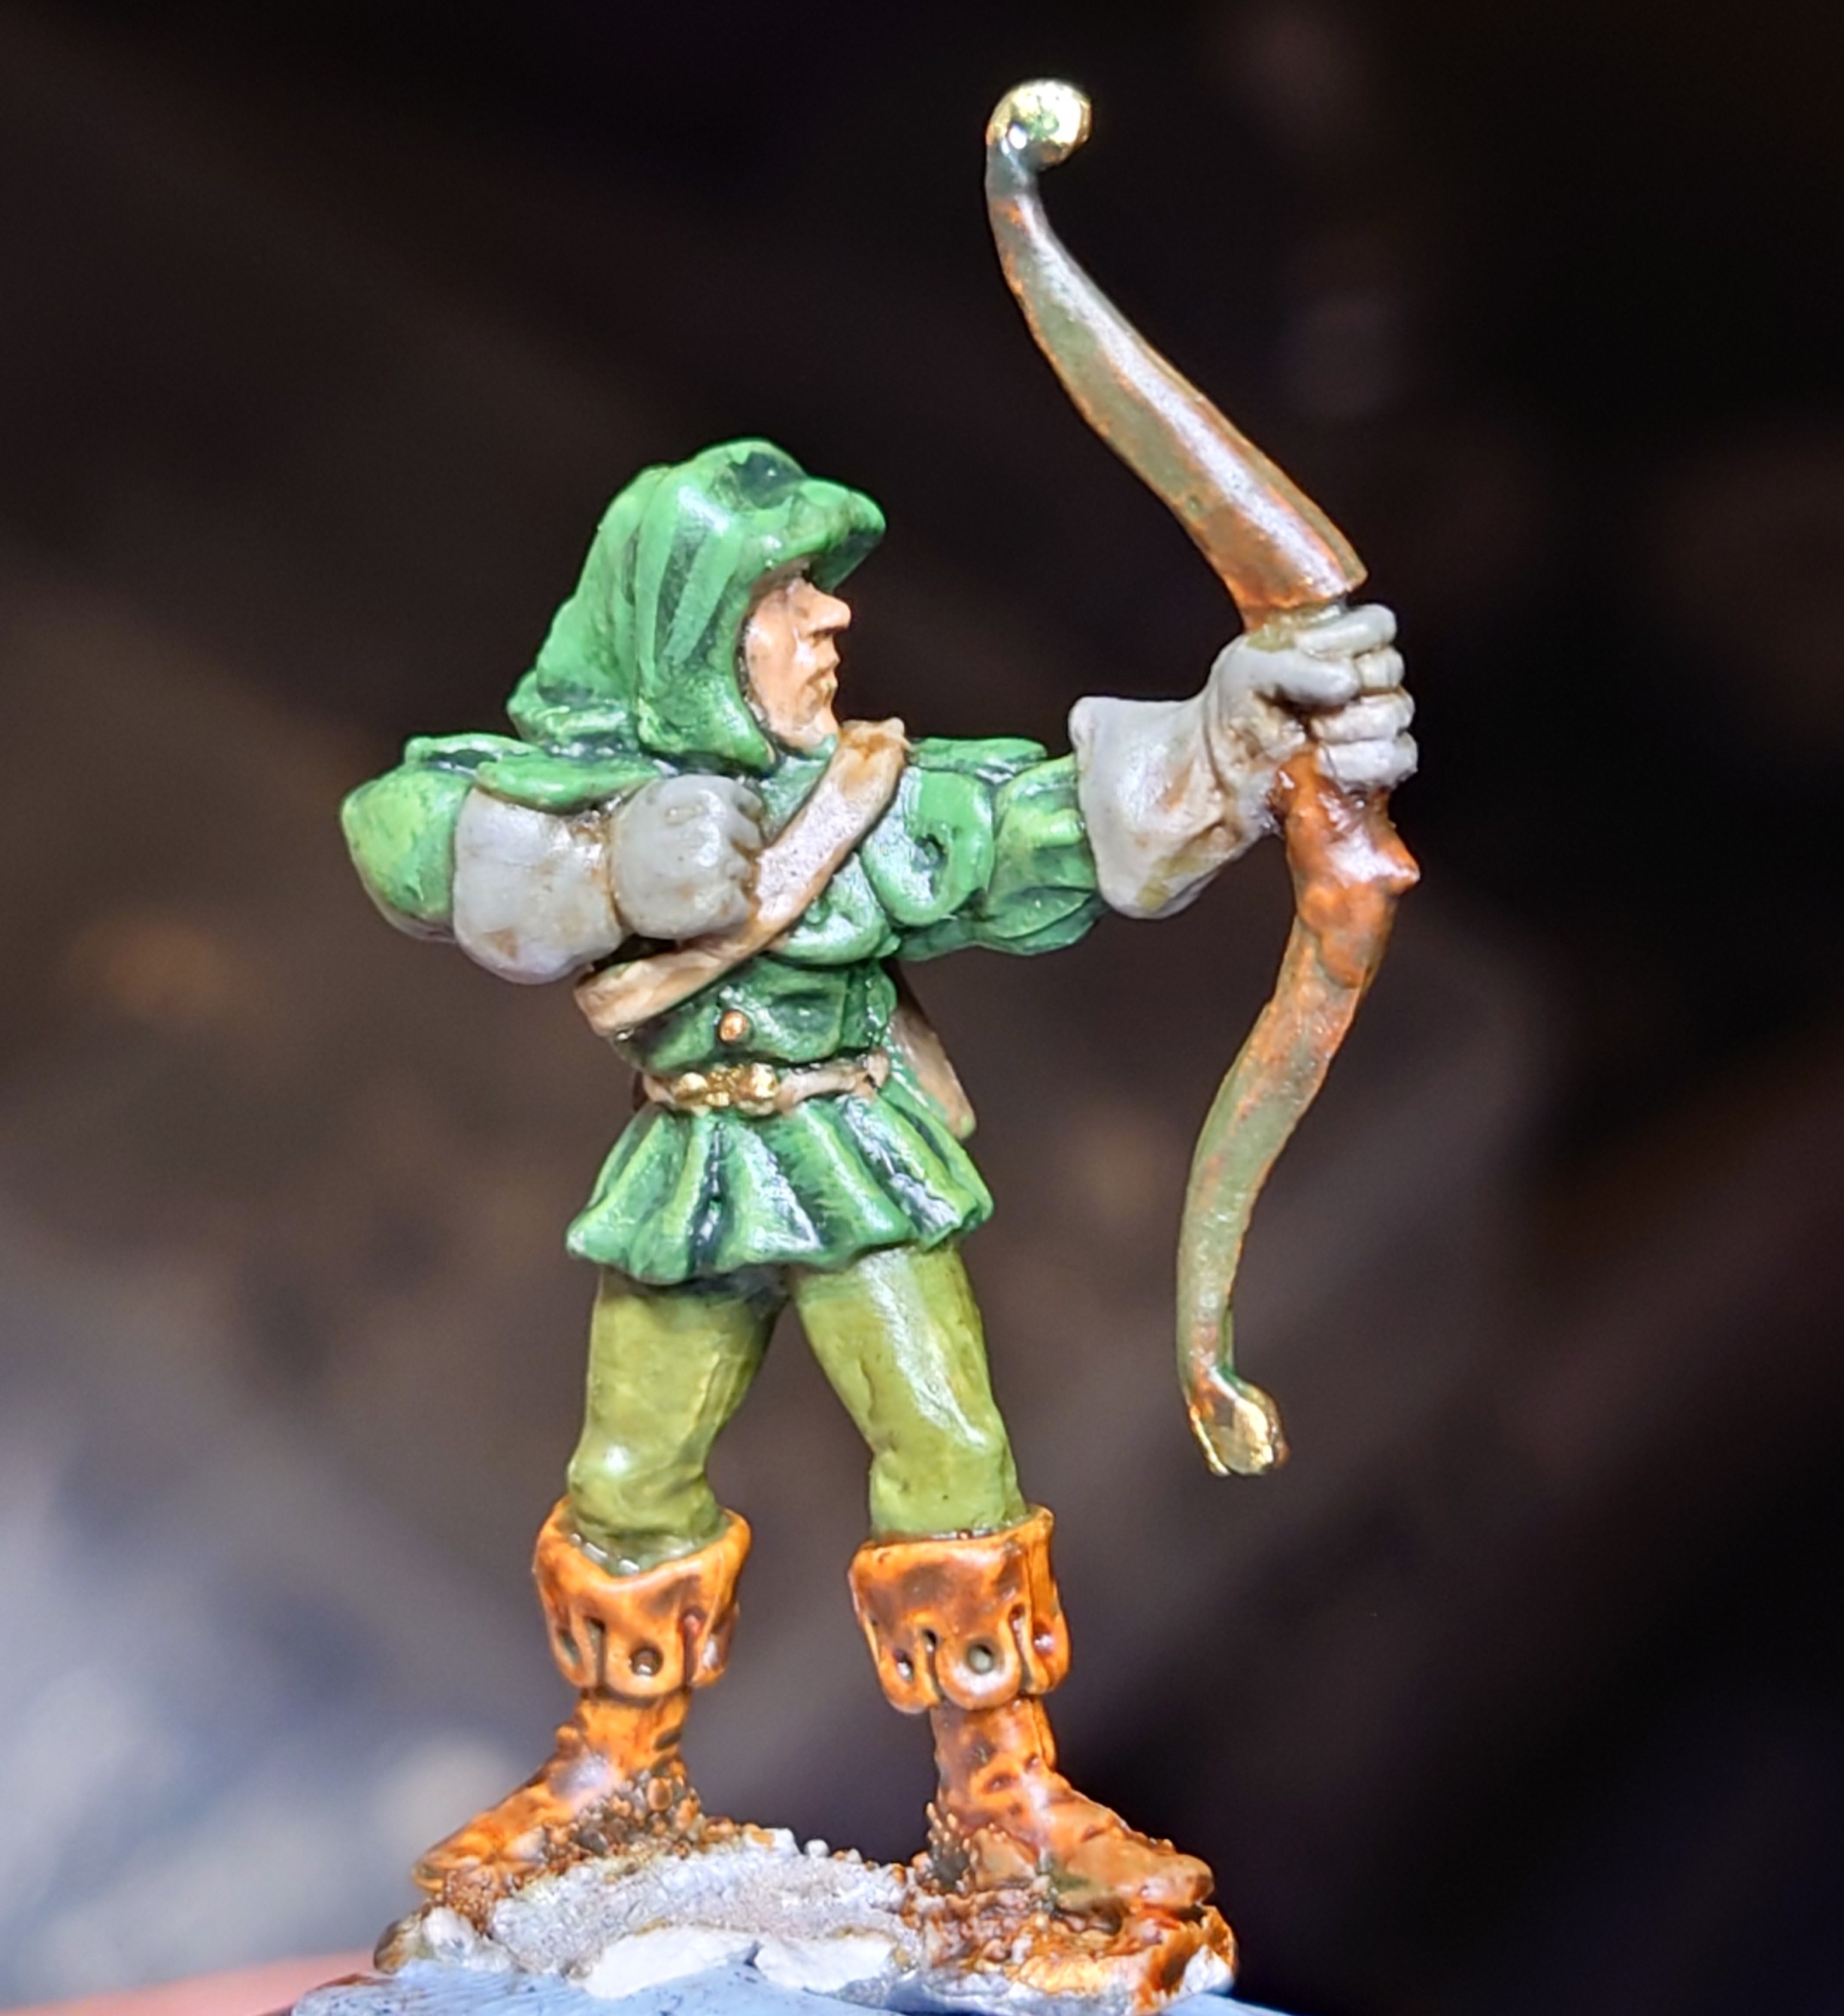
I bought this wood Elf from Reaper Miniatures recently, but noticed he didn't have any dagger. I tried a couple of plastic and metal swords but they just looked wrong.
Good old brush bristle knife looked just right, job done!
Update, The Silvan Elf is now in his woodland colours. I need about twenty four Elves to bring my Silvan force up to strength and this guy is the first.
Painting Elves is very relaxing and rewarding. No dirty colours here, just nice ink washes and subtle woodland tones.
The new dagger looks good now it has some detailing. Might just make all the difference when he runs out of arrows.
More evil Orcs crawl out from under a rock to join the growing horde. I used a dabbing technic to draw on the skull design. This worked well I thought and produced a crude, naive design, very Orcy.
He carries the broken bone on his shield so will go with the standard bearer of the same design.
A silver Sharpie pen was used to add metal highlights to the rusty armour. It's also excellent for doing rivets and studs.
This strange hairy Orc makes for a good leader. A Ral Partha figure judging by the detail and styling. He's a good size too, able to lob off a few heads to bring his lads back under control.
It's always good to put some black around the mouth to act as dried blood and the like.
MTT Toy
6 Feb 3:12 PM (2 months ago)

A screen shot from the Battlefront game for reference.
Another lucky find on the toy front, a MTT to help transport 102 B1 battle droids or 10 B2's.
The scale isn't bad at all and is definitely close enough to work. It could of been slightly bigger maybe but it's pretty damn close.
I will weather it up and add some scratches etc. Again the images from the Battlefront game will really help with this.
I won't bother to repaint the whole vehicle as it is already very good, just a few washes of black and browns should do.
I've realised that there aren't very many vehicles in the Xenos Rampant game, one or two at the most. These large transports can be used for debris on the battlefield. They're so big you'll have to go around them and they should also block line of sight too.
A nice touch is the doors at the front actually open up which is great for a knocked out vehicle.

Well I'm very proud to announce that I have made it into Wargames illustrated. While at the 'Other Partizan' show with James Morris and the Midgard game, I was interviewed by James Griffith from the magazine.
It was all done via a face to face dictaphone recording, so I'm surprised anything could be heard over the din of the huge gaming event. However, on reading through the article it all made sense and I thought James did a grand job putting it all together.
I did mention my Blog in the chat and that too has made an appearance. I love the scrapbook effect they have created for this page.
I was only expecting a page if that of my painting tips and figures, so was blown away to see it had made a six page article. I know the interview went on for around twenty minutes but I still wasn't expecting so many pages.
I'm really pleased with the finished article and the WI team have done a great job in laying it out.
Having this hobby blog also helped with WI able to delve in and select photos to help show what I was talking about. This was really useful for the creation of the mighty Beorn out of a couple of toys off eBay.
I kept running down the town to check if it was in the WHSmith, only to come back empty handed. However, James got in contact and offered to send me some copies which was very thoughtful and greatly appreciated.
I hope it goes down well with the readers, if it does it could lead to more articles, you never know...
This article is the cherry on the cake to what was an amazing weekend recreating the infamous battle. I know James Morris has shown interest in putting it on again...now I've found a way to transport my armies safety, I'm all up for it.

Well what a great Friday for getting stuff in the mail...these two beautiful books turned up.
I first saw these a couple of years ago used by James Morris to photograph his Middle Earth figures. I decided to follow suit and order a starter bundle.
As I was also painting up Sci-Fi figures I went for the Sci-Fi backgrounds too.
These are just quickly put together pictures with what I had on the table. However, even these quick snaps show how a good backdrop can make all the difference.
Here is the soldier I painted with my son as a learning project, now he's a Colonial Marines fighting xenomorphs.
It's always best to use some scenery as well with your figures to help blend them it. I can't wait to do some arty stuff with these books. My ancient Irish Fomorians spring to mind...
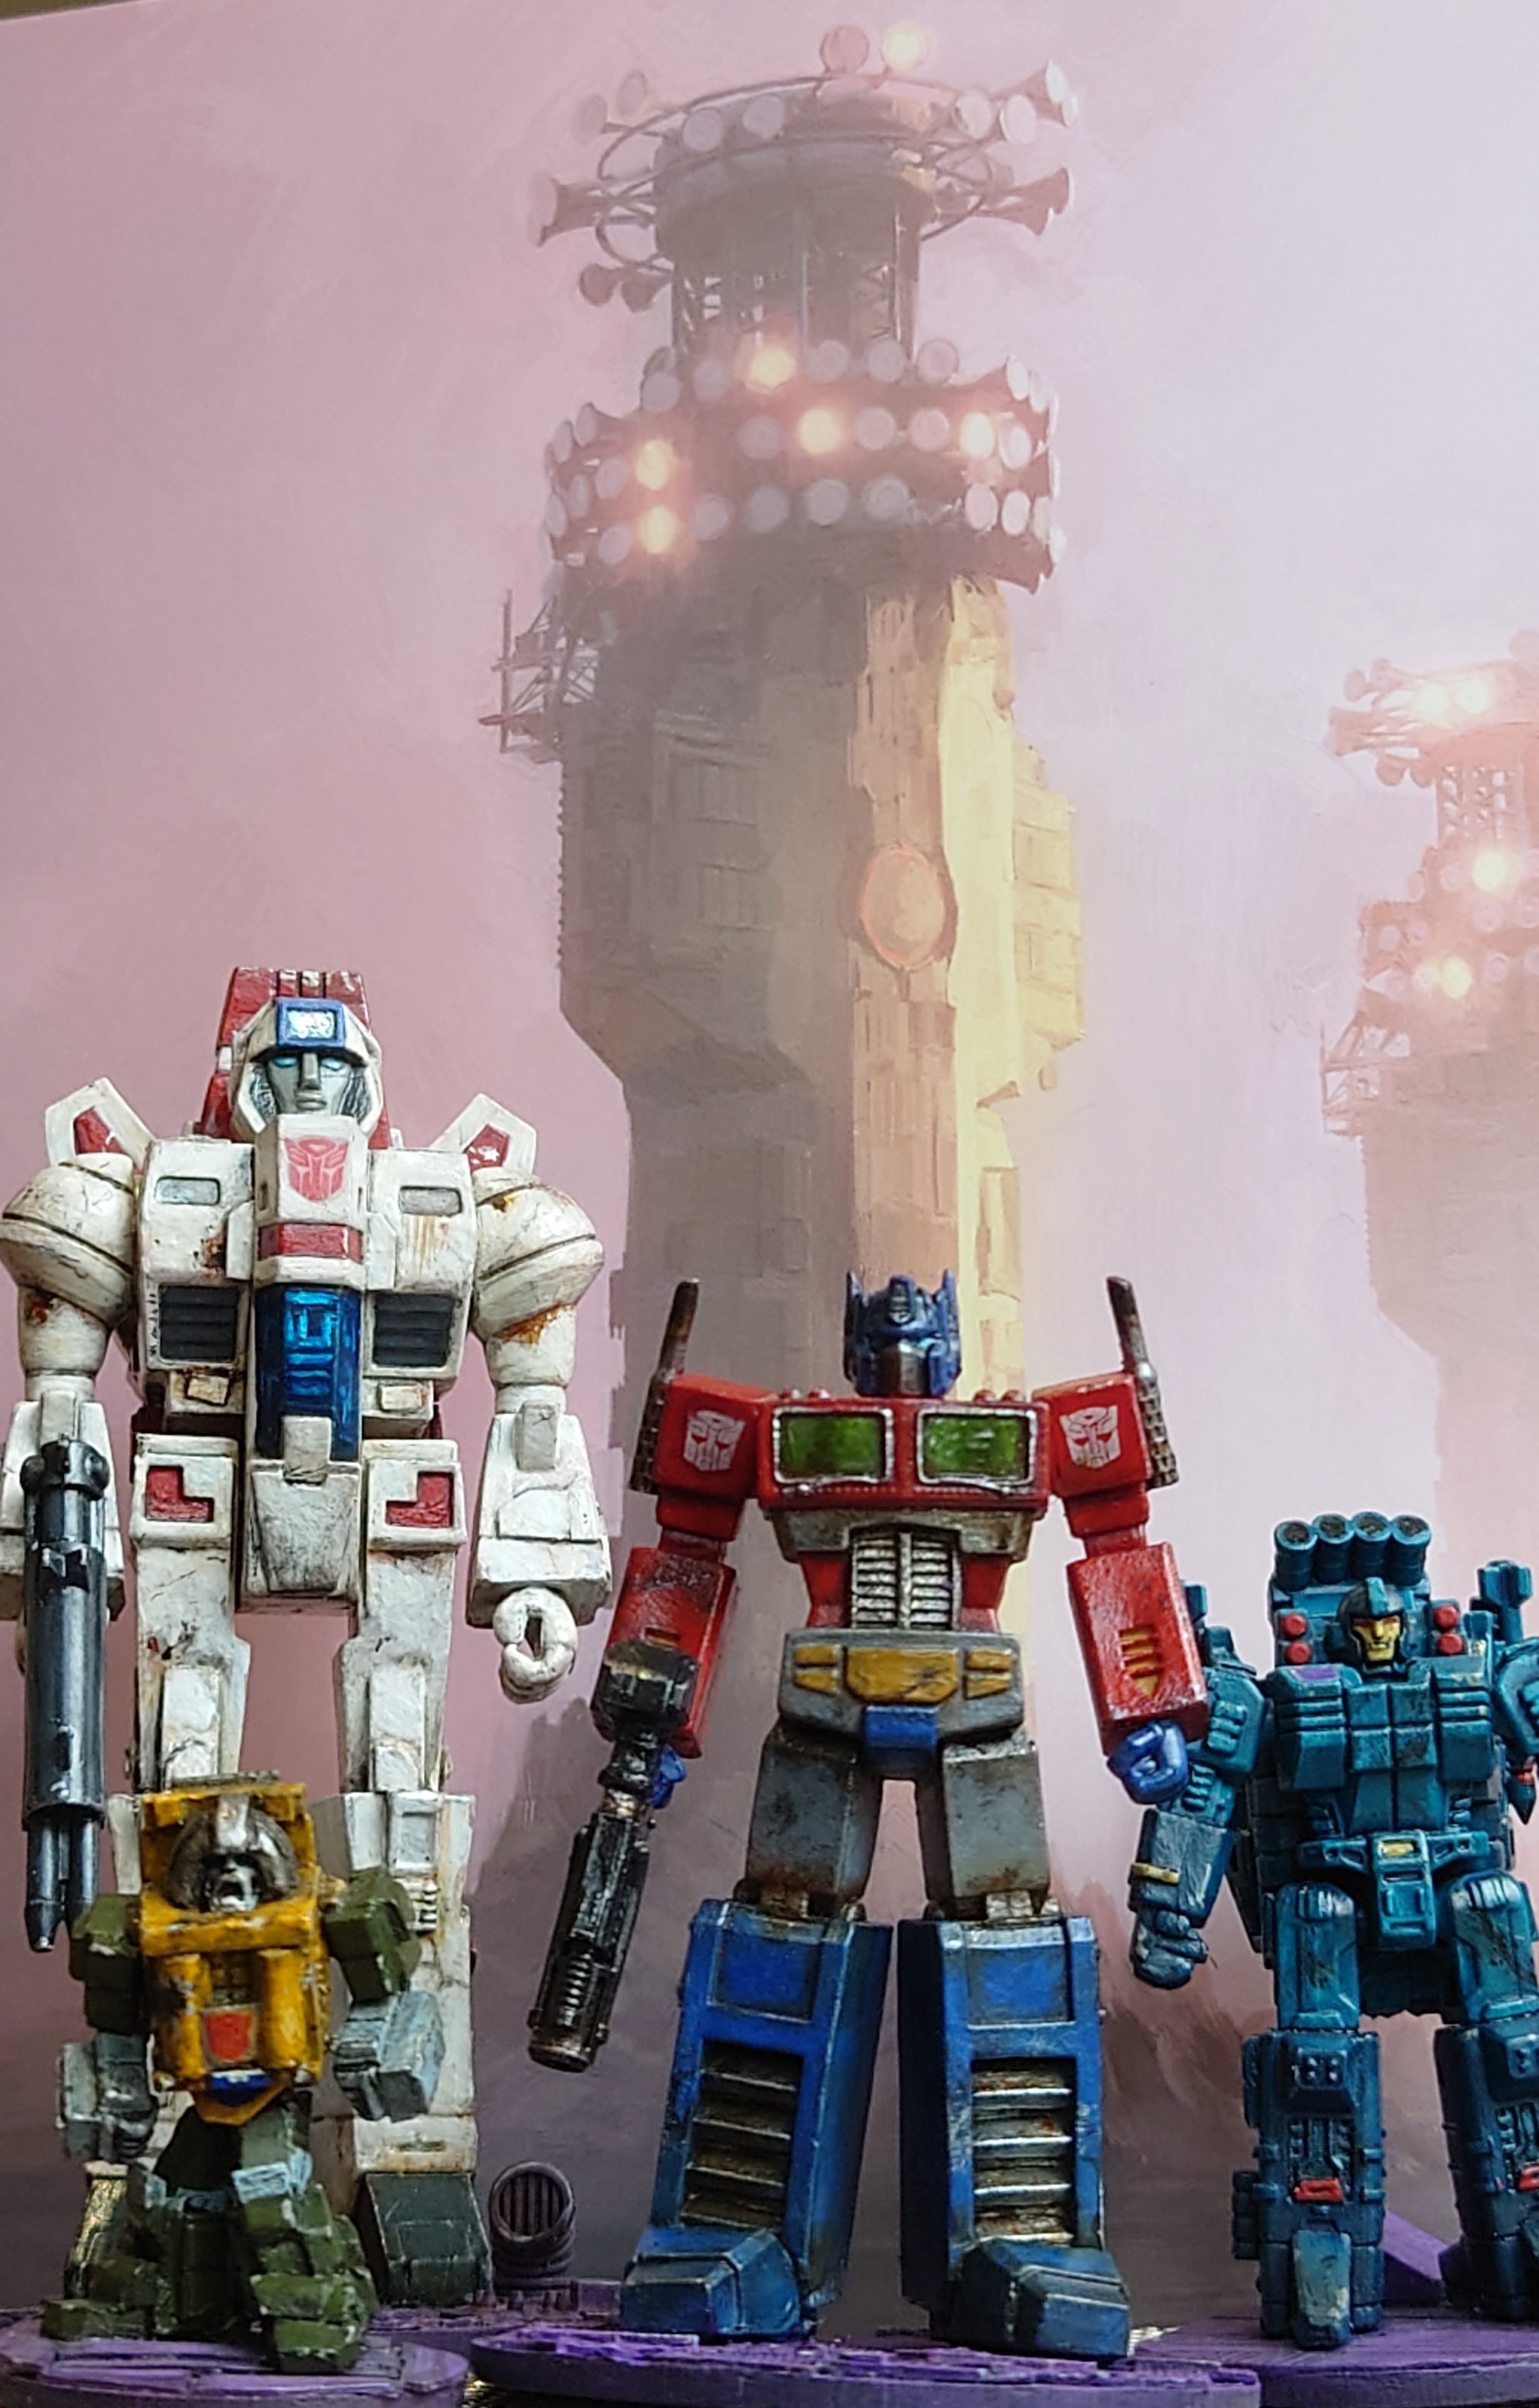
Even my Transformers got in on the act, showing a more peaceful age of Cybertron.
Til all are one.
I actually messed up big time when ordering these books.
When I first became aware of them they were a kickstarter in 2023. I placed an order for this bundle but what I actually ordered was a license to use the backgrounds commercially. Knowing Kickstarters can take ages to arrive, I sat and waited for my phantom Kickstarter for a couple of years. After seeing them for sale on a web shop I contacted Jon. After some detective work the whole dyslexic tangle was unravelled and Jon kindly sent the actual books to me at home. A very nice man indeed. So my wait for these books has been a very long one but definitely one worth waiting for.

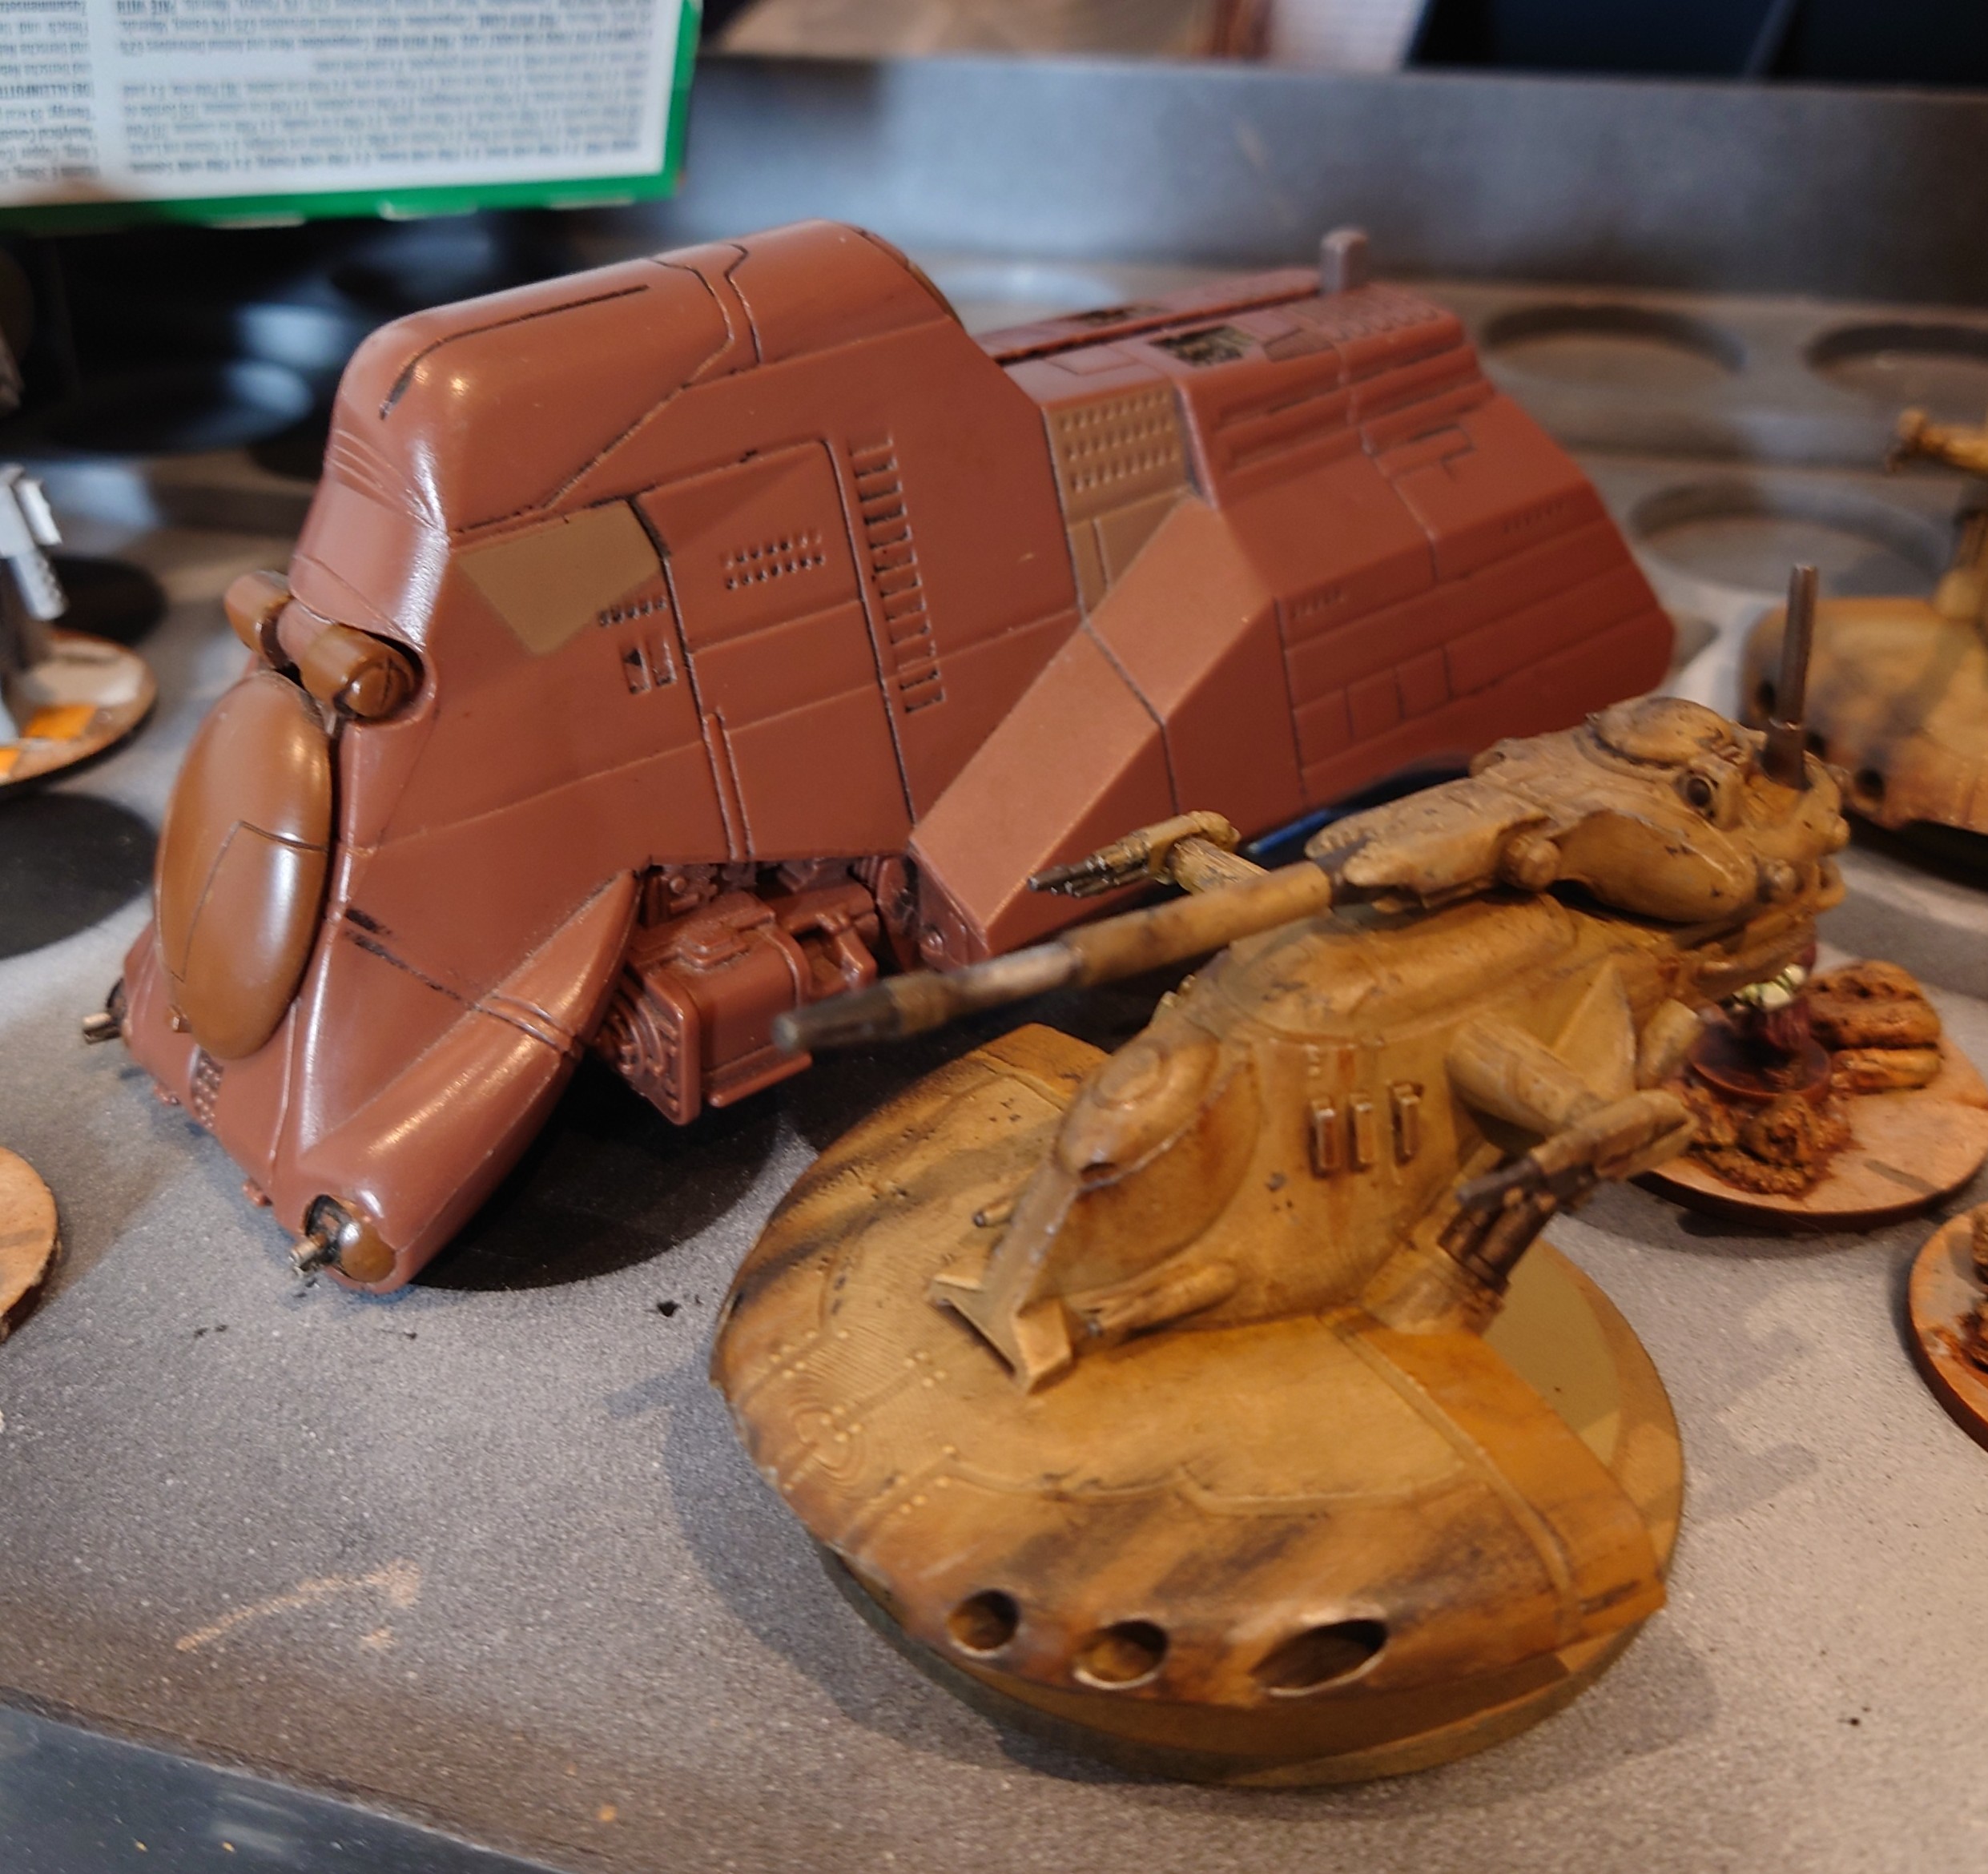
The Sepretist heavy armour has arrived just in time to counter those bloody handed Jedi
The AAT hovers into place to lay down some covering fire.
As I was constantly referring to a reference book for the colours and details, I thought it wise to complete one fully. This completed model will then be used as a guide for the others.
One of the main features of these tanks is the emense carbon scoring from the missile launchers.
There is also a subtle colour change on some of the rear panelling, This took a little paint mixing to get right.
I went around the tank with a lead pencil just picking out worn edges and panels. This tank was quite easy to paint. I started with a spray of Tamiya dark yellow. Zandri dust from GW was then used to dry brush it to bring out the panels. On top of this, I added a few washes of browns to weather it up.
The carbon scoring was done with a brush so that was a nice easy step I also used a sponge to add from metal chipping with a silver paint.
AT-TE Vs AAT
The repulser lift vehicle out manoeuvres the slower walker. Its nice to see these two models together fully painted.
Again, the Battlefront game really helped get the detailing right on this model. Having such amazing graphics that can be rotated is a god send for a painter.
The other great news is that most vehicles from the Clones wars are on the game. This will be very handy for the speeders and other vehicles too.
Update: Three Advanced Attack Tanks hover into position.
I've given them a coat of Kleer floor varnish to give them a metal appearance.
I'll go over the smoke streaks with some Tamiya weathering soot, this will take away the gloss.
The picture above is the one I've used for reference.
It was very useful for spotting all the details like the rust streaks and battle damage.