Bisquick Scones Basic Recipe 15 Apr 2:27 AM (3 days ago)
Fall in love with these easy and delicious Bisquick scones!
Simple ingredients are used to make these vanilla scones with raisins and a sweet powdered sugar dusting.
You might find you have all the ingredients on hand in your kitchen and pantry.
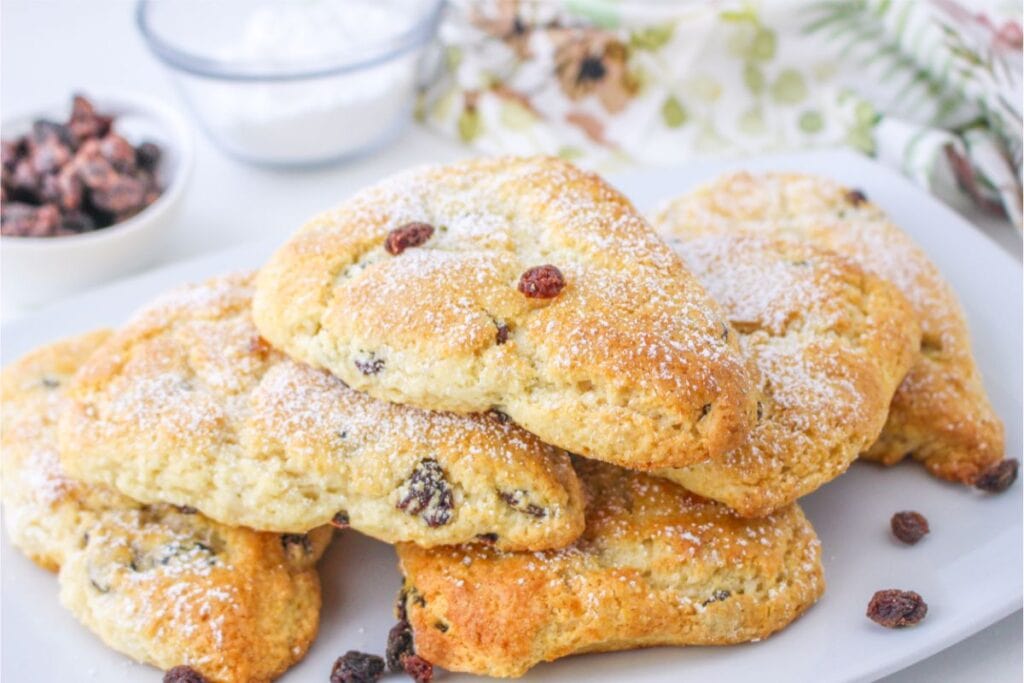
Scones are a delicious breakfast, brunch, or even tea-time snack. This recipe uses the Bisquick baking mix as the base, to speed up the prep work. Then I added raisins in for even more sweetness when you sink your teeth into the subtly sweet scones.
If you are a lover of Starbucks, make sure to try my copycat petite vanilla bean scones. They are a favorite of mine!
Reasons To Fall For These Bisquick Scones…
- This is a foolproof scone recipe. It takes minimal effort to make with the simple steps for mixing, shaping, and baking up!
- The Bisquick helps to ensure you get that consistent texture to your dough, so you get perfect scones each time.
- Change up the flavor of the scones with a few tweaks of ingredients. This is a versatile recipe for sure.
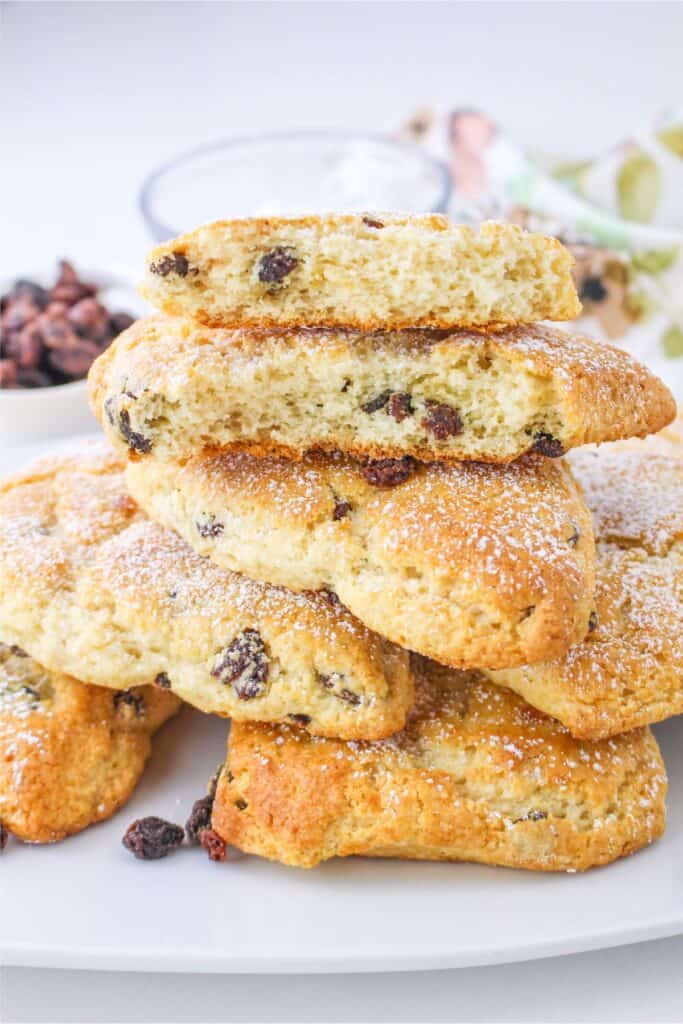
- These scones offer that flakey texture that melts in your mouth, that you know and love.
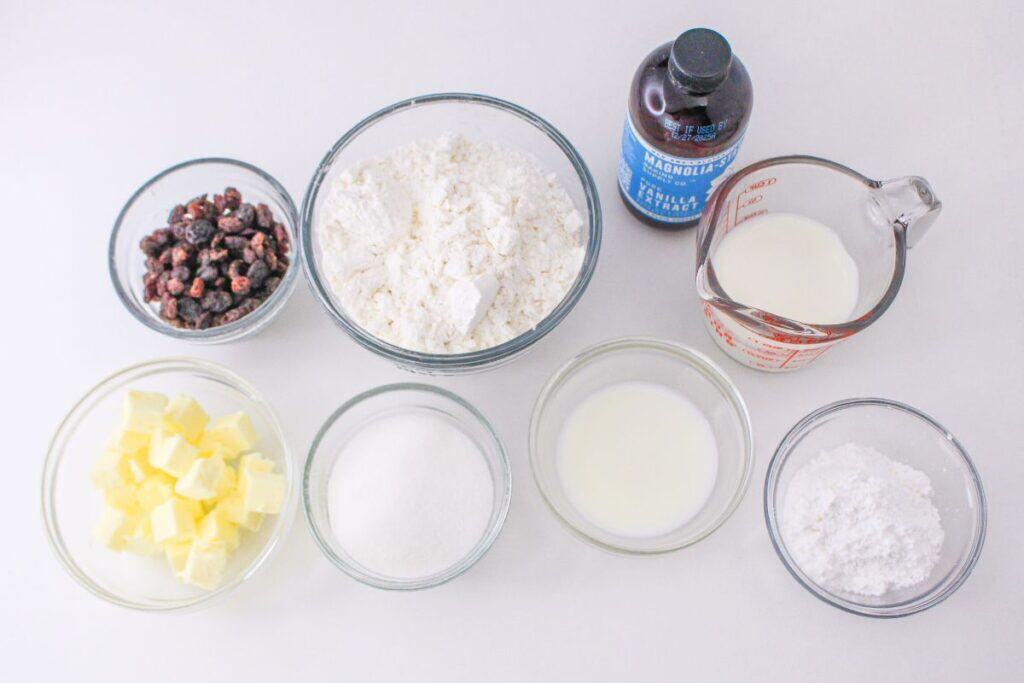
Ingredients Needed
Bisquick – Find this in the baking aisle by the flour and sugar. This is a baking mix that you will use as the base for this homemade scone recipe.
*You can also make your own with this copycat Bisquick recipe.
Sugar – I used granulated sugar to sweeten the scones and then powdered sugar to make the dusting on top.
Butter – Real butter that is cold and cubed up is what you want. The butter melts as it bakes which helps create that light and flaky texture.
Milk – Milk is used for the batter and brushing on the tops of the scones to create a nice golden brown color as they bake up.
Raisins or Currants – This is optional but it does help elevate the flavor and adds tasty sweetness.
How to Make Scones
Full directions on how to make this simple Bisquick Scones recipe are in the printable recipe card below. This is a quick walk through on how it is made.
Step 1: Preheat your oven and prep your baking sheet with parchment paper or a silicone baking mat.
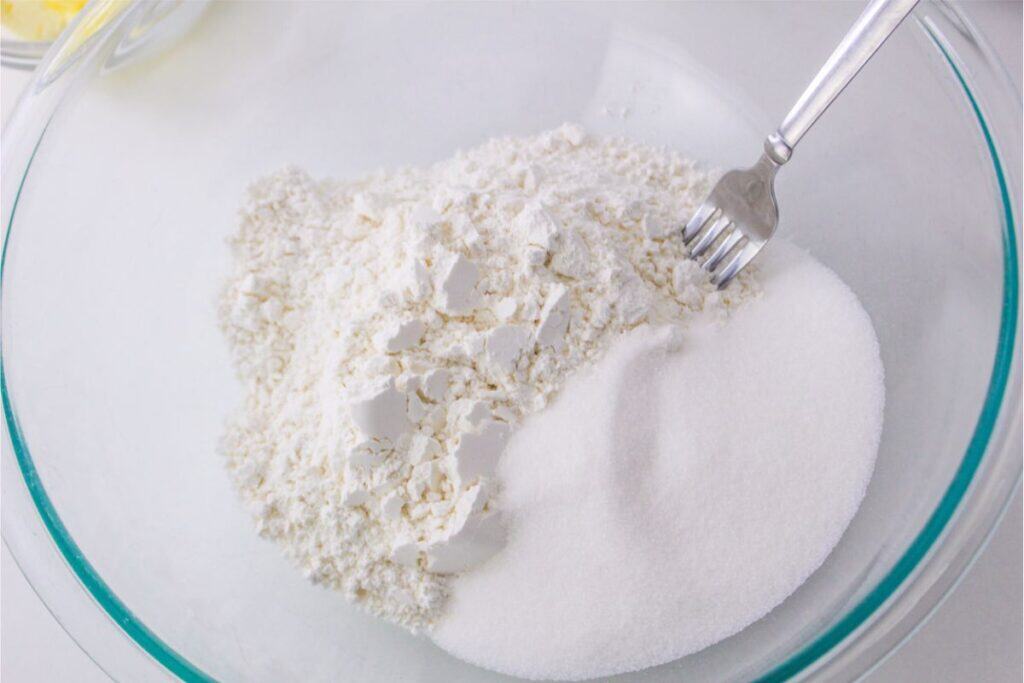
Step 2: In a large mixing bowl, add your baking mix and granulated sugar.
Mix to evenly combine.
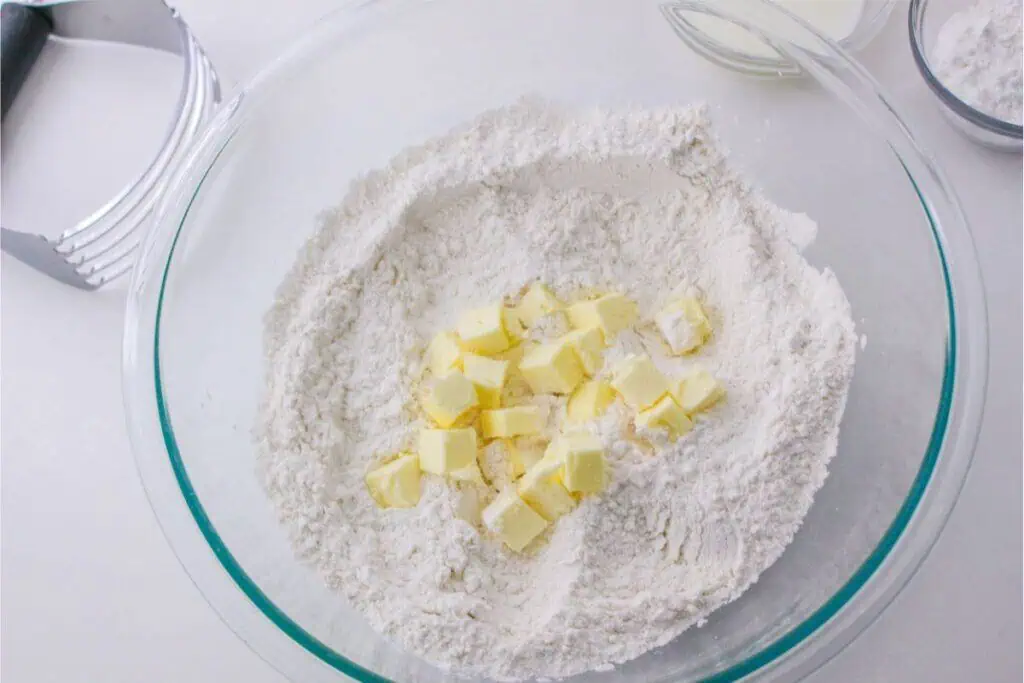
Step 3: Add in the cold butter and use a pastry cutter to work it into the dry mixture.
You want it to have a coarse crumble.
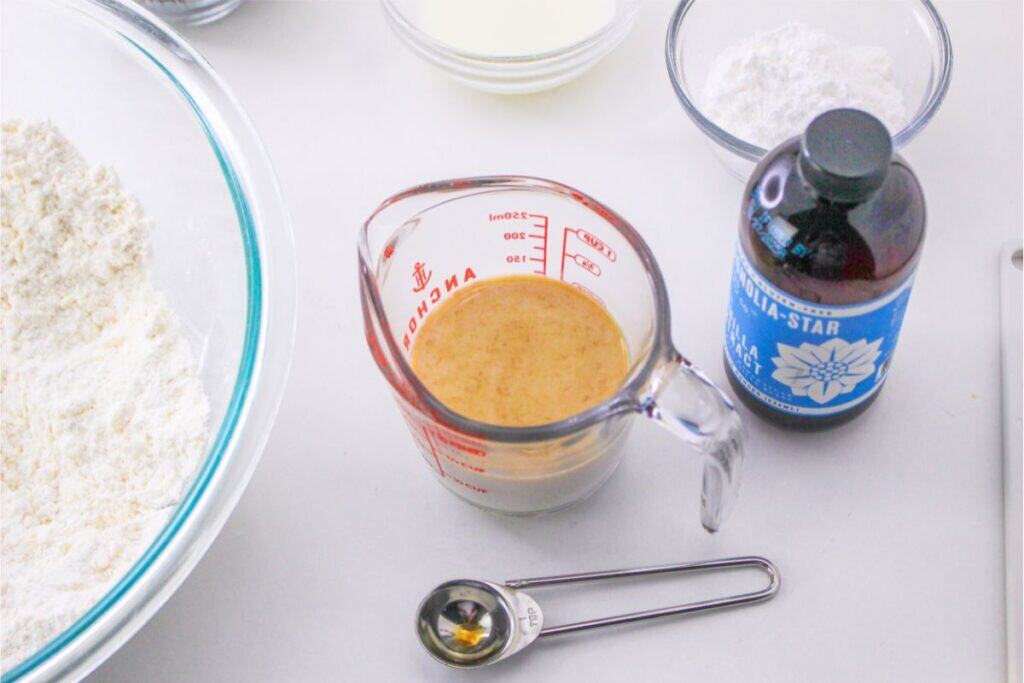
Step 4: Pour in the milk and vanilla and work to form the dough.
Then fold in the raisins.
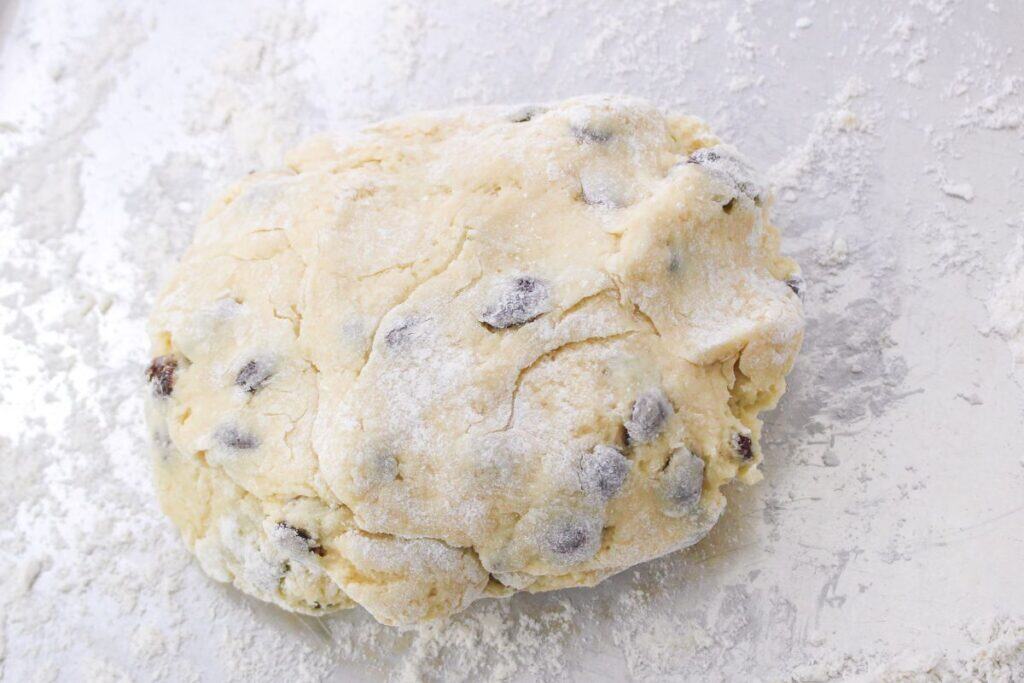
Step 5: Place the dough on a floured surface and knead gently.
Then make a circle out of the dough.
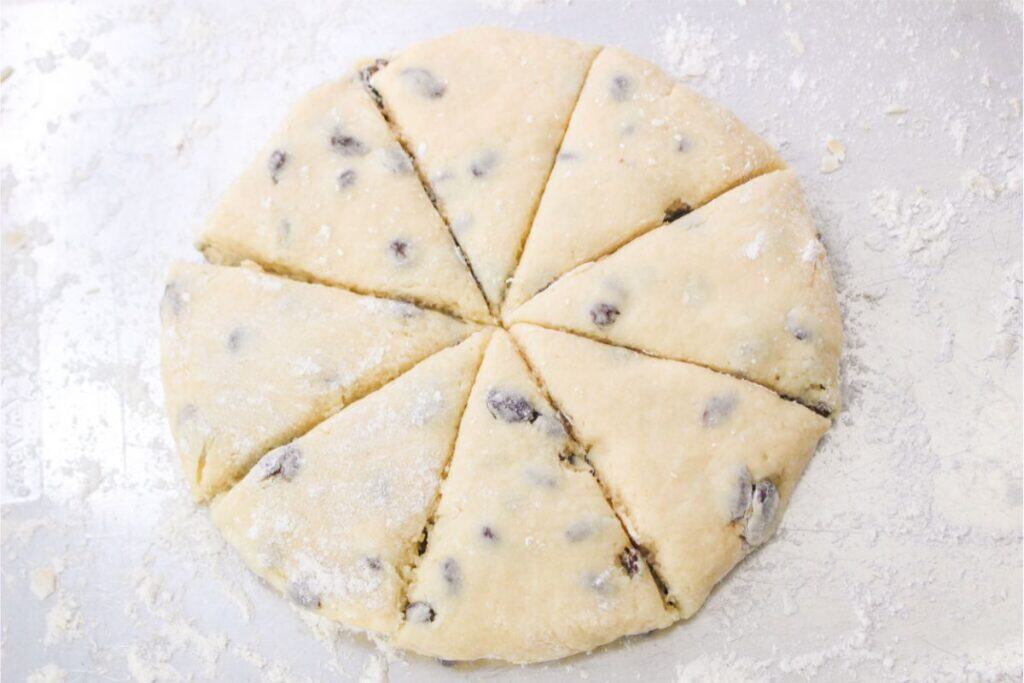
Step 6: Cut out the scones and place them on the baking sheet.
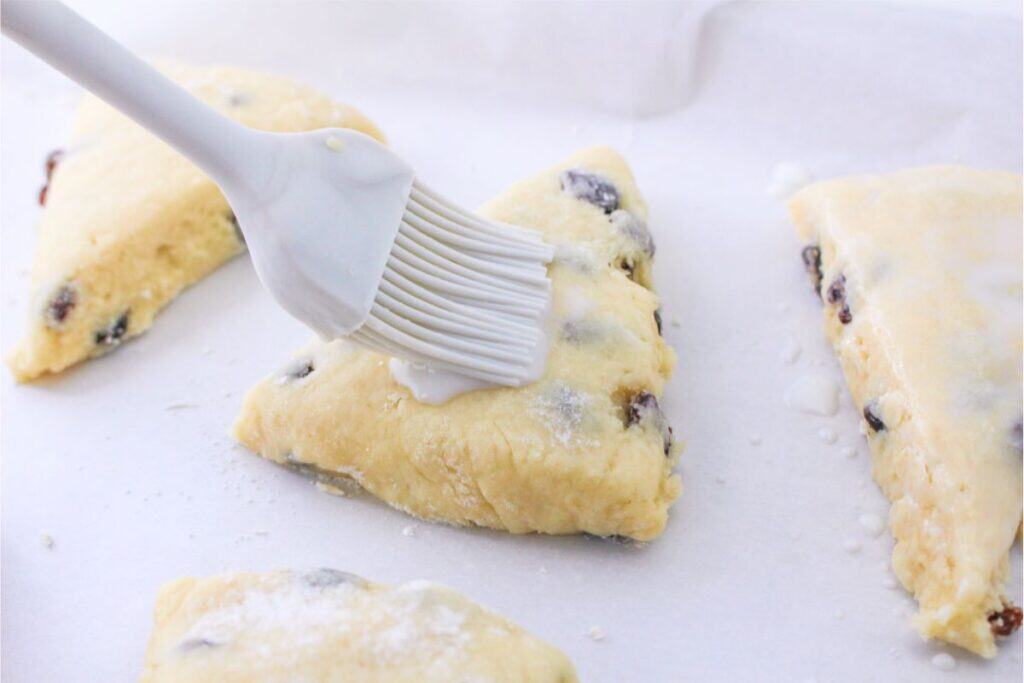
Brush the tops with milk.
Step 7: Bake as directed.
Once done, place on a cooling rack to cool for a bit.

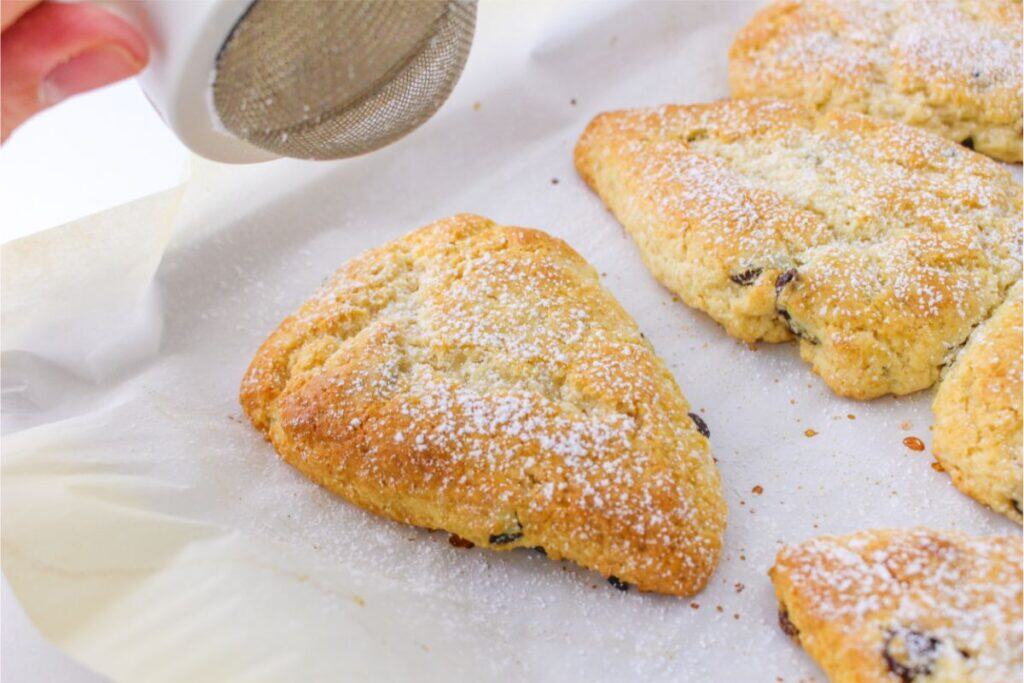
Step 8: Dust with powdered sugar, and serve.
Variations To Recipe
Mix In’s – The possibilities here are truly endless. Dried fruit, cheese, diced fresh fruit, chocolate chips, fresh herbs or dried herbs, diced bacon, etc. Feel free to add your ingredients to give your scones that personal touch. Fresh lemon juice, or lemon zest is another great mix-in.
Glaze – Instead of a powdered sugar dusting, you can make a glaze. Mix powdered sugar with a little bit of milk to create a drizzle. Then add an extract to flavor the glaze how you would like.
Extracts – Instead of a vanilla extract for the scone you could do an almond extract for a sweet and nutty twist. Or use an orange, raspberry, etc. Feel free to pick any flavors you would like.
How To Store Scones
You can store your scones in a sealed container at room temperature.
Now if you use perishable ingredients then you will want to store the buttery scones in the fridge.
But for this particular recipe, they can be stored at room temperature for 2-3 days.
Or you can extend the shelf life and freeze them for 4-5 months.
Then just thaw them on the counter when you are ready to eat them! This is a great way to preserve the scones.
Tips for Making
- The butter needs to be cold, so you get a buttery and flaky texture. If the butter is melted it will affect the texture.
- When you knead do it lightly. If you overwork the dough it will become heavy and dense.
- Leave space between the scones when you place them on the pan to bake. This is going to help ensure they bake up evenly.
- Brushing the tops of the scones with milk is going to help create a golden brown color to the tops of the finished scones.
- Watch the baking time, and use it as a guide. If you overbake them they will become crumbly and dry.
Can I add vanilla bean seeds instead of vanilla extract?
Of course. Just add the vanilla bean seeds into the dough and mix with the ingredients as you would.
When you scrape it out of the bean pod then just add to the dough when you would add in other wet ingredients.
How should I serve vanilla Bisquick scones?
Serve your scones at room temperature with a cup of tea, coffee, or other brunch-themed items.
You can eat the scones plain or add on some butter, jam, spread on lemon curd, or even top with some whipped cream.

More Homemade Recipes
If you liked this homemade recipe, you’ll love these ones too:
- Vanilla Bean Scones – Starbucks Petite Vanilla Bean Scones are so delicious and go perfectly with your favorite copycat Starbucks drinks like this Copycat Starbucks Iced Cinnamon Dolce Latte.
- Homemade Pop Tarts – Every bite of these toaster pastries, with their flaky pastry shell and sweet strawberry center, takes me back to my childhood.
- Glazed Donut Holes – Such an easy recipe to make!
- Lemon Blueberry Cream Cheese Danish – This recipe uses puff pastry that creates a delicious, buttery, and crisp base for the sweetened cream cheese and sugared blueberries.
- Frosted Orange Quick Bread – This Orange Creamsicle Loaf Cake Recipe makes one 11 x 9 loaf pan-sized cake.
- Raspberry Swirl Bread – You can basically use any kind of filling you prefer or have on hand.
- Pull Apart Cinnamon Roll – It’s so easy to make and everyone will love these ooey, gooey cinnamon rolls straight out of the oven.
- Caramel Apple Baked Donuts – The beauty of these delicious treats is the fact that they are baked and not fried, which I like to pretend makes these a healthy treat.


Bisquick Scones
Ingredients
- 2 cups Bisquick baking mix
- 1/2 cup granulated sugar
- 1/3 cup unsalted butter cold and cubed
- 1/2 cup milk
- 1 teaspoon vanilla extract
- 1/2 cup raisins or currants optional
- 1 tablespoon milk for brushing the tops
- Powdered sugar for dusting optional
Instructions
- Preheat your oven to 425°F (220°C). Line a baking sheet with parchment paper.
- In a large mixing bowl, combine Bisquick baking mix and granulated sugar. Mix well to ensure the sugar is evenly distributed.
- Add the cold, cubed butter to the dry ingredients. Use a pastry cutter or your fingertips to cut the butter into the mix until it resembles coarse crumbs.
- Pour in the milk and vanilla extract. Stir the mixture until just combined. If desired, fold in raisins or currants at this stage.
- Turn the dough out onto a lightly floured surface. Knead it gently a few times until it comes together. Pat or roll the dough into a circle about 1/2 to 3/4 inch thick.
- Cut out scones from the dough and place them on the prepared baking sheet, leaving a little space between each.
- Brush the tops of the scones with a little milk. This will give them a golden color during baking.
- Bake in the preheated oven for 12-15 minutes or until the scones are golden brown on top.
- Allow the scones to cool on a wire rack for a few minutes.
- Serve the scones warm. If desired, dust the tops with powdered sugar before serving.
Nutrition


Simple Ways to Save Money on Home Improvements 14 Apr 2:55 AM (3 days ago)
Below, you’ll find several simple Ways to Save Money on Home Improvement projects.
Let’s be honest—home improvement can get expensive fast.
From the rising cost of lumber to tool prices and contractor fees, it’s easy to see why many families are putting off those long-overdue updates.
But the good news? You don’t have to spend a fortune to improve your home.
Whether you’re looking to update your space or prep it for resale, these simple and practical tips will help you stretch your dollars further.

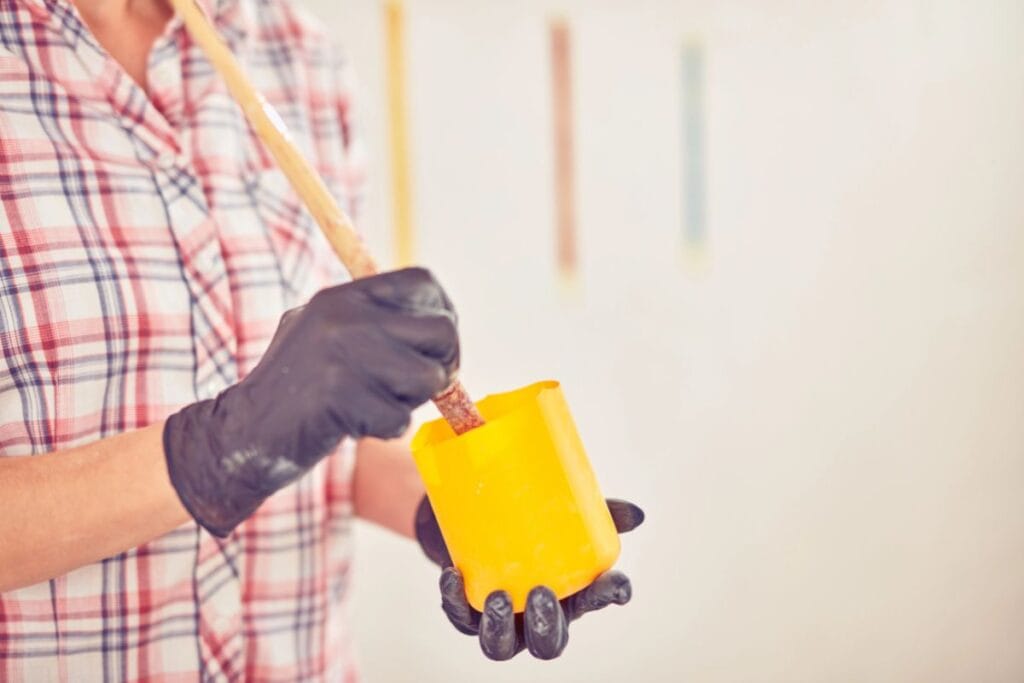
How to Cut Costs on Paint Projects
Painting is one of the most affordable and impactful ways to upgrade your space.
A gallon of paint can cost as little as $25, and basic painting kits with rollers and tape are easy to find at any big box store.
If you want a quick refresh or are planning to sell your home, a fresh coat of paint—inside or outside—can instantly boost your home’s appeal.
Money-saving tips:
- Use foam brushes for trim, door frames, baseboards, and other detailed areas. They’re cheap and reduce paint waste.
- Check the “oops” paint section at your local hardware store for discounted colors that didn’t work out for someone else. You might discover the perfect accent wall color at a great price.
Do It Yourself (When You Can)
Many home improvement projects are DIY-friendly, especially if you’re dealing with basic upgrades like replacing light fixtures, painting walls, or installing peel-and-stick flooring.
If you’re new to DIY, start small and build your confidence.
YouTube, free online courses, and local community workshops can help you gain the skills you need.
Not ready to take on the full project?
You can still save money by doing your own demolition work before bringing in the pros.
Get Deals on Supplies
Before buying materials, always compare prices.
Local mills sometimes sell lumber at lower prices than national retailers, and buying in bulk online can also offer big savings.
Sign up for email newsletters from your favorite home improvement stores to stay in the loop about sales and seasonal discounts.
Shop Secondhand for Materials
Used or leftover materials can save you a lot of money.
Check out:
- Habitat for Humanity ReStores
- Facebook Marketplace
- Craigslist
- Local yard sales
You might need to be patient and flexible with your vision, but the savings can be well worth it.
Just be sure to inspect items for damage or imperfections before purchasing.
Ask Friends and Family for Help
Tackling big projects? Don’t do it alone.
Enlist friends or family members to lend a hand with painting, moving heavy items, or assembling furniture.
If you know someone else working on their own home upgrades, consider teaming up to split costs on tools or supplies.
Helping each other out can save everyone time and money.
Barter Your Skills
If you have a skill—like gardening, sewing, or graphic design—consider trading your time in exchange for help with a home project.
Bartering is a great way to get the help you need without spending money.
Just make sure both sides are clear on what’s being exchanged.
Choose Projects That Save You Money Long-Term
Energy-efficient upgrades might cost more upfront, but they can reduce your utility bills in the long run.
Consider investing in:
- LED lighting
- New insulation
- Energy-efficient appliances
- Upgraded windows
These changes not only improve your home’s function but also add value.
Reconsider Replacing Your Floors
Before you tear out your flooring, see what’s underneath.
If you find old hardwood, consider refinishing it instead of replacing it.
Refinishing hardwood floors is often cheaper than installing laminate or carpet—and vintage hardwood is stylish and durable.
Avoid Moving Plumbing If You Can
Moving plumbing (like relocating a sink or toilet) can dramatically increase the cost of a project.
If at all possible, work with your current plumbing layout to avoid hefty plumbing fees.

Home improvement doesn’t have to break the bank.
With a little creativity, some DIY spirit, and a few smart shopping habits, you can tackle upgrades that make your home feel brand-new, without blowing your budget.
Pick one or two projects to start with, try out a few of these money-saving tips, and before you know it, your home will be looking better than ever without the financial stress.

We Were Just 18 (babies!!)The Photo That Took Me Back 12 Apr 2:52 AM (5 days ago)
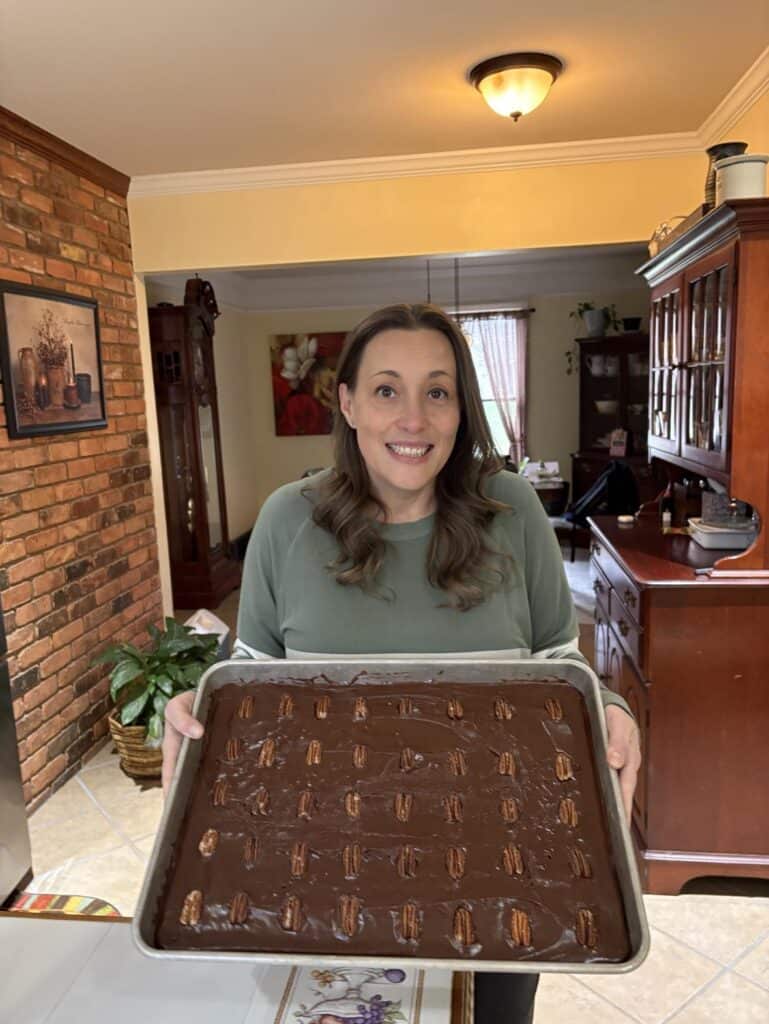
This week I baked a from-scratch Texas Sheet Cake (yes, the real deal!) for my women’s Bible study group to celebrate all the lovely ladies with April birthdays.
It was rich, chocolatey, and totally worth the mess in my kitchen.
There’s just something special about gathering around something homemade to celebrate friendship and another year of life.
This is the pan I use for almost every larger gathering I attend. I grabbed it a couple years ago at Walmart and it has been THE BEST!!
It’s 18×13 and comes with a lid — perfect for baking, but I also use it to carry just about anything. It’s one of those super practical things I didn’t know I’d love so much until I had it!
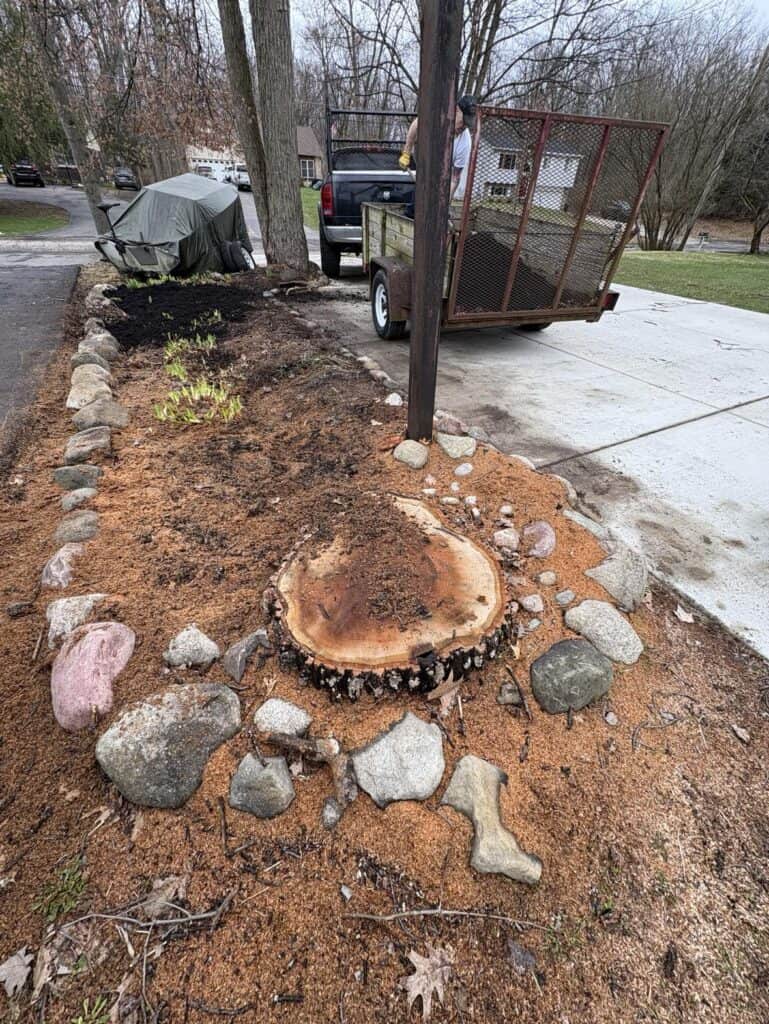
Even though the temps are still acting like it’s February, we’ve been pushing forward with our outdoor spring projects.
One of the big things we tackled was repairing a flower bed that got completely wrecked when we had a tree taken down over the winter.

It needed loads of fresh dirt, but it’s finally starting to look like it belongs in a garden again instead of a construction zone.
And while we were out there in the backyard, we caught another one of those sunsets that just stops you in your tracks—definitely the first of many to come this season.

Inside the house, Rich picked up work on our “forgotten” bathroom.
It’s the spare one attached to our bedroom—the one that’s been more of a storage closet than an actual bathroom for… well, let’s just say a very long time.
We usually forget it’s even there unless we open the door!
But little by little, we’ve been bringing it back to life.
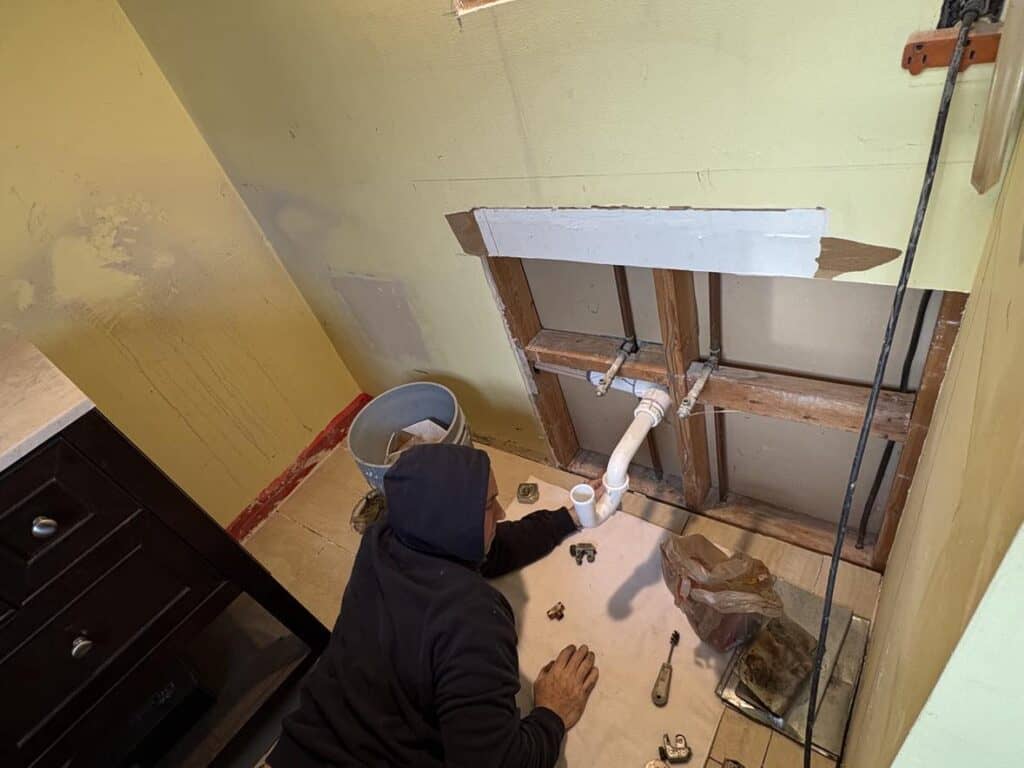
This week, Rich did some plumbing work to make the new sink fit. It’s not glamorous progress, but it’s progress all the same!
Life feels full right now, in the best kind of way—messy kitchens, muddy flower beds, and all.
Weekly Wins
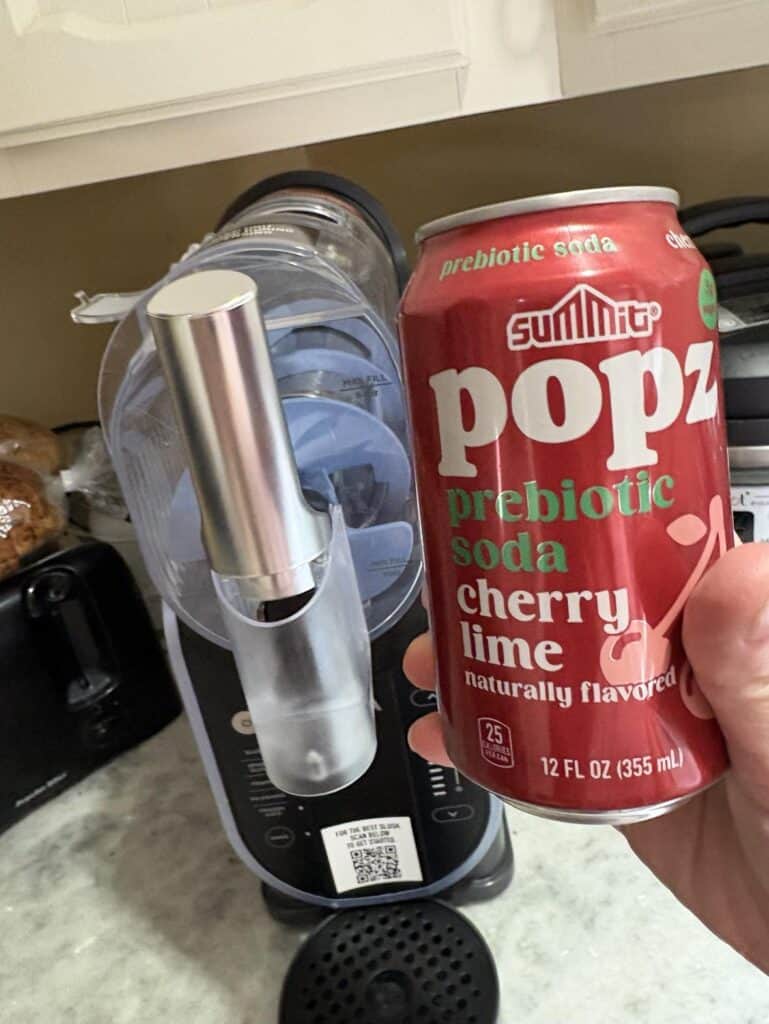
This week’s little win? Finding the new Popz drinks at Aldi — they’re basically a Poppi dupe and let me tell you, they are SO good.
But the real magic happened when I tossed one into our slushie machine just to see what would happen.
Y’all. It turned into the most delicious frozen treat ever.

Light, refreshing, and just 25 calories with 7 grams of carbs.
The cherry lime and strawberry lemon flavors are my top picks — totally giving summer vibes even if the weather says otherwise.
Highly recommend giving this a try if you’re looking for a fun, guilt-free treat!
Favorite Find
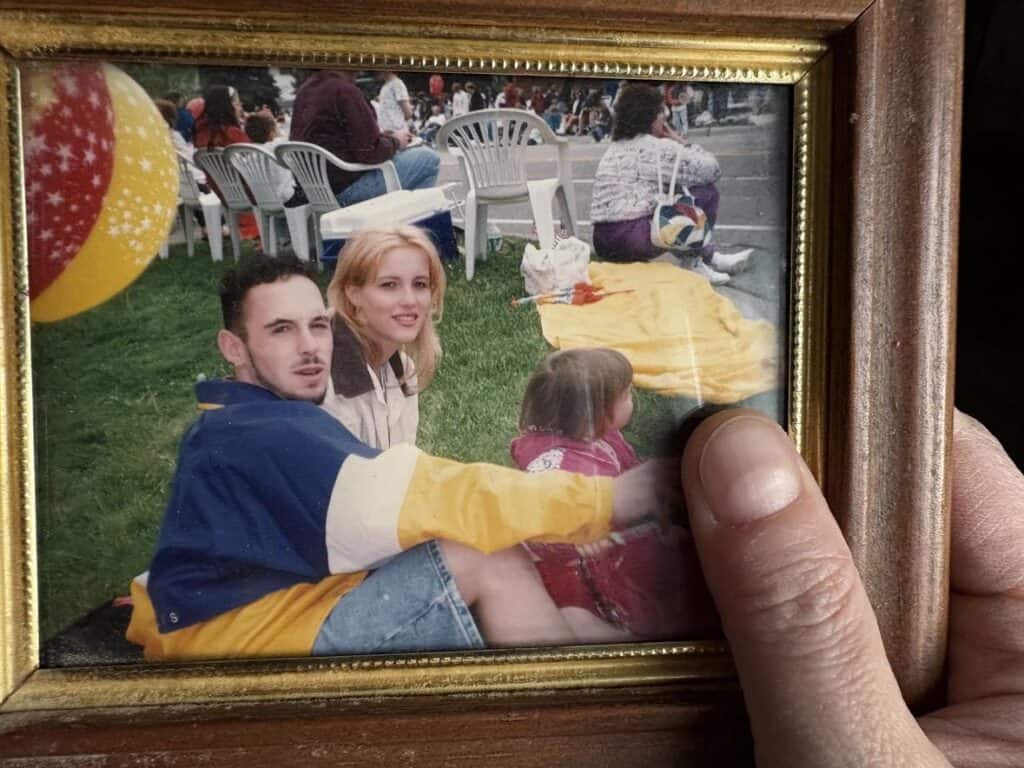
I found an old photo this week that completely stopped me in my tracks — it’s a picture of Rich and me with our daughter at a local parade.
We were just 18 years old.
Just kids ourselves, really.
And yet there we were, trying to figure out life, clinging to each other and dreaming about the future.
Seeing our younger faces brought back a wave of memories.
Life felt so simple then in some ways, and yet when I look closer, I can see the weight we were already carrying.
The photo captures not just the sweetness of young love, but also the hardness of the lives we came from.
You can see it in our eyes — the grit, the survival, the hoping for something more.
And oh, how different our lives look today.
Not because we had it all figured out.
But because the Lord stepped in.
He gently met us in the middle of our mess and began to do what only He can do—make all things new.
I’m just so grateful for His faithfulness, for the way He’s written a story we never could have imagined at 18.
That picture is a sweet reminder of where we’ve been… and just how far we’ve come.

What I’m Watching/Reading/Listening to:
We rented a movie on Amazon Prime this week called Flight Risk starring Mark Wahlberg — or as I still like to call him, Marky Mark.
It was actually pretty good!
A pilot transports an Air Marshal accompanying a fugitive to trial. As they cross the Alaskan wilderness, tensions soar and trust is tested, as not everyone on board is who they seem.
Definitely not one for the kids though — fair warning, there’s some strong language and intense moments.
But the storyline kept us interested, and it was wild seeing Marky play such a dark and twisted character.
Totally different than what we’re used to from him!
If you’re into thrillers and don’t mind a little grit, it might be worth adding to your weekend watch list.
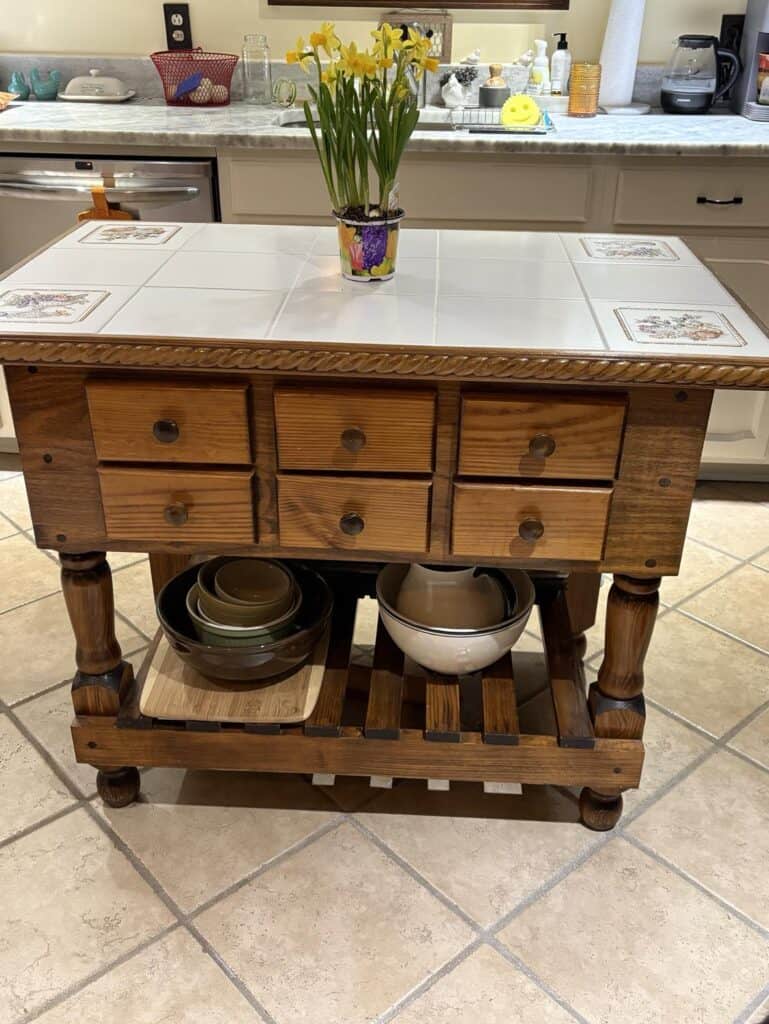
And before I go, I just have to share this photo of the cheeriest little daffodils you’ve ever seen!
I couldn’t resist bringing them home during a quick trip to Home Depot, and I’m so glad I did.
For just $2.49 they brighten up the room and bring a little sunshine to my day every time I see them.
Thanks for catching up with me this week.
I love being able to share these little pieces of life — from chocolate sheet cake and slushie experiments to old memories, home projects, and movie nights.
It’s a mix of simple joys and slow progress, and I wouldn’t trade it for anything.
Wherever you’re at this week, I hope you’re able to pause and see the beauty in your own story too — even the messy, in-progress parts.
Until next time,

7 Smart Ways to Make Money Selling Your Stuff 10 Apr 5:41 AM (7 days ago)
Doing some spring cleaning or just trying to declutter?
Before you start donating or tossing your unwanted things, consider turning them into cash with these smart Ways to Make Money Selling Your Stuff.
You might be surprised at how much value is hiding in your closets, garage, or storage bins.

Here are seven easy ways to sell your stuff and earn some extra money without a lot of hassle.
Consignment Shops
Consignment stores are a great option for selling gently used clothing, shoes, and accessories—especially if they’re in good condition and still in style.
Some shops pay you upfront, while others give you a percentage after the item sells.
For example, stores like Plato’s Closet or Uptown Cheapskate buy trendy adult and teen clothing, and Kid to Kid is a great place to sell outgrown children’s items.
This can be a simple, low-effort way to clean out your closet and earn a little cash in the process.
eBay
Have something collectible or higher in value?
Try listing it on eBay. You can sell items through auction or set a fixed price with the “Buy It Now” feature.
Keep shipping costs in mind—eBay allows you to offer free shipping or calculate it based on the buyer’s location. Just be aware of seller fees, which typically total around 12% (including eBay and PayPal fees).
This is a great option for anything from electronics and clothing to rare or vintage finds.
Craigslist
If you want to sell something locally, especially large or bulky items like furniture or tools, Craigslist can be a great choice—and it’s free to use.
Just remember to use caution.
Don’t share personal information, and always meet buyers in a public place during daylight hours.
Trust your gut, and don’t be afraid to walk away if something feels off.
Facebook Marketplace & Local Groups
Facebook Marketplace and local buy/sell/trade groups are great alternatives to Craigslist.
They’re often easier to use and feel a bit more personal since many buyers are in your community.
It’s also a great place to sell baby items, household goods, or seasonal decor.
Just be sure to read the group’s rules before posting—some have limits on how often you can list or bump your items.
Safety tip: Always meet in a public spot and bring someone with you if possible.
Host a Garage Sale
A good old-fashioned garage sale is still one of the easiest ways to unload a lot of stuff in a short amount of time.
Set everything up in your driveway or garage, price items clearly, and be ready to negotiate.
Advertise with signs in your neighborhood, post on your local Facebook groups, and spread the word on social media to draw a crowd.
With a little prep and promotion, you can easily make hundreds of dollars in a single weekend.
Upcycle Before You Sell
Want to earn more from old furniture or home decor? Try giving it a quick makeover before selling.
Paint an old dresser, add new knobs, or repurpose an outdated piece into something fun and functional.
Even small updates—like adding fabric to a bookshelf backing—can boost your asking price.
This is a fun and creative way to increase the value of items you might have otherwise tossed out.
Try Niche Selling Apps
Depending on what you’re selling, there may be apps or websites better suited for your item:
- Poshmark – Great for clothing and accessories
- OfferUp – Similar to Craigslist but with in-app messaging
- Mercari – Easy way to sell just about anything nationwide
- Decluttr – Perfect for selling used tech, CDs, DVDs, and books
Each has its own pros and cons, but many offer built-in shipping tools and buyer protection, which can make things easier and safer.

Selling your stuff can be a great way to clear clutter and make a little extra money on the side.
Whether you’re downsizing, spring cleaning, or just simplifying your space, these options make it easy to turn unwanted items into cash.
Don’t forget—what feels like clutter to you might be just what someone else is looking for.
What’s your favorite way to sell your stuff? Share your tips or success stories in the comments!
Essential Oil Diffuser Recipes for Spring 10 Apr 3:04 AM (7 days ago)
As the seasons change, there’s nothing better than opening the windows, letting in the fresh air, and filling your home with clean, uplifting scents.
These Essential Oil Diffuser Recipes for Spring are perfect for spring and a great way to freshen up your space naturally.
If you’re trying to ditch synthetic air fresheners, candles, or sprays filled with hidden chemicals, essential oils are a simple and effective alternative.

Why Use Essential Oils?
One of the first steps I took toward living more naturally was replacing store-bought air fresheners with essential oils.
I was shocked to learn that the word “fragrance” on a label can be a catch-all for dozens—even hundreds—of undisclosed ingredients. That realization made me want to be more mindful about the products I use in my home.
Diffusing essential oils is one of the easiest ways to make your home smell amazing without all those questionable ingredients.
Plus, many oils have extra benefits like boosting your mood, supporting relaxation, and cleansing the air.

How to Use a Diffuser
Using a diffuser is really simple:
- Fill the water reservoir to the fill line.
- Add 6–8 drops of essential oil (use one of the recipes below).
- Replace the lid and turn it on.
Be sure to follow your diffuser’s instructions, but most work the same way.
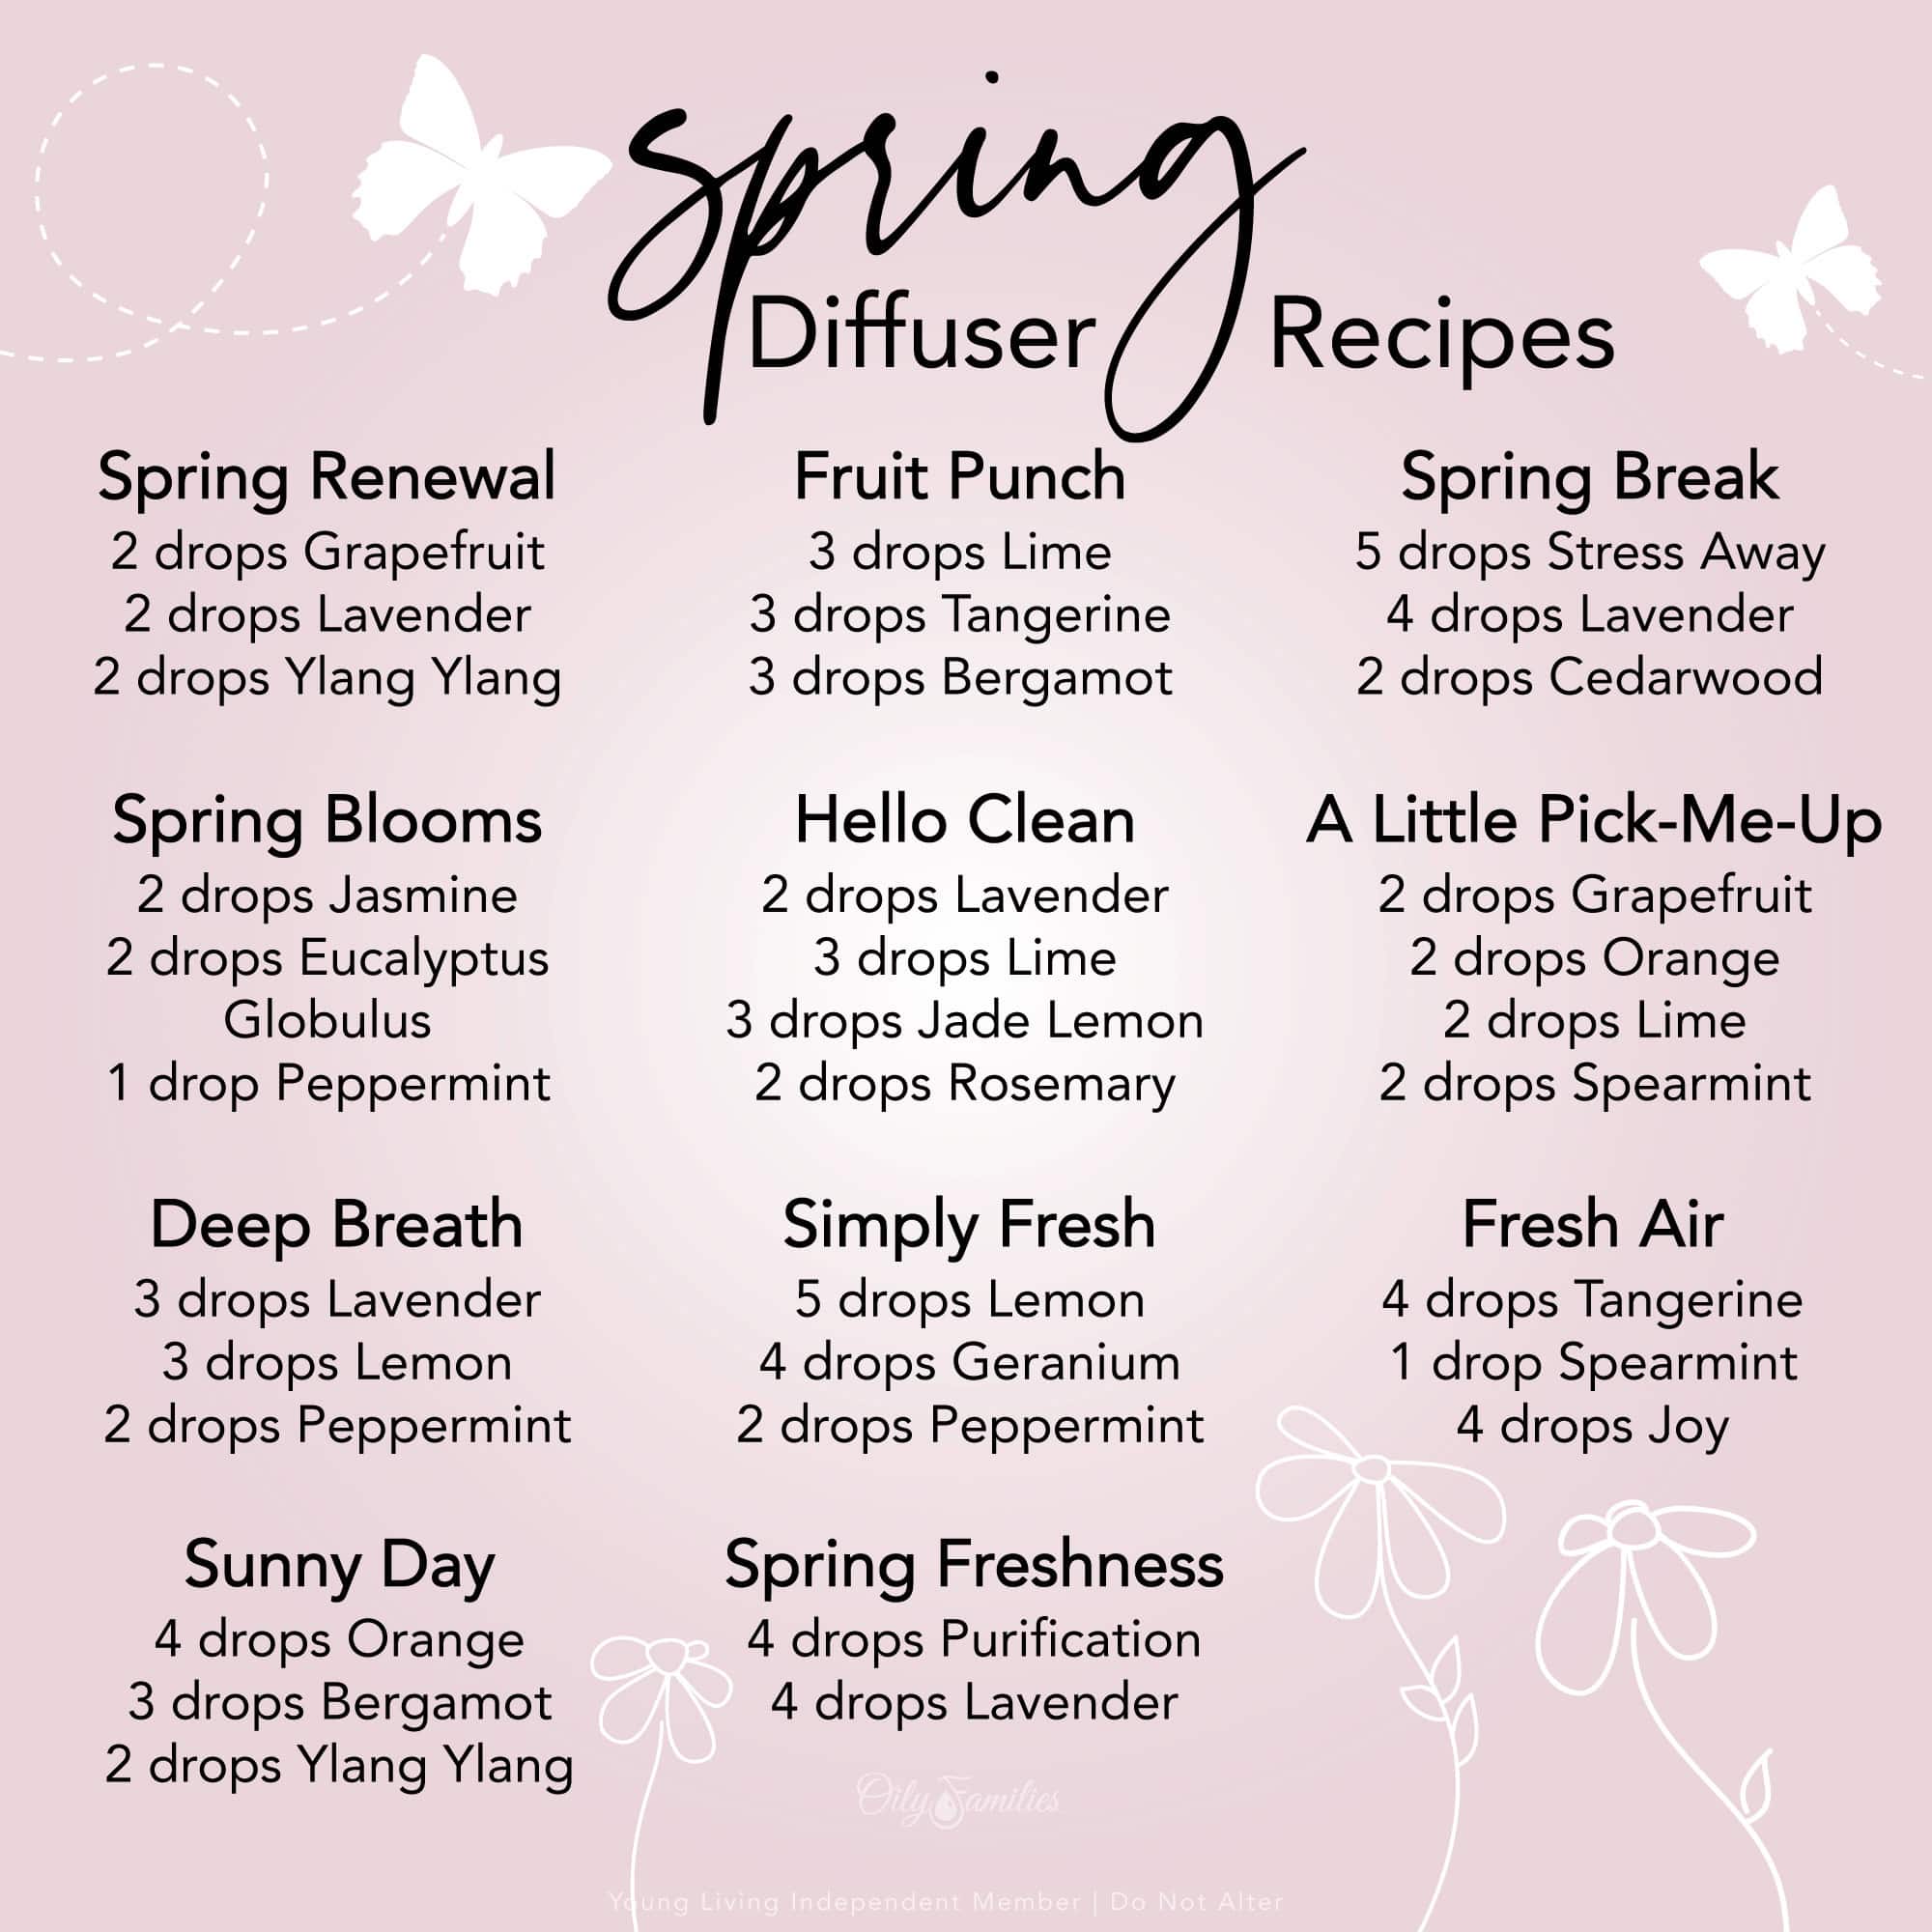
Spring Diffuser Blends
Here are some of my favorite diffuser recipes to use this time of year. They’re fresh, clean, and perfect for bringing the feeling of spring indoors.
Spring Clean
This one smells crisp and clean—like a freshly aired-out house.
Morning Bloom
- 3 drops Orange
- 2 drops Geranium
- 2 drops Ylang Ylang
A cheerful floral blend that helps set a positive tone for the day.
Fresh Meadow
- 3 drops Peppermint
- 3 drops Eucalyptus
- 2 drops Lemon
Cool, refreshing, and ideal when you want to clear your head.
Rainy Day Refresh
This one is calming and earthy, perfect for cozy days inside.
Hello Sunshine
- 4 drops Grapefruit
- 2 drops Lemon
- 2 drops Spearmint
Bright and energizing, this blend is great for lifting your mood.

Making the switch to essential oils is an easy way to cut down on chemicals in your home and enjoy the benefits of nature’s scents.
These spring diffuser blends are some of my go-to favorites, and I hope they become yours too.
If you try one of these blends—or create your own—feel free to share it in the comments or tag me on Instagram @kristiesawicki. I’d love to see what you’re diffusing this season.
Create Your Own Homemade Resurrection Eggs – Free Printables Included! 10 Apr 2:21 AM (8 days ago)
Looking for a meaningful Easter tradition that goes beyond the candy and colorful baskets?
These Homemade Resurrection Eggs are a fun, hands-on way to help kids learn the true story of Easter—and you can make them right at home with just a few supplies and our free printable.
This project is perfect for Sunday School, homeschool, or a simple family tradition at home.
Make your own Easter story eggs to tell the story of Jesus’ death and resurrection using this free printable.
The Easter story printable scriptures make this a simple and easy to understand Easter craft that kids will love to do.
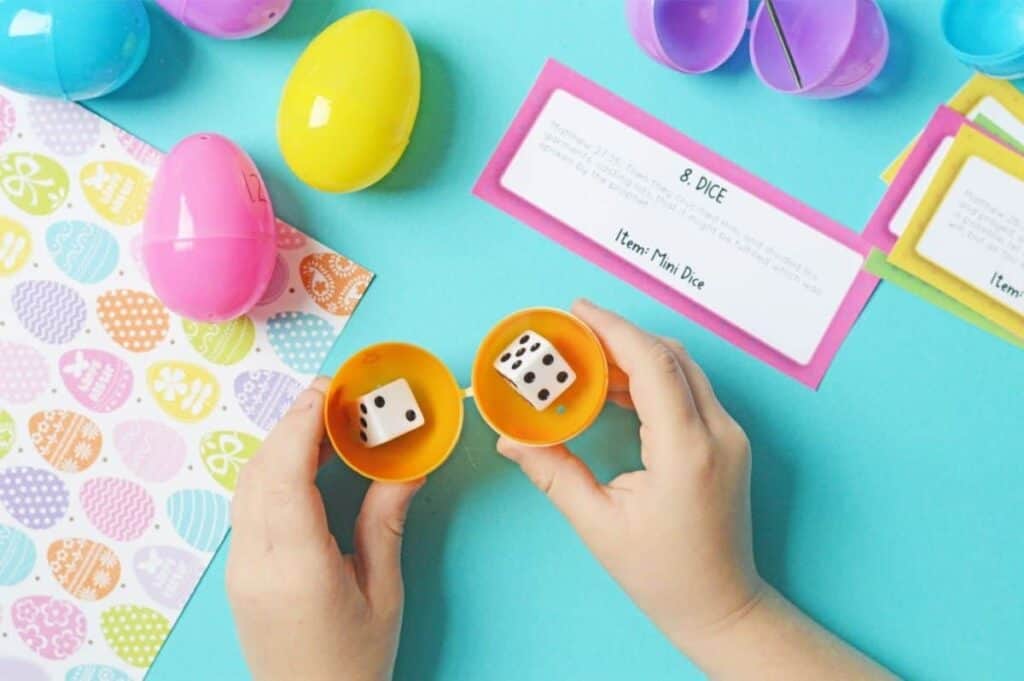
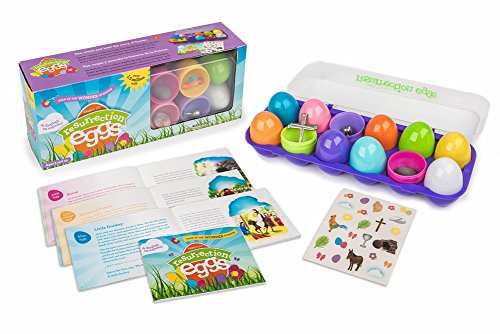
What Are Resurrection Eggs?
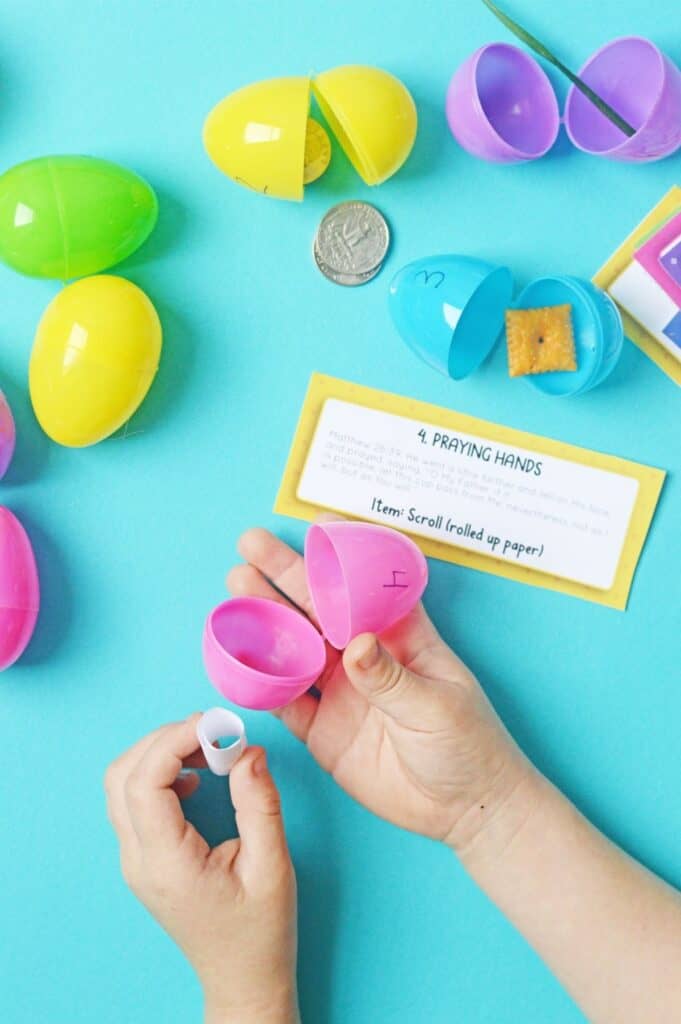
Resurrection Eggs are a set of 12 plastic Easter eggs, each filled with a small item that represents a part of the Easter story—from Palm Sunday to Resurrection Sunday. As kids open each egg, they discover a symbol of Jesus’ final days along with a corresponding Bible verse.
It’s a powerful way to teach the Gospel in a kid-friendly way, and a wonderful alternative to a traditional egg hunt.
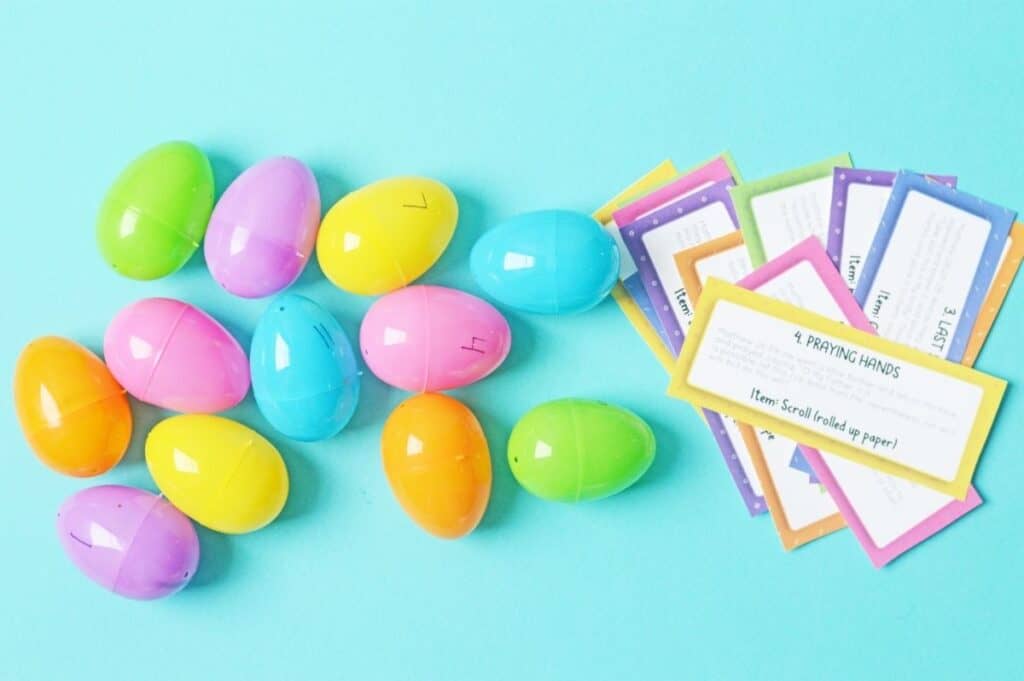
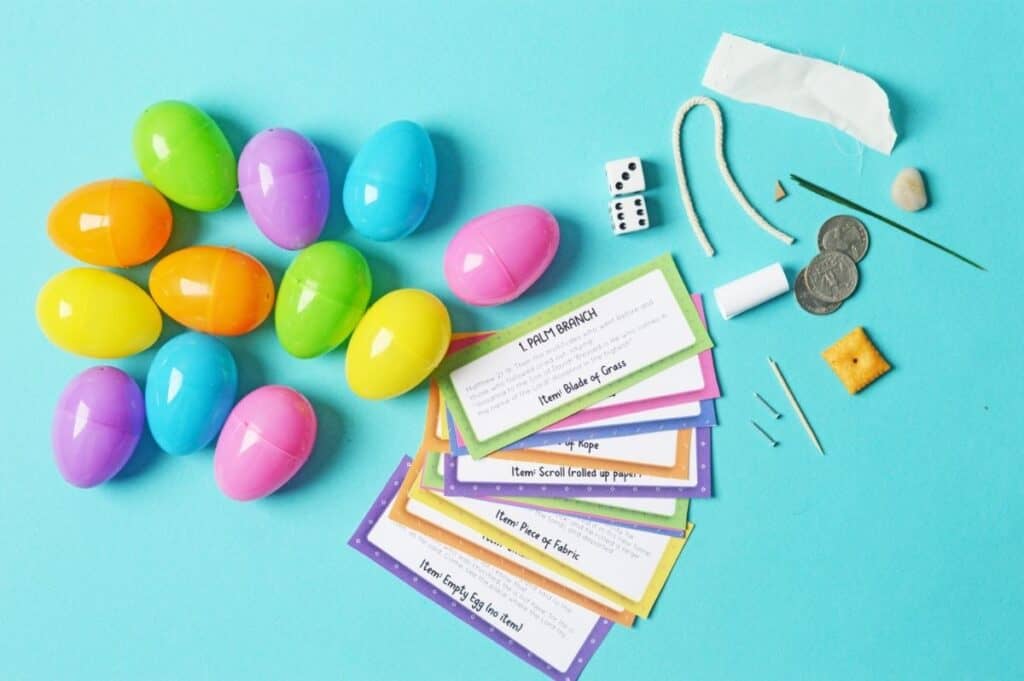
What You’ll Need
To make your own set of Resurrection Eggs, gather:
- 12 plastic Easter eggs
- A small egg carton or container
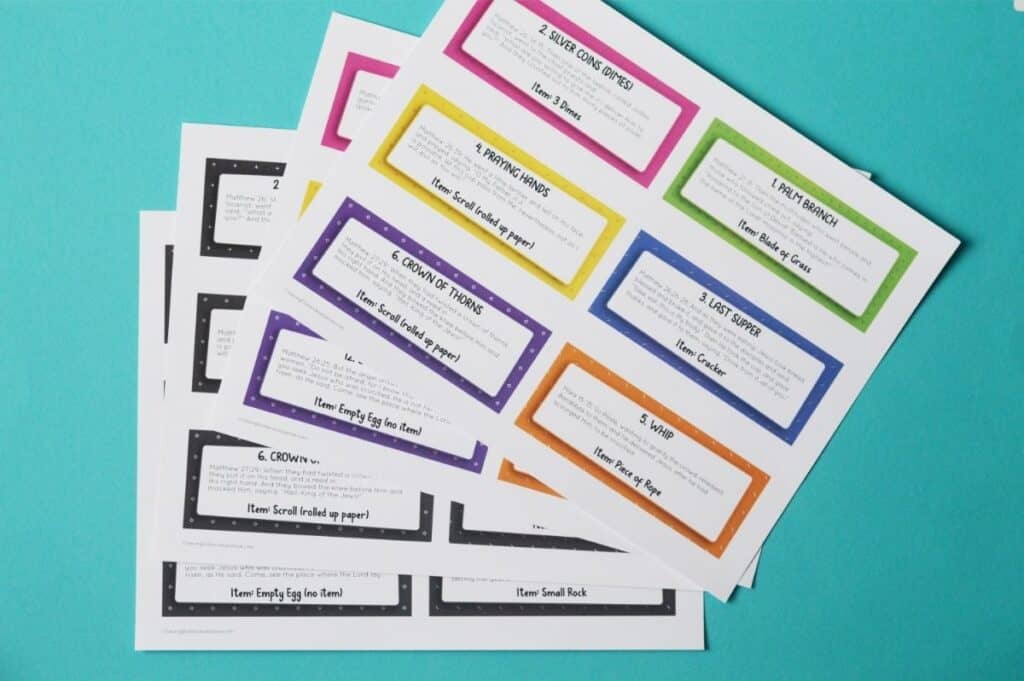
- Our FREE Resurrection Eggs printable with Bible verses and story cards
- The following small items (or get creative with what you have at home):
| Egg | Symbol | Represents |
| 1 | Blade of grass | Palm branches from Jesus’ entry |
| 2 | 3 coins | Judas’ betrayal for 30 silver pieces |
| 3 | Cracker | The Last Supper |
| 4 | Tiny scroll | Jesus’ prayer in the Garden |
| 5 | String or yarn | Jesus being whipped |
| 6 | Thorn | The crown of thorns |
| 7 | Two nails | The crucifixion |
| 8 | Dice | Soldiers casting lots for His clothes |
| 9 | Broken toothpick | Spear that pierced Jesus’ side |
| 10 | White cloth | Burial cloth |
| 11 | Small stone | The stone rolled away from the tomb |
| 12 | Empty egg | The empty tomb—He is risen!  |
These plastic Resurrection eggs are a cute idea and memorable way to connect Easter eggs with the story of Jesus Christ.

This is a beautiful way to celebrate Easter in the more secular sense with eggs, while keeping a focus on Christian values and the story of Christ and the forgiveness of sins.
You can buy the Complete Kit from Amazon or you can make your own using the directions below.
Homemade Resurrection Eggs Printables

Resurrection Eggs are a simple and meaningful way to share the Easter story with little ones. They gently walk kids through the events of Holy Week in a way that’s age-appropriate—skipping over the heavier details until they’re ready for more.
When my kids were younger, this was one of our favorite Easter traditions. We made our own version at home using a few plastic eggs and the free Scripture printables you’ll find at the bottom of this post. It was such a sweet (and budget-friendly!) way to bring the story of Jesus to life.
With just a few simple supplies, you can create a Resurrection Eggs craft that your kids will enjoy—and remember.
The Resurrection Eggs Story Script
To get started, gather twelve plastic Easter eggs, the printable Scripture cards, and the small items that go with each part of the story.
These eggs make it easy to walk your kids through the Easter story in a simple, hands-on way. The story is told using everyday objects, which helps little ones stay interested and understand each part of Jesus’ journey in a way that makes sense to them.
Tips for Teaching Young Kids
- Use simple language and pause to answer questions.
- Let your child open one egg a day leading up to Easter.
- Reinforce each lesson with a short prayer or song.
You can even turn it into a scavenger hunt—hide the eggs and go on a mission to discover the Easter story together!
Bible Verses for Each Egg
Each egg includes a Scripture verse that brings the symbol to life. Our printable includes all of these already formatted and ready to cut out!
Want it ready to go? Grab the free Resurrection Eggs printable here!
Resurrection Eggs Readings
Egg 1: Blade of Grass
Matthew 21:9
The crowds that went ahead of him and those that followed shouted, “Hosanna to the Son of David!” “Blessed is he who comes in the name of the Lord!” “Hosanna in the highest heaven!”
Egg 2: Quarters
Matthew 26:14-15
Then one of the Twelve—the one called Judas Iscariot—went to the chief priests and asked, “What are you willing to give me if I deliver him over to you?” So they counted out for him thirty pieces of silver.
Egg 3: Cracker
Matthew 26:26-28
While they were eating, Jesus took bread, and when he had given thanks, he broke it and gave it to his disciples, saying, “Take and eat; this is my body.” Then he took a cup, and when he had given thanks, he gave it to them, saying, “Drink from it, all of you. This is my blood of the covenant, which is poured out for many for the forgiveness of sins.
Egg 4: Scroll
Matthew 26:39
Going a little farther, he fell with his face to the ground and prayed, “My Father, if it is possible, may this cup be taken from me. Yet not as I will, but as you will.”
Egg 5: String
Mark 15:15
Wanting to satisfy the crowd, Pilate released Barabbas to them. He had Jesus flogged, and handed him over to be crucified.
Egg 6: Thorn
Matthew 27:29
and then twisted together a crown of thorns and set it on his head. They put a staff in his right hand. Then they knelt in front of him and mocked him. “Hail, king of the Jews!” they said.
Egg 7: Nails
Matthew 27:31
After they had mocked him, they took off the robe and put his own clothes on him. Then they led him away to crucify him.
Egg 8: Dice
Matthew 27:35
When they had crucified him, they divided up his clothes by casting lots.
Egg 9: Toothpick
John 19:34
Instead, one of the soldiers pierced Jesus’ side with a spear, bringing a sudden flow of blood and water.
Egg 10: White Cloth
Matthew 27:59
Joseph took the body, wrapped it in a clean linen cloth,
Egg 11: Rock
Matthew 27:66
So they went and made the tomb secure by putting a seal on the stone and posting the guard.
Egg 12: Empty Egg
Matthew 28:5
The angel said to the women, “Do not be afraid, for I know that you are looking for Jesus, who was crucified.
Like I mentioned above, when my kids were little, this was one of our favorite traditions. They loved the surprise inside each egg, and I loved the way it opened the door for deeper conversations about Jesus, grace, and the resurrection.
You don’t need anything fancy—just a few minutes, some everyday items, and a willing heart to share the good news with your children.
Get Your Free Printable
To make it super easy, I’ve put together a FREE Resurrection Eggs printable pack that includes:
- 12 story cards with Scripture
- A how-to guide
- Verses to read for each egg
Click here to download your free Resurrection Eggs printable!
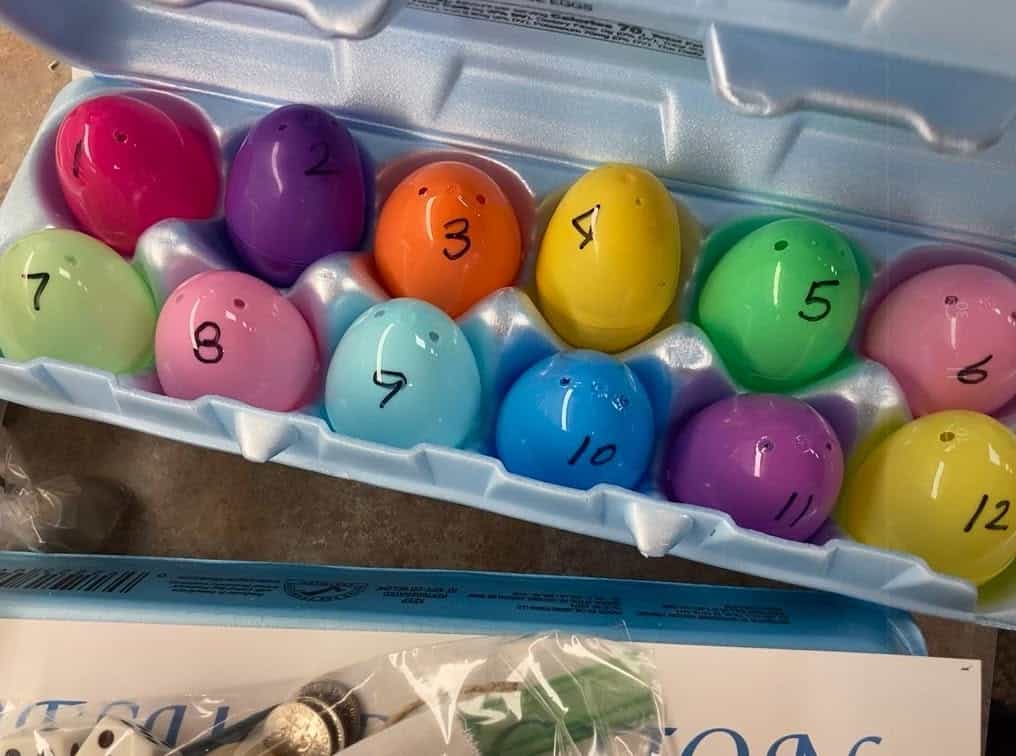
Tips for Making Resurrection Eggs
- Using a permanent marker, number each of the 12 plastic eggs 1. 2. 3., etc. until you’ve numbered twelve eggs in order.
- Fill each egg with the correct scripture and trinkets (trinkets are optional).
- Choose a time when your children are ready to sit and listen for about 20 minutes.
This is a great way to share the story of Easter with even your littlest ones.
I also think this is a great idea too!
Share Your Experience
If you make these with your family, I’d LOVE to see! Tag me on Instagram @kristiesawicki or leave a comment below and let me know how it went.
Let’s keep Christ at the center of Easter—one egg at a time!
Looking for more Easter ideas?
- 100 Easter Basket Stuffers – NO Candy
- Homemade Easter Basket Ideas
- Easter Lamb Cupcakes
- Easter Bunny Cookies
- Easter Blondie Bars
- Bunny Butt Cookies