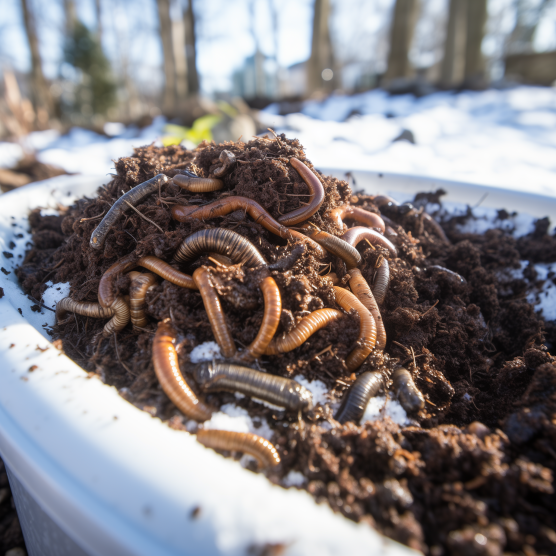
Why Spring is the Best Time to Start Your Worm Bin (And How to Harvest Successfully) 24 Mar 10:25 AM (7 days ago)
Why Spring is the Best Time to Start Your Worm Bin (And How to Harvest Successfully)
Spring has sprung, and that means it’s time to bring your composting dreams to life! If you’ve been waiting for the right moment to start a worm bin—or grow your current colony—now is the best time to act. In this guide, you’ll learn why spring is ideal for worm composting, how to harvest worms effectively, and how to get started with an exclusive seasonal discount.
Spring: The Ideal Season for Worm Composting
When soil temperatures rise and daylight increases, worms become more active, eating and reproducing at faster rates. This leads to quicker composting cycles and richer, more productive worm castings.
- Soil warms up: Encourages faster breakdown of organic materials.
- Longer days: More consistent bin temperatures and microbial activity.
- Garden prep season: Use fresh castings for spring planting!
Benefits of Starting Your Worm Bin in Spring
- Accelerated worm growth and reproduction
- Ideal temperature and moisture conditions
- Early-season compost to prepare your garden beds
- Reduced risk of freezing or overheating bins
Step-by-Step: Setting Up Your Spring Worm Bin

Example of a DIY worm bin set up with proper ventilation and moist bedding.
1. Choose the Right Bin
Pick a plastic storage container or commercial composter with a tight lid and drainage holes. For outdoor bins, select a shady, sheltered area away from direct sunlight.
2. Add Bedding
Shredded newspaper, cardboard, coconut coir, and dry leaves make excellent bedding. Moisten the material until it feels like a wrung-out sponge.
3. Introduce Your Worms
Red wigglers (Eisenia fetida) are the gold standard. Start with at least 1,000 worms (~1 lb) for a healthy colony. Buy worms here.
4. Start Feeding
Feed a small amount of chopped fruit and veggie scraps every few days. Bury food under bedding and avoid meat, dairy, or citrus.
5. Monitor and Adjust
Check moisture levels and temperature weekly. Stir the bedding lightly to maintain airflow and avoid anaerobic conditions.
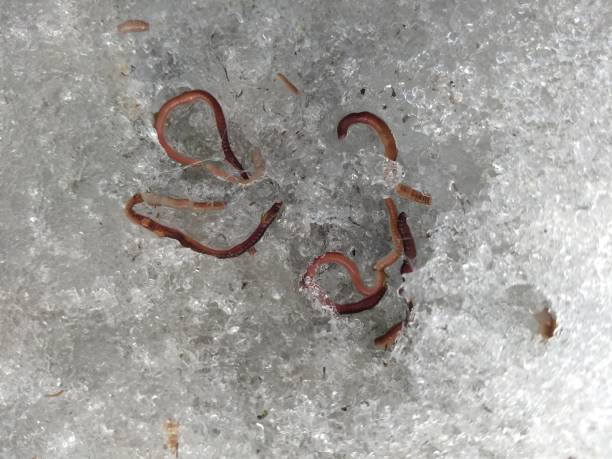
Harvesting Worms in Spring: A Quick Guide
Spring is also a great time to harvest mature worms, especially if your colony has expanded over winter. Harvesting allows you to:
- Separate worms for new bins or to share with friends
- Sell or expand your operation
- Collect nutrient-rich castings for immediate use
Popular Harvesting Methods
1. Light Harvesting: Dump contents on a tarp, form into small piles, and let worms crawl downward. Scrape off castings gradually.
2. Lateral Migration: Push contents to one side of the bin and add new food and bedding to the other. Wait 1–2 weeks for worms to migrate.
3. Trap Method: Use a mesh bag with food scraps placed on top of the bedding. Worms crawl in—remove the bag and relocate worms.
Where to Use Worm Castings This Spring
- Seed starting mixes
- Transplant holes for vegetables and flowers
- Top-dressing garden beds and potted plants
- Compost tea for foliar sprays
Choosing the Best Worms for Sale in the U.S.
When buying worms online, quality and freshness matter. Uncle Jim’s Worm Farm offers premium worms raised in the U.S. and shipped live to your door.
- Red Wigglers: Ideal for compost bins
- Super Reds: Bigger and better for garden soil
- Mealworms: Bonus for pets and poultry
Explore our worms for sale and choose the perfect species for your composting or gardening goals.
FAQs About Spring Worm Composting
Is spring really the best time to start a worm bin?
Yes! Warmer soil and ambient temps speed up composting, and your garden benefits all season long.
How many worms should I buy?
We recommend starting with at least 1 lb (1,000 worms) per compost bin. Larger systems may need 2–5 lbs.
Can I use worm castings immediately?
Absolutely! Castings are gentle and can be applied directly to soil or made into compost tea for a nutrient boost.
Do I need to refrigerate worms when they arrive?
No. Store them in a cool, shaded area and introduce them to their bin within 24–48 hours.
Ready to Start Your Worm Journey?
There’s no better time than spring to start composting with worms. Whether you’re a gardener, homesteader, or eco-conscious household, worms can transform your food waste into a powerful tool for soil health.
Explore our best-selling worms, composting kits, and worm castings—and don’t forget to use code HARVEST25 for 10% off!
Shop Composting Worms | Learn More About Organic Gardening
Happy composting, and here’s to your best garden yet!
The post Why Spring is the Best Time to Start Your Worm Bin (And How to Harvest Successfully) appeared first on Uncle Jim's Worm Farm.


Top 5 Organic Gardening Trends to Watch in 2025 16 Jan 9:35 AM (2 months ago)
As we look toward 2025, organic gardening continues to grow in popularity, with new trends emerging to meet the challenges of a changing climate and the increasing demand for sustainable practices. Whether you’re a seasoned gardener or just starting, these five trends will shape the way we cultivate our plants and interact with the environment. Let’s take a closer look at the innovations and ideas that will define organic gardening in the coming year.
1. Vermiculture Takes Center Stage

Red wigglers from a composting bin, a key component of vermiculture.
Vermiculture, or the practice of composting with worms, is becoming a must-have for gardeners looking to improve soil health and reduce waste. As people grow more aware of the environmental impact of organic waste, more households are embracing worm composting as an eco-friendly solution.
Worm castings, often referred to as “black gold,” provide a nutrient-rich fertilizer that enhances plant growth and soil structure. To learn more about the benefits of vermiculture, explore our comprehensive guide.
Pro Tip: Start with high-quality red wigglers, such as those available from Uncle Jim’s Worm Farm, to ensure your vermiculture setup thrives.
2. Native Plant Gardening
In 2025, gardeners will increasingly focus on native plants as a means to support biodiversity and create resilient landscapes. Because native plants are adapted to local climates and soils, they require less water and fewer resources to thrive. Furthermore, they attract pollinators and beneficial insects, fostering a balanced ecosystem.
Organizations such as the National Wildlife Federation provide tools to help you select native plants for your region. By incorporating native species, you’ll reduce maintenance efforts and contribute to conservation.

3. Climate-Resilient Gardening Practices
As climate change impacts weather patterns, gardeners are adopting climate-resilient practices to ensure their gardens can withstand extremes. For instance, drought-tolerant plants and advanced irrigation systems help mitigate the effects of unpredictable weather.
- Drought-Resistant Plants: Species such as succulents and native grasses are ideal for areas experiencing water scarcity.
- Water Conservation Techniques: Drip irrigation and rainwater harvesting systems are becoming staples for eco-conscious gardeners.

Native wildflowers attract pollinators and support biodiversity.
For actionable tips, read our guide to gardening in different climates.
4. Urban and Vertical Gardening
As urbanization continues, limited space is driving innovation in urban and vertical gardening. For example, rooftop gardens and vertical planters are helping city dwellers transform small areas into lush, productive spaces.
Popular options include:
- Vertical Planters: Perfect for growing herbs, flowers, and vegetables in compact spaces.
- Hydroponic Systems: Ideal for indoor gardening without soil.
For more ideas, check out our urban gardening solutions guide.

5. Regenerative Agriculture Techniques
Regenerative agriculture is extending its influence into backyard gardens. This approach focuses on restoring soil health, increasing biodiversity, and sequestering carbon. Additionally, techniques such as no-till gardening, cover cropping, and companion planting are key components of this trend.
Here’s how to integrate these practices into your garden:
- No-Till Gardening: Preserve soil structure and reduce erosion by avoiding tilling.
- Cover Cropping: Plant cover crops like clover to enhance soil fertility and suppress weeds.
- Companion Planting: Pair plants that benefit each other, such as tomatoes with basil.
Discover more about regenerative techniques in our blog, and don’t forget to check out our Lasagna Gardening, a gardening system that works– so you don’t have to!.

Incorporate These Trends with Uncle Jim’s Worm Farm
Ready to embrace these organic gardening trends? Uncle Jim’s Worm Farm has everything you need, from high-quality composting worms to eco-friendly gardening supplies. Visit our online store for composting worms & more and take your garden to the next level in 2025!
Stay informed about the latest gardening innovations by subscribing to our newsletter. Together, we can cultivate a greener, more sustainable future.

The post Top 5 Organic Gardening Trends to Watch in 2025 appeared first on Uncle Jim's Worm Farm.
Winter Worm Care: How to Keep Your Composting System Thriving in Cold Weather 9 Jan 9:32 AM (2 months ago)
As the frost sets in, your garden might be dormant, but your worms don’t have to be! Imagine the warmth and energy of a thriving composting system, even in the chilliest months. Winter can be a challenging time for vermicomposters, but with proper care, your worm farm can thrive and keep working its magic year-round. Whether you’re an experienced composter or new to the process, here’s a guide to keeping your worms happy and productive during winter.
Why Winter Worm Care is Crucial
Worms are sensitive to temperature changes. Most composting worms, like red wigglers (Eisenia fetida), prefer a temperature range of 55°F to 77°F. When the mercury drops, they may slow down their composting activity or go dormant. Extreme cold can even be fatal. Protecting your worms during the winter is crucial to maintaining a healthy composting system.
Preparing Your Worm Farm for Winter
1. Relocate Your Bin
Move outdoor bins to a sheltered location such as a garage, basement, or shed. Keeping the bin in a space with stable temperatures will help maintain worm activity. For more tips, check out our winter care guide.
2. Insulating Worm Bins for Winter
Use materials like straw, bubble wrap, or blankets to insulate the bin and retain heat. Consider investing in an insulated worm bin for optimal winter protection.
3. Increase Bedding for Extra Warmth
Add extra bedding material, such as shredded newspaper or coconut coir, to help retain heat and provide additional protection for your worms. This creates a buffer against the cold.
Winter Worm Feeding Tips
Worms’ activity slows in cooler temperatures, so adjust their feeding schedule accordingly:
- Smaller Portions: Feed less frequently to avoid excess food buildup that can lead to odors.
- Chop Food Scraps: Smaller pieces are easier for worms to process in colder conditions. Learn more about feeding worms effectively.
Troubleshooting Winter Challenges
1. How to Handle Frozen Worm Bins
If your bin freezes, don’t panic. Worms can often survive in the unfrozen bedding layers. Once temperatures rise, they’ll resume their activity.
2. Preventing Odors
Avoid overfeeding and maintain proper ventilation to prevent unpleasant smells. If odors persist, read our worm bin troubleshooting guide.
3. Maintaining Moisture Levels
Monitor moisture levels and mist the bedding if it becomes too dry. A well-maintained bin should feel like a wrung-out sponge.
Post-Winter Revival
As spring approaches, gradually move your worm farm back to its regular location. Increase feeding and monitor their activity to ensure a smooth transition. Check out our spring preparation tips for more guidance.
Stay Equipped with Uncle Jim’s Worm Farm
From insulated bins to worm-friendly bedding, Uncle Jim’s Worm Farm has everything you need to keep your worms cozy this winter. Don’t let winter slow your composting – give your worms the cozy home they deserve and shop our insulated worm bins today!
The post Winter Worm Care: How to Keep Your Composting System Thriving in Cold Weather appeared first on Uncle Jim's Worm Farm.
Kickstart Your New Year’s Resolution: Sustainable Living with Vermicomposting 3 Jan 10:43 AM (2 months ago)
As the New Year begins, many of us are looking for ways to live more sustainably and make a positive impact on the planet. One simple yet transformative resolution you can adopt this year is vermicomposting. This eco-friendly practice not only reduces waste but also enriches your garden soil naturally. Let’s dive into the world of vermiculture and explore why it’s the perfect way to start your journey towards sustainable living.
What is Vermicomposting?
Vermicomposting is the process of using worms, primarily red wigglers, to convert organic waste into nutrient-rich compost. These industrious creatures break down kitchen scraps, yard waste, and other biodegradable materials into a dark, crumbly substance known as castings or worm manure. These castings are packed with essential nutrients that your plants will love.
Benefits of Vermicomposting
1. Reduces Household Waste
Vermicomposting can reduce the amount of organic waste you send to landfills by up to 30%.
2. Improves Soil Health
Worm castings enhance soil structure, promote microbial activity, and increase nutrient availability. Learn how worm castings improve soil health naturally.
3. Eco-Friendly
By composting at home, you decrease methane emissions associated with organic waste in landfills. Explore the EPA’s guide to composting for more insights.
4. Cost-Effective
Produce your own natural fertilizer, reducing the need for store-bought alternatives. Learn more about how home composting saves money.
5. Fun and Educational
A vermicomposting setup can be a great project for kids and adults alike, teaching the importance of sustainability.
How to Start Vermicomposting
1. Choose Your Worm Bin
For beginners, a plastic or wooden bin with proper ventilation works well. Uncle Jim’s Worm Farm offers a variety of options, including indoor bins and stackable systems.
2. Get Your Worms
Red wigglers (Eisenia fetida) are the best choice for vermicomposting. Order high-quality red wiggler worms to get started.
3. Set Up Your Bin
- Bedding: Start with moistened shredded paper, coconut coir, or aged compost.
- Placement: Keep the bin in a location with consistent temperatures between 55°F and 77°F.
4. Feed Your Worms
Add food scraps like fruit peels, vegetable trimmings, coffee grounds, and eggshells. Avoid meat, dairy, and oily foods to prevent odors. Check our guide to feeding worms for detailed tips.
5. Harvest the Castings
After a few months, your worms will produce rich compost. Separate the castings from the worms and use them in your garden. Here’s a step-by-step guide to harvesting castings.
Tips for Success
- Avoid Overfeeding: Excess food can lead to odors and attract pests.
- Maintain Moisture Levels: Your worm bin should feel like a wrung-out sponge.
- Watch the Temperature: Extreme heat or cold can harm your worms.
Vermicomposting for Gardeners
Worm castings are often called “garden gold” for a reason. They improve plant growth, enhance flowering, and increase yields. Whether you’re growing vegetables, flowers, or houseplants, incorporating vermicompost can make a noticeable difference. Discover more about the benefits of worm castings in gardening.
Make It a Community Effort
Get your family or community involved in vermicomposting. Schools, community centers, and urban gardening programs can benefit from setting up worm composting systems. Share your experience on social media to inspire others to adopt this sustainable practice.
Start Today with Uncle Jim’s Worm Farm
Ready to kickstart your sustainable living journey? Uncle Jim’s Worm Farm offers everything you need, from high-quality red wigglers to durable composting bins. Visit our online store to explore our range of products and start vermicomposting today!
The post Kickstart Your New Year’s Resolution: Sustainable Living with Vermicomposting appeared first on Uncle Jim's Worm Farm.
5 Common Mistakes Beginners Make in Worm Farming and How to Avoid Them 9 Dec 2024 10:04 AM (3 months ago)
Worm farming, also known as vermiculture, is an eco-friendly way to recycle organic waste, enrich your soil, and support sustainable living. However, as with any new hobby, beginners often make a few common mistakes when starting their worm farm. Don’t worry—this guide will help you identify and avoid these pitfalls so you can ensure a successful and thriving worm farm!
Mistake #1: Overfeeding Your Worms
One of the most common mistakes is overloading your worm bin with food scraps. While worms are excellent recyclers, too much food can lead to problems:
- Signs of Overfeeding: Bad odors, mold, and pests (like fruit flies).
- How to Avoid It: Start with small amounts of food scraps and wait for the worms to consume what’s there before adding more. Aim to feed your worms once or twice a week.
Pro Tip: Learn more about what worms can and can’t eat in the EPA’s Composting at Home Guide.
Mistake #2: Choosing the Wrong Location for the Bin
Temperature and location are critical for worm farming success. Worms thrive in temperatures between 55°F and 77°F.
- What Can Go Wrong: Placing the bin in direct sunlight or an unshaded area can overheat the worms, while freezing temperatures can harm them.
- How to Avoid It: Keep your worm bin in a shaded outdoor area, a garage, or even indoors. Always monitor the temperature to ensure it stays within the ideal range.
For additional tips on ideal worm bin conditions, check out this resource from Gardeners.com.
Mistake #3: Using Improper Bedding
Bedding provides a comfortable environment for your worms and should mimic their natural habitat.
- Common Errors: Using bedding that is too dry, too wet, or unsuitable (e.g., glossy paper or chemically treated materials).
- How to Avoid It: Use shredded newspaper, coconut coir, or dried leaves. Moisten the bedding until it feels like a wrung-out sponge. Fill the bin about two-thirds full with this bedding.
Pro Tip: Read our full Worm Bedding Guide for step-by-step instructions.
Mistake #4: Neglecting Moisture Levels
Worms need a moist environment to survive, but too much moisture can cause issues.
- What Can Go Wrong: A waterlogged bin can drown worms, while a dry bin can cause them to dehydrate.
- How to Avoid It: Regularly check the moisture levels in your bin. If it feels too wet, add dry bedding materials. If it’s too dry, lightly spray water until the bedding feels damp.
For an in-depth look at maintaining proper bin conditions, check out the Master Composter Guide.
Mistake #5: Ignoring Bin Maintenance
Maintaining your worm bin is essential for a healthy worm farm.
- Common Problems: Failing to harvest worm castings regularly or not cleaning the bin can lead to an unhealthy environment for the worms.
- How to Avoid It: Every few months, harvest the worm castings by separating the worms and adding fresh bedding. Regularly clean the bin to prevent odors and pests.
Pro Tip: For tools and tips to make harvesting easier, explore our Compost Harvesting Tools.
Conclusion
Starting a worm farm is a rewarding way to reduce waste and improve your garden, but avoiding these common mistakes is key to your success. By feeding your worms correctly, choosing the right location, and maintaining your bin, you’ll enjoy all the benefits of worm farming without the headaches.
Ready to Get Started? Explore our Worm Farming Supplies to find everything you need for a thriving worm farm. Got questions? Reach out to us for expert advice!

The post 5 Common Mistakes Beginners Make in Worm Farming and How to Avoid Them appeared first on Uncle Jim's Worm Farm.
How to Start Worm Farming in Hot Climates: A Guide for South Texas Gardeners 9 Dec 2024 9:46 AM (3 months ago)

Worm farming, also known as vermiculture, is a fantastic way to recycle organic waste, enrich your soil, and reduce your environmental footprint. If you live in South Texas, you might be wondering if the warm climate poses a challenge to raising worms. The good news is that starting a worm farm in South Texas is not only possible but also rewarding with the right approach. Here’s a step-by-step guide to get you started.
Why Start Worm Farming?
Worm farming is perfect for eco-conscious gardeners and anyone looking to improve their garden’s soil quality. Worms produce nutrient-rich castings, commonly referred to as “black gold,” which can supercharge your plants’ growth. Plus, it’s a great way to reduce food waste and live more sustainably.
Step 1: Choose the Right Worms
Not all worms are suited for composting, especially in warm climates. Red wigglers (Eisenia fetida) are the best choice because they thrive in a variety of conditions, including higher temperatures. They are easy to care for and highly efficient at breaking down organic matter.
Step 2: Select the Right Worm Bin
In South Texas, the heat can be intense, so your worm bin needs to provide protection:
- Material: Use a durable, well-ventilated plastic or wooden bin like our Worm Farm Starter Kit.
- Size: For beginners, a small to medium-sized bin is perfect. As your worm population grows, you can expand.
- Location: Place the bin in a shaded, cool area, such as a covered patio, garage, or under a tree. Avoid direct sunlight, as it can overheat and harm the worms.
Step 3: Prepare the Bedding
Worms need a comfortable environment to thrive. For bedding:
- Use shredded newspaper, coconut coir, or dried leaves.
- Moisten the bedding until it feels like a wrung-out sponge.
- Fill the bin about two-thirds full with bedding before adding the worms.
Check out our Worm Bedding Guide for more tips.
Step 4: Feed Your Worms the Right Way
Worms love organic scraps but are picky eaters. Start with small amounts of the following:
- Fruit and vegetable peels
- Coffee grounds and filters
- Eggshells (crushed)
- Small amounts of bread
Avoid feeding them:
- Meat, dairy, or greasy foods
- Citrus fruits in large amounts
- Spicy or salty scraps
Add food to one section of the bin at a time and cover it with bedding to avoid pests. Explore our detailed Worm Feeding Guide for more dos and don’ts.
Step 5: Manage the Heat
South Texas temperatures can soar, so keeping your worms cool is essential:
- Frozen Water Bottles: Place a frozen water bottle inside the bin (wrapped in cloth) to cool it down during hot days.
- Spray Water: Keep the bedding moist but not soggy to prevent overheating.
- Elevate the Bin: Raise the bin off the ground to improve air circulation.
Step 6: Harvest Worm Castings
After a few months, you’ll notice a build-up of rich, dark worm castings. These can be harvested by:
- Moving the worms and bedding to one side of the bin.
- Adding fresh bedding and food to the empty side.
- Waiting a few weeks for the worms to migrate before scooping out the castings.
Looking for tools to help? Check out our Compost Harvesting Tools.
Common Challenges and Tips
- Overheating: Monitor the bin’s temperature regularly. Aim for a range of 55–77°F.
- Pests: Keep the bin covered with a lid or breathable fabric to deter flies.
- Odor: A well-maintained worm bin should not smell. If there’s an odor, reduce feeding or check for soggy bedding.
Ready to Start Your Worm Farm?
Starting a worm farm in South Texas is not only feasible but also a great way to contribute to sustainability and improve your garden. By choosing the right worms, setting up a proper bin, and managing the heat, you’ll be on your way to successful vermiculture in no time.
Have more questions? Feel free to reach out to us or explore our worm farming supplies to get started today!
The post How to Start Worm Farming in Hot Climates: A Guide for South Texas Gardeners appeared first on Uncle Jim's Worm Farm.
How to Build the Perfect Garden Soil 13 Nov 2024 6:46 AM (4 months ago)
Healthy, thriving plants start from the ground up—literally. You’ll need just as lively garden soil if you want a garden bursting with life, beauty, and bountiful harvests. Building that perfect soil is both an art and a science. But don’t worry, you don’t need a lab coat! With some guidance, some hard-working worms, and a few key ingredients, you’ll be well on your way to creating rich, fertile soil that’ll keep your plants happy all season long.
1. Know Your Garden Soil Type
Every garden’s soil has its own personality! Your soil might be sandy, clay, or somewhere in between, but each type has its quirks. Sandy soil drains quickly and warms up fast, but it can be a bit forgetful when holding onto nutrients. Clay soil is nutrient-rich but can hold on to water a bit too tightly. And if you’re lucky enough to have silt, you’ve got soil that balances water retention and drainage reasonably well.
To get to know your garden soil, grab a small handful, dampen it slightly, and give it a squeeze. Sandy soil crumbles easily, clay forms a sticky lump, and silt holds its shape but crumbles at the edges. Once you know what you’re working with, you can give your soil exactly its needs.
2. Add Organic Matter
Let’s get one thing straight: good soil is like a living, breathing ecosystem. And just like any living thing, it loves to eat! Organic matter—like compost, aged manure, or shredded leaves—is the soil’s version of a gourmet meal. But here’s where it gets fun: add organic matter to your garden, and worms will start showing up to help you out.
Worms are nature’s little composters. They break down organic material and turn it into pure plant fuel. Supercharge your soil by adding composting worms like Red Wigglers. They’re hungry eaters and produce vermicompost, a nutrient-rich, soil-boosting marvel that makes garden plants cheer. We’ve got Red Wigglers (Eisenia fetida) here at Uncle Jim’s Worm Farm that are itching to dig into your garden!
3. Create a Perfect Soil Structure
Soil structure might sound technical, but it’s about giving your plants’ roots room to breathe. A good soil structure has a nice balance of solid bits and tiny air pockets, so water and nutrients can flow where needed. This balance is critical to healthy roots and happy plants!
One of the easiest ways to improve soil structure is by adding—you guessed it—organic matter! For incredibly dense clay soil, a bit of sand or perlite can help create those precious air spaces. As a tip, avoid walking on or overworking the soil too much, as it compacts those little air pockets. Give those roots room to stretch out!
4. Add Worm Castings
If soil is the garden’s soul, worm castings are the heart! Worm castings, aka worm poop, are packed with essential nutrients, minerals, and beneficial microbes your plants love. Plus, they contain humic acid, which works wonders on soil structure and nutrient retention. By adding worm castings, your plants grow stronger, leaves get greener, and blooms get brighter.
You can sprinkle some worm castings around your plants’ base or mix them into your vegetable beds. Uncle Jim’s Worm Farm has some of the best worm castings from our little composting champs.
5. Check Your Garden Soil’s pH
Did you know soil has a “sweet spot” regarding pH? Most garden plants prefer a pH between 6.0 and 7.5, which lets them absorb nutrients at their best. Testing your soil’s pH is easy with a kit, or you can send a sample to your local agricultural office for a full report.
If your soil is too acidic (low pH), add lime. If it’s too alkaline (high pH), sprinkle in some sulfur or organic compost to bring it back into balance.
6. Feed Your Garden Soil with the Right Nutrients
Just like us, plants thrive on a balanced diet. Nitrogen, phosphorus, and potassium (N-P-K) are the three primary nutrients that keep plants growing strong. Compost, organic fertilizers, and worm castings are excellent ways to naturally add these nutrients without chemicals.
Here’s what each nutrient does:
- Nitrogen promotes lush green leaves.
- Phosphorus is excellent for root development and flower production.
- Potassium helps strengthen plants and supports water absorption.
Organic fertilizers are safe for all the friendly critters in your soil, which means your plants get what they need without disturbing the garden’s ecosystem.
7. Boost Soil Health with Microbial Life
Soil is alive with tiny helpers—beneficial bacteria, fungi, and microorganisms. These break down organic matter and release plant nutrients. They’re like the unsung garden soil heroes, turning compost into plant food, protecting roots from disease, and balancing soil structure.
Adding compost or vermicompost from worms boosts your soil’s microbial life. And if you want to go the extra mile, try making worm tea! It’s as easy as soaking worm castings in water and using that tea to drench your soil or spray on plants, giving a microbial boost right where needed.
8. Mulch for Moisture and Cozy Worm Homes
Mulch is like a big hug for your soil, keeping moisture, weeds out, and temperatures steady. Organic mulches like straw, wood chips, or shredded leaves slowly break down, adding more organic matter to your soil over time. A layer of mulch is also the perfect invitation for worms—they love the cool, damp environment it creates!
Remember to keep mulch a few inches away from plant stems to avoid rot; you’ll soon have healthier, happier plants.
9. Use Crop Rotation and Cover Crops
Crop rotation is a great way to keep your soil balanced. Growing the same plant repeatedly in one spot can sap specific nutrients from the soil. Rotating crops each season helps restore nutrients and prevents pest and disease buildup.
If you’re not planting anything over winter, consider sowing a cover crop like clover or vetch. Cover crops protect the soil, add nitrogen, and prevent erosion. When spring rolls around, you can till them back into the soil to add even more organic matter and nutrients.
10. Garden the Sustainable Way
When you garden sustainably, you create a self-sustaining ecosystem that builds up instead of breaking down. Opt for organic methods whenever possible, and skip synthetic fertilizers and pesticides. Look for organic options, like beneficial nematodes or insecticidal soaps that are gentle on soil life. Choosing heirloom seeds also helps promote biodiversity, which leads to a more resilient garden.
Wrapping Up
Building your garden’s perfect soil takes time. But with each step, you give lasting benefits that improve each season. From knowing your soil type and managing your garden soil’s pH to adding organic matter, you’ll create a lively soil for a lush and productive garden.
So roll up those sleeves, grab a few of our happy, hard-working worms, and get started! With some patience and care, your garden will be the envy of the neighborhood, with plants that thrive and soil that just keeps getting better and better.
The post How to Build the Perfect Garden Soil appeared first on Uncle Jim's Worm Farm.
12 Wiggly, Wacky Facts About Worms 6 Nov 2024 8:15 AM (4 months ago)
Worms are tiny, squishy, and kinda mysterious, but they’re doing amazing stuff right under our feet! They’re way more than garden goo—they’re ancient, multitasking compost machines with quirks that’ll make you laugh and say, “Wait, worms can do that?” Prepare for twelve hilarious, squirm-worthy facts about these little soil heroes! You will never look at them the same way.
1. Worms Love Dog Hair
Do you have extra pet hair floating around your house? Your worms will eat them up (literally)! Turns out, hair is like protein-packed pasta for worms. Toss in a bit of your furry family’s fur, and you’re treating them to a delicious, high-protein meal they’ll wriggle with joy over. Just don’t expect them to bark or sit in return.
2. The Older the Manure, The Better
Does your worm bin need a pick-me-up? Give it the good stuff: aged manure from horses, pigs, sheep, chicken, etc. Worms have discerning tastes and think aged horse or cow manure is the crème de la compost. Fresh manure is way too “spicy” for them, but the old stuff? That’s pure worm happiness. Give it a little spritz of water before you toss it in, and they’ll be practically high-fiving each other in worm glee.
3. Too Much Food? Just Add Carbon
If your worm bin starts looking like the floor of a messy kid’s room, don’t panic—just add some carbon. Worms need a balanced diet of “browns” (carbon-rich stuff) and “greens” (food scraps). Shredded paper, cardboard, and dried leaves are perfect. They keep their bin balanced and it also reduces funky smells. When in doubt, just throw in some cardboard!
4. Paper Products Are a Worm Buffet
Worms are huge fans of paper. Give them shredded newspaper, cardboard, toilet paper rolls, or paper towels, and they’ve hit the jackpot. It’s like every crinkly, pulpy bite of cardboard or paper is their idea of a Michelin-star meal. Plus, it helps you get rid of that mountain of junk mail. Win-win!
5. Worms Are Hermaphrodites—But They Still Need a Date Night
Worms are born with both male and female parts, but they’re not self-reliant in the romance department. They still need a snuggle partner. And when conditions are perfect, they throw wild parties! An adult worm can produce 2-3 tiny, lemon-shaped cocoons each week that hatch new baby worms. If things get rough, they just put a “pause” on reproduction and wait for better days. Now that’s family planning!
6. Freeze Your Scraps
If you want to get the garden gold as quickly as possible, freeze your food scraps! It breaks down the cell walls, so when they thaw, they’re like a soft, soggy feast that worms absolutely love. Frozen scraps also help cool down the bin on hot days, like giving worms their little compost A/C. Fancy, huh? Another benefit: if you have too many scraps, don’t overfeed your little wiggly friends. Freeze some instead.
7. Worms Have Been Around Before Dinosaurs
Forget dinosaurs—worms are the real ancient survivors. They’ve been hanging out underground for over 500 million years, quietly munching and pooping their way through history. They’ve survived ice ages and asteroids. When you have worms in your garden, you host some of nature’s toughest little recyclers.
8. Worms Have Five Hearts
Five hearts, people! FIVE. Worms might be unable to write you a love letter, but they have heart(s) in spades. Cold-blooded and heart-filled, worms use all five to circulate blood through their segments. This keeps them ready to eat, wriggle, and turn trash into treasure. It makes you wonder if they have a favorite.
9. Worms Have No Teeth
Despite having zero teeth, worms are absolute food-processing machines. They swallow bits of soil and grit, which acts like a blender. Everything they eat gets “chewed” up in their gizzard, allowing them to break down organic material into fine, crumbly compost. Who needs teeth when you’ve got grit?
10. Worms Are Basically Little Vampires
While worms don’t have eyes, they’re super sensitive to light and absolutely hate it. Sunlight can harm them, so they’ll instantly burrow deeper to avoid it. Next time you see worms diving into the soil, imagine them with tiny capes, yelling, “The light! It burns!” You don’t need to worry about garlic or crosses, though.
11. Some Worms Can Get Giants
Most garden worms are a few inches long, but certain species go big. South Africa has worms that can grow up to 10 feet. In contrast, Australia’s Giant Gippsland Earthworm casually stretches over 10 feet! These giants make your standard Red Wigglers look like wiggly little pipsqueaks.
12. There are Over 6,000 Species of Earthworms
There are over 6,000 different varieties of worms all over (or under) the earth. Red Wigglers are composting pros while deep-diving Canadian Nightcrawlers are built for aerating soil. Each species has its own personality (as much personality as a worm can have) and plays a unique role in the garden ecosystem.
Wrapping Up
Now you know that worms are way cooler than they look. They’re ancient, multi-hearted, light-dodging, paper-loving machines that quietly power up your soil and turn waste into rich compost gold. They might not look like much, but these slimy superheroes are essential for any garden to thrive. Next time you see a worm wiggling in the dirt, give it a little mental high-five! They’re doing the dirty work that keeps gardens, plants, and ecosystems going strong.
The post 12 Wiggly, Wacky Facts About Worms appeared first on Uncle Jim's Worm Farm.
Start Your Own Indoor Worm Farm: Easy, Eco-Friendly Composting at Home! 28 Oct 2024 4:11 AM (5 months ago)
With winter just around the corner, it’s the perfect time to consider composting indoors. Cold weather can make outdoor composting challenging, but that doesn’t mean you must put your green habits on hold! An indoor worm farm is a simple, fun, and rewarding way to compost all year, no matter the weather. Raising worms indoors is perfect if you live in a cozy apartment or just want to keep composting through the winter months. These little helpers will turn your kitchen scraps into nutrient-rich compost, all from the warmth of your home. And the best part? It’s easier than you might think!
In this guide, we’ll walk you through the basics of setting up your indoor worm farm and why it’s a perfect option for composting indoors.
Why Start an Indoor Worm Farm?
First, let’s discuss the why. Composting with worms—also called vermicomposting—offers tons of benefits, especially indoors. For one, it’s space-efficient! You don’t need a big yard or garden, just a quiet corner or under-the-sink spot. Worms are hard-working little creatures that break down organic material into rich, dark compost known as worm castings. This compost is excellent for houseplants, balcony gardens, or outdoor flower beds.
Plus, an indoor worm farm helps reduce food waste. Instead of tossing your fruit peels, coffee grounds, and veggie scraps in the trash, your worms will happily munch on them and turn them into something useful.
What You’ll Need to Get Started
Setting up your indoor worm farm is surprisingly simple. Here’s what you’ll need to get started:
1. Worm Bin
First, you’ll need a cozy home for your worms. At Uncle Jim’s, we offer indoor compost bins designed explicitly for worm farming. These bins keep everything neat, tidy, and odor-free!
2. Red Wigglers
The stars of the show! Red Wigglers are the best worms for indoor composting. They thrive in small, confined spaces and break down food quickly. We’ve been raising Red Wigglers for over 40 years, and they’re our top choice for indoor bins.
3. Bedding Material
Worms need a comfy home. Line the bottom of your bin with shredded newspaper, coconut coir, or cardboard. Bedding provides structure and helps absorb moisture.
4. Worm Food
Worms love kitchen scraps, but there are a few things to avoid (more on that below!). Stick to veggie peels, fruit scraps, coffee grounds, eggshells, and some bread.
How to Set Up Your Indoor Worm Farm
Ready to get started? Here’s a step-by-step guide to creating your worm-friendly composting system:
1. Prepare the Bin
Choose a shallow bin that is wide enough for the worms to roam. If the bin doesn’t have ventilation, drill small holes in the lid and sides to allow airflow.
2. Add Bedding
Fill your bin with moist bedding material. Shredded newspaper or cardboard works excellent, but make sure it’s damp (like a wrung-out sponge). This bedding is where the worms will live and work their magic.
3. Add Worms
Place your Red Wigglers on top of the bedding. Give them a little time to burrow down—they naturally avoid light, so they’ll settle into their new home quickly.
4. Feed Your Worms
Start adding your kitchen scraps! Start with small amounts. Once they’re established, you can add more. Aim for a good balance: too much food can lead to bad smells, but too little won’t keep the worms happy.
5. Maintain the Bin
Check the moisture level regularly. The bedding should always be moist but not soaking wet. You’ll also need to turn the bedding occasionally to aerate the system.
6. Harvest Your Compost
In a few months, your worms will have turned the scraps into rich, dark compost. Harvest the castings by pushing the finished compost to one side of the bin and adding fresh bedding and food to the other. The worms will naturally migrate, and you can scoop out the finished compost!
What to Feed and What Not to Feed
Worms love a variety of plant-based kitchen scraps, and feeding them right will keep your indoor worm farm thriving. Here’s a quick guide on what to give them and what to avoid:
What to Feed Your Worms:
- Fruit and vegetable scraps (peels, cores, etc.)
- Coffee grounds and tea bags
- Crushed eggshells (great for grit and calcium)
- Bread and grains in small amounts
- Shredded newspaper and cardboard (for bedding and extra carbon)
What Not to Feed Your Worms:
- Meat, dairy, and oily foods (these can rot, smell, and attract pests)
- Citrus fruits (lemons, oranges, etc., are too acidic for worms)
- Onion, garlic, and spicy foods (too strong for worms to process)
- Pet waste or anything non-organic
Stick to these worm-friendly foods, and your little composting crew will be happy and productive without unwanted smells!
What about the smell indoors?
Talking about smells! One common concern about starting an indoor worm farm is the fear of bad smells. Don’t worry! When properly maintained, a worm bin is virtually odor-free. Worms naturally break down food scraps in a way that prevents the unpleasant smells you might expect from rotting food. In fact, if you notice any strong odors coming from your bin, it’s usually a sign that something’s off balance—but it’s easy to fix!
The key to avoiding bad smells is maintaining the correct moisture level and avoiding overfeeding your worms. Too much food can overwhelm the system, causing scraps to decompose faster than the worms can handle. This is where the stink comes from! Stick to small amounts first; you can gradually add more as your worms settle in and multiply.
Also, avoid adding meat, dairy, or oily foods, which can rot and attract unwanted pests. If you follow these simple guidelines, your indoor worm farm will stay fresh, clean, and odor-free—no one will even know it’s there except for you and your worms!
Wrapping Up
Starting your own indoor worm farm is a simple and eco-friendly way to compost year-round, even when the weather outside makes outdoor composting difficult. Worms work tirelessly to transform your kitchen scraps into rich compost that will nourish your plants and reduce your waste footprint. With just a little bit of care and the right setup, you’ll enjoy a clean, odor-free, and productive indoor composting system that’s great for your home and the planet.
The post Start Your Own Indoor Worm Farm: Easy, Eco-Friendly Composting at Home! appeared first on Uncle Jim's Worm Farm.
Worm Farm Kit: Everything You Need for Easy Worm Composting at Home 21 Oct 2024 4:56 AM (5 months ago)
Are you looking for an easy, fun way to turn food scraps into nutrient-rich compost? With Uncle Jim’s Worm Farm Kit, you’ll have everything you need to start. Whether you’re an experienced gardener or just beginning to explore sustainable living, we have different worm farm kits designed to make worm composting simple, effective, and enjoyable for everyone.
Which Worm Farm Kit is Right for You?
- Worm Hobby Kit – Looking for a fun project? This kit is great for beginners, classrooms, or anyone curious about worm composting. With 500 Red Wigglers, starter bedding, and a special feed supply, you’ll be amazed at how easy and exciting it is to watch your worms turn scraps into rich compost!
- Worm Farm Kit – Ready to level up? This kit is ideal for ambitious gardeners who want to take composting a step further. With 1,000 worms, double the bedding, and a month’s worth of feed, you’ll have a thriving worm farm in no time—perfect for those with bigger composting goals!
- Worm Ranch Kit – Serious about composting? The Worm Ranch Kit is packed with 2,000 Red Wigglers, three months of feed, and a roomy container for maximum compost production. This is the kit for the ultimate worm enthusiast looking to compost like a pro!
- Children’s Vermicomposting Kit – Have a little worm lover in your life? This colorful kit is designed just for kids, with 100 worms, bedding, a fun book, and even a spray bottle to help keep the bin moist! It’s the perfect way to get kids excited about gardening and sustainability.
No matter which kit you choose, you’re in for a fun, rewarding experience that benefits both your garden and the planet! Happy composting!
Benefits of Using a Worm Farm Kit
1. Eco-Friendly
Worm composting is a fantastic way to reduce waste and recycle food scraps. Instead of tossing them in the trash, you create valuable compost to benefit your plants.
2. Nutrient-Rich Compost
The worm castings in your bin contain essential nutrients like nitrogen, phosphorus, and potassium. You can also brew worm tea. Those organic fertilizers will help your plants thrive.
3. Easy Setup
The worm farm kit is beginner-friendly. The instructions are simple to follow, even if you’ve never tried worm composting before.
4. Great for Indoor Use
Don’t worry about space! The worm bin is compact enough to fit indoors, making it a perfect addition to your kitchen, garage, or utility room.
5. Low Maintenance
Once your bin is set up, you can feed your worms regularly and harvest the compost when it’s ready. Worm composting is an easy and efficient way to handle food waste while enriching your garden soil.
Worm Farm Kit Instructions: How to get started
Setting up your worm farm kit is easy and exciting! Whether you’re new to worm composting or have some experience, these simple steps will have your worm bin up and running in no time. Here’s what to expect:
1. Prepare the Bedding For Your Compost Worms
The first step is to add the provided bedding to your worm bin. This material mimics the worms’ natural habitat and creates a soft, cozy environment for them. The bedding helps maintain moisture and provides the worms a place to burrow, which is crucial for their health and comfort. Don’t forget to dampen the bedding—it should feel like a wrung-out sponge. The correct moisture level is important to keeping your worm farm functioning smoothly.
2. Introduce Your Red Wigglers to the Worm Bin
Once the bedding is ready, it’s time to introduce your Red Wiggler worms into the bin. These hardworking worms are the stars of any composting system. Red Wigglers are known for their ability to break down organic matter quickly and efficiently. They’ll start exploring and settling in as soon as they enter their new home. Within a few days, they’ll be busy processing your food scraps into valuable worm castings—the black gold of composting!
3. Start Feeding Your Worms
Now for the fun part—feeding your worms! Start by giving them small amounts of food scraps, such as fruit and vegetable peels, coffee grounds, and other non-greasy kitchen waste. Avoid meat, dairy, and oily foods, which can create odors and attract pests. As your worms multiply and their appetite grows, you can gradually increase the amount of food you provide. Worms can eat roughly half their weight in food each day, so a well-fed colony will make quick work of your kitchen scraps, turning them into nutrient-rich compost in no time.
4. Harvest Your Worm Castings
After a few weeks of steady composting, the dark, crumbly compost worm castings begin accumulating at the bottom of your bin. These castings are an excellent natural fertilizer, rich in nutrients like nitrogen, phosphorus, and potassium. Your plants will love the boost! To harvest the castings, you can either scoop them out or move the worms to one side of the bin and collect the compost from the other. With regular harvesting, your garden will enjoy a steady supply of high-quality organic fertilizer.
Pro Tips for a Healthy Worm Farm
Keeping your worm farm healthy and happy is easier than you might think! With a few simple tips, you can ensure your worms thrive while turning your food scraps into nutrient-rich compost.
- Keep it Balanced: Remember, worms prefer a balance of “greens” (food scraps) and “browns” (paper, leaves, or cardboard) in their diet. This balance helps maintain the right moisture level and keeps odors at bay.
- Monitor Moisture: The worm bin should stay damp but not too wet. Add more dry bedding like shredded newspaper or cardboard if it’s getting soggy. If it’s too dry, lightly mist it with water.
- Give Them a Break: Worms can sometimes get overwhelmed if given too much food. If the scraps aren’t being eaten within a week, reduce the amount you’re feeding them and give them time to catch up.
Wrapping Up
If you’re ready to take your composting to the next level, Uncle Jim’s Worm Farm Kit is the perfect way to get started. With easy instructions, an efficient worm bin, and everything you need for successful worm composting, this kit is ideal for beginners and seasoned composters.
The post Worm Farm Kit: Everything You Need for Easy Worm Composting at Home appeared first on Uncle Jim's Worm Farm.