Getting Free Charging for Your Tesla 5 Nov 2024 1:36 PM (5 months ago)
I’ve had a Tesla Model Y for over two years now. For the most part I’ve charged at home at 110v and 14a. Not only is that quite slow for charging speeds, resulting in 24+ charge times, but it costs me anywhere from $3 to $6 depending on time of use to charge my car. Now that’s incredibly cheap compared to gas, and I work from home so I don’t do a ton of driving, so I just didn’t really worry too much about it.
Lately I’ve been having a lot of fun finding spots I can charge for free. It turns out there are numerous places near me where I can plug in and charge for free, often at a faster rate of charge! So where can you find free charging, and how would one find it?
ChargePoint
The first thing I’d recommend doing is downloading the ChargePoint app and creating an account. You can also browse their map for free on their website. Thanks to it I’ve found numerous free charging locations around my town. In addition to using it to locate charging spots you will also use the app to activate the charger by tapping your phone to the NFC reader on the charger. Once authenticated it will unlock the cable and allow you to plug it into your car. These all seem to be a max of 6.8 kW.
Community Sites
This one is going to vary a lot depending on where you live. You’ll want to search the name of your town / city or community and free charging. You may find your town has all sorts of free charging options list on their site. For example my town has free charging in about 30 locations and as long as you are paying for parking in those lots you are welcome to use a charger, usually there are four per parking lot. Again these appear to use the ChargePoint app to activate the machine. These all seem to be a max of 6.8 kW as well.
I personally use this option a lot, seeing how I only have a 110v / 15a circuit at home. I just park my car at the arena a couple of blocks away and can charge at 240v / 30a for free, it’s actually about 6x faster than charging at home and also has the added benefit of being free!
Flo
While most Flo chargers charge a fee to use, not only are they one of the most reliable chargers (second to Tesla’s SuperChargers) but they also sometimes are free to use, depending on the location. For example two of the No Frills locations I know of have Flo chargers that are free to use while shopping there. They will require the Flo app to activate though.
PlugShare
Another good app / website to check is PlugShare. They will have a list of free charging stations near you. You may see some overlap with what you see on the ChargePoint app but it’s definitely worth checking.
At Your Office
While I work from home when I was previously interviewing for a new job one place I interviewed at did have an interesting perk: over 20 chargers free to user for their employees. That would make my commute basically free. While not an option for everyone, it’s certainly something to look into.
Car Dealerships
You’d be surprised how many car dealerships have EV chargers available to the public. So look around, you may see them listed on some of the above apps even. The challenge with these I find is the often want you to go in and talk to them before they will switch it on, and will try and sell you a car in the mean time. I’ve had very little luck showing up after hours and using them to charge. So plan accordingly, but I don’t find these to be worth the hassle.
Campgrounds
While not necessarily free, as you’re paying for the right to camp there, I was quite pleased to be able to charge my car while camping several times this summer. You will need a TT-30 adapter to connect, at least here in Ontario Provincial Parks. But it was well worth the cost as I have gotten at least a half dozen full charges while camping or visiting friends camping this past summer, and also camped in my car using camp mode several times.
As electric cars become more widely adopted and common I suspect the free options will become less and less common. I’ve already seen costs of charging increase significantly. So take advantage while you still can and get some free juice!
The post Getting Free Charging for Your Tesla first appeared on FettesPS.


The Roomba i1 Sucks :( 25 Jul 2024 9:22 AM (8 months ago)
Well, it pains me to admit this, but I hate my new Roomba. I’ve been such a big supporter of iRobot and their robotic vacuum lineup for more than 15 years now, but let’s be real here: this model sucks. I wouldn’t have bought it had it not been for the fact that I’ve loved all my previous Roombas, with my 530S lasting more than 10 years. However each one since has lasted less and less time with more and more issues, but this new i1 takes the cake.

First off, let’s talk about the battery issue. I don’t think the battery itself is any worse than previous models, however a design change on the Roomba itself has resulted in the battery life being nuetered. What happened? Well, they introduced WiFi to the Roomba, and implemented it poorly. At least that’s my assumption, without reviewing the code or hardware. But it’s the only thing that makes sense, every other Roomba I have owned has had no issues being left unplugged or off the charger for long periods of time assuming it already had a reasonable charge. This even allowed me to share one dock between two Roombas for several years, with one of them sitting for days at a time without charging, yet they were always ready to go when needed.
Now if you leave the Roomba i1 off the dock overnight, even if the battery was full at the start, it will be dead by morning. Isn’t that rediculous? As someone who has owned several Roombas and has many years experience using them I can tell you they often get lost under couches, beds or just stuck in a corner and you don’t notice until later that it didn’t make it back to the dock. This has never been an issue before, you could just pick them up and drop them somewhere else and once you hit start it would clean for a considerable amount of time. Now I have to be meticulous about making sure it got back to the dock or it will be dead when I go to use it next. This is not an acceptible compromise for the little added benefit of adding WiFi.
But it gets worse! They’ve redesigned the whole suction system and their new design is extremely prone to clogging. And not even clogging on large amounts of debris, I’m talking small amounts of hair get stuck in the “neck” between the beaters and the vacuum bin. Either it doesnt’ have enough suction or this neck is just too narrow and prone to clogging. In any case, almost every time I use the vacuum it lasts about 5 minutes before shutting off and telling me the dustbin is full. You then clean it out, start it up, and get about 5 more minutes before it gives up again. At that point I just go for the Dyson and start cleaning on my own because this thing is useless.
My next robot vacuum at this point is most likely to be Roborock. Sorry iRobot, you had the lead for so many years but you squandered it.
The post The Roomba i1 Sucks :( first appeared on FettesPS.
20 Years and Counting 23 Jul 2024 9:41 AM (8 months ago)
I feel extremely old typing this, but my blog is officially 20 years old (the domain itself came two years later). It all started off when I was wrapping up a college project and found myself running into a problem I had encountered and solved before but had already forgotten the solution. I ended up finding it one someone’s blog, which lead to me creating my own so I could document these solutions both for my future self as well as for other developers. Mind you, this was long before StackOverflow was a thing and most answers were found burried in Forum posts back then.
As time went on my focus began to shift. I started to pick up more and more freelance work and FettesPS became the face of my business, it grew into a web design and web development company and at one point in time I hosted a great many websites. But as time went on my duties (and pay) at my full time job grew and I had less time to dedicate to my own business. On top of that I found there was a big shift from people wanting their own “dot com” address and website to just throwing it up on Facebook or SqaureSpace. So as time went on the web hosting side of things began to wind down and the site returned to it’s roots as just a development blog.
Over the years it has served me well. Some highlights include being featured on Hack a Day, building prototypes for Tony Hawk and Tom Green and some other really big clients I will not mention here. But what keeps me going is all the comments from people thanking me for their help, I especially appreciate it when it’s on a post that is 10-15 years old. So if you find a solution on my blog, please make sure to let me know! Thanks for everyone who’s visited over the years!
The post 20 Years and Counting first appeared on FettesPS.
Embracing the Gamification of Working Out: My Journey with Ring Fit Adventure 24 Mar 2024 3:17 PM (last year)
Discovering a Possible Game-Changer
As the world grappled with the onset of the pandemic, like many, I found myself confined within the walls of my home, seeking new ways to maintain both my physical and mental well-being. This quest led me to discover Ring Fit Adventure – a unique blend of gaming and fitness that transformed my approach to exercise and actually introduced the concept of “fun” into my workouts.
In the past I’ve talked a lot about gamification in order to make less enjoyable tasks more enjoyable. The best example of this is Duolingo, I’ve been practicing Spanish daily for 7 or 8 years now. The simple idea of losing a streak is enough to keep me practicing. While I’m not fluent yet I’ve gotten quite comfortable with the language and can understand a lot of spoken Spanish and have even read several novels in it now!
You may also remember a while back I logged may daily routine of Rocksmith. I would definitely say in the 100 days that I practiced it I got further with playing the guitar than I ever have, ultimately that one did not stick. It was a really cool concept but the game just didn’t hook me in the same way and for what ever reason I just set it down one day and never picked it up. Looking back, the game itself wasn’t really all that fun, which probably played a big role in me dropping off with it. A new version of Rocksmith is out and while i was very excited to get back into it I simply cannot get behind their pricing model (a monthly subscription) or the fact that they keep removing a lot of paid content from the older versions of Rocksmith.
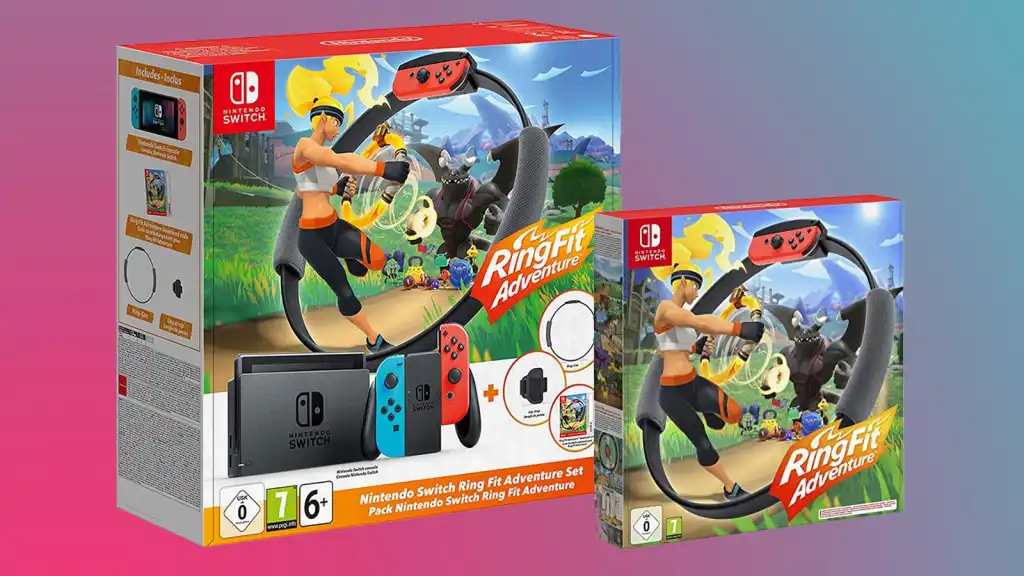
Enter Ring Fit

Nintendo’s Ring Fit, with its engaging gameplay and fitness challenges, offered an unexpected yet delightful fusion of fun and exercise (or so I hoped). I committed to using it two to three times a week, a regimen that felt more like a playful escape than a workout session. Turns out though, it’s surprisingly addictive. While the story line isn’t that interesting, nor are the characters, the game as a whole does seem to do a good job of making me want to play longer than I actually should. I am often prompted to finish for the day as it thinks I’ve gotten enough exercise but I still want to continue playing, which is a great sign. I also found early on I wanted to play every day and not give myself the rest days I should have been, again this was a good problem to have.
The game’s design, which cleverly integrates physical activity into an adventurous narrative, kept me motivated though not entirely captivated. As I navigated through various levels, battling enemies with squats and lunges, I hardly noticed the time passing – a stark contrast to the often monotonous nature of traditional workouts where I find myself constantly glancing at my watch and telling myself “Just another 10 minutes, you can do it!”.
The Story
Overall the story for Ring Fit isn’t that amazing. I won’t spoil anything, but lets just say the story is just enough to keep you engaged, but not enough to really keep you coming back for more. You have the Ring character who acts as your guide, but often can be rather annoying, as you persue the big bad: Dragaux. Who is Dragaux, well don’t worry, you’ll get to see a lot of him. He’s basically the end boss of every world then gets up and flies off to the next one. But he’s definitely slightly more interesting than most of the bad guys you’ll be fighting.
Along the way you’ll meet lots of other characters. Each world has a store front with two familiar faces, they will give you quests and sell you what you need. You’ll often make new friend and companions along the way, but again none of it is particularily engaging and I’m struggling to remember their names or any key plot points as I’m typing this out.

Of course with it being a game they’ve weaved in all sorts of game like elements, such as collecting coins on each level that can later be used in the store to buy clothing, ingredients or shakes. You can also make your own shakes by squeezing them, this giving you a bit more excercise. The shakes themselves act as powerups in battle or can be used to revive yourself. You also have a skill tree that you can unlock new excercises and techniques as the game progresses, which actually works well for getting you to start off with basic exercises that get more difficult as your fitness and skill level progresses.
I will say the skill tree is one of the things that did impress me. There seems to be no end to new skills and more complicated versions of your techniques to unlock. Every time I thought I was nearing an end it expanded and gave me more to work towards. This is important in the world of fitness where you are never really done and if one were to beat the game or run out of stuff to do they might drop off with their workout plan.
The Exercises
This is where Ring Fit really impressed me. I would not have thought you could get so may different exercises out of a flexible Ring controller, but yet you can. In addition to squeezing and pulling it there are many other exercises you can without the controller such as yoga poses, pushups, situps, and all that stuff. In the end you’ll find yourself aching after a 30 minute session, much more you’d expect going in. So make sure you get those rest days in!

Falling off the Wagon
With life being life, I eventually fell off the wagon with Ring Fit. In my case it was a fairly reasonable excuse, we moved to a new house and with that pretty much all my good habbits were disrupted. I stopped reading (previously I had been reading one chapter a day in Spanish), I stopped doing Ringfit and I stopped biking. All of those things I eventually got back into but each one took different amounts of time, and it was unfortunately almost 2 years before I picked Ringfit back up.
But I won’t beat myself up over it, as I said life tends to be that way sometimes. So in the end I was just happy that I did come back to it and get myself back out of that rut.
Unexpected Outcomes: Beyond Weight Loss
While I haven’t experienced significant weight loss, the impact of Ring Fit on my overall fitness and well-being has been profound. The consistent, moderate exercise sessions enhanced my stamina, flexibility, and muscle tone. Within just two weeks of starting to use it I was noticing muscles where it previously felt like there were none, most noticably in my chest and arms. So while I did not lose any significant weight I definitely did put on some muscle mass and since muscle is more dense it may have obscured the fat loss I experienced.
I also noticed a difference in overall comfort when not working out. What I mean by that is I was starting to notice that after sitting all day (for work) either my lower back would be sore, or often my butt from sitting on the chair. Since I was getting up often enough or stretching these issues were starting to get worse. But when actively using Ring Fit I notice these problems just all go away as I get more exercise.
But more importantly, Ring Fit rekindled my enthusiasm for physical activity. The game’s approachable nature removed the intimidation factor often associated with exercise, especially after a prolonged period of inactivity. As someone who can often be self conscious I didn’t have to worry about getting all gross and sweaty around other people, or people watching me exercise (except maybe my wife) as I got to do it all from the comfort of my home.
A Gateway to Broader Fitness Horizons
The most surprising outcome of my Ring Fit adventure was how it paved the way for a return to the gym. The confidence and physical readiness I gained from my at-home workouts made the transition back to a gym environment less daunting and I felt myself wanting some extra exercise to compliment Ring Fit’s workout. This was a big step for me as I had not had a gym membership in 15 years let alone went to one with any regularity.

I’ve also noticed in the spring when I get back into biking it takes me less time to get back into biking shape. Previously I would start each spring only being able to biek short distances and after going several times a week all summer I would slowly increase my distance to a 10k loop. And then by the time I got that on farm status fall would start to break into winter and it would be too cold to bike, and I’d put it away in the garage again for another 6 months jut to start the cycle (no pun intended) all over again. No longer do I feel like my winter months will be spent gaining weight and getting out of shape like the years of past.
Today, I complement my Ring Fit sessions with a couple of gym visits per week or workouts in VR (I’ll be writing a whole other post on working out in VR, don’t worry). This blended approach keeps my fitness routine diverse and engaging, allowing me to reap the benefits of both structured gym exercises and the dynamic, fun elements of Ring Fit.
But What About My Diet
I feel like it would be a disservice to skip over this part, even though I’m sure you are more interested in Ring Fit than a diet. And to be clear, so was I. I think that was one of the bigger issues is I did not change the way I ate, I just added some exercise to my life. While that was great for improving my overall cardiovascular abilities and easing some aches and pains related to being out of shape, it doesn’t really get you far when it comes to weight loss.
To achieve any significant amount of weight loss you will need to not only incoroproate exercise into your life but also change the way you eat. So do not take my lack of signficant weight loss as a hit against Ring Fit, as I take the blame for that one.
You will see in my post on working out with the Meta Quest 2 in VR that significant weight loss is possible with the help of technology and gamification, but you’re really going to have to focus on your diet to see significant changes there.
A Few Criticisms
Ring Fit is a great game, but like anything there’s room for improvement. One thing I would have liked to have seen is some sort of a daily streak mechanism, or something that rewarded you for exercising more often. As it stands you can literally not play for 2 years and when you start back up it does not say anything different, not even a “Wow, welcome back! It’s been a while!” There needs to be something to get us to keep coming back, even if it’s some free rings (the in game currency) or ingredients for smoothies.

I also felt it lacked any sort of competitive elements. While I’m not a hugely competitive person I can see some people being really driven by it and things like being able to complete time trials or even game gyms against random online oponents would be a fantastic addition. Even just the option to share your workouts with others can be a motivator. When I did the Couch to 5K program and similar programs for situps and pushups I would share my progress every day with my wife and friends and while I’m sure they got annoyed by the endless updates it did help motivate me and keep me honest with my goals.
I also was a bit surprised that the game doesn’t really track or monitor your goals. It asks you your age and weight when you first start playing but never again does it suggest weighing in again, or updating that information. Now I realize it doesn’t come with a built in scale like Wii Fit did, and maybe not everyone owns one, but I don’t see any harm in adding the ability to track your weight loss. In fact, it just seems… obvious. I’ve seen stories on Reddit of people losing significant amounts of weight and the game would have never rewarded them in any way for that as it simply had no way of knowing.
Reflections and Moving Forward
Looking back, I realize how Ring Fit was not just a stop-gap measure during the pandemic but a transformative tool in my fitness journey. It got the ball rolling and had a snowball effect that lead into me getting more active in other areas of life, which is everything I could have hoped for. It demonstrated that fitness could be accessible, enjoyable, and effective, even in the most challenging times.
In a world where our fitness options are vast and varied, Ring Fit stands out as a testament to the power of innovation and adaptability in maintaining our health and well-being. For anyone looking to add a fun, engaging element to their fitness regime, I can’t recommend it enough.
I am hopeful there will be a sequel, I think we are long overdue for Ring Fit 2. But I now start to wonder if we will ever see one now that The Switch is nearing the of it’s lifecycle. It’s more likely if we see a sequel it will be on their next platform. But in any case, there are numerous other fitness games worth checking out and most do not require buying any additional hardware like Ring Fit. Many even have demos available, so check them out!
Remember, the journey to fitness is personal and ever-evolving. Whether it’s through virtual adventures, traditional workouts or a combination of the two, what matters most is finding joy in the movement and celebrating the small victories along the way!
The post Embracing the Gamification of Working Out: My Journey with Ring Fit Adventure first appeared on FettesPS.
The Roomba I1: When Your Vacuum is More High Maintenance Than a Houseplant 30 Oct 2023 6:40 PM (last year)
Ah, the Roomba I1. As someone who’s been on the Roomba bandwagon since the glory days of the 530S, I’ve seen it all — from knock-off Roombas that just spin around in circles to the used Roomba I bought that came with bedbugs. The 530S was like that old, reliable car that never let you down – it wasn’t flashy, but it got you from point A to B without a fuss. Fast forward to the Roomba I1, and it’s like we’ve traded in our dependable sedan for a sports car that spends most of it’s time in the shop.
The Good Old Days: Roomba 530S
Remember the 530S? That little guy was the Hercules of robotic vacuums. It didn’t have all the bells and whistles of today’s models, but it did one thing and did it well: clean your floors without drama. It was like the vacuum equivalent of a loyal golden retriever – always there, always reliable. And you know what the best part about it not having scheduling was? I never had to worry about it running over dog poop.
The Downward Spiral
Each new Roomba model I’ve welcomed into my home promised to be the next big thing. But instead of a red carpet experience, it felt more like a series of unfortunate events. It’s like going to a fancy restaurant and finding out they’ve replaced your favorite dish with something unpronounceable.
The Roomba I1: A Soap Opera Star
Enter the Roomba I1, the diva of the vacuum world. This model has more drama than a daytime soap opera.
1. The Battery Saga
The I1’s battery life is like a forgetful actor who can’t remember its lines. The Wi-Fi won’t turn off, so the battery drains faster than a kiddie pool with a hole in it. It’s like having a phone that needs to be charged every time you look at it.
2. The Dust Bin Melodrama
The I1 frequently cries wolf – or should I say, cries “full bin” – when it’s not. The passage to the dust bin is so narrow, it gets clogged faster than a freeway at rush hour. You’ll spend more time checking its bin than checking your social media.
3. Filter Fiascos
The filters on this thing are so sensitive, they could star in a romantic comedy. A speck of dust, and it’s all, “I can’t work under these conditions!” You’ll be tapping out those filters more often than a Morse code operator during a crisis.
Conclusion
Looking back from the Roomba 530S to the I1, it’s like watching a movie franchise that started strong but lost its way. The I1, with its quirks and demands, feels like a step back into a more complicated era, not forward into the future of cleaning. If you’re in the market for a Roomba, maybe consider one that’s more old-school reliable and less drama-queen. After all, you want a vacuum that cleans your house, not one that needs its own reality show.
The post The Roomba I1: When Your Vacuum is More High Maintenance Than a Houseplant first appeared on FettesPS.
The iRobot Braava Jet 11 Apr 2023 9:39 AM (2 years ago)
I’ve written a fair bit about the various Roombas I own, but I haven’t really talked about the one other iRobot product I own. I consider it a Roomba, but technically the Braava Jet is not a part of the Roomba lineup, but it does come from the same trusted and experienced company, iRobot.
I had actually been holding off for a wet mop Roomba that existed years ago, but they ended up being discontinued. I was sad to hear that, but they weren’t all that reliable so I don’t blame them for not wanting to continue with that lineup. However other companies like RoboRock seem to have it figured out. So I’m still interesting in getting something like that for deeper cleans.
In any case, we got the Braava Jet as a wedding shower gift and I was quite excited from the get go. That gift was clearly bought with me in mind  It’s a much simpler system which sprays water in front of it and pushes around a cleaning pad. The cleaning pads are disposable and there are wet, damp and dry versions that you can buy for it. You can also find washable pads on amazon for a reasonable price.
It’s been over a year now and we are still using the original bottle of cleaning solution, you only use a capful each time so it lasts for a long time. We mostly use wet or damp pads (I prefer wet) and I order them off amazon as the unofficial ones are cheaper and work just as well. I did intend to get a reusable one but have not bothered thus far. I will say the pads aren’t the cheapest so there is a moderate cost to use this device.
It does pair with the iRobot Home app which is nice. I can’t say I ever really used it until I picked up the Roomba i1 and had to set it up all over again. Generally speaking I just put it where I need it and hit the start button.
One thing that is interesting about this device is it does not have a charging dock. Instead you pop out the battery and stick it into a wall charger. It’s not really a big deal but I just thought that was interesting as it’s my only iRobot product that works that way. As for the battery itself it does seem to last a long time, I’ve had it running in the basement for a good 45+ minutes right now and it’s already on lap two of the area is cleaning. And because the battery is so easily removed you could have two ready to go if you have a bigger space to clean, but so far I haven’t felt the need to get a second. Generally I only use it in the kitchen or basement and quite sparingly at that.
Overall, the iRobot Brava Jet is a great investment for anyone who wants to save time and effort when it comes to cleaning their floors. While the branded cleaning pads and cleaning solution are effective, they can be expensive to replace. By opting for third-party cleaning pads and vinegar, you can save a significant amount of money while still enjoying all the benefits of this innovative floor cleaning robot. And if you’re looking for a good wedding or shower gift, I’d say they make a fantastic gift.
The post The iRobot Braava Jet first appeared on FettesPS.
I Bought a Roomba i1! 9 Apr 2023 9:19 AM (2 years ago)
As technology advances, so do our options for making our lives easier. One such technology that has made a significant impact in my life is the robotic vacuum cleaner, more specifically Roombas from iRobot. I long ago reviewed my Roomba 530 and continued to keep you apprised of it’s continued reliability, as robot vacuums were new at the time. Now, all these years later I have retired my old Roomba 530 and upgraded to the new Roomba i1, and in this article, I’ll share my experience and why I decided it was finally time to upgrade.
Firstly, let’s talk about the Roomba 530. I purchased this model 13 years ago, and it served me well. The Roomba 530 was one of the earlier models and had limited features compared to the newer ones. It had basic functionality and could clean most floors well enough, but there were a few limitations that were starting to become more noticeable as technology advanced. I did like how it came with two virtual walls and a charging station, plus additional brushes and a cleaning kit. This gave me a good starting point and even though I have retired that Roomba I still use the virtual walls from it and sometimes that charging dock.
One of the most significant limitations of the Roomba 530 was its lack of connectivity. It had no Wi-Fi connectivity, so it could not be controlled using a smart phone app or voice commands. This meant that I had to physically press a button on the device to start it, and it could not be scheduled to clean automatically. This was not a big deal at first, but as I got busier, I found myself forgetting to start the Roomba, which defeated the purpose of having a robotic vacuum in the first place. I did modify my Roomba and add on a serial adapter to allow me to schedule it, however that was cumbersome and not very practical. However I did enjoy the hackability of the earlier models, which doesn’t seem to be a thing anymore.
Enter the Roomba i1. This newer model is a moderate improvement over the Roomba 530 and 614 in a few different ways. For starters, it has Wi-Fi connectivity and can be controlled using a smartphone app or voice commands. This means that I can schedule the Roomba to clean automatically, and I can start it from anywhere using my phone or smart speaker. This has been a huge convenience, as I no longer have to remember to start the Roomba manually.
The most noticable new feature with the i1 for me is the fact that it cleans in nice neat lines. All of my other roombas just wander around aimlessly banging into things. I’ve gotten used to it over the years but it is kind of annoying to not know where it’s going to go next. This roomba moves in a predictable manner and if I still had carpets it would leave nice perfect lines in them. So that’s fantastic. It also seems to have better obstacle avoidance than my previous roombas but I’m not convinced it’s using cameras as some other reviews have lead me to believe. It looks like good old infrared or something that stops it just before it slams into most things, then from there it gently nudges up against it to get in close clean. I did discover though, after several more trial runs, that it does give you a map of the area it cleaned when the job is done. But that could just be good old fashioned trigonometry.
Something else I want to point out is the side brush runs pretty much constantly and I like that. One of my other roombas, the 614, it would spin it periodically such as when it was in a corner and because of that I found it missed a lot of small debris. So I am thankful to see this one runs pretty much non stop. I am curious to see if it self destructs in a few uses like most of them these days, they really are designed to be a consumable now unlike the early days where one brush would last you years.
Another great feature of the Roomba i1 is its ability to empty its own dustbin. This would be a huge convenience, if it came with the dustbin, as it would mean I no longer have to manually empty the Roomba’s dustbin after each cleaning session. But only the i1+ or the i3 come with an automatic dustbin, however it is nice to know the option to is there should I grab one one later on down the road.
That being said, now that I have it opened up and have run it a couple of times, I’m not convinced this will work with an automatic dustbin. It does seem to be a new bin design on the Roomba itself, with a hinged system and a small HEPA filter, but I don’t see how it would automatically empty at a station. I do hope this one is not prone to the same issue as some of my problematic Roombas where the dustbin would detatch mid cleaning cycle, either being left behind or failing to suck the debris out of the beaters. This was the main reason I no can longer rely on my 614, it too often becomes separated and bumbles about without really cleaning until I notice and fix it.
A couple of things I would like to point out as negatives before I wrap things up. First off, you can only charge the Roomba from its docking bay, as there is no connector on the Roomba. This seems to be the trend these days but I don’t like it as I used to plug my 530 in directly quite often as sometimes the dock can give you trouble if it’s not on a perfecty level floor or the contacts are dirty. This kit also did not come with any virtual walls, which means I’m still using the ones that came with my 530 all those years ago as nothing I’ve bought since has come with any. This is too bad, as I think they should come with more of those additional features out of the box, and I have never seen them sold individually in any store.
In conclusion, upgrading to the Roomba i1 was a good decision for me. Its advanced features and convenience have made it a valuable addition to my home. While my old Roomba 530 served me well for many years, it was getting pretty discoloured and overall quite noisy so I stopped using it. My 614 has been fairly reliable and my 770 has been quite unreliable. So it will be nice to have a reliable workhorse in the house again so I don’t have to bust out the dyson quite so much. Plus it will be fun to be able to use the app to run the vacuum! If you’re considering upgrading your Roomba or purchasing one for the first time, I highly recommend the Roomba i1 so far. But as always, I will keep you apprised!
The post I Bought a Roomba i1! first appeared on FettesPS.
How to Enable Telnet in Windows 12 12 Mar 2023 6:10 PM (2 years ago)
Well Windows 12 is here, and like the last several versions of Windows it has shipped with Telnet disabled out of the box. Should you need to enable it, here are a few ways:
Through Windows Features
- Open the Start menu and type “Control Panel” in the search bar. Click on the “Control Panel” app from the search results.
- In the Control Panel, select “Programs” and then click on “Turn Windows features on or off”.
- Scroll down the list and find “Telnet Client”. Check the box next to it.
- Click on “OK” to save the changes. Windows will install the Telnet client.
- Once the installation is complete, you can open the Telnet client by typing “telnet” in the Command Prompt or PowerShell.
- To connect to a Telnet server, type “telnet <server name or IP address>” and press Enter.
Via the Windows Registry
- Press the Windows key + R to open the Run dialog box.
- Type “regedit” in the Run dialog box and press Enter to open the Registry Editor.
- In the Registry Editor, navigate to the following key:HKEY_LOCAL_MACHINE\SOFTWARE\Microsoft\TelnetClient
- In the right pane, double-click on the “Disabled” value and change the value data from “1” to “0”. This will enable the Telnet client feature.
- Close the Registry Editor.
- Open the Command Prompt or PowerShell as an administrator.
- Type “telnet” and press Enter to launch the Telnet client.
Via PowerShell
If you’re a PowerShell user this will probably be the quickest way to enable it. If you’re looking to enable just the client, run the following command:
Enable-WindowsOptionalFeature -Online -FeatureName "TelnetClient"That’s it! You should now be able to use Telnet in Windows 12. Keep in mind that Telnet is an unencrypted protocol and is not considered secure, so it’s recommended to use a more secure protocol like SSH instead. For that I highly recommend using Bitvise SSH Client over the infamous putty.
The post How to Enable Telnet in Windows 12 first appeared on FettesPS.
Enabling Telnet in Windows 11 10 Mar 2023 2:18 PM (2 years ago)
Well Windows 11 is finally official and we’re starting to see some pre-releases being leaked. Never one to wait I managed to get my hands on a copy and started playing around with it. Turns out, one of my favourite old tools is disabled out of the box. But don’t let that stop you, you can easily re-enable it by following these steps:
- Open the Start menu and type “Control Panel” in the search bar. Click on the “Control Panel” app from the search results.
- In the Control Panel, select “Programs” and then click on “Turn Windows features on or off”.
- Scroll down the list and find “Telnet Client”. Check the box next to it.
- Click on “OK” to save the changes. Windows will install the Telnet client.
- Once the installation is complete, you can open the Telnet client by typing “telnet” in the Command Prompt or PowerShell.
- To connect to a Telnet server, type “telnet <server name or IP address>” and press Enter.
That’s it! You should now be able to use Telnet in Windows 11. Keep in mind that Telnet is an unencrypted protocol and is not considered secure, so it’s recommended to use a more secure protocol like SSH instead. However if the situation calls for it it’s painless to enable.
The post Enabling Telnet in Windows 11 first appeared on FettesPS.
Unleashing Your Laptop’s Stealth Mode: A Guide to Disabling the Asus ROG Strix Bootup Sound 6 Mar 2023 2:11 PM (2 years ago)
I picked up an Asus ROG Strix Scar for work about a year back, and it’s been a fantastic laptop. But while the flashy features such as RGB lighting might be fine when I’m at home (and I do work from home, 99% of the time) they can be a little unprofessional looking during meetings with clients or co-workers. The lighting is easy enough to enable or disable via the keyboard as needed, but I was having a hard time finding the option to disable the boot up sound and hadn’t gotten around to doing so yet. Sure enough, during a meet up with my co-workers a week back I turned on my laptop mid meeting and had everyone turn their head and look at me when my computer loudly went “SWOOOOSH” as it booted up. Oopsie!
So after returning to my hotel room later that night I dug into the problem some more and finally found the solution. It was not to disable it in Asus’ Armory Crate application as several links had suggested, I had searched through there in vain in the past. Rather it was in the BIOS all along, but even knowing that much I found it to be a bit challenging to locate because of where they had burried it.
So here’s the steps you need to follow:
- Fully power off your laptop and then turn it back on
- Press and hold F2
- Hit F7
- Go to Advanced
- Go down to Animation Post Logo Configuration
- Disable Animation Post Logo Audio
- Save and Exit
After that your computer will reboot and you’ll be happy to see that it no longer makes that loud annoying wooshing sound!
The post Unleashing Your Laptop’s Stealth Mode: A Guide to Disabling the Asus ROG Strix Bootup Sound first appeared on FettesPS.