16 Best Course Creation Software and Tools (Expert Picks for 2025) 2:00 AM (2 hours ago)
When I helped create WPBeginner’s online video course portal, the team and I spent countless hours trying to find the perfect software and tools to do the job easily. Along the way, I learned that having the right course creation software can make or break your success.
But here’s the thing – choosing the perfect fit for your online course isn’t easy. The market is flooded with options, each claiming to be the perfect solution.
That’s why I’ve spent a lot of time thoroughly testing many different solutions. I looked at everything from course creation platforms and marketing software to budget-friendly recording and editing tools.
Whether you’re looking to create your first course or want to upgrade your existing setup, I’ve done the heavy lifting for you. I’ve narrowed it down to the best course creation platforms that actually deliver results, ranked and reviewed based on real-world testing, ease of use, and business impact.

Quick Picks – The Best Course Creation Software and Tools
Need a quick overview? Here are some of my top picks for course creation software and tools:
| # | Tool | Category | Best For | Pricing |
| 🥇 | MemberPress | Course creation platform | Creating and selling online courses | From $179.50/ year |
| 🥈 | OptinMonster | Course marketing tool | Building email lists | From $9/month |
| 🥉 | Constant Contact | Course communication tool | Sending emails to learners | From $12/month |
| 4 | Sony Alpha ZV-E10 | Course recording | High-quality course videos | From $645 |
How I Test and Review Course Creation Software and Tools
At WPBeginner, we review course creation tools by using them ourselves and looking at how they work in real-life situations. We focus on the features that really matter for building and selling online courses.
Here’s how I reviewed each tool for this roundup:
🛠️ Ease of Use – I timed how long it took to set up a basic course, upload a video lesson, and integrate with an email marketing service. I looked for intuitive interfaces and clear documentation to ensure a smooth experience for beginners.
📚 Course Creation Features – I checked how well the tool organizes learning materials and supports interactive, engaging courses.
🙌 Student Engagement & Support – I assessed features like quizzes, forums, and social tools that keep students engaged, plus the quality of customer support.
💰 Pricing & Value – I compared cost vs. features to see if the tool is worth it, including free trial options.
🌎 Real World Usage – Apart from the tools I’ve used for creating my own online courses, I tested each platform by creating a short sample course, including uploading videos, creating quizzes, and setting up student access. I also read real user reviews and testimonials to get a more complete picture of each tool’s pros and cons.
Why Trust WPBeginner?
WPBeginner is the largest free WordPress resource site. For over 16 years, we’ve been helping thousands of entrepreneurs build and grow their businesses.
But we’re also big fans of online course creation.
Drawing from our firsthand experience with our free video tutorials, we’re passionate about supporting educators in running their own online course platforms. And, of course, make it easy for everyone!
Our recommendations for course creation software and tools come from real-world experience and thorough testing. We’ve also learned a ton from creating and managing our own online resources.
Our goal? To help you find the best solutions for your online course, backed by data and honest recommendations. You can learn more about how we test and review products in our complete editorial process.
Here’s a quick overview of all the software and tools I’ll share in this guide:
With that in mind, here’s my curated list of the best course creation software and tools.
Best Online Course Creation Platforms
Creating an online course involves more than just content creation. You need a platform that makes it easy to host, sell, and manage your courses while providing a seamless learning experience for your students.
Why I Recommend WordPress for Your Online Courses
I highly recommend using WordPress to create and sell your online courses.
🚨 But first, it’s important to understand the difference between WordPress.com and WordPress.org. I recommend using WordPress.org to host your courses.
Why? WordPress.com is a hosted platform that is easy to use but has some customization limitations. On the other hand, self-hosted WordPress.org offers complete control over your website and course content.
It allows you to install a learning management system (LMS) plugin and turn your WordPress website into a feature-rich online course platform. You will also have complete control over your branding, pricing, and content.
For more information about the platforms, you can see our comparison article on WordPress.com vs. WordPress.org.
At WPBeginner, we’re big fans of WordPress.org. Our team has been using it for more than 16 years and loves how much freedom it offers and how easily it can handle complex data.
To get started with WordPress, you’ll need web hosting and a domain name.
You can think of web hosting as renting space on the internet for your course website.
Then, you’ll need to get a domain name, which is your website’s address. It’s how people will find your site online, so you’ll want to choose something catchy and easy to remember.
For tips, you can see our guide on how to choose a domain name.
Bluehost is a great option for both of these things because they are beginner-friendly and reliable. Plus, they offer a huge discount on their hosting to WPBeginner readers + a free domain name for the first year.
Their packages also come with a free SSL certificate, which is great for making your online course site more secure and trustworthy.

Basically, you can build an online course site starting from $1.99 per year.
Just click on the button below to get started.
To learn more, you can see our article on how to install WordPress, which covers steps for other WordPress hosting providers like SiteGround and Hostinger, too.
Once you have WordPress set up with your hosting and domain, you can start building your website. You can also find tons of plugins and tools available to help you create your course and make it awesome for your students.
With all that said, I will also look at some non-WordPress options for creating and sharing your online courses. Let’s explore my top picks.
1. MemberPress
MemberPress is the perfect all-in-one course creation solution for beginners. It offers an easy-to-use learning management system (LMS) with powerful features for building and managing a members-only, paid course platform.
At WPBeginner, we personally use MemberPress to power our free online video courses, and we love how easily it lets us set up student access rules. For more details, see our guide on how we use a video membership site to grow our email list.
To create courses with MemberPress, you can use 2 powerful addons: Courses and CoachKit.
MemberPress Courses lets you easily create and manage your online courses. It uses the WordPress block editor, which makes it simple to build and structure your lessons. You can also add multimedia content like videos and audio to engage your students.
Its Classroom Mode is designed for a distraction-free learning experience. It features intuitive navigation to help students move through the course easily. There’s a course overview and instructor details for quick reference. Plus, the progress bar helps students track their learning journey and stay motivated to complete the course.

MemberPress Courses comes with extra addons, such as:
- ⁉️ Quizzes: Let students test their knowledge and reinforce what they’ve learned. There are many quiz types to choose from, like short answers, multiple choices, true/false questions, and more.
- 📄 Assignments: Give students a way to submit their work after each lesson, whether it’s written responses or projects.
- 🌟 Gradebook: Easily track progress and manage grades all in one place.
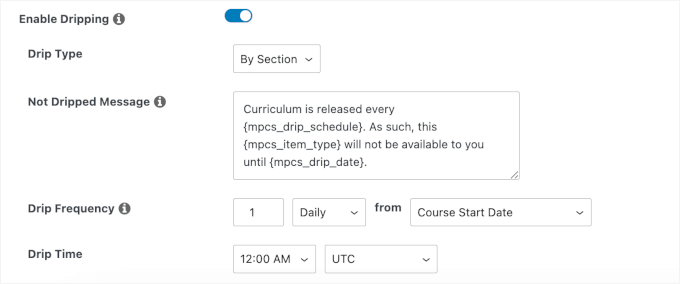
There’s also the content-dripping feature to release lessons gradually instead of all at once.
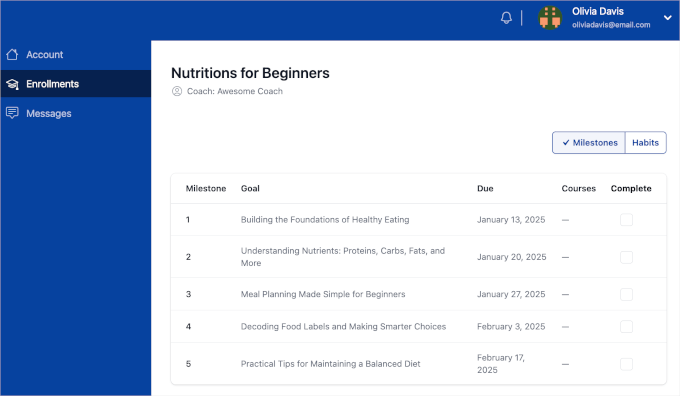
You can also use MemberPress CoachKit, which is perfect for offering one-on-one coaching or group sessions. It lets you manage coaching schedules, track student progress, and provide a more personalized learning experience.
To learn more about it, see our guide on how to start an online coaching business.
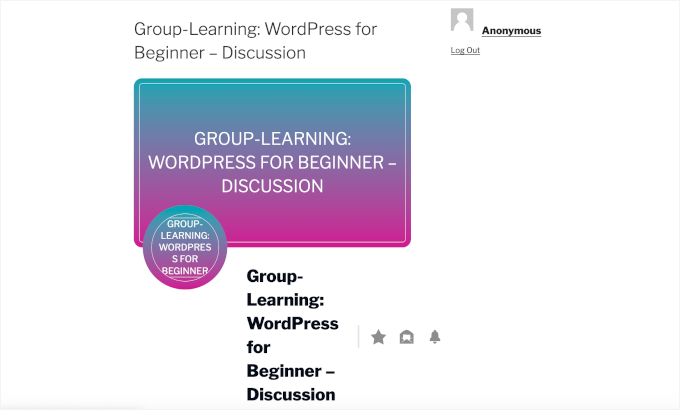
Another great thing about MemberPress CoachKit is that it allows you to offer WordPress group learning with the ‘Cohorts’ feature.
It’s a structured learning experience where participants progress together with set start and end dates.
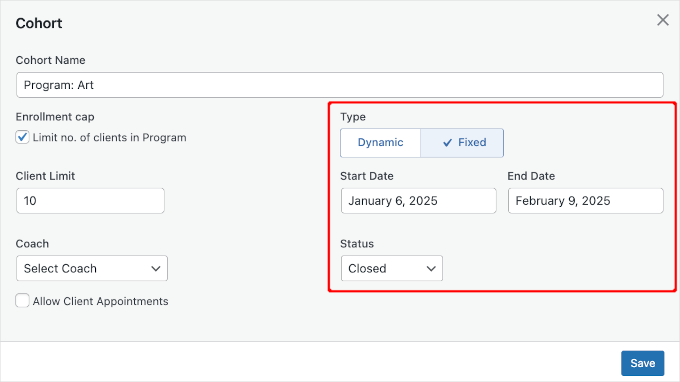
This format encourages a sense of community, improves accountability, and allows students to interact with both instructors and peers.
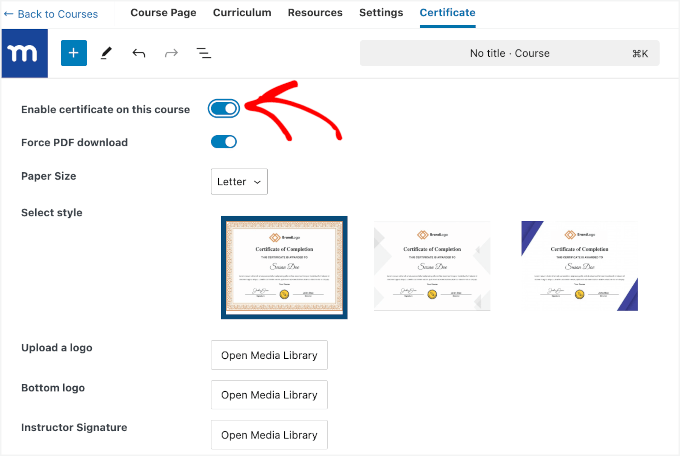
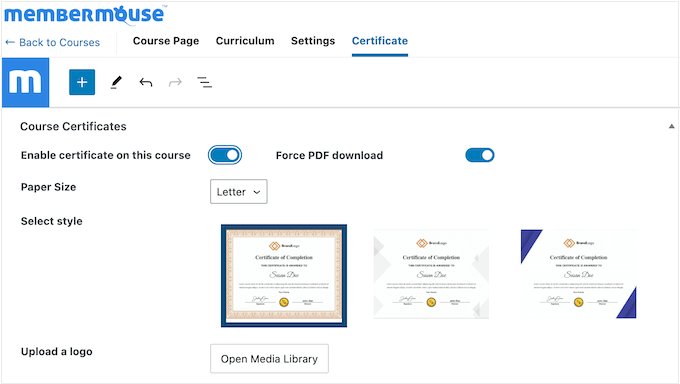
If you want to offer certificates, then you can do that too!
MemberPress allows you to enable certificates on your courses. Even better, you can customize the details, such as the paper size, design choice, and custom logo.
On top of all that, MemberPress is a membership plugin, so you’ll get access to features like paywalls, custom access rules, and members-only forums. For details, see this complete guide on how to create a membership site with WordPress.
Pros
- Powerful LMS features with Courses and CoachKit addons.
- Distraction-free Classroom Mode with intuitive navigation, overview, and progress tracking.
- Flexible course creation and management with multimedia, quizzes, assignments, and grade books.
- Supports one-on-one coaching as well as group learning.
- Drip content for scheduled course releases.
- Includes certificates with customization options.
- No transaction fees with the Basic plan.
Cons
- Requires the Courses and CoachKit addons for full LMS functionality.
- Pricing may be high for small online course projects.
Pricing: MemberPress offers 4 pricing plans. The Basic plan starts at $179.50 per year and allows for unlimited members and no transaction fees. The Elite plan offers a coaching integration with CoachKit, which is perfect for those wanting to offer personalized coaching alongside courses.
Why I Chose MemberPress: I strongly recommend MemberPress because it’s an all-in-one solution for creating and selling online courses and coaching sessions. Its Courses and CoachKit addons make it easy to create engaging learning experiences, while the ‘Cohorts’ feature boosts student interaction and accountability.
2. Thrive Apprentice
Thrive Apprentice is a WordPress LMS plugin that stands out for its powerful School Wizard visual editor. This feature makes designing and customizing your online courses very easy. Overall, it’s a great all-in-one solution for creating and managing courses and memberships – no coding needed.
I tried out all of Thrive Apprentice’s features to see how it compares to other online course creation software. For more details, you can see this complete Thrive Apprentice review.
During onboarding, I liked that the course builder lets you choose from 55 templates and then quickly customize them using drag and drop.
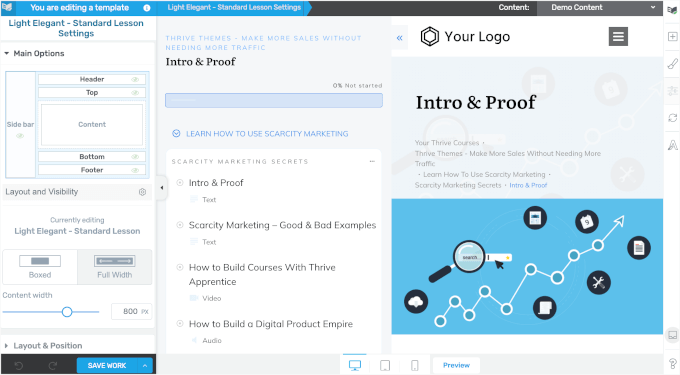
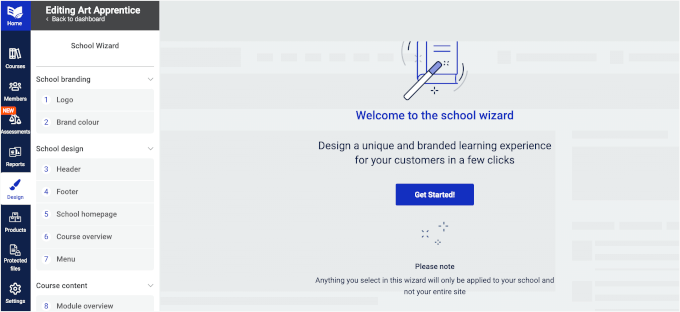
Don’t want to use a template? Then you’ll appreciate the School Wizard.
This feature walks you through setting up your online course from scratch with a step-by-step checklist. It helps you create a more unique, personalized result that aligns with your brand.
To keep learners engaged, you can create lessons in different formats, including text, video, and audio. Plus, you can add extra resources like PDFs, links, and lesson summaries.
The good news is that combining these formats gives students the flexibility to learn in a way that works best for them.
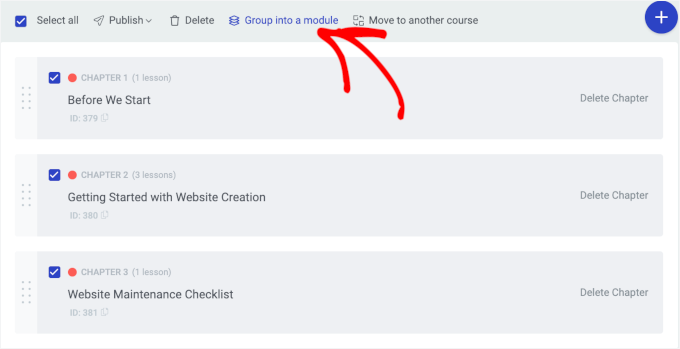
You can then organize your lessons into chapters and group chapters into modules. This helps you create a clear and structured course layout.
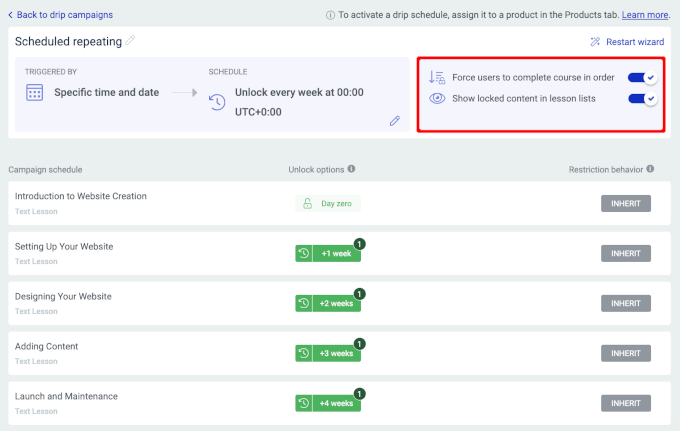
I also like that Thrive Apprentice lets you lock content on a drip schedule or based on specific actions.
This way, students might need to finish a lesson or pass a test to access the next part of the course, encouraging progressions.
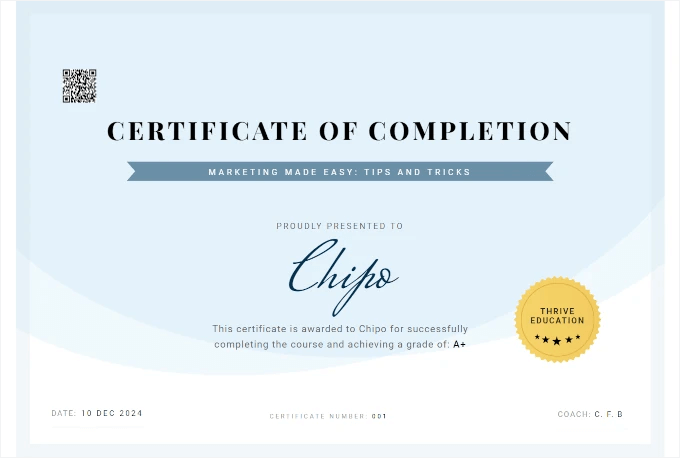
I also appreciate the course-level grading feature in Thrive Apprentice. It lets you assign and calculate overall grades based on student performance across different assessments.
You can customize how each assessment contributes to the final grade, set flexible weightings, and define custom grade ranges and labels.
Even better, these grades will appear on students’ course certificates, like this:
Additionally, Thrive Apprentice gives you access to over 6 million high-quality, royalty-free stock photos from Unsplash. This makes it easier to add engaging visuals to your course lessons and sales pages.
On top of all that, student management is easy with Thrive Apprentice’s built-in dashboard. Here, you can control course access, track student progress, and review a complete log of their activities.
Pros
- Easy-to-use visual editor, with the School Wizard option to create your online course from scratch and 55 ready-made course templates.
- Text, video, audio, and mixed course format support.
- Structure courses into lessons, chapters, and modules.
- Ensure course progression through content locking or a drip schedule.
- Course-level grading with customizable weightings and grades shown on certificates.
- Unsplash access to easily add engaging images without leaving Thrive Apprentice.
- Built-in dashboard to manage students and track progress.
Cons
- Fewer built-in payment gateways for accepting payments from your students.
Pricing: Thrive Apprentice is available for $149 per year, which is perfect for adding online courses to an existing site. However, for people launching a new website or business, we recommend the Thrive Suite for $299. It includes all the Thrive plugins for designing, building, and growing a successful site.
Why I Chose Thrive Apprentice: I like Thrive Apprentice because it’s perfect for course creators who want an easy setup, thanks to its visual builder and ready-made templates. It’s a flexible, scalable solution for building and managing online courses.
3. Courses for MemberMouse
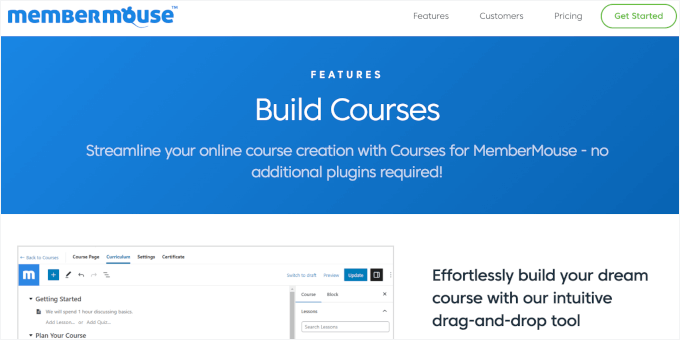
If you’re serious about making money from your online courses, then Courses for MemberMouse is a reliable option. It’s another WordPress LMS plugin, but it stands out for how well suited it is to enterprise-level businesses.
I tried out all of MemberMouse’s features, which you can see in this complete MemberMouse review.
Courses for MemberMouse lets you easily build and sell online courses using a drag-and-drop builder, making it beginner-friendly with a low learning curve.
A standout feature is the ability to restrict access to specific courses or lessons, similar to MemberPress. You can restrict lessons or courses based on memberships, bundles, or sales packages, keeping your material secure and exclusive.
The Classroom Mode automatically applies a professional, customizable template. It lets you brand your courses with your custom logos, colors, and images for a cohesive look.
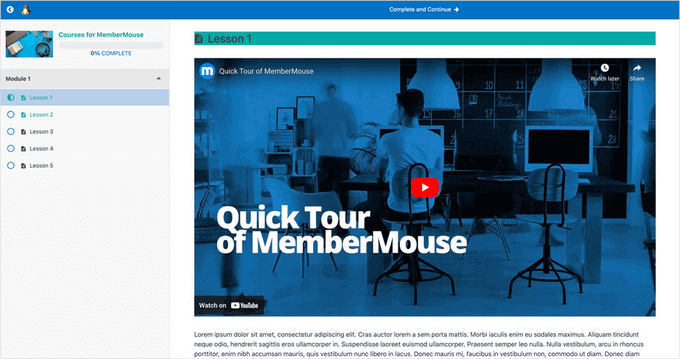
Courses for MemberMouse also offers several tools to improve the learning experience.
For example, progress-tracking bars and lesson navigation prompts help students stay on track and know exactly where they are in the course.
To test students’ knowledge, you can use a variety of quiz options, such as multiple-choice and long essay questions.
Once students complete a course, you can reward them with downloadable, customizable certificates to recognize their achievement.
To streamline online course sales, Courses for MemberMouse offers one-click purchase links so learners can quickly complete their transactions without having to re-enter their payment details. You can also offer cross-sells to promote multiple online courses more effectively.
On top of that, MemberMouse has some great features for growing your business. I discovered that it tracks important business metrics, including lifetime customer value and churn rates. It even processes overdue payments automatically, so you don’t have to worry about losing sales.
Pros
- Ability to restrict access to specific courses or lessons (similar to MemberPress).
- Classroom Mode with a progress-tracking bar and lesson navigation for a professional course appearance.
- Downloadable certificates for course completion.
- One-click purchase links for a streamlined sales process.
- A cross-sell feature to promote additional courses.
- Flexible access rules for content protection (based on memberships, bundles, or sales packages).
- Drip Content Scheduler for gradual content release and structured learning.
Cons
- No free plan.
- Limited design options compared to other WordPress LMS plugins.
Pricing: MemberMouse offers 4 pricing plans, with the Basic plan priced at $199.50 per year. This plan allows for unlimited membership plans and payment acceptance via Stripe. It also includes access to the Courses for MemberMouse extension, making it an excellent choice for creating a successful membership site.
Why I Chose Courses for MemberMouse: I recommend Courses for MemberMouse because it offers a lot of built-in features for making money from your online courses. The drag-and-drop builder, combined with course access restrictions and one-click purchases, makes it an ideal choice for membership site owners looking to grow.
🚨 Alternative: WishList Member is another great option for protecting content and offering tiered access to your students. For details, you can check out this WishList Member review.
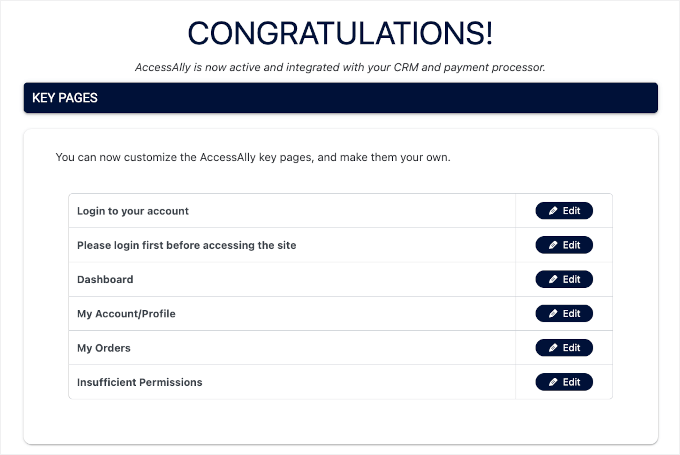
4. AccessAlly
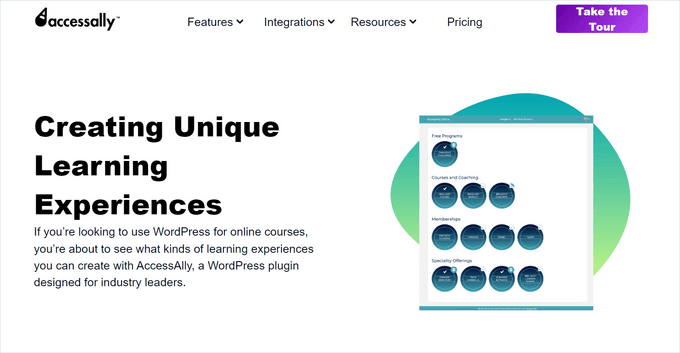
If you want to scale your online course, group coaching, or membership business, then I think that AccessAlly is a great option. It stands out for its strong community-building features and seamless CRM integrations.
One of AccessAlly’s standout features is CommunityAlly. This powerful add-on creates a space for students to connect, collaborate, and engage.
In my opinion, this feature is key to building a strong and engaged community across your online course programs.
I also really liked its seamless integration with different email marketing CRMs like Kit and Drip, along with eCommerce payment gateways, WordPress themes, and other WordPress plugins. Essentially, AccessAlly lets you handle almost everything from one place, from accepting payments for your online courses to keeping in contact with your students.
Using AccessAlly is also easy, thanks to their drag-and-drop course builder. Plus, you can mix and match modules, lessons, and downloadable resources.
To make the setup even easier, AccessAlly’s Offerings Wizard walks you through the entire process step by step. Then, it automatically generates all the essential course pages – landing pages, module and lesson pages, registration pages, and even a completion page.
Lastly, AccessAlly offers excellent progress-tracking features that allow you to set objectives for each lesson or module, such as passing a quiz. This ensures that students stay on track and motivated as they move through the course.
Just keep in mind that AccessAlly is a little more expensive than other WordPress LMS plugins on this list. That’s why I recommend it for growing businesses that want to scale.
Pros
- CommunityAlly lets you build an engaging, collaborative student community.
- Seamless and extensive integrations with email marketing software, eCommerce shopping carts, and themes.
- Drag-and-drop builder with an Offerings Wizard for quick setup.
- Automatically generate all necessary course pages, saving you time on setup.
- Progress tracking with customizable objectives, like quiz completion, to measure student progress.
- Flexible course types, including live, evergreen, and progress-based courses.
Cons
- Higher price compared to some LMS plugins.
Pricing: AccessAlly starts at $82/month (billed annually) for one site with unlimited courses and members. The LMS features require the Pro plan at $108/month (billed annually).
Why I Chose AccessAlly: I recommend AccessAlly if you’re looking to scale your online courses or coaching programs. It gives you all the tools you need to create a powerful online learning community and monetize your courses.
5. YouTube
YouTube is a popular, free platform for hosting video-based courses. In addition to public videos, you can offer members-only content through the Memberships system. This makes YouTube a great solution for reaching a wide audience while controlling access to your content.
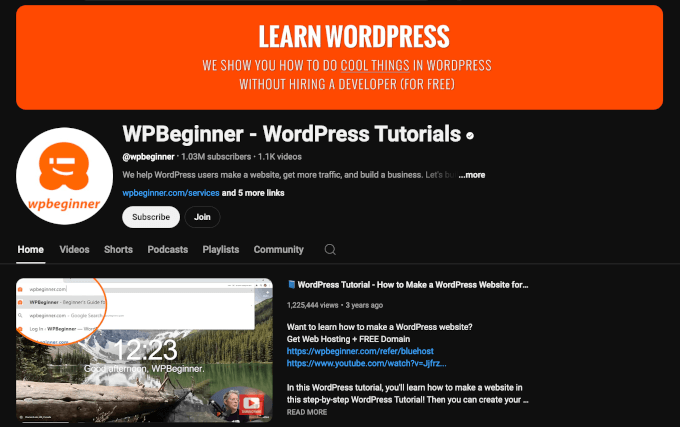
At WPBeginner, we have our own WPBeginner channel where we share helpful content and tutorials for both free and paid users. We’ve had tremendous success with YouTube and continue to manage several channels for different businesses.
But you might still be asking yourself why YouTube is a good platform for video courses.
First, it’s free to use, making it accessible to anyone who wants to create and share videos. You can upload unlimited content, and it’s easy for students to access courses from anywhere. Plus, YouTube’s massive audience gives you the potential to reach people worldwide.
For details, see this guide on how to start a successful YouTube channel.
Plus, if you turn on Memberships for your channel, then you can offer exclusive perks such as custom emojis, badges, and members-only videos. You can create up to 6 membership levels, with higher-priced tiers unlocking all the perks from the lower levels.
Another great feature of YouTube is its built-in SEO capabilities. Optimizing your video titles, descriptions, and tags can improve your chances of ranking higher in YouTube’s search results.
To take it a step further, tools like TubeBuddy can help you fine-tune your SEO strategy. This way, you can grow your channel and reach more viewers.
That being said, YouTube does offer less control than hosting online courses on your own website. Also, while it’s excellent for video delivery, YouTube isn’t designed for complex learning paths, assignments, or detailed progress tracking.
Pros
- Free to use with unlimited video uploads.
- Easy access for students from anywhere, which unlocks massive audience potential for global reach.
- Built-in SEO capabilities for wider discovery.
- Channel memberships with multiple tiers for offering exclusive perks.
Cons
- Only suitable for video courses.
- Lacks course-specific features like quizzes or certificates.
- Not designed for dedicated course management.
- Less control over branding and customization.
Pricing: Free
Why I Chose YouTube: I recommend YouTube because it’s a free video-sharing platform with a massive global reach. More than 2 billion people use YouTube every month, so it’s ideal if you’re trying to reach a wide audience. Plus, you can monetize your online courses through the Memberships system.
6. Teachable

Teachable is a hosted online course platform that makes it easy to create and sell online courses without worrying about running your own website. Its drag-and-drop course builder helps you get started quickly and easily, allowing you to add videos, quizzes, and downloadable resources.
Since it’s a standalone platform, you don’t have to worry about updates or backups. Teachable will take care of all that, giving you more time to focus on creating content.
I’ve tested Teachable extensively, which you can learn more about in this comparison article on Teachable vs Skillshare vs MemberPress.
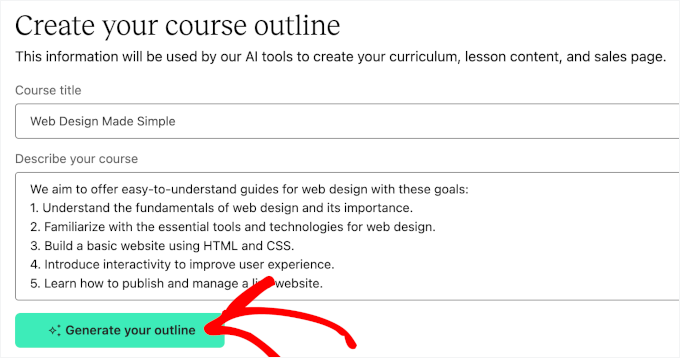
Getting started with your first course is simple. Teachable’s AI-powered outline generator helps you develop course materials quickly. Just enter a course title and a brief description, and the AI will immediately make a structured outline for you.
Once the outline is ready, Teachable takes you to the setup guide. Here, you can customize your course layout, add lessons, and make necessary adjustments.
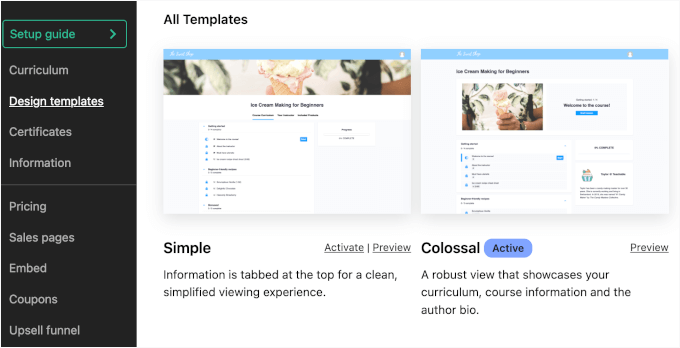
While customizing course design, I found that Teachable offers 2 template options: Simple and Colossal. While this may feel somewhat limiting, you can still adjust these templates to match your brand.
Teachable includes built-in email marketing to help you stay connected with your students. It also generates a sales page automatically, so you can start promoting your courses right away.
I also found that you can track your course performance with analytics, monitor student engagement, and use referral programs to grow your business.
Overall, Teachable is a great choice for course creators who want an easy-to-use, all-in-one platform to build, manage, and sell their courses.
Pros
- Hosted platform – no need to manage a website, updates, or backups.
- AI-powered tools to generate a structured course outline in just a few clicks.
- Built-in email marketing to help you stay connected with students.
- Auto-generated sales page for quick promotion of your courses.
- Analytics to track course performance and student engagement
- Referral programs to help grow your business
Cons
- Less control over customization compared to WordPress-based platforms.
- Higher transaction fees apply to free and lower-tier plans.
Pricing: Teachable’s free plan is great if you want to try things out before paying. It lets you publish one course, coaching session, or downloadable product, but there’s a $1 + 10% transaction fee on every sale. The Basic Plan, $39/month, billed annually, lets you publish up to five products: courses, coaching, downloads, and the transaction fee drops to 5%.
Why I Chose Teachable: Teachable stands out for its simplicity and power. It’s an ideal platform for course creators who want to build, manage, and sell their courses without technical headaches.
Best Online Course Marketing Tools
Once your online course is ready, it’s time to focus on getting the word out. The right marketing tools can help you attract students, build your brand, and boost enrollment.
Let’s dive into my marketing tool recommendations for your online course.
7. OptinMonster
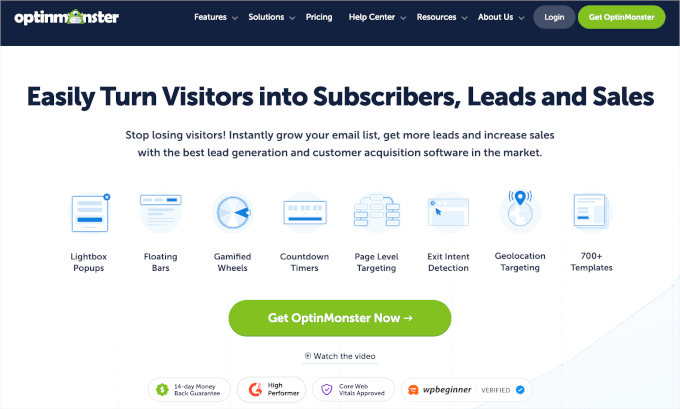
OptinMonster is a powerful tool for boosting sign-ups to your online courses. It helps you grow your email list and convert visitors into students with features like popups, slide-ins, and lightboxes.
At WPBeginner, we have been using OptionMonster for a while, and it has helped us grow our email lists exponentially. You can learn more about it in our complete OptinMonster review.
With OptinMonster, you can create customized calls-to-action that encourage visitors to sign up and start learning.
With over 400 professionally designed templates, OptinMonster makes it easy to create high-converting popups that match your course branding. You can customize these templates using the simple drag-and-drop builder, and no coding is required.

One of its standout features is the countdown timer, which is a perfect tool for promoting your online courses.
For example, you can use it to create urgency for limited-time discounts, early bird offers, or course enrollment deadlines. This motivates visitors to sign up quickly, helping you boost conversions and fill your courses faster.
Another great feature is content locking. It allows you to gate access to certain content or course previews, asking visitors to sign up for your email list before they can view the material.
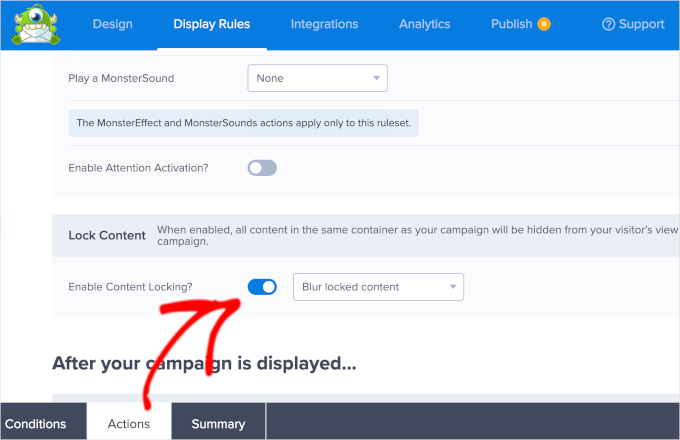
It’s a smart way to build your email list while giving potential students a sneak peek at what your course offers.
Additionally, I recommend using OptinMonster’s A/B testing feature to test different popup variations and see which ones resonate most with potential learners. By comparing results, you can fine-tune your strategy to improve sign-up rates.
Pros
- Boosts student sign-ups and email list growth.
- Customizable calls-to-action with 400+ templates.
- Simple drag-and-drop builder, no coding needed.
- The countdown timer creates urgency for course promotions.
- Content locking to gate course access and grow your email list.
- A/B testing for optimized conversion strategies.
Cons
- Limited free features.
Pricing: OptinMonster offers four pricing plans starting at $9 per month, with higher plans unlocking more features. It also provides a 14-day money-back guarantee, giving you time to test the plugin and decide if it’s the right fit.
Why I Chose OptinMonster: I love OptinMonster because it’s an incredibly powerful tool that helps you boost course sign-ups and grow your email list. It comes with customizable popups, advanced targeting features, and an easy-to-use editor. Plus, it allows you to create urgency and test strategies to improve your conversion rates.
8. Canva

Canva is a fantastic tool for creating graphics and visuals for your online courses, especially if you’re not a designer. Whether you need eye-catching course thumbnails or custom lesson slides, this design software makes it simple to make professional-level images.
One of Canva’s standout features is its library of customizable templates, which cover everything from lesson slides to social media posts. This makes it easy and quick to create visuals that match your course branding.
I also like that Canva offers a wide range of royalty-free stock photos, illustrations, and icons for your designs.
While some premium resources are available with Canva Pro, the free version offers plenty of options to get started. If you want more unique graphics, though, the paid version could be worth it.
Finally, Canva’s mobile app lets you create and edit designs on the go, making it easy to work on your course visuals whenever inspiration strikes.
Pros
- Easy to use for beginners and non-designers.
- Tons of customizable templates for course thumbnails, lesson slides, and promotional materials.
- Access to an extensive number of royalty-free stock photos, illustrations, and icons.
- Design on the go with Canva’s easy-to-use mobile application.
- The free version provides plenty of design options.
Cons:
- Some resources are only available in the Pro version.
Pricing: Canva‘s free plan includes basic features, such as access to over 250,000 templates and thousands of photos, graphics, and fonts. The pro version starts from $12.99 per month (or $119.99 per year). This plan includes additional features like 100+ million premium stock photos, videos, audio, a brand kit, and more.
Why I Chose Canva: I recommend Canva because it’s an intuitive, user-friendly design tool that allows anyone to create professional-looking course materials. Its vast library of templates and resources, combined with powerful customization options, makes it a top choice for creating engaging visuals for your online courses.
9. Google Slides
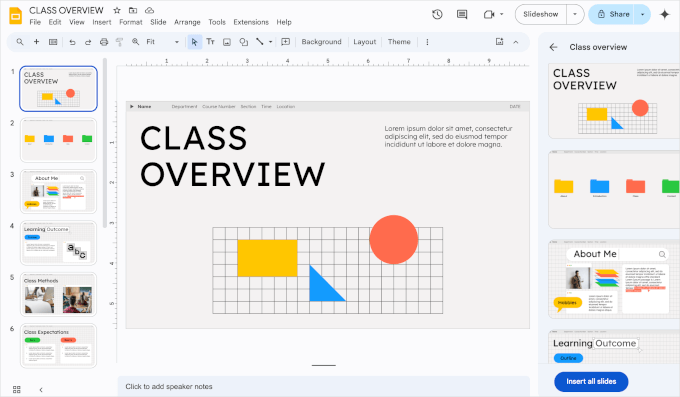
Google Slides isn’t just for presentations. It’s also a powerful tool for designing and delivering your online courses. With its sleek templates and easy customization, you can create visually appealing course previews, lead magnets, and sales materials that attract potential students.
As a course creator, you can use Google Slides to design engaging lesson breakdowns, highlight key takeaways, and create interactive slides that boost student engagement.
Plus, it’s easy to share. You can embed slides on your WordPress site, include them in email campaigns, or use them in free mini-courses to showcase your expertise.
For even more impact, you can repurpose your slides as downloadable PDFs or promotional materials for platforms like Udemy, Teachable, or your own student membership site.
Best of all, Google Slides is free, with a premium version available for extra features and flexibility. If you’re looking for a simple yet effective way to create and market your online course content, then this tool can be a game-changer.
Pros
- Free for personal use with a Google account.
- Customizable templates for creating visually appealing course materials easily.
- Ideal for creating course previews, lead magnets, sales materials, and interactive lessons.
- Simple to embed on WordPress websites, include in email campaigns, or integrate into mini-courses.
- Convert slides into PDFs or promotional materials for various platforms like Udemy or Teachable.
Cons
- Some advanced features are only available with a paid plan of Google Workspace.
- Limited offline access without a stable internet connection.
Pricing: Google Slides is free for personal use with a Google account. For businesses, Google Workspace subscriptions start at $6 per user per month, with higher costs for larger packages. A free trial is also available.
Why I Chose Google Slides: While often overlooked, Google Slides is an excellent choice for course creators who want to design professional, engaging learning materials without the need for complex software.
🚨 Alternative: Looking for a way to create beautiful and professional-looking lead magnets for your online course? Check out this detailed Beacon review to learn more about this powerful lead-magnet builder.
Best Online Course Communication Tools
Effective communication is key to creating a successful learning experience. You will need to stay connected with your students, provide support, and keep them engaged throughout their course journey.
Here are my top choices for communicating with students.
10. Constant Contact

Constant Contact is a powerful email marketing tool that can help you engage with your learners. For example, it allows you to personalize course emails and send them at the perfect time for engagement, keeping students informed and motivated throughout their learning journeys.
After thorough testing, I found that Constant Contact is a great choice for engaging students and growing your eLearning business.
With advanced segmentation and detailed reports, Constant Contact makes your email campaigns more targeted. You can group your audience based on course enrollment, progress, or past interactions, ensuring every message feels relevant.
Another standout feature is its automated drip campaigns. You can use this feature to create a welcome series for new students, making onboarding smooth.
Or you can use it to schedule lesson reminders based on the course timeline. It’s also a good idea to trigger follow-ups when someone finishes a module but hasn’t started the next one.
Automating actions based on student behavior is easy, too. For example, if a learner abandons their cart before enrolling, then you can send a follow-up email with a special discount.
Likewise, if someone hasn’t accessed their course in a while, you can send a re-engagement email with study tips or bonus materials to encourage them to return.
Pros
- Segment your audience based on course enrollment, progress, past interactions, or other categories to ensure relevant messaging.
- Set up automated email sequences like a welcome series, lesson reminders, and follow-ups based on student activity.
- Automates actions like sending discounts for cart abandonment or re-engagement emails for inactive learners.
- Reports to track email campaign performance and student engagement.
Cons:
- Email formatting can be a bit tricky for beginners.
- It has basic email analytics compared to some other options.
Pricing: Constant Contact offers a 60-day free trial, allowing you to send up to 100 emails and build your email list before committing to a paid plan. Their pricing starts with the Lite plan at $12 per month. This lets you send 10x your contact number in monthly emails and get access to professionally designed templates, automated welcome emails, and engagement reporting.
Why I Chose Constant Contact: I recommend Constant Contact due to its powerful yet beginner-friendly email automation features that can help you re-engage learners. Its 60-day free trial allows you to test its capabilities, and the automated drip campaigns make it easy to communicate with your students.
11. WebinarJam
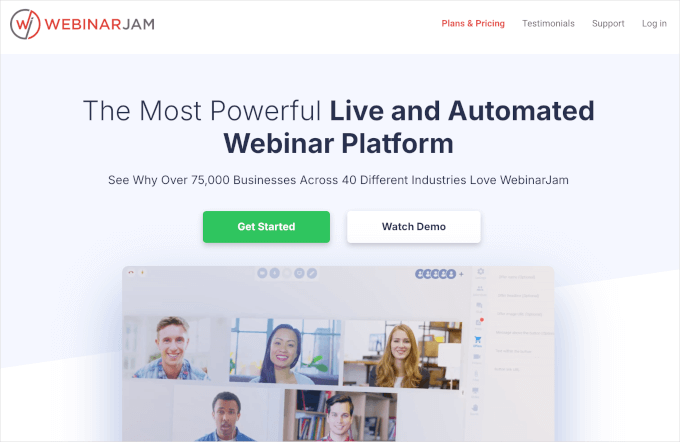
WebinarJam is a popular tool for hosting live webinars, and I recommend it for course creators who want to connect with groups of their students online.
We actually use WebinarJam for our own WPBeginner live workshops, and we’ve had a good experience. Our team has found WebinarJam’s interface simple to navigate, especially when hosting basic webinars or live learning sessions.
This software offers features such as unlimited live webinars, multiple hosts, live chat, webinar recordings, polls, and surveys. It also has email and SMS marketing tools, which allow you to follow up with learners after the live session has ended.
With WebinarJam, you can also find features like flexible scheduling, attendee handouts, and broadcasting to Facebook and YouTube. Plus, you can register extra team members, making it ideal for organizing online events of any size.
However, it can take some time to learn all the features, especially if you’re new to webinars. That learning curve can be a little intimidating for beginners.
Pros
- Interface for hosting basic webinars.
- Unlimited live webinars and multiple hosts.
- Includes live chat, webinar recordings, polls, and surveys.
- Email and SMS marketing tools.
- Flexible scheduling and attendee handouts.
- Broadcasting to Facebook and YouTube.
- Option to add extra team members.
Cons
- Learning curve for new users.
- Video quality could be better.
- Automating webinars requires an extra service (EverWebinar) at an additional cost.
Pricing: WebinarJam is a premium tool. Its plans start from $39/month, billed annually, and they’re great for smaller webinars. The tool allows up to 100 attendees per webinar with one host.
Why I Chose WebinarJam: I recommend WebinarJam because it offers powerful features that make hosting live webinars seamless and engaging. With unlimited webinars, multiple hosts, and interactive tools like live chat and polls, it’s perfect for connecting with students.
12. Google Meet
Google Meet is a great choice for coaching or one-on-one learning due to its ease of use and integration with Google Workspace. What I love about this tool is that it allows you to set up video calls quickly, share your screen, and collaborate seamlessly using tools like Google Docs and Sheets.
All these tools make Google Meet ideal for personalized coaching sessions or learning experiences where real-time interaction and content sharing are essential.
It’s also free to use for meetings up to 60 minutes and 100 participants, which should be more than enough for many online courses. You can read more about it in our comparison article on Google Meet vs Zoom: Which Is Better for Your Business?
Just keep in mind that it doesn’t have specific features for online courses, so it’s more of a communication medium.
Pros
- Easy to use with quick video call setup.
- Seamless integration with Google Workspace – Docs, Sheets, Slides, and more.
- Free plan for meetings up to 60 minutes with 100 participants.
- Ideal for personalized coaching and real-time collaboration.
Cons
- Limited to 60-minute meetings on the free plan.
- Fewer features compared to some other webinar tools.
Pricing: Google Meet offers a free plan, which allows unlimited one-on-one meetings and group meetings lasting up to 60 minutes with a maximum of 100 participants. For those needing more features, the Google Workspace Essentials plan is available for $8 per user per month. This plan supports group meetings with up to 150 participants and additional features like custom meeting links and file sharing.
Why I Chose Google Meet: I chose Google Meet because it offers a free and easy way to call your students and even host group calls.
13. Facebook (Group)
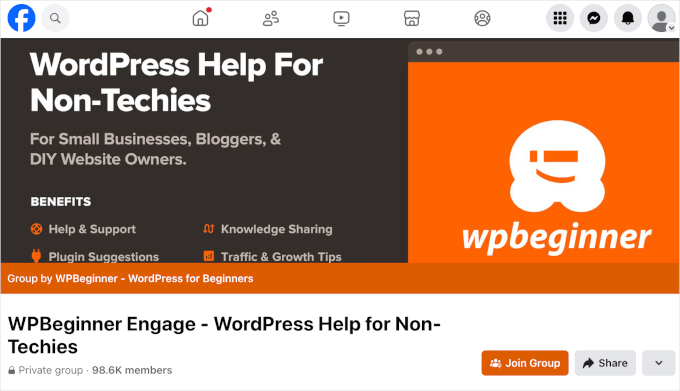
A Facebook group can be a great place to connect with your learners, offer support, and create a sense of belonging. You can also engage with new students who are just discovering your course.
For example, we have the WPBeginner Engage Facebook group with more than 98,000 active members. WordPress users can post their questions and get help with WordPress, interact with each other, and more.
Facebook groups let you promote your content, share updates, and even host discussions. For course creators, they’re a great way to build a learning community. You can create a space where your students can interact with each other, ask questions, and get extra help.
It’s also a perfect forum for group learning because it allows you to post lessons, answer queries, and foster engagement in a more personal way. Plus, you can keep your community active and engaged, helping students stay motivated throughout the course.
However, while Facebook Groups are free to create and use, it’s good to keep in mind that you don’t have full control. Since the platform sets the rules, there’s always a small chance your group could be limited or removed.
Pros
- Facebook groups are completely free to create and use.
- Great for building a learning community where students can get extra help and support.
- Gives you a space for content promotion, sharing updates, and hosting discussions to boost the learning experience.
- Provides a platform for learners to connect, ask questions, and engage with each other, creating a sense of belonging.
Cons
- Subject to Facebook’s terms of use and algorithm.
- File sharing limitations.
Pricing: Creating a Facebook group is completely free.
Why I Chose Facebook (Group): A Facebook Group provides an easy, cost-effective way to build a vibrant, engaged community. Plus, it’s free, making it an accessible option for course creators looking to enhance engagement without breaking the budget.
Best Online Course Recording and Editing Tools
If you’re thinking about offering video learning, then creating high-quality videos is key to engaging your audience.
Let’s check out the best camera, microphone, and editing software for your video courses.
14. Sony Alpha ZV-E10

We have a professional video team here at WPBeginner, and they consistently recommend the Sony Alpha ZV-E10 for course creators looking to capture high-quality video content. I decided to put it to the test and discovered that it has excellent autofocus. This ensures that your shots stay sharp even if you’re moving around during your recordings.
The ZV-E10 doesn’t impose any time limits on your recordings, so you can film extended lessons or tutorials without interruption. However, keep in mind that your recording time will ultimately be limited by the capacity of your memory card and the battery life of the camera.
For longer sessions, make sure you have a large enough memory card and consider having a spare battery on hand. You can also power the camera via USB-C while filming, which is super handy for those marathon recording days.
I also really like that it can shoot in 4K. This is especially important for online courses, where clear visuals can make a huge difference in the learning experience.
Another feature that I appreciate is the ability to connect the camera to a computer via USB-C and use it as a webcam without any additional software. This is great for live teaching sessions, webinars, or video conferences.
Despite all these pro-level features, the ZV-E10 is still budget-friendly for a starter camera. It’s an excellent choice for course creators who want top-notch video quality without overspending.
Pros
- Excellent autofocus for sharp and smooth focus, even during movement.
- No recording limits – record continuously without worrying about time constraints.
- Stunning 4K video support for professional-quality content.
- USB-C charging while recording, perfect for long sessions.
- Seamless webcam integration via USB-C without any additional software.
- Budget-friendly – great features at an affordable price.
Cons
- If you’re filming without a tripod, videos might be a bit shaky because there’s no built-in stabilization.
- The camera might get too hot during long 4K videos.
Pricing: Starts at $645, depending on the color option and any addons included at checkout. For example, the white model is priced at $798, and you can bundle it with extras like a microphone, lens, or tripod.
Why I Chose Sony Alpha ZV-E10: Its excellent video quality, combined with user-friendly features for content creators, makes the Sony Alpha ZV-E10 stand out. It offers 4K video recording with reliable autofocus, great for capturing professional videos. Plus, it has a great balance of cost and features, perfect for those who want good value for their investment.
💡 Expert Tip: A stabilizer like the Rode Vlogging Kit can keep your videos steady while also improving sound with its built-in mic.
Good lighting is just as important. The Sensyne 10” Ring Light offers adjustable brightness and colors to enhance your indoor shots.
15. Hollyland Lark M1

For a high-quality, budget-friendly wireless microphone, the Hollyland Lark M1 is a top choice for course creators. Our video team uses it for their video content, and it delivers professional sound without the hassle of cords or complex setups.
The Hollyland Lark M1’s built-in noise reduction ensures clear audio in any environment. Whether you’re filming in a busy space or outdoors, your learners will always hear you without distractions.
The charging case keeps your mics powered and ready to go, making it easy to stay charged during long recording sessions. I also like that it is compact and portable, perfect for on-the-go filming.
For live teaching sessions, the 2-transmitter combo lets you mic up two people simultaneously. So, whether you’re teaching with a co-instructor or hosting a webinar with a guest expert, this feature ensures synchronized audio for both speakers.
Plus, the Lark M1 is compatible with many different cameras and smartphones. Whether you’re using a DSLR for polished videos or recording on your phone (both iPhone and Android), you can count on excellent sound.
Pros
- Wireless mic with advanced noise reduction for clear, professional audio in any environment.
- The portable charging case ensures your mics are always powered and ready for use.
- 2-transmitter combo allows for simultaneous recording of two people, perfect for interviews or co-teaching sessions.
- Broad compatibility with cameras and smartphones (iPhone and Android).
Cons
- Limited wireless range may cause audio signal loss in large spaces.
- Signal interference in areas with many devices may affect audio quality.
Pricing: The Hollyland Lark M1 offers two microphone setups:
- 2TX + 1RX (2 Transmitters, 1 Receiver) – Ideal for two-person recordings; starts at $59.00.
- 1TX + 1RX (1 Transmitter, 1 Receiver) – Best for single-speaker setups; starts at $29.00.
Why I Chose Hollyland Lark M1: The microphone stands out for its affordability and performance. Its compact design and included charging case are convenient, while features like built-in noise reduction help with audio clarity. This makes the Hollyland Lark M1 a practical choice for creators seeking reliable audio without a high price tag.
🚨 Alternative: Røde PodMic is another great option, but it’s more expensive and better suited for advanced users. It delivers professional sound and can be connected to mixers, computers, and your cell phone.
16. Camtasia

Camtasia is a top video editing choice for online course creation, but it’s also versatile enough for other professionals who need dynamic video content. It stands out for its strong screen recording capabilities, perfect for crafting tutorials, presentations, and screen demos.
During testing, I found Camtasia’s video editor to be intuitive and user-friendly. It supports a variety of basic editing features, such as cutting footage, adding transitions, and incorporating effects or annotations.
Camtasia also includes advanced options like animations, cursor effects, and green-screen capabilities. It even has AI-powered tools to make content creation even easier:
🖼️ AI Image Generation – Create unique images for your videos using artificial intelligence.
🗑️ AI-Assisted Background Removal – Easily remove or replace backgrounds in your videos.
🎙️ Natural-Sounding AI Script and Voice Generation – Generate scripts and voiceovers that sound natural and professional. This ensures high-quality audio without the need for a studio setup.
Additionally, you can make your learning videos interactive with features like clickable hotspots, quizzes, and surveys.
Camtasia is available on both Windows and macOS. And you can easily record your screen, voice, and webcam all at once. Importing existing audio and video is easy, too, giving you even more flexibility in creating your content.
Pros:
- Comprehensive editing features, both basic and advanced.
- Strong screen recording capabilities, ideal for creating tutorials, presentations, and screen demos.
- AI image generation, AI-assisted background removal, and natural-sounding AI script and voice generation.
- Interactive learning features such as clickable hotspots, quizzes, and surveys.
- Allows for the recording of screen, voice, and webcam simultaneously.
- Easy importing of existing audio and video tracks.
- Available on both Windows and macOS.
Cons:
- It can be a bit expensive for beginner course creators.
- It has a learning curve.
Pricing: Starts at $179.88/year.
Why I Chose Camtasia: I recommend Camtasia for its outstanding screen recording and video editing capabilities, perfect for online course creation. Its interactive features, like quizzes and hotspots, boost learner engagement. Plus, cross-platform compatibility and easy media importing add flexibility for producing quality video content.
🚨 Alternatives: If you’re looking for a free solution, then Davinci Resolve is a great option. It comes with professional-grade video editing tools and color correction features, which are ideal for course creators who need advanced capabilities without high costs.
Canva also offers a built-in video editor. It’s easy to use, packed with templates, and works on Windows, Mac, iOS, and Android.
For more advanced editing, Adobe Premiere Pro is a top choice. It has AI-powered tools to help automate tasks, making professional-quality video editing more efficient. However, it can be very expensive for beginner course creators.
What Are the Best Course Creation Software and Tools?
When creating and promoting your online courses, choosing the right tools is essential to reaching the right audience and getting more student signups.
The right software can help you design professional-looking courses, engage your students, and even grow your audience. Whether you’re just starting or looking to take your course to the next level, using the best tools in each area can make all the difference.
Here are some of my top recommendations to help you build, manage, and promote your courses effectively:
- MemberPress: MemberPress is a powerful and easy-to-use learning management system (LMS) for managing your courses and students. It lets you create and sell online courses, manage memberships, and even set up different access levels for your students.
- OptinMonster: Want to attract more students? OptinMonster helps you create popups and other engaging optins to promote your online courses, increase signups, and grow your email list.
- Constant Contact: Keeping your students engaged and informed is crucial for a successful online course. Constant Contact lets you send welcome emails to new students, automated lesson reminders, and personalized announcements to keep everyone on track.
- Sony Alpha ZV-E10: A fantastic choice for creators who want professional-looking videos without breaking the bank. Its excellent autofocus ensures your videos stay sharp, even if you move around while filming. Plus, you can easily use it as a webcam for live sessions, making it a versatile tool for any course creator.
FAQ About Course Creation Software and Tools
Let’s go through some answers to some common questions about course creation tools and platforms.
Can I make money selling courses online?
Yes, selling courses can be quite profitable, especially if you target the right audience and provide valuable, high-quality content. Your success largely depends on how well you market your course and engage with your students.
Can I sell my course on Udemy?
Yes, you can sell your course on Udemy. It’s a popular platform for course creators because it provides a large audience and handles payment processing, but it also takes a share of your revenue.
What are the best online platforms for online classes?
Some of the best platforms for online classes include MemberPress, Teachable, and Thrive Apprentice. These platforms offer powerful features for creating, marketing, and selling your courses.
Is Teachable the best platform for offering online courses?
Teachable is a great choice for offering online courses due to its user-friendly interface and comprehensive feature set. However, whether it’s the best for you will depend on your specific needs and goals.
I hope this article has helped you find the best course creation software and tools. Next up, you might want to see our guides on how to create and sell online courses and how to run a virtual classroom.
If you liked this article, then please subscribe to our YouTube Channel for WordPress video tutorials. You can also find us on Twitter and Facebook.
The post 16 Best Course Creation Software and Tools (Expert Picks for 2025) first appeared on WPBeginner.


Is Google Marking Your Site as “Not Secure”? (& How to Fix It) 7 Apr 2:00 AM (yesterday, 2:00 am)
I know how frustrating it can be when you visit your website and see a big “Not Secure” warning in the browser. It feels like something’s broken—and worse, your visitors can see it too. 😬
That little message can scare people off before they’ve even had a chance to look around. They might leave without reading a word, filling out a form, or making a purchase.
Google shows this warning when your site doesn’t have an SSL certificate. That means your site isn’t using HTTPS, and the browser is letting visitors know their connection might not be private.
Luckily, the fix is straightforward, and I’ll walk you through it step by step. I’ve used the same process on my own websites and helped countless others do the same with WordPress.
🌟Expert Tip: Not confident about fixing errors yourself? Why not leave things to the professionals?
Our team at WPBeginner offers Emergency WordPress Support Services, available 24/7. We can fix everything from SSL errors to plugin issues at affordable prices for small businesses and website owners.
Ready to learn more? Just book a free consultation call today!
Why Does Google Show “Not Secure” on Your Website?
When I see the “Not Secure” warning pop up on a site, I know it usually means one thing: the site isn’t fully encrypted. Google shows this warning when a website doesn’t use HTTPS or there’s something wrong with its SSL certificate.
For reference, HTTPS (Hypertext Transfer Protocol Secure) is the secure version of HTTP. It uses something called an SSL/TLS certificate to encrypt the connection between your website and your visitors.
And the Google “Not Secure” message isn’t just a minor warning you can ignore. Most visitors don’t stick around when they see that alert. It signals a lack of trust, and that affects everything from conversions to your search rankings.
Let me walk you through the four most common reasons I’ve seen this warning appear on WordPress websites.
1. Your Website Doesn’t Have an SSL Certificate
SSL certificates encrypt the connection between your website and your visitors. Without one, browsers assume your site is unsafe, because technically, it is. Any data people enter on your site, like personal or credit card details, could be intercepted.
That’s why Chrome and other browsers flash the “Not Secure” warning for sites that still use plain HTTP. I’ve seen this happen to brand-new sites where SSL just wasn’t enabled yet, or even older sites where it was never installed.
2. Your SSL Certificate Is Expired or Invalid
Sometimes the SSL certificate is there, but it’s expired or wasn’t installed properly. This is one of the first things I check when someone asks why their site suddenly shows a warning.
You can usually spot this SSL issue by clicking the padlock (or the missing padlock) in your browser’s address bar.

If there’s a problem, then your hosting provider should be able to help you renew or reinstall the certificate.
3. Your Website Has Mixed Content Issues
Even with a valid SSL certificate, your site can still show as “Not Secure” if it’s loading some content over HTTP. I’ve seen this a lot when people switch their site to HTTPS but forget to update old links to images, scripts, or stylesheets.
This is known as mixed content, and browsers don’t like it. The fix is simple—you just need to update any insecure URLs so everything loads over HTTPS. Later in this tutorial, I will show you how to do this.
4. Your Site Has HTTP URLs in WordPress Settings
Another thing I always double-check is the site URL settings inside WordPress. If the WordPress Address or Site Address is still set to HTTP, your site may continue to trigger security warnings even if SSL is working fine.
You can find these settings by going to Settings » General in your WordPress dashboard. Then, switch both URLs to use HTTPS to ensure that every page loads securely. I will show you how to do this later on.
Now that I’ve covered what causes the “Not Secure” warning, let’s take a look at how to fix it and prevent it from coming back.
How to Fix the “Not Secure” Warning in Google Chrome
Seeing the “Not Secure” warning on your site can be frustrating. You want your visitors to feel safe, not greeted with a warning label.
Luckily, the fix usually isn’t complicated. In most cases, it comes down to enabling an SSL certificate, updating a few WordPress settings, or cleaning up what’s known as mixed content.
I’ve gone through this troubleshooting process on dozens of sites—both my own and for others—and I’ll show you exactly what to do to secure your site and get rid of that warning for good.
Here are the steps I will cover:
- Step 1. Get a Free SSL Certificate for Your Website
- Step 2. Update Your WordPress URLs to Use HTTPS
- Step 3. Fix Mixed Content Issues in WordPress
- Step 4. Set Up an HTTP to HTTPS Redirect in WordPress
- Step 5. Test Your SSL Setup for Security Issues
- Make Your Site Feel Safe for Every Visitor
- Bonus Resources
Step 1. Get a Free SSL Certificate for Your Website
The first thing I do when fixing a “Not Secure” warning is check if an SSL certificate is installed. This small piece of security tech encrypts data between your website and visitors—and it’s what enables HTTPS.
Years ago, SSL certificates could be expensive. Some companies still charge a premium, but the good news is you don’t need to pay for one, especially if you’re just starting out.
Most WordPress hosting providers now offer free SSL certificates with their plans. I’ve used this option on dozens of websites, and in most cases, enabling it only takes a couple of clicks from your hosting dashboard.

If you’re using Bluehost, just log in to your account and head to your website settings. Then click the ‘Security’ tab.
From there, you’ll see the option to enable the free SSL certificate. Just toggle it on, and you’re good to go.
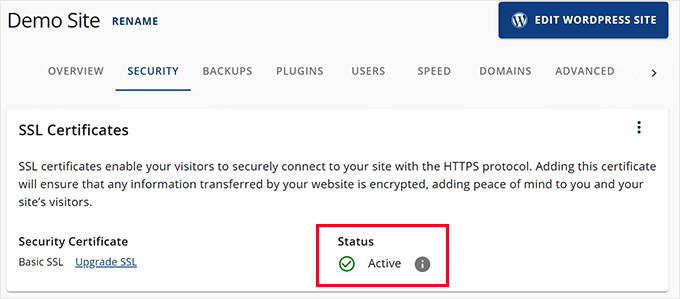
Note: The screenshots above show the Bluehost dashboard. If you’re using a different host, then things might look slightly different, but the SSL setting is almost always in the security section.
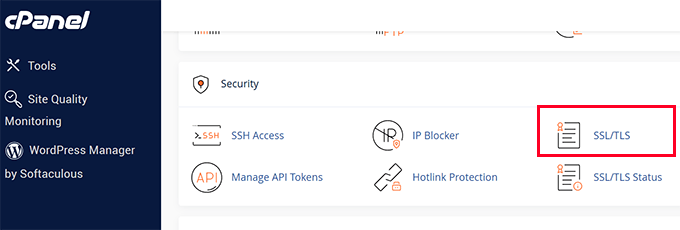
For hosts that use cPanel, you’ll need to launch it from your hosting dashboard. Scroll down to the ‘Security’ tab and click on the SSL/TLS icon.
And if your host doesn’t offer free SSL, don’t worry—you can still get one through Let’s Encrypt.
We have a detailed tutorial showing you exactly how to do it: How to Add Free SSL in WordPress with Let’s Encrypt.
Step 2. Update Your WordPress URLs to Use HTTPS
Even with an SSL certificate, your site might still load as “Not Secure” if the WordPress settings are incorrect. You can fix this by updating your site’s URL.
Simply go to the Settings » General page in your WordPress dashboard.
Then, make sure both the ‘WordPress Address (URL)’ and ‘Site Address (URL)’ fields use https:// instead of http://.
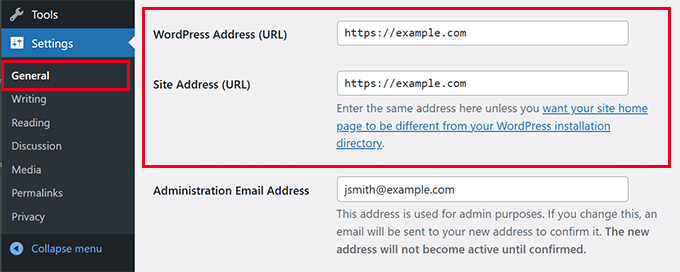
Don’t forget to click on the ‘Save Changes’ button to store your settings.
WordPress will now start using https:// for all URLs across your website. However, some HTTP URLs may still be stored in your WordPress database, which may cause issues moving forward.
Next, I will show you how to fix those URLs easily.
Step 3. Fix Mixed Content Issues in WordPress
One reason for the ‘Not Secure’ warning is mixed content issues. This happens when some parts of your website load using an HTTP (insecure) URL.
Almost all of these URLs are stored in your WordPress database and added by your WordPress theme or plugins. You may also have http:// URLs in your blog posts and pages.
To fix this, you will need a search and replace plugin to find http URLs and replace them with https://. The best plugin for the job is Search & Replace Everything.
I use Search and Replace Everything because it is fast and efficient. More importantly, it is super easy to use even for beginners.
Tip💡: There is also a free version of Search & Replace Everything that you can use.
First, you need to install and activate the Search and Replace Everything plugin. For details, you can see this guide on how to install WordPress plugins.
Upon plugin activation, go to the Tools » WP Search & Replace page to start using the plugin.
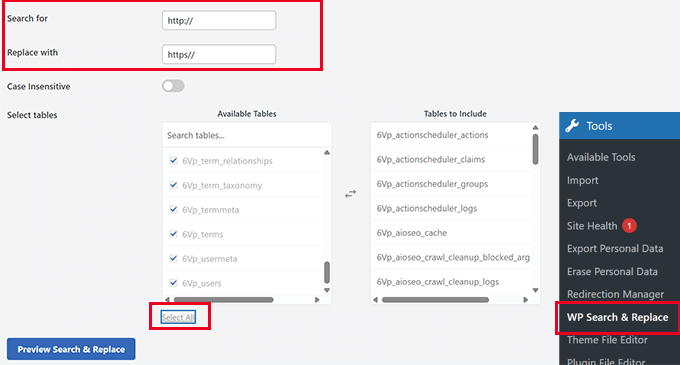
In the ‘Search for’ field you need to enter http:// and in the ‘Replace with’ field add https://.
After that, you need to click on ‘Select All’ to ensure all tables in your WordPress database are included in the search.
Finally, click on the ‘Preview Search & Replace’ button.
The plugin will then perform the search and show you a preview of the results. This allows you to review the data before it is permanently changed.
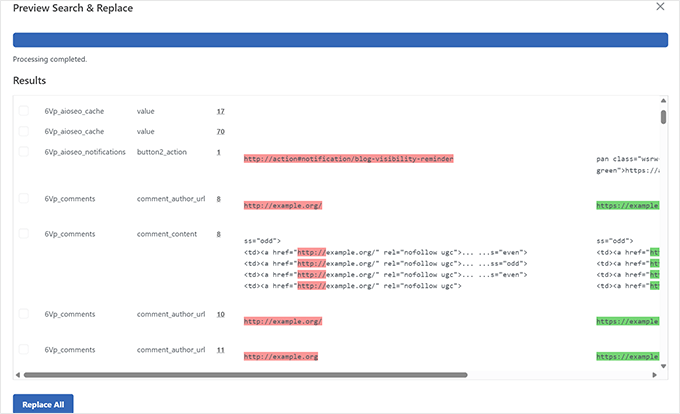
Carefully review the results, and once you are satisfied, click on the ‘Replace All’ button.
The plugin will then make changes to your WordPress database and replace all HTTP URLs with HTTPS.
For more details, see this guide on how to fix the mixed content error in WordPress.
Step 4. Set Up an HTTP to HTTPS Redirect in WordPress
After switching a site to HTTPS, one of the steps I never skip is setting up a redirect from HTTP to HTTPS. Without it, people might still land on the insecure version of your site through old links or bookmarks.
The most reliable way to fix this is by adding a redirect rule to your .htaccess file. Here’s the snippet I use on most WordPress websites:
RewriteEngine On
RewriteCond %{HTTPS} !=on
RewriteRule ^(.*)$ https://%{HTTP_HOST}%{REQUEST_URI} [L,R=301]
For details, see this guide on how to fix the WordPress .htaccess file.
If your website is running on Nginx instead of Apache, then you’ll need to set up the redirect differently.
Instead of editing a .htaccess file, you’ll need to update your Nginx configuration.
Here’s the code I would add to redirect all HTTP traffic to HTTPS in Nginx:
server {
    listen 80;
    server_name yoursite.com www.yoursite.com;
    return 301 https://yoursite.com$request_uri;
}
You’ll want to place this block above the existing HTTPS server block in your site’s Nginx config file—usually found in /etc/nginx/sites-available/ or /etc/nginx/conf.d/.
Once you’ve added the redirect, don’t forget to reload Nginx for the changes to take effect:
sudo nginx -s reload
If you’re not sure where to make the change, it’s a good idea to reach out to your hosting provider.
Step 5. Test Your SSL Setup for Security Issues
After making these changes, you should test your website to ensure everything is working correctly.
You can use the SSL Labs SSL Test to check your certificate and confirm your site is fully secured. Simply enter your domain name, and it will check the SSL implementation on your domain name.
Another alternative tool that I have often used is Why No Padlock? What I like about it is that it explains issues in plain language, which is helpful for beginners.
Finally, try visiting your site in Incognito mode. If you still see the “Not Secure” warning, you need to clear your WordPress cache or wait a few minutes for changes to take effect.
Make Your Site Feel Safe for Every Visitor
No one wants their site to scare away visitors with a browser warning. The biggest damage is losing the trust of your customers and visitors.
I hope this guide helped you fully secure your WordPress site with HTTPS so that your visitors won’t have to think twice about trusting it.
Bonus Resources
I follow this WordPress security guide on all websites I work on. This step-by-step guide offers an easy action plan to properly secure your WordPress website.
The following are a few additional resources that I think you’ll find helpful:
- How to Renew SSL Certificate (Step by Step for Beginners)
- TLS vs SSL: Which Protocol Should You Use for WordPress?
- Ecommerce Security Tips: How to Secure Your WordPress Store
- How to Add HTTP Security Headers in WordPress (Beginner’s Guide)
- Most Common WordPress Errors and How to Fix Them
If you liked this article, then please subscribe to our YouTube Channel for WordPress video tutorials. You can also find us on Twitter and Facebook.
The post Is Google Marking Your Site as “Not Secure”? (& How to Fix It) first appeared on WPBeginner.
How to Make a Car Rental Website with WordPress (Step by Step) 4 Apr 2:00 AM (4 days ago)
Running a car rental business without a proper website is like trying to drive with the parking brake on – you’re just making things harder for yourself. I learned this firsthand when helping a friend create a website for his rental company.
Whether you’re starting fresh or upgrading an existing rental business, creating a professional website doesn’t have to be complicated or expensive. With WordPress, you can build a fully functional car rental site that handles everything from showing off your vehicles to processing bookings.
In this guide, I’ll show you the exact steps to create your car rental website in WordPress. I’ve done all the research and testing, so you can skip the headaches and get straight to growing your business.

Why Build a Car Rental Website with WordPress?
Are you fed up with juggling multiple phone calls and emails from customers who are trying to get information about your car rentals?
A WordPress website can be a game-changer for your business, providing a one-stop shop where customers can find everything they need.
A good website can handle all the heavy lifting: customers can browse your fleet of vehicles, compare different packages, read reviews, and even reserve a car directly through your site. This not only saves you time but also improves the overall customer experience.
Plus, a car rental website is your chance to get seen by a whole new crowd.
Think about it: people are constantly searching online for things like ‘car rentals near me,’ ‘affordable SUVs,’ or ‘weekend car deals.’ If you don’t have a website, then these people won’t find you. It’s that simple.
A car rental website acts like a 24/7 billboard, showing off your fleet and prices to potential customers who are actively looking for what you have to offer.
That said, let’s help you create a car rental website. I cover a lot in this guide, so feel free to use the quick links below to jump straight to the section you want to learn about:
- Choose Your Car Rental Website Builder
- Set Up Your Website Hosting
- Install WordPress on Your Web Hosting
- Select a WordPress Car Theme
- Create a Custom Home Page
- Add More Pages
- Add a Contact Us Form
- Add a Click-to-Call Button
- Accept Online Reservations
- Alternative: Use a Simple Car Rental Booking Form
- Create a Stunning Vehicle Display
- Guide Customers to Your Door
- Showcase Your Rental Options
- Display Customer Reviews
- Create a Navigation Menu
- Add Social Media Feeds (Optional)
- Publish Valuable Content (Optional)
- Use FOMO to Drive Car Rental Reservations (Optional)
- Bonus Tips: How to Grow Your Car Rental Website
You’ll notice I have some “optional” steps, but I highly recommend you try them if you really want your website to drive sales and boost revenue.
✋ If you’re a busy business owner, then creating a website might feel like too much to handle. WPBeginner is here to help!
Our team of experts can handle every step of creating a custom car rental website, from design to development. That way, you can focus on what matters most: providing excellent service to your customers and growing your car rental business.
We will work closely with you to create a custom-designed website that showcases your fleet of vehicles, highlights your services, and makes it easy for customers to book rentals online. Just book a free consultation call to get started!
Step 1: Choose Your Car Rental Website Builder
First things first, before building a car rental website, you’ll need a powerful platform that can handle lots of traffic and give your customers a smooth ride. That’s why I recommend WordPress.
There are lots of different website builders out there, but WordPress stands out for business owners seeking a user-friendly, reliable, and budget-friendly solution.
In the car rental industry, every cent counts. The awesome thing about WordPress is that it’s open-source and totally free to use. That means more money to spend elsewhere – whether that’s marketing, keeping your fleet in tip-top shape, or buying new vehicles.
For more on this topic, see our article on why WordPress is free.
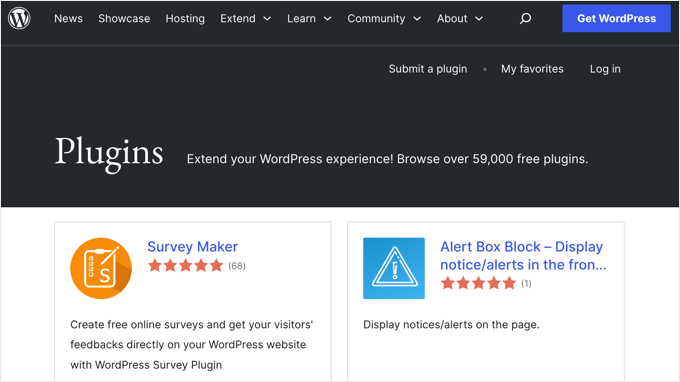
Here’s where it gets really good: WordPress has a massive plugin library, with over 59,000 plugins on WordPress.org alone.
Think of plugins as little add-ons that do specific things. For your car rental website, you might use car plugins to manage bookings, showcase customer reviews, and display eye-catching photos of your fleet.
With the right plugins, you can really streamline your business and boost those bookings.
And get this: according to our blogging statistics, WordPress powers almost 43% of all websites. That’s a huge number, proving just how reliable and scalable it is. Perfect for growing your business online!
Now, let’s get a bit more technical: there are two types of WordPress software, so it’s important to pick the right one.
First up is WordPress.com, which is a blog hosting platform. Then there’s WordPress.org, also known as self-hosted WordPress. For a car rental website, I recommend WordPress.org because it gives you the freedom to use all those must-have WordPress plugins without an expensive plan.
For a deeper dive into why I consistently recommend WordPress, see our complete WordPress review.
☝ Have you already created a site on WordPress.com? Don’t worry! I have a step-by-step guide on how to migrate your website from WordPress.com to self-hosted WordPress, ensuring a smooth transition for your car rental business.
Step 2: Set Up Your Website Hosting
Before you can create a professional and user-friendly car rental website, you’ll need a few things in place.
First up, you need a domain name. This will be your online address, where potential customers can see your cars, check your rates, and book rentals.
You’ll also need a web hosting plan, which is where your website lives online. You’ll want to make sure you pick a reliable host that keeps your site running 24/7. After all, if your car rental website experiences downtime, you’ll almost certainly miss out on bookings.
To make your life easier, we’ve hand-picked some of the best WordPress hosting you can buy.
☝ While WordPress itself is free, domain names and hosting costs can add up quickly. To help you budget, we’ve created a guide on how much it costs to build a WordPress website, so you can avoid any unexpected expenses.
A domain name typically costs $14.99/year, and hosting costs start from $7.99/month. This may sound manageable, but it tends to add up over time.
Here’s the good news: WPBeginner has an exclusive deal with Bluehost. They’ve agreed to offer WPBeginner readers a huge discount on web hosting, plus a free domain. You can click the button below to get started for as little as $1.99 per month.
Once you’re on the Bluehost website, just click the green ‘Get Started Now’ button.
This takes you to the pricing page, where you can choose a hosting plan.
For a car rental website, I recommend picking either the ‘Basic’ or ‘Choice Plus’ plan, as they have everything you need.
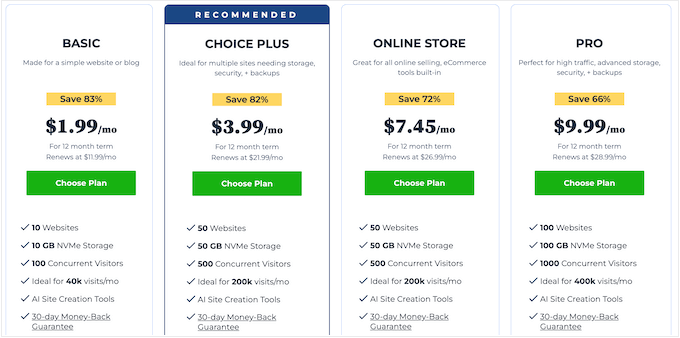
After choosing a plan, go ahead and click ‘Continue.’
Next, it’s time to choose a domain name for your car rental website.
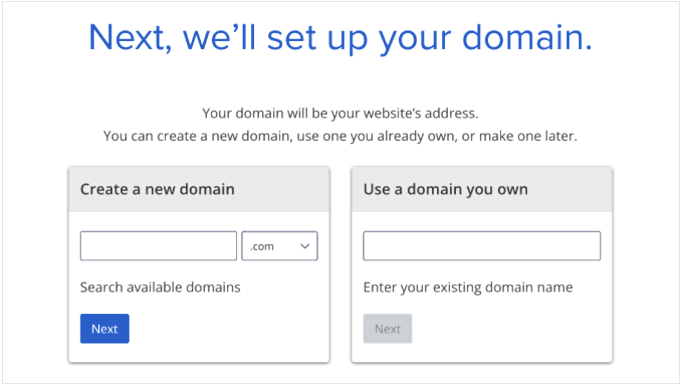
Remember that a domain is your online address, so it should be easy to remember and say, and fit your brand. The name of your car rental business is usually a good option.
For example, if your rental business is called Speedy Rides, then speedyrides.com is a solid choice.
However, if that domain name isn’t available, then you can experiment by adding helpful information like location or the type of vehicles you rent.
For instance, if you specialize in luxury cars in Austin, then you could try SpeedyLuxuryRides.com or SpeedyRidesAustin.com.
The key is keeping it relevant and easy to understand. Play around with different combinations until you find something you like.
💡 Struggling for inspiration? Check out our guide on how to choose the best domain name.
Now, go ahead and click the ‘Next’ button after choosing a domain name.
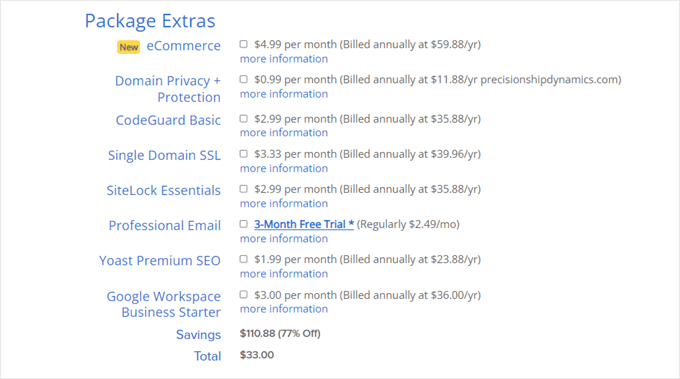
Bluehost will now ask for your account information, such as your name and email address. You’ll also get a chance to buy some optional extras.
I typically don’t recommend buying these extras right away if you’re trying to keep costs down. Plus, you can always buy them later if your car rental business needs them.
That done, simply type in your payment information to complete the purchase.
After a few moments, you’ll get an email with instructions on how to log in to your web hosting control panel. This is the dashboard where you can manage your car rental site, including setting up email notifications and asking for WordPress support.
Step 3: Install WordPress on Your Web Hosting
When you sign up using the Bluehost discount link, Bluehost will install WordPress on your domain name automatically.
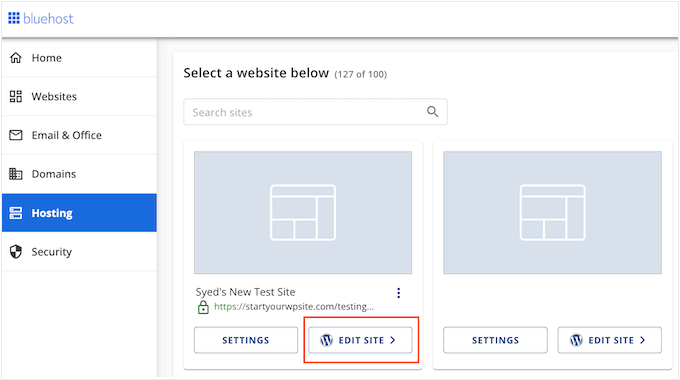
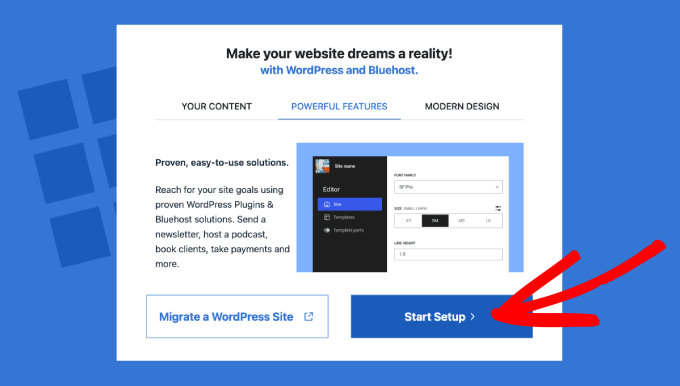
Give it a few minutes to load, and then click the ‘Edit site’ button so you can set up your new website.
At this point, a window will appear asking if you want to migrate a WordPress site or start a new setup.
Since you’re creating a new car rental site, click the ‘Start Setup’ button.
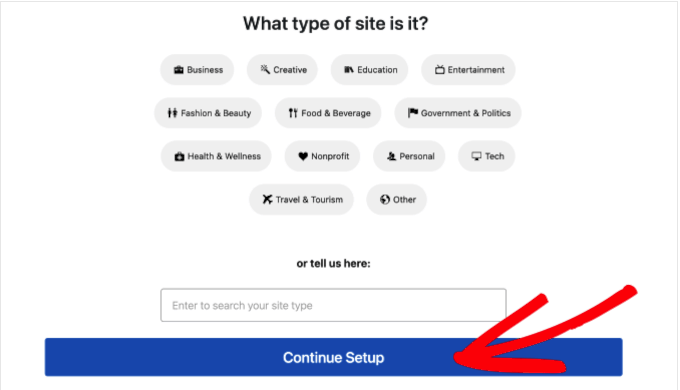
The setup wizard will now ask for some basic information, such as the type of website you’re building.
You can now choose the category that best fits your site. For a car rental site, you’ll typically select ‘Business,’ but you can choose any category you want. After that, click ‘Continue Setup.’
Once you’ve gone through the entire Bluehost WordPress setup wizard, click on ‘Complete Setup.’
Bluehost will now take you to the WordPress admin area.
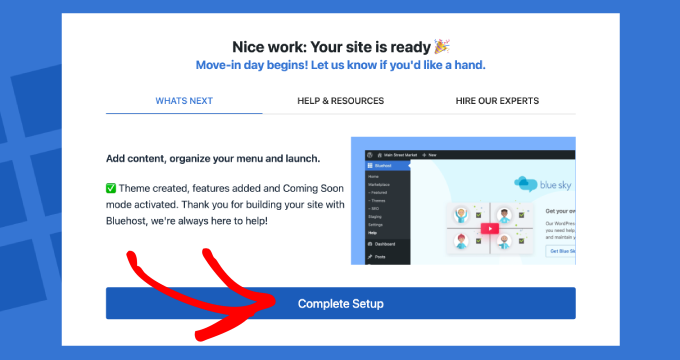
You can also log in to the WordPress dashboard by heading to yoursite.com/wp-admin/ directly in your web browser.
Are you using a different WordPress website host such as SiteGround, Hostinger, HostGator, or WP Engine? See our complete guide on how to install WordPress for step-by-step instructions.
Now that the setup is out of the way, you’re ready to start building your car rental website.
Step 4: Select a WordPress Car Theme
So, you’ve got your domain and hosting – now it’s time to make your website look fantastic.
After all, it’s the first thing potential customers will see, so it’s important to make a great first impression.
WordPress comes with a default theme, but it’s not ideal for a professional car rental site.

When choosing a theme for your rental website, you should look for something that reflects your brand identity. Are you aiming for a luxurious and sophisticated feel, or do you specialize in budget-friendly vehicles?
You should also think about the content you’ll be showing.
Do you have a ton of car photos taken by a professional photographer? Then, make sure your WordPress theme can handle a big gallery.
Want to display your cars in a listing format? Look for a theme that supports this layout and perhaps even has built-in searching and filtering options.
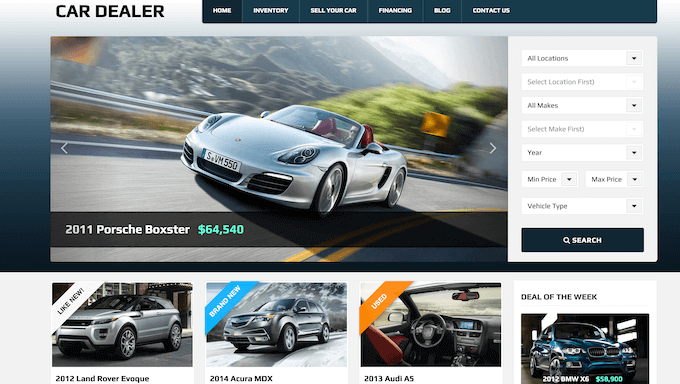
To help you out, my team has collected the best themes for car dealerships and the best themes for auto repair shops.
Many of these themes have features designed specifically for the automotive industry, such as a built-in Vehicle Identification Number (VIN) decoder.
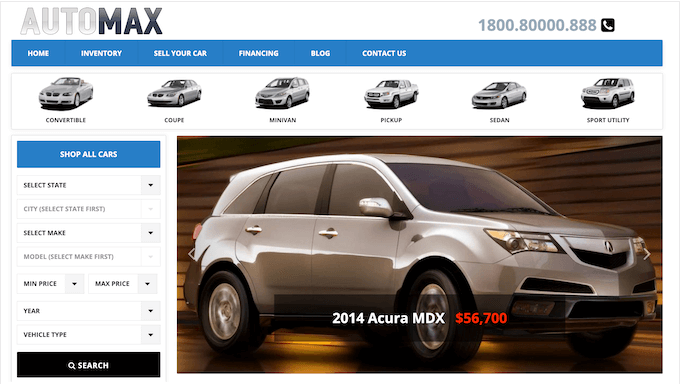
Don’t worry if you’re not technical! We’ve created a step-by-step guide on how to install a WordPress theme, so your car rental website will look great in no time.
After installing your theme, you can customize it by heading over to Appearance » Customize in the WordPress dashboard. This will launch the theme customizer, where you can fine-tune the theme settings and see your changes in the live preview.
Are you using one of the newer full-site editing (FSE) themes? Then you’ll need to go to Appearance » Editor instead. This launches the full site editor, where you can add, remove, and edit the blocks in your WordPress theme. It’s super intuitive.
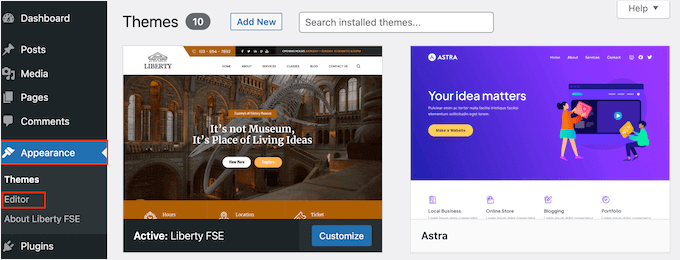
Another option is using a website and landing page builder plugin like SeedProd.
SeedProd is a drag-and-drop page builder that’s super popular and easy to use. We’ve used it to build many of our partner websites, including the Duplicator, WPForms, and WP Charitable websites.
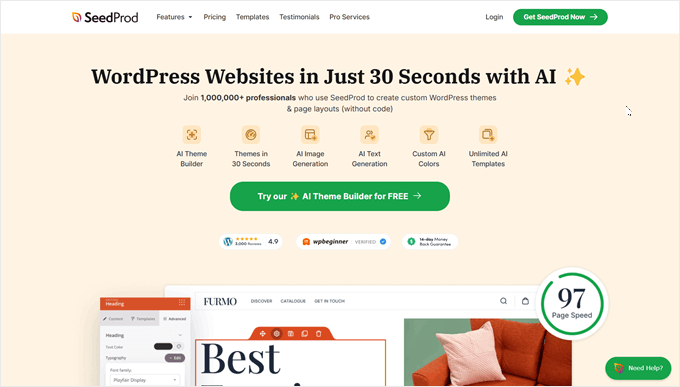
With SeedProd, you can create stunning landing pages, homepages, and even entire websites.
It also comes with ready-made templates designed specifically for the automotive industry.
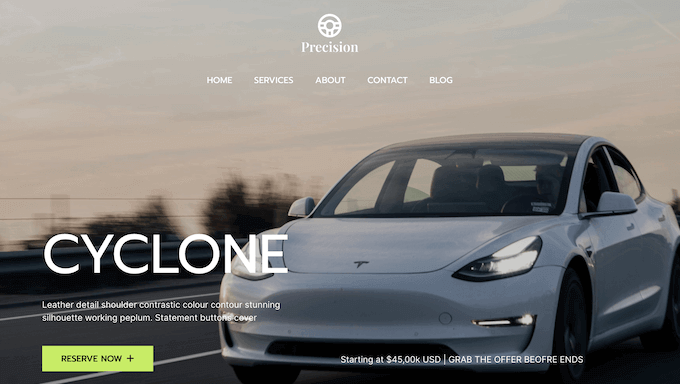
There’s even a dedicated car rental template that you can use.
As you can see, this template has a ready-made section where you can display your fleet.
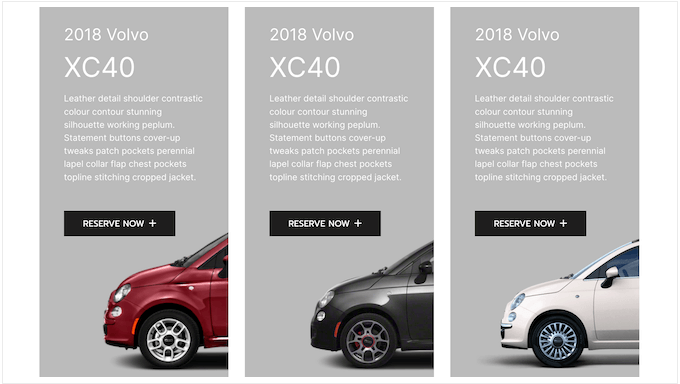
You can easily upload your own photos and details, so it’s super simple for customers to find what they’re looking for.
The template also has a ‘Reserve Now’ call to action button that you can customize to seamlessly integrate with your booking or inventory management system (more on that later!)
Alternatively, you can use SeedProd’s AI website builder to create a completely custom theme in just a few seconds. For details, see our guide on how to make a WordPress website with AI.
Step 5: Create a Custom Home Page
WordPress has two default content types called posts and pages. Website owners typically use posts to create articles and blogs, but this creates a bit of a problem for you.
By default, WordPress will display a list of blog posts on your homepage. Regardless of your blogging plans, you don’t want a list of posts to be the first thing potential customers see.
That’s why I recommend creating a custom home page that includes a quick rundown of your company, a peek at your vehicles (think pictures and specs), your rates, and other important information.
You might even include customer testimonials and reviews to build trust and credibility (more on that later!) Basically, you want to wow your visitors, and a list of blog posts just won’t cut it.
To help you out, we’ve created a complete guide on how to create a custom homepage. Simply follow this guide, and you’ll have the perfect ‘welcome mat’ for your visitors and potential customers.
Once you’re happy with how the page looks, you can set it as your homepage. To do this, head over to Settings » Reading in the WordPress dashboard.
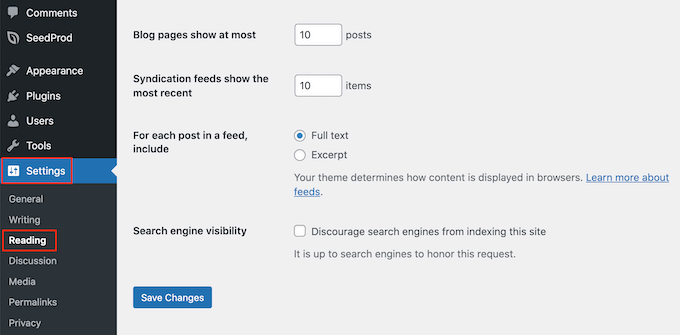
Here, scroll to the ‘Your homepage displays’ setting and select ‘A static page.’
Next, open the ‘Homepage’ dropdown and select the page you created earlier.
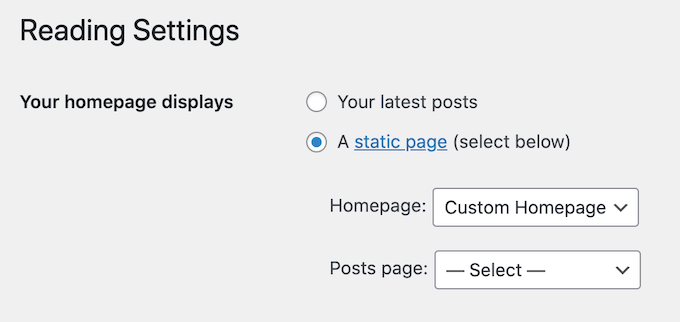
Now, your customers will see a welcoming home page that includes all the essential information about your car rental business.
Step 6: Add More Pages
When designing your car rental website, it’s important to share as much information as possible. This will help potential customers understand what your business has to offer, so they can make an informed decision about whether you’re right for them.
Want to show off your fleet of vehicles? No problem. Need to share your rates and pricing? Easy. FAQs, maps, and other key details? WordPress can handle it all.
But before you start adding all that awesome content, let’s talk about organization. Your website must be easy to navigate so that customers can find what they need quickly. That means setting up different pages for different types of information.
For example, you might create a dedicated page for your vehicles where you display photos and descriptions. Another page might focus on rates and pricing, including any deals you’re currently running.
Thankfully, it’s super easy to add more pages to WordPress. Just head over to Pages » Add New Page.
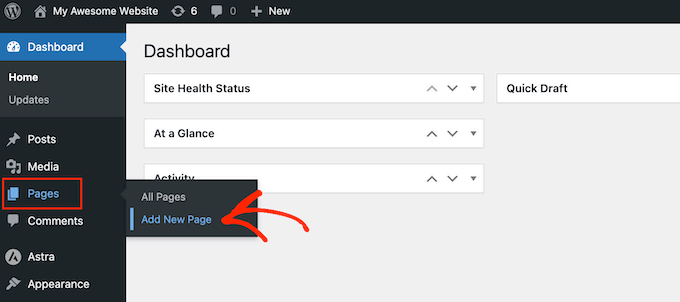
This opens the WordPress content editor, where you can add a title, type in the body text, add a featured image, and more.
Once you’re happy with a page, just hit the ‘Publish’ button to make it live.
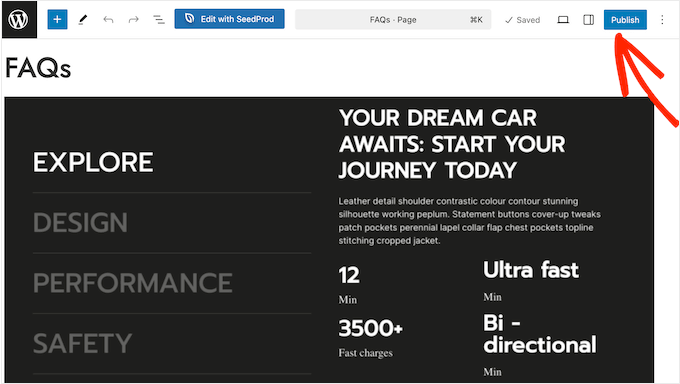
Want more creative control over your page layouts and designs? Then, be sure to check out our guide on how to create custom pages in WordPress.
Step 7: Add a Contact Us Form
Want to help customers get in touch? A contact form is your answer!
It’s the simplest way for visitors to ask questions, voice concerns, or make requests—whether they are about booking, rates, or just providing helpful feedback.
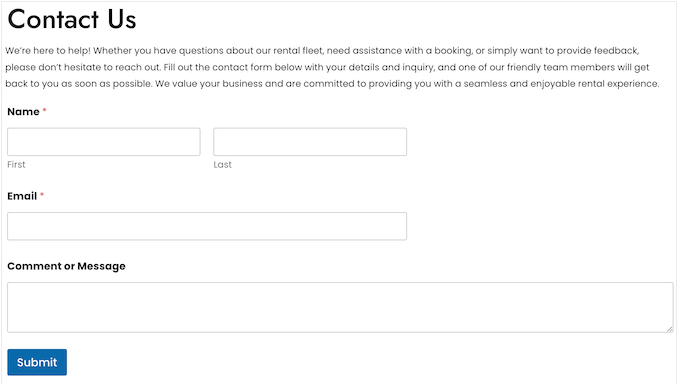
The easiest way to add a contact form to your WordPress website is by using the WPForms plugin.
We use WPForms to power all our forms across WPBeginner, including our contact form, so we’re confident it’s a great fit for your car rental website.
To learn more about this popular contact form plugin, check out our detailed WPForms review.
After installing the plugin, you’ll notice that it comes with a ready-made Simple Contact Form template. You can quickly customize this form in WPForms’ drag-and-drop editor.
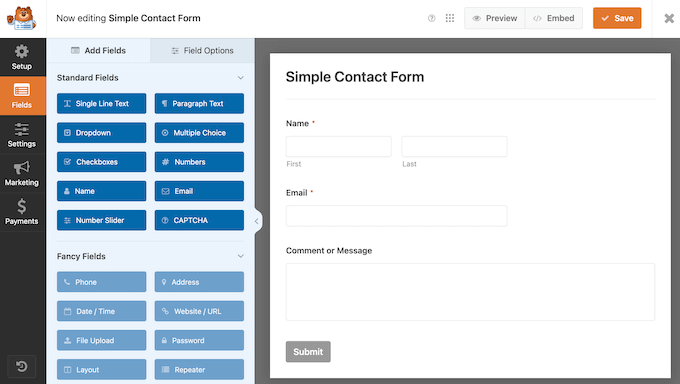
Then, just add the form to any page, post, or widget-ready area using the WPForms block. It’s that simple!
Step 8: Add a Click-to-Call Button
Have you already added a contact form to your site? Great!
But sometimes, customers need you now. Think: car trouble, accidents – all times when waiting for a response just won’t cut it.
That’s where a click-to-call button comes in. It lets folks dial your number in one click from their phone or computer, no typing needed.
Even when it’s not an emergency, some people may just prefer a phone call.
A click-to-call button makes it easier for these people to call your business, and more calls mean more bookings and more money in your pocket.
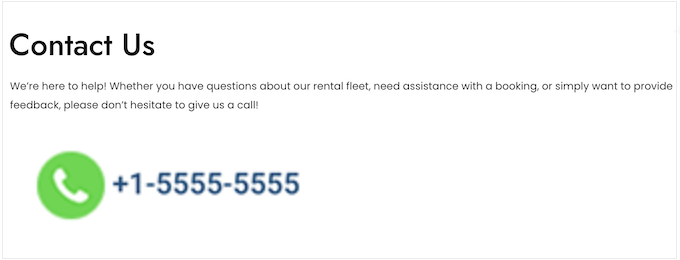
☝ If you don’t have a business phone number, then I recommend using Nextiva. We use it at WPBeginner for our business phone needs, and we have been very happy with it.
Ready to add a click-to-call button to your site? Check out our step-by-step guide on how to add a click-to-call button in WordPress.
Step 9: Accept Online Reservations
This might be the most important step for your car rental website. If you really want to grow your business, then you absolutely need to let visitors book vehicles directly on your website.
This is typically much quicker and easier than calling customer service or visiting your rental lot in person. It’s better for the customer and for you.
There are a few ways to add online reservations, but I highly recommend the free VikRentCar plugin. Why? Because it’s designed specifically for car rental websites.
It’s packed with features you won’t find in generic booking plugins. This includes the option to define pickup and dropoff locations, dates, and times for smooth bookings.
You can also show off your vehicles in a grid or list, making it easy for customers to browse your entire fleet.
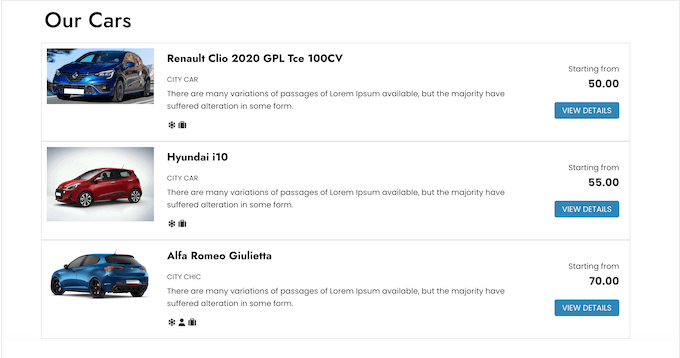
The first thing you need to do is install and activate the VikRentCar plugin on your website. There’s also a premium version of the VikRentCar plugin that comes with extra features like rental restrictions, seasonal pricing, an integrated payment system for 60+ payment gateways, and more.
For more details, you can follow our guide on how to install a WordPress plugin.
Upon activation, select ‘VikRentCar’ from the left-hand menu.
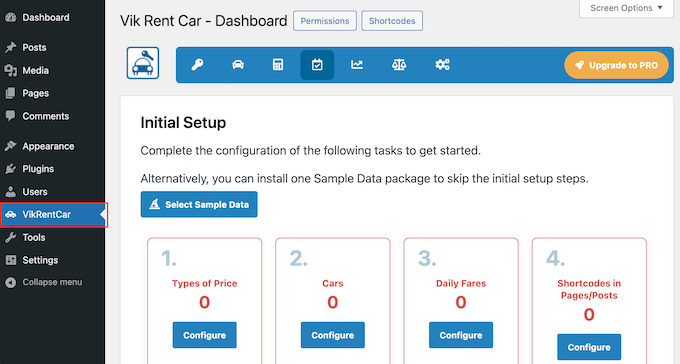
Here, you’ll see a setup wizard that will walk you through all the steps to get your online reservations up and running. Now, let’s go over these steps.
Set Up Your Pricing Plans
The first step is setting up your pricing plans. Make sure to think about the plan options you’d like to offer before you continue.
For instance, you’ll likely want a ‘Base Plan’ and then maybe another that comes with rental insurance or other add-ons.
When you’re ready, click the ‘Configure’ button under ‘Types of Price.’
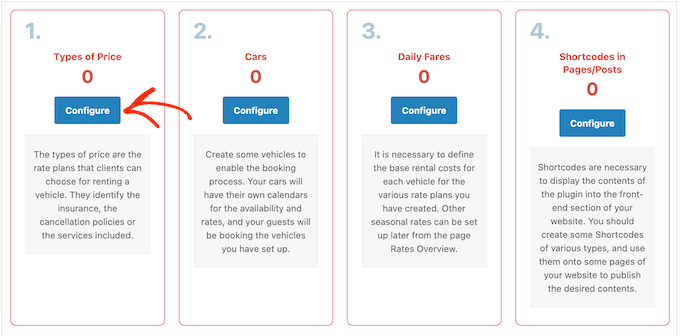
You’ll need at least one pricing plan in order to show rates to your customers.
With that in mind, go ahead and click on the ‘New Price’ button.
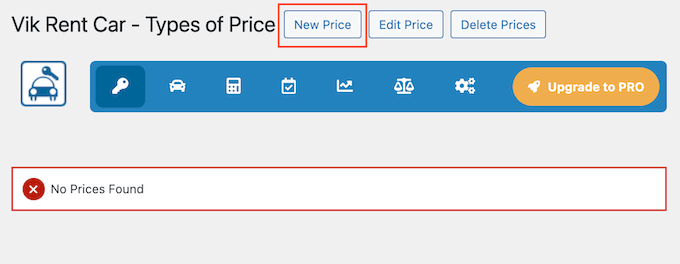
Now, fill in the details for your first price type. You can also add attributes, but that’s optional.
When you’re happy with the information you’ve entered, click the ‘Save’ button.
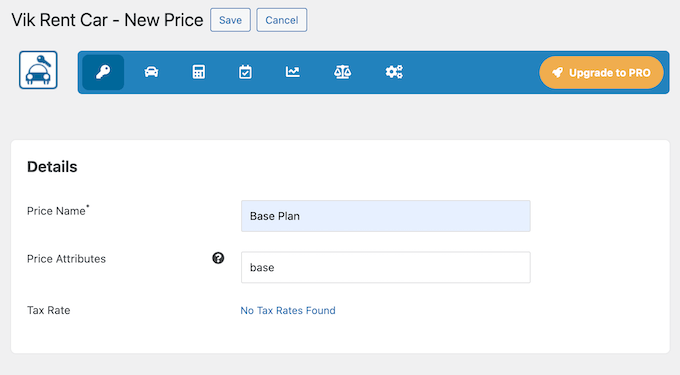
Just repeat these steps for all the pricing plans you want to offer.
Once that’s done, click the ‘Dashboard’ icon to return to the main setup wizard.
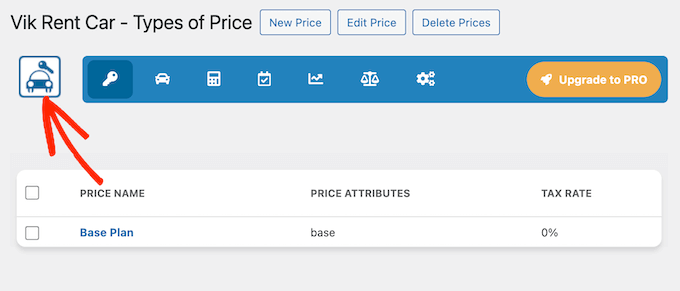
List Your Rental Cars
Now it’s time to create a profile for each car model in your fleet. Think of it as a little info sheet for each type of car you have.
To start, click the ‘Configure’ button under ‘Cars.’
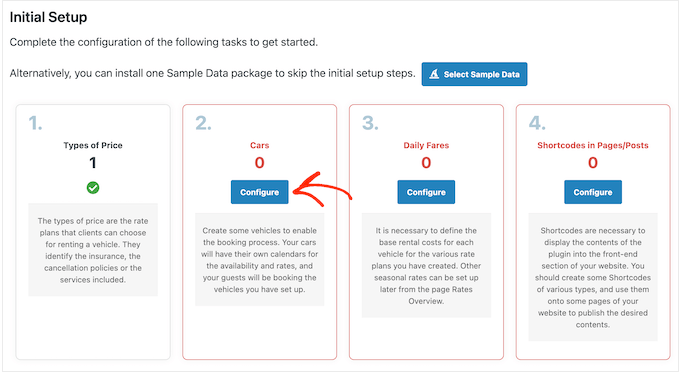
Once again, this takes you to a new screen.
Here, click on the ‘New Car’ button.

Now, fill in all the details for this car. This includes:
- The name of the car.
- The total units you have.
- Whether it’s available or not.
- Additional information you want to show potential customers, like images.
Simply work your way down this page and fill in all the info.
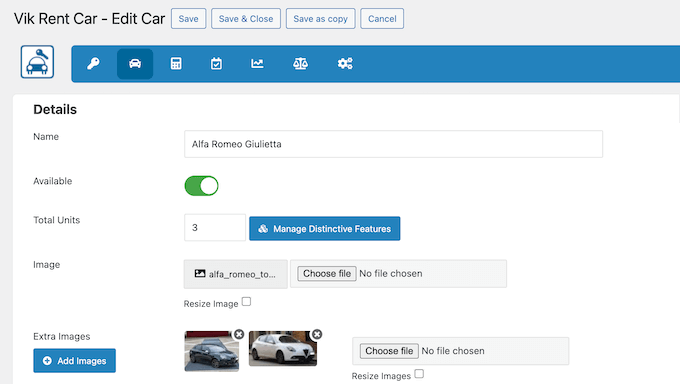
Don’t forget to click ‘Save’ to store your changes.
Customize Your Car Rental Fares
When you click ‘Save,’ VikRentCar will ask you to enter the daily rental cost for each pricing plan you created earlier.
Just type in the price for each plan, then click ‘Insert Fares’ to save this information.

After you hit ‘Insert Fares,’ you’ll see a table where you can adjust your prices for specific rental periods for each price level.
There are options for ‘Daily Fares, ‘Extra Hours Charges,’ and ‘Hourly Fares.’
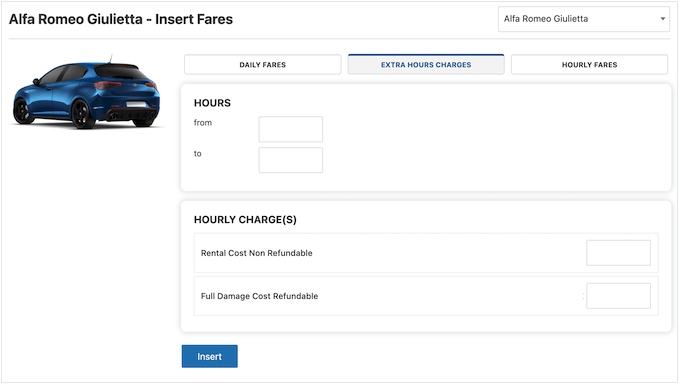
If you keep scrolling through, you’ll see the standard pricing.
By default, VikRentCar multiplies the daily rate by the number of rental days.

However, you can customize this by scrolling back up to the ‘Daily Fares,’ ‘Extra Hours Charges,’ and ‘Hourly Fares’ tabs and making some changes.
For example, you might offer a discount for rentals longer than 3 days and then an even bigger discount after 7 days.
In that case, you’d need to set specific prices for daily ranges 1-3, 3-7, and so on.
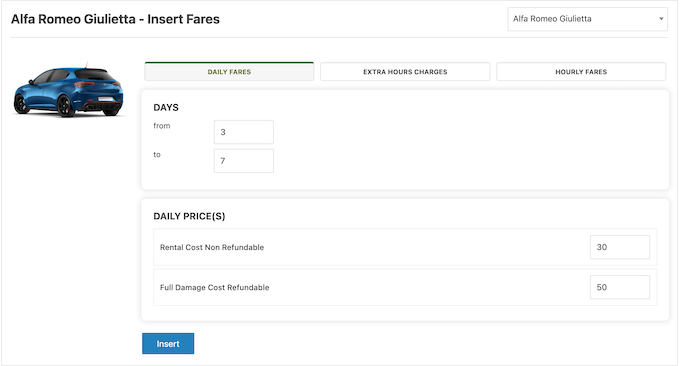
You might also add hourly rates in order to attract more customers.
As you type in different prices, the list of fees below will update instantly.
This makes it easy to play around with different pricing to see how it affects your total costs.
I recommend taking some time to explore the table and the different tabs. This will help you find that sweet spot – pricing that’s competitive for customers but also covers your costs and makes you money.
Once you’re happy with your pricing, click ‘Quit Inserting’ to return to the main dashboard.
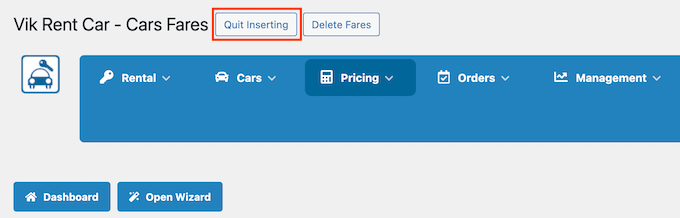
Now, simply repeat these steps to add all the cars and pricing information to your site.
Choose Pickup & Dropoff Times & Locations
With that done, let’s set up your pickup and dropoff times by selecting the calendar icon in the toolbar. Then, click ‘Calendar’ in the dropdown menu.
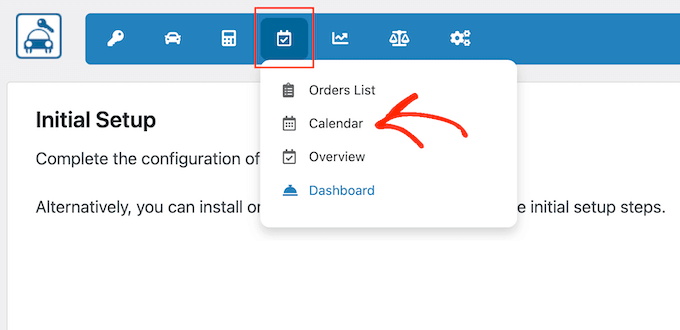
Here, you can set your pickup and dropoff times.
Once you’re happy with the times, click the ‘Back’ button.
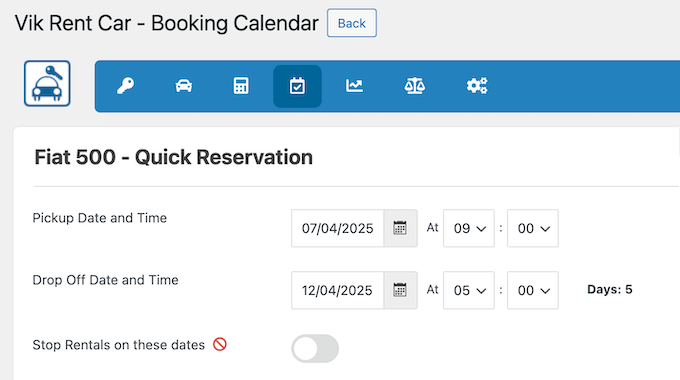
Next up, let’s add your locations.
Click the key icon in the toolbar, then select ‘Pickup/Dropoff Locations.’
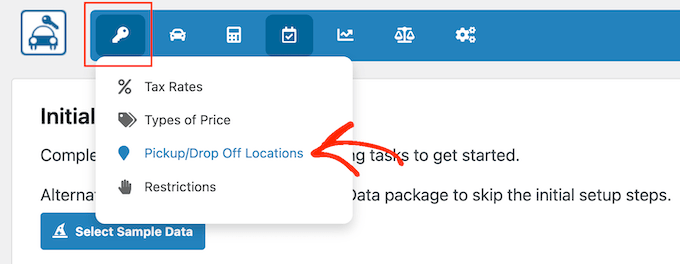
On the next screen, click on the ‘New Location’ button.
Now, you can enter all the details for each pickup and dropoff location you offer.
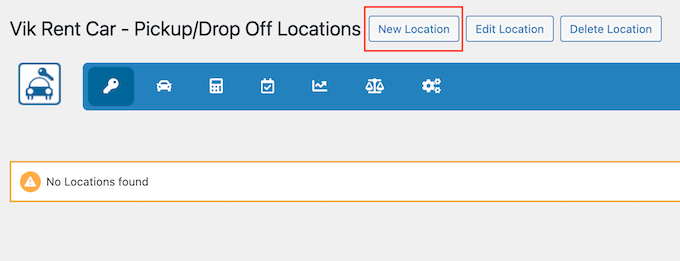
When you’re ready, just click ‘Save’ to store your changes.
There are more settings you can explore, but this is enough to create a simple car rental system.
Add Your Booking Calendar to Your Website
That said, it’s time to add your car rental booking calendar to your site using VikRentCar’s built-in shortcode generator. Click the car icon to return to the main dashboard.
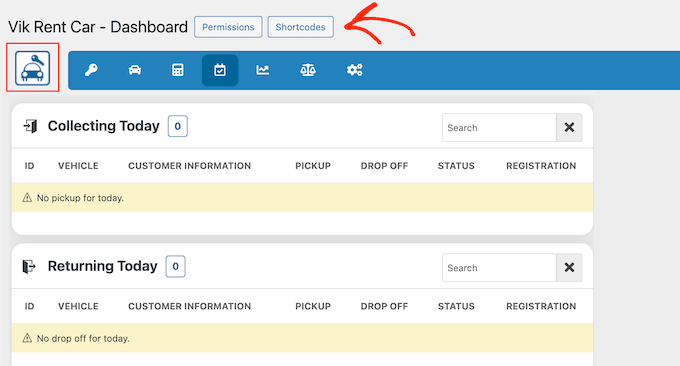
Then select the ‘Shortcodes’ button.
On the next screen, select ‘New.’
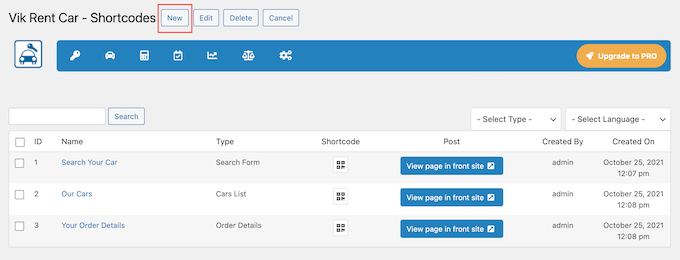
This takes you to the shortcode builder.
The easiest way to create a shortcode is to select the content you want to display from the ‘Type’ dropdown menu.
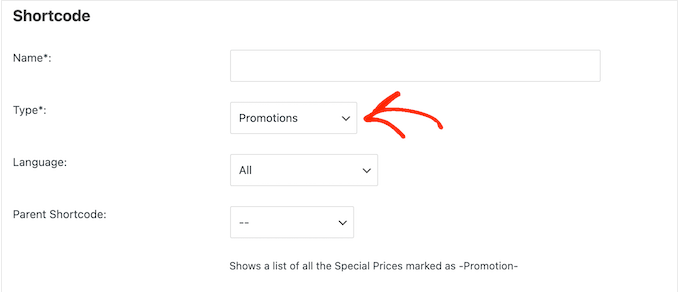
For example, you can select Locations List, Search Form, General Availability, Promotions, and more.
Typically, though, you’ll want to start by showing your available cars, so in that case, you’d need to select ‘Cars List’ from the ‘Type’ dropdown menu.
VikRentCar will then show some settings under ‘Details’ where you can make some customizations.
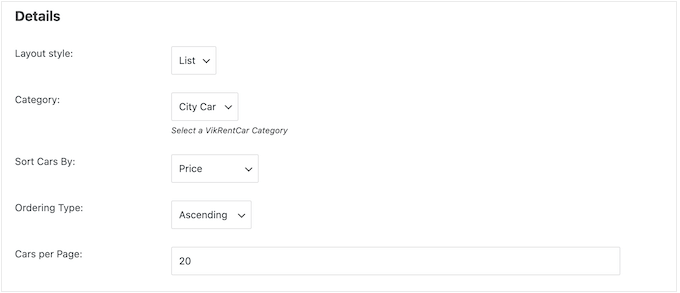
Simply work through these options and adjust them to your liking.
You can choose to display your vehicles in a list or a grid. You can also pick the order in which they appear and how many cars VikRentCars shows per page.
When you’re happy with how the shortcode is set up, give it a descriptive name. This will help you identify the shortcode later in your dashboard.
Then, click on ‘Save & Close.’
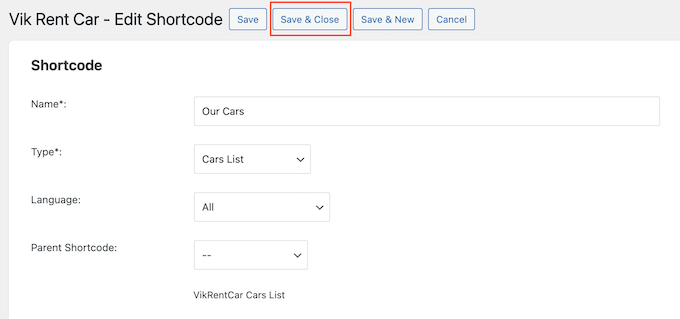
With that done, VikRentCar will display a dashboard with all the shortcodes you’ve created.
To add this content to an existing page or post, click the icon under ‘Shortcode.’
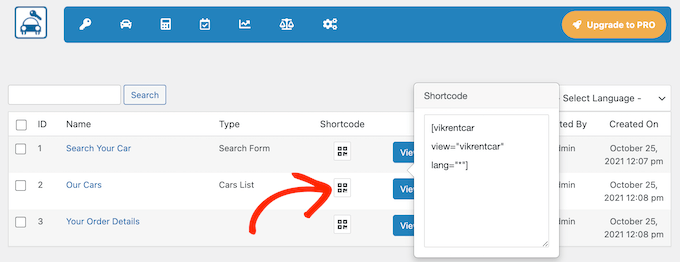
You can now copy the shortcode and paste it into any page, post, or even a widget area on your site. If you’re not sure how, then check out our guide on how to add a shortcode in WordPress.
Alternatively, if you want to add this content to a brand new page, then click the ‘Create page’ button.
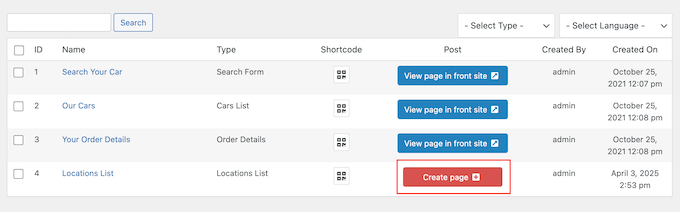
This will automatically create a new page and insert the shortcode for you. Super easy!
By following these steps, you’ll have your car rental system up and running on your WordPress site in no time.
🚨 Important Legal Requirements for Your Car Rental Website
Before you start accepting bookings through your website, you need to make sure you’re following all the legal requirements. This protects both your business and your customers.
Here are some key legal elements your car rental website needs:
- Privacy Policy: If you collect any customer information (and you will for bookings), you need a privacy policy. This should explain what data you collect and how you use it.
- Terms and Conditions: This outlines the rules for using your service, including booking policies, cancellation rules, and payment terms.
- Rental Agreement: Display your rental contract terms clearly on your site. This should cover insurance requirements, fuel policies, mileage limits, and damage policies.
- Cookie Notice: If your site uses cookies (most do), then you need to tell visitors about this. I recommend WPConsent to manage cookie consent banners, secure data storage, and more.
⚠️ While I aim to provide helpful information, this is not legal advice. I strongly recommend consulting with a legal professional to ensure your website complies with all local, state, and federal regulations.
Step 9 Alternative: Use a Simple Car Rental Booking Form
If you want a quick and easy way to rent out your cars, then you can also create a rental form using WPForms. This way, visitors can enter all their requirements, and you can review each request manually.
WPForms even has a ready-made Truck Rental Agreement form template that you can customize and add to your site with just a few clicks.
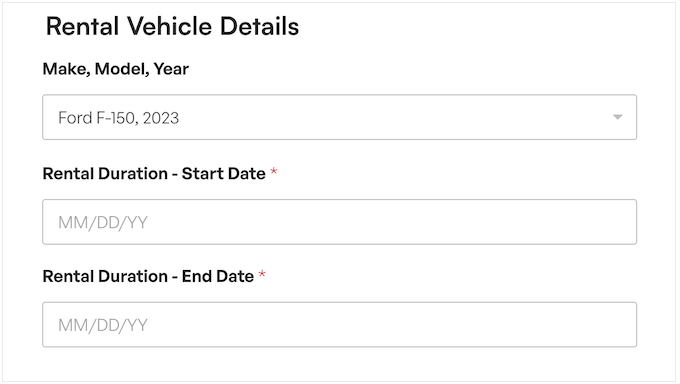
This approach tends to work best when you have a smaller fleet of vehicles. You could even accept payments directly through the form or process the rental request before sending customers to a dedicated WordPress payment form on your website.
💡Related Post: Learn how to offer equipment rentals in WordPress.
Step 10: Create a Stunning Vehicle Display
Photos are a great way to impress potential customers with the sheer variety and quality of your car rental options. You should already have high-quality photos of all your vehicles. Now it’s time to show them off!
But here’s the catch: too many big photos can really slow down your site. And a slow site? That’s a surefire way to frustrate visitors and may even drive potential customers away.
That’s why smart business owners use a slider plugin that’s optimized for performance. Envira Gallery is our pick because it lets you upload unlimited photos, create slick sliders, and organize your vehicles into albums.
This means customers can scroll through your entire fleet, seeing every detail without your site malfunctioning or slowing down. It’s the perfect way to show off your vehicles and give customers a better understanding of what you have to offer.

Want to learn more? Check out our detailed Envira Gallery review, where we downloaded this popular plugin and put it to the test.
Ready to dive in? Our guide on how to create a responsive image gallery has step-by-step instructions to help you get started.
Step 11: Guide Customers to Your Door
Even after you have a website, some people may still prefer to see your vehicles before booking, or they might opt for direct pickup.
You can make it easy for those people to find you by adding a Google Map to your site.
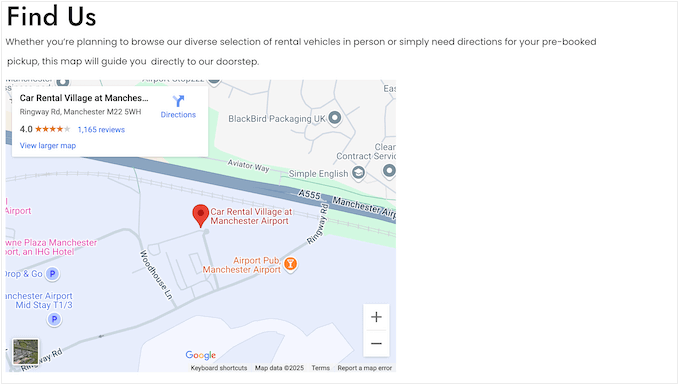
You can embed an interactive Google Map directly in your site using a map plugin or a code snippet.
We cover both methods in our guide on how to add a Google Map in WordPress, so you can choose the method that suits you the best.
Step 12: Showcase Your Rental Options
It’s essential to clearly communicate your pricing, packages, and any additional fees to customers. Being upfront makes you seem more trustworthy and helps customers avoid any nasty surprises.
For the best results, your pricing table should display all the rental options with their prices right next to them. You might also create tables for different car types (such as economy, compact, luxury) and different rental durations (like daily, weekly, monthly).
That way, customers can compare their options quickly and find the right package for them.
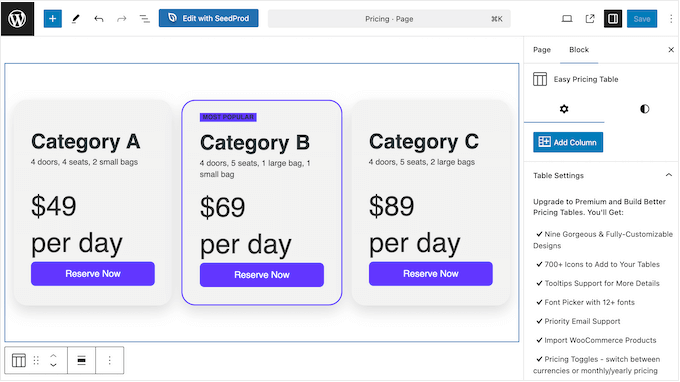
Ready to create an easy-to-read pricing table without writing a single line of code? Head over to our complete guide on how to add pricing tables in WordPress.
Step 13: Display Customer Reviews
When was the last time you bought a product or signed up for a service without checking the reviews first? Before you buy anything, you probably want to know what others think, and so do your car rental customers.
If you already have reviews on platforms like Google Business Profile, Facebook, or Yelp, then you can display them directly on your site using Smash Balloon Reviews Feed.
This plugin can fetch testimonials from all the top review platforms and embed them on your site. It will even fetch new reviews automatically.
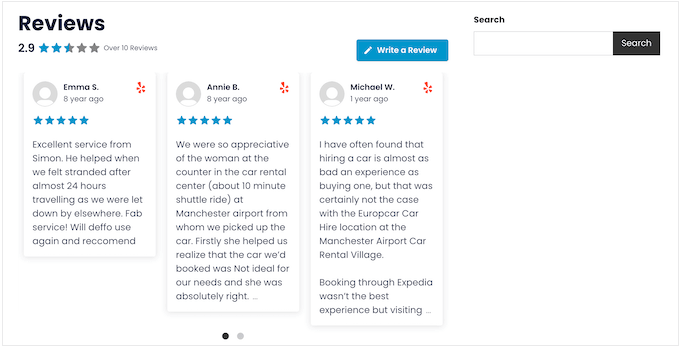
You can customize the review feed to perfectly fit your website so everything looks professional and consistent.
For complete step-by-step instructions, see our guide on how to show Google, Facebook, and Yelp reviews on your site.
Don’t have any reviews yet? It’s time to change that! You can use WPForms to add a review form to your site.
The plugin even has a Review Form template that lets you collect star ratings, recommendations, pros and cons, and other feedback from your customers.
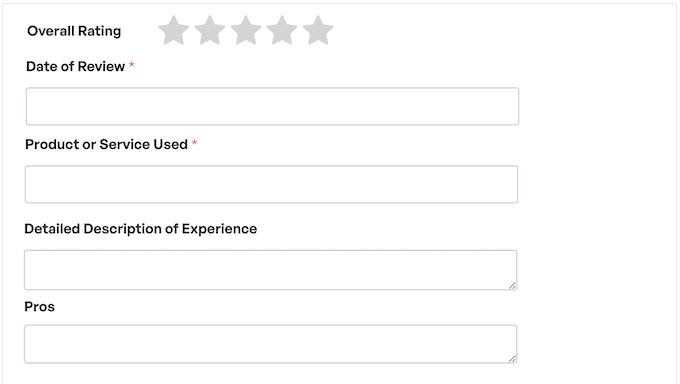
Want feedback on specific staff members?
WPForms also has a Customer Service Review template that you may find helpful.
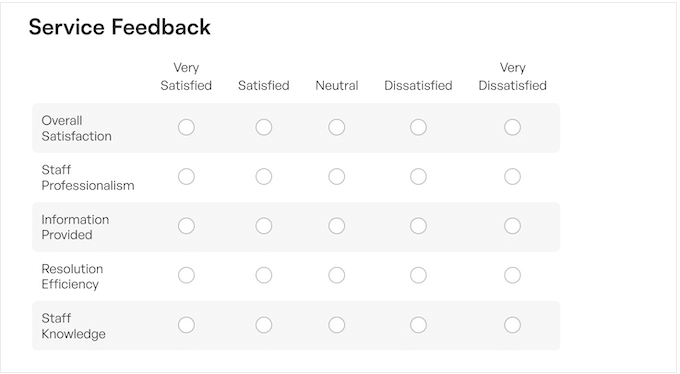
For detailed instructions, see our guide on how to add a client feedback form in WordPress.
Once you start collecting feedback, I recommend creating a dedicated customer review page.
Step 14: Create a Navigation Menu
Now that you’ve added some useful content to your car rental website, it’s time to make it easy for customers to find what they need.
A well-organized navigation menu will help customers quickly locate the information they’re looking for, such as your location, vehicle inventory, or rental policies.
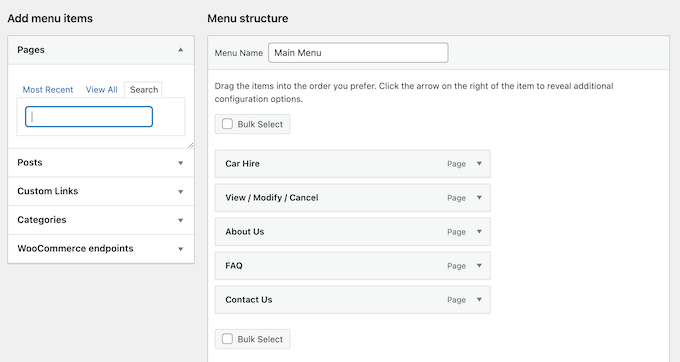
Don’t worry – adding menus and even sub-menus in WordPress is surprisingly straightforward.
For a comprehensive, step-by-step guide, check out our detailed post on how to add a navigation menu.
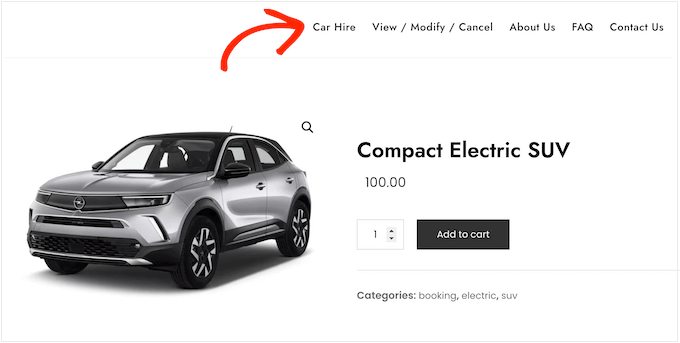
Step 15: Add Social Media Feeds (Optional)
Are you active on social media? Then, you already know how important it is to keep your audience in the loop.
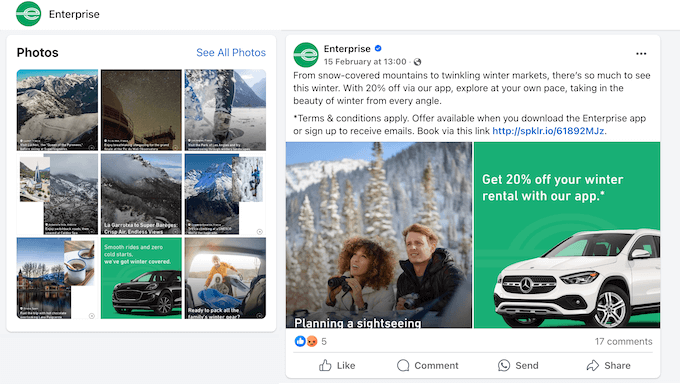
But did you know you can bring all that social buzz right onto your website?
You can embed social media feeds directly in your WordPress website using a plugin like Smash Balloon.
This can keep your site fresh and dynamic, even when you’re busy with other tasks. This way, your visitors will always see your latest social content, even if they’re not following you on platforms like Facebook and Instagram.
It’s perfect for keeping visitors engaged and informed.
Displaying social media content directly on your website also directs traffic to your social profiles, so you may get more followers, too!
Want to learn more before downloading Smash Balloon? Just check out our in-depth Smash Balloon review.
Step 16: Publish Valuable Content (Optional)
It’s not essential, but starting a blog is a great way to show off your expertise, get new customers, and keep existing customers coming back to your business.
You might keep things straightforward and use your blog to share company updates or industry news. This is an easy way to build a relationship with your audience. Plus, you can add relevant industry keywords to your website so people can find your services more easily.
Regularly publishing this content can also keep your site fresh and up-to-date, which is a key way to improve your search engine rankings.
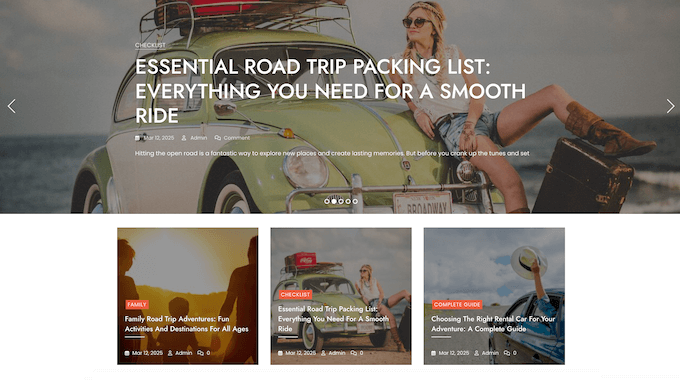
If you have more time to blog, then you could get creative and produce high-quality, original content.
For example, you might review different types of vehicles, sharing your thoughts on their pros and cons, features, and performance. This can help your customers make informed decisions when choosing a rental vehicle.
You might even offer advice on related subjects, like what to pack for a road trip or how to stay safe while traveling.
This valuable content increases your chances of appearing in search results and being shared on social media. This means more visitors, more bookings, and more revenue.

Ready to start blogging? See our guide on how to create a separate page for blog posts in WordPress.
After that, I recommend checking out our blog post idea generator for some extra inspiration.
Step 17: Use FOMO to Drive Car Rental Reservations (Optional)
As a car rental business, increasing bookings is always a top priority, and FOMO can be your secret weapon.
FOMO, or ‘fear of missing out,’ is a term for anxiety about missing out on something exciting and trendy. If visitors think that your cars are in high demand, then they’re more likely to book immediately rather than delay.
That’s where TrustPulse comes in.
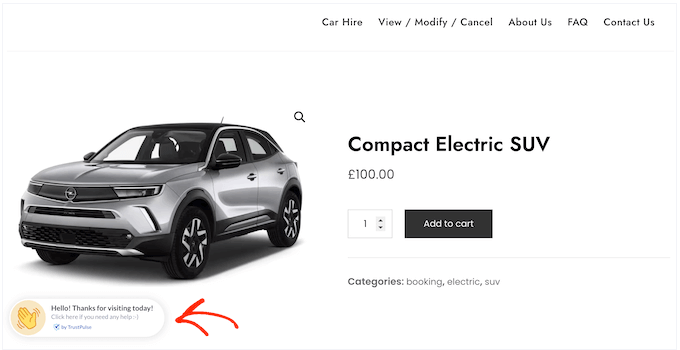
TrustPulse can display real-time user activity notifications on your car rental website. For example, it can show a popup every time someone rents a vehicle from you. You can even display the total number of bookings within a certain time frame to really prove your popularity.
TrustPulse also tracks customer activity on individual listings, so you can show how many people viewed a particular vehicle. This creates a sense of urgency, encouraging visitors to book before the vehicle is gone.
Essentially, TrustPulse highlights the popularity of your rentals, motivating people to book right now.
We’ve seen firsthand how this strategy can convince visitors to make a purchase. To learn more, see our complete TrustPulse review.
Ready to get started? Check out our guide on how to use FOMO on your WordPress site. It will show you how to set up TrustPulse and start boosting your bookings.
Bonus Tips: How to Grow Your Car Rental Website
Congratulations! You now have a professional-looking car rental website. Now, let’s get that website working hard for you, bringing in more traffic and turning visitors into paying customers.
Here are some extra tips to really boost your car rental business:
- Use AIOSEO to climb those search engine rankings. This plugin can help people find your website when they’re searching for things like ‘car rentals near me,’ ‘rent a car today,’ or any other phrases you want to target. See our ultimate WordPress SEO guide for details.
- A slow-loading website can frustrate visitors and make a terrible first impression. To make your site lightning fast, check out our guide on how to boost WordPress speed and performance.
- Understanding customer behavior is crucial for driving bookings and revenue. MonsterInsights lets you monitor your website’s performance by tracking visitor numbers, engagement, and conversion rates. You can then use these insights to fine-tune your car rental site and watch your revenue soar. For details, see our guide on how to install Google Analytics in WordPress.
I hope this article has helped you learn how to make a car rental website with WordPress. You may also want to check out our expert picks of the must-have WordPress plugins for all business websites or our guide on how to sell car parts in WordPress.
If you liked this article, then please subscribe to our YouTube Channel for WordPress video tutorials. You can also find us on Twitter and Facebook.
The post How to Make a Car Rental Website with WordPress (Step by Step) first appeared on WPBeginner.